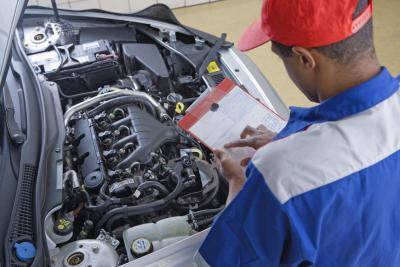
Most gas engines can be converted to propane, but the process is easier, cheaper and more effective in cars with a carburetor. The propane is stored as a liquid until the converter vaporizes it. This vapor is mixed with intake air and delivered to the cylinders for combustion. Your gas mileage and performance won't change much, but you'll greatly extend the life of your engine while reducing tailpipe emissions and oil consumption. Give propane a try and say goodbye to carbon deposits in your cylinders and gummy residues in your fuel system.
Install the tank. Because of vehicle differences, there's no standard location that works for every car. You need a place on your car's exterior that will accommodate the tank and its brackets. If you separate the trunk from the passenger area with foam, and cut vents at the lowest point to allow propane vapors to escape, you can mount the tank in your trunk.
Install the converter. If your cooling system continually circulates water through the heater, use the hacksaw to cut the cooling system hose that delivers hot water to your heater and attach the converter to this line with hose clamps and a screwdriver. If your cooling system doesn't continually circulate hot water through the heater, follow the instructions that came with your converter. Always apply pipe-joint sealer to the connections.
Use a screwdriver and a hose clamp to attach the 2-foot rubber hose to the propane vapor outlet port of the converter. Let this hose dangle and use the appropriate fitting to attach the 8-foot high-pressure hose to the liquid propane inlet port of the converter. Attach the other end of this hose to the outlet port of your propane tank and zip-tie the hose to the frame.
Install the jet. Use screwdrivers and wrenches to remove the air cleaner and unbolt the carburetor from the intake manifold. Disconnect any linkages to the carburetor and transfer the carburetor to the vise.
With your cordless screw gun and a 5/16-inch bit, drill a hole in the narrowest portion of the carburetor's up-down passageway. Make sure you choose a spot that won't damage the float bowl. As you drill, look into the carburetor to make sure your bit doesn't damage the carburetor throat when it breaks through.
Insert the 1/8-inch NPT tap into the hole you just drilled and twist it, to tap threads into the hole, until it just penetrates the carburetor throat. Remove the tap and screw in the jet until it's almost halfway through the carburetor throat. Make sure the jet's bevel is facing down, then apply pipe-joint sealer to the external threads.
Pour gasoline over the carburetor to remove dirt and metal shavings and reinstall it in your vehicle. You might need a friend to step on the gas pedal while you reconnect the linkages. Use a screwdriver and a hose clamp to attach the dangling 2-foot converter hose to the jet.
Install the fuel valve. Use the hacksaw to cut the hose or metal tube that goes from the top of the carburetor to the fuel pump. Attach the on/off valve to this location with compression fittings. If your engine uses a hose, add a short section of 1/4-inch copper tubing to each end of your valve. This will give the hose something to slip over.
Install the priming switch. Connect one end of a long section of single-strand wire to the converter terminal specified by the installation guide. Feed the wire into the driver's side of the passenger compartment through a grommet in the fire wall or floorboard, then attach it to the doorbell button switch.
Run another length of the same wire from the free terminal of the button switch to your vehicle's fuse box. As you hold the button in the "On" position, remove fuses and touch the free end of your wire to each side of the empty fuse holders. When one side of a fuse holder sparks but the other doesn't, connect the wire to the side that doesn't. Replace the fuses and mount the button switch to a convenient location.