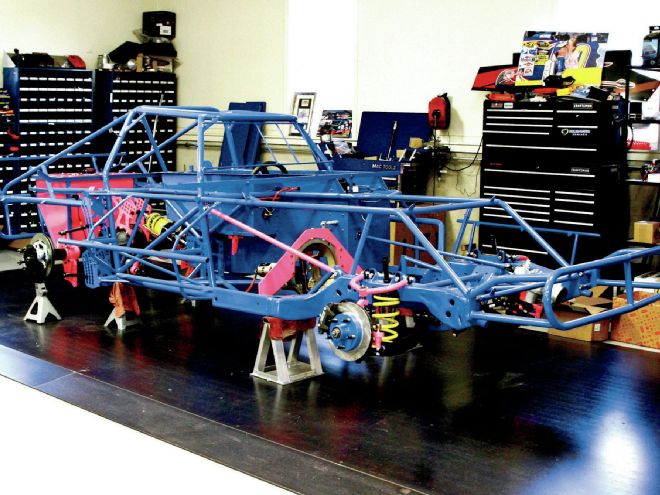
When I visited David Reutimann’s shop recently it was full of cars. That means his business is catching on with the racers and he must be doing something right. What he is doing is catering to the wants and desires of the average, and above average, Dirt Modified race teams.
As we go through his build of our Circle Track project car, we might be able to identify certain areas where attention to detail and well thought out design goals make a difference. Speaking of identifying, Reutimann’s chief fabricator is David Anderson, not Kyle Strickler, as I reported in the last installment.
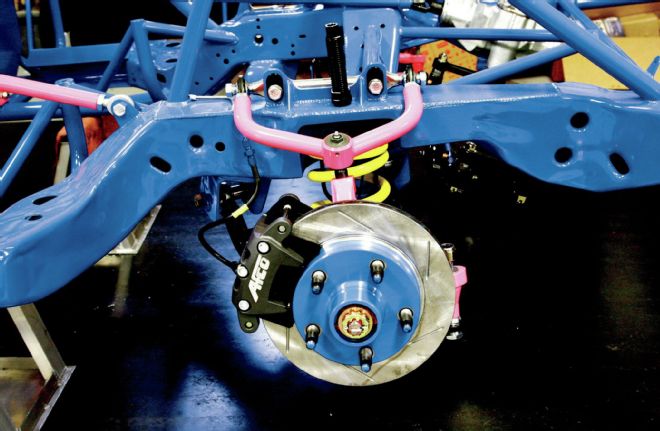 This is a good view of the front hub assembly with the Afco brakes, springs, and lower control arms. We have already showcased the stock remanufactured front clip and it has worked out great in the whole scheme of things.
The car is at a stage now where all of the suspension parts are attached, as well as the fuel cell, seat, steering, bell housing, and so on. All but the engine, radiator, body panels, and wheels and tires are there to view. It is a great place to be in our observation process because we can photograph the important components unimpeded by the covering.
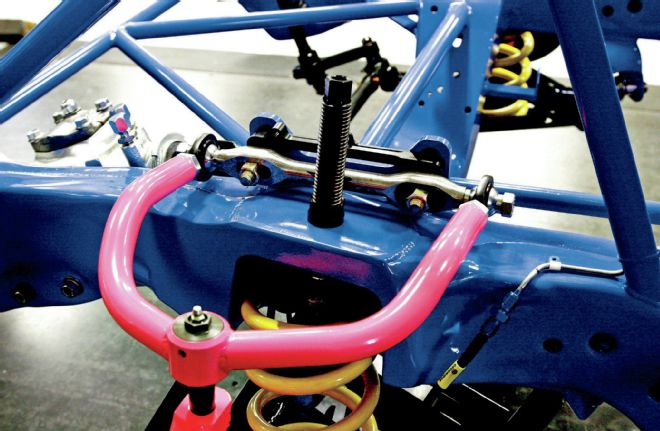 Beak makes their own upper control arms and they are bent to increase the wheel travel for the inner mounts that are positioned very low. Mounting them low helps create more upper control arm angle, which helps reduce camber change and enhances the frontend geometry.
Starting at the front, we see a Sweet steering box that is 6:1 ratio. This is a very quick steering unit that Reutimann not only prefers but feels is necessary in this kind of racing. After all, Reutimann will drive this car himself. The entire linkage back to the steering wheel is all Sweet.
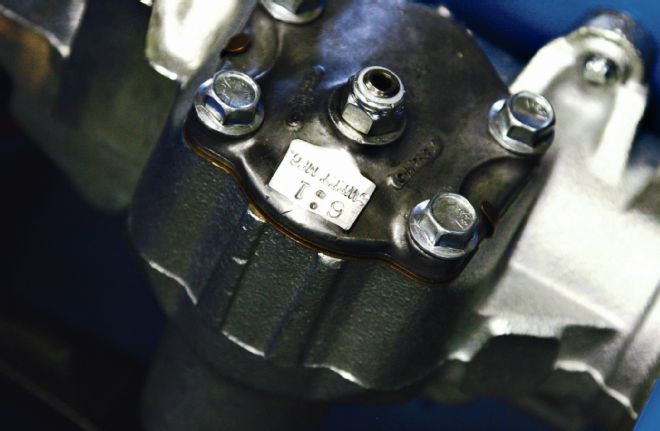 Reutimann will drive this car in competition and he prefers a quick steering box. This 6:1 unit from Sweet Manufacturing is just what he needs. Reutimann exclusively uses steering components from Sweet for the entire length of the steering assembly all the way from this box to the steering wheel.
All of the draglink, idler arms, Beak upper and Afco lower control arms, tie rods, and spindles are excellent quality parts. The boys at Beak don’t spare a dime on the important things like this. The upper arms, which Beak builds in-house, are adjustable for inner mounting heights so you can tune your Moment Center. The mounts have been lowered as much as possible to achieve proper upper arm angles. The arm shaft is adjustable for caster as well.
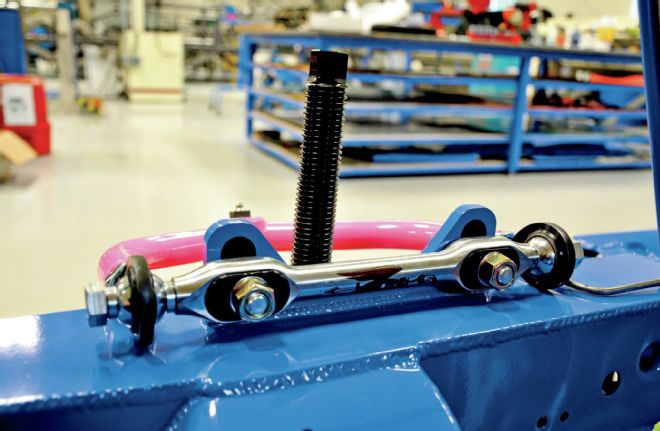 Here we can see the adjustability of the upper control arms for caster and arm angle. There are slugs in both the arm shaft and the mounting plate for making these adjustments. We’ll be experimenting with different positions for each upper arm once we get into the testing phase. Note the flat plate on the upper part of the frame that makes a very good mounting platform for the upper mounts.
The spindles use low friction ball joints and we can install different length studs if need be to further enhance Moment Center design. Right now Reutimann is using a 1/2 inch longer left upper ball joint stud to provide more angle in that arm over the right upper control arm. This will generally provide an MC that is left of centerline, a sweet spot we are all familiar with and one in which the industry has mostly agreed upon.
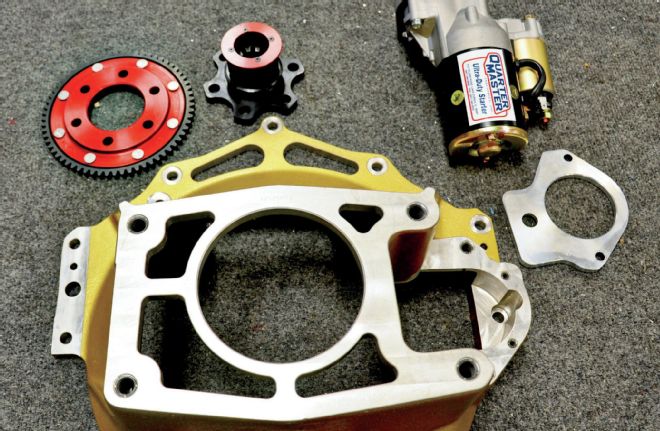 Beak uses the really cool Quarter Master magnesium bellhousing along with the Ultra-Duty starter and clutch assembly for his car.
Moving back in the car we come across a nice magnesium bellhousing and starter by Quartermaster. The engine in this car will be specially built as is common for this class. The power will pass through the driveline to a Tiger low friction rearend, a brand we were introduced to back many years ago when they first burst on the short track scene. They proved that by using low friction parts, coatings, and lubricants, they could reduce the loss of power through the rearend and put more power to the ground.
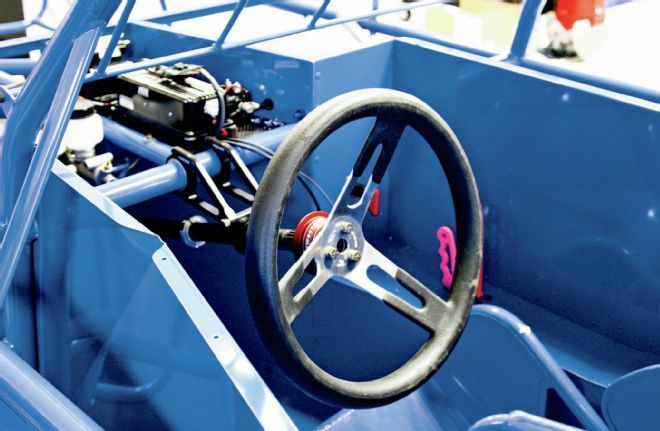 Reutimann prefers this large-diameter grip steering wheel off one of his other cars. He feels that it provides a better handhold and reduces the amount of force needed to grip the wheel during those long runs.
Once we get the frontend all set and turning well, the rear of the car is where the real work takes place. Here, Reutimann and company has done a lot of thinking and innovation. Not only has he provided a lot of adjustment possibilities for the rear steer aspect, but also for the third-link rear mounting points.
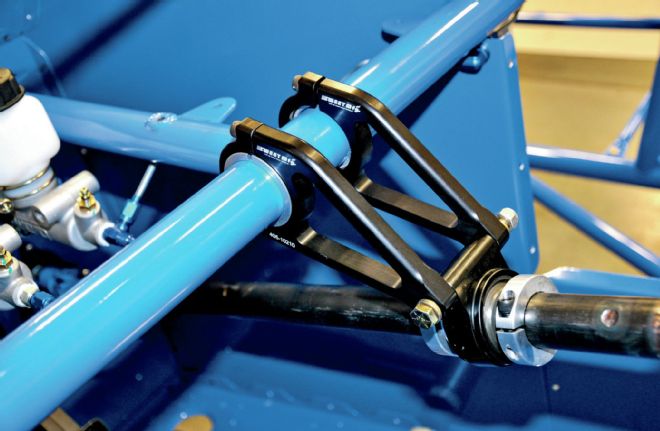 This Sweet steering shaft mount is fully adjustable for all sizes of drivers. The shaft also utilizes heavy-duty steering joints.
When we need to adjust our cars as the track conditions change from tight to loose, as they always will in varying degrees depending on which track it is, we need to have the tools to do so. Beak cars have lots of tools.
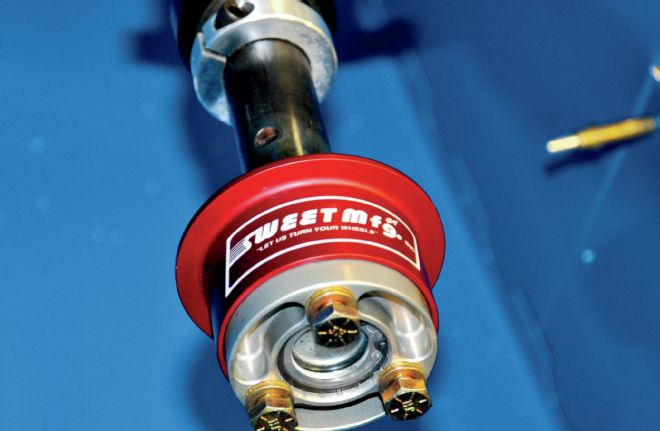 That large steering wheel comes off easy with the Sweet slider–style quick-release unit.
Besides the rear steer, which I personally think is overrated, there are the dynamic changes that need to be made. The Center of Gravity needs to go up for dry slick. The rear roll, or what a lot of people like to call roll stiffness, needs to change to allow more rear roll versus the front roll. And the spring rates need to be softer.
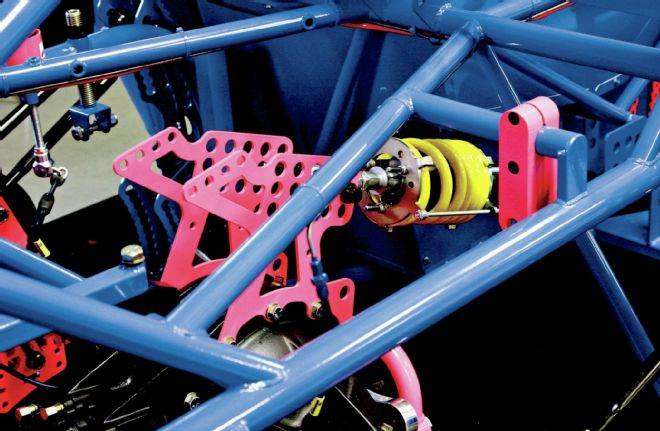 The third-link mount has more adjustment holes than any I’ve ever seen. With this unit, you could run a pull bar to the front, as well as a shock to the rear to dampen the movement. The choices are many.
What Reutimann has done to accomplish all of the above is: one, provide an adjustable battery box for height, move it up for dry slick and down for tacky; two, provide moveable upper spring mounts so that the top of the springs can be moved inward from full out position by over 4 inches to soften (mounts moved inboard) or stiffen (mounts moved out) the spring rate; three, provide moveable upper spring mounts to adjust the width of the spring base, wider for tight conditions and narrower for dry slick.
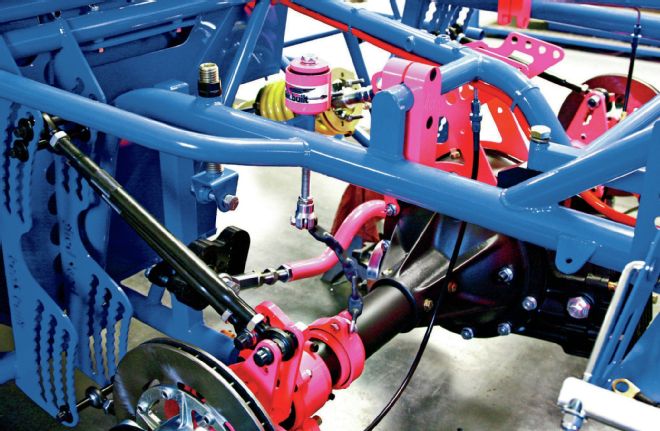 Our view from the left rear shows an array of cool parts. The rubber snubber at the top of the chain limiting left rear lift is designed to cushion the shock as the chain goes tight and loose over a rough track. There’s also the adjustable top shock mount just to the right of the snubber that we’ll talk about a few pics down.
The above items two and three are huge. When I did a simple calculation, moving the upper spring mounts from full out to full in positions was like changing the Panhard bar height by a full 2 inches. That means, you can start out racing on a wet tacky surface with the rear spring upper mounts all the way out. For the setup I ran, the roll angle difference front to rear was 1/2 degree.
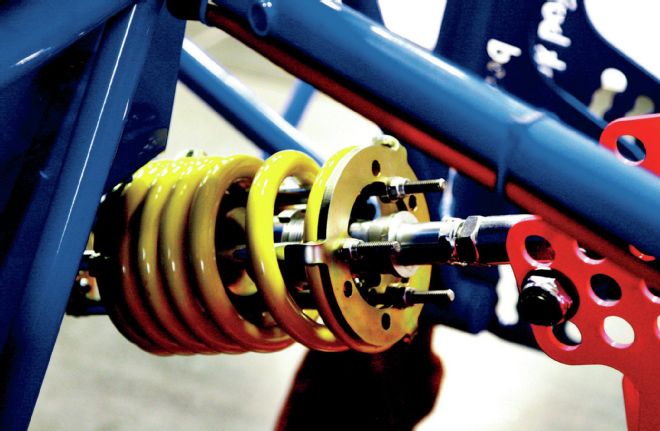 This Afco rising rate spring pull bar controls the accelerating forces and helps to maintain bite off the corners. There is a travel indicator on the other side of the unit so you can see how far the spring moves.
Then, I ran less g-force to simulate dryer and slicker track conditions and moved the upper mounts full inboard. The roll angle difference between the front and rear increased to 1.8 degrees, just what we want for added bite in the rear to overcome the slick conditions.
Enough of the detailed analysis, let’s let the pictures do the talking. In this photo essay, I will explain each part of the car and how it is unique. All of the parts that are adjustable will be used and worked with once the car is completed and tested and we will report those findings.
I personally cannot wait to hit the track and play with all of the parts and pieces that we can work with on this car. We hope to develop a routine that you might use to make adjustments for different conditions. We’ll do it through the adjustability inherent in this car and you can do it with whatever means you have at your disposal. There are many ways to “skin a cat,” but the desired end results are the same.
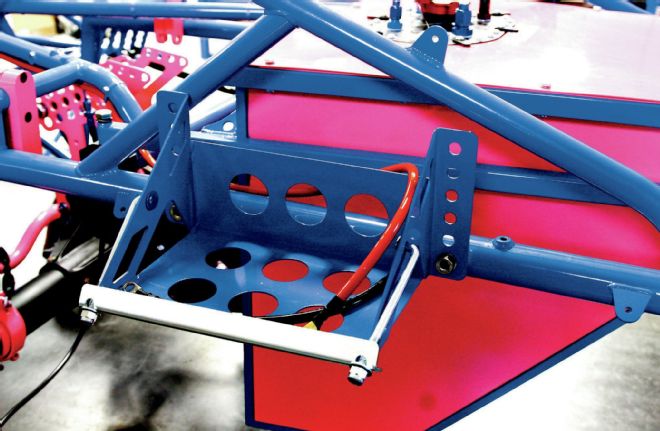 Adjusting the Center of Gravity for different conditions is easy with this battery mount that allows you to raise and lower the load. Many teams will mount 30 or 40 pounds to a vertical tube in the car to affect the height of the CG. This is easier to get to and very effective being located at the rear of the car. There are also provisions for moving the battery to a different location in the car.
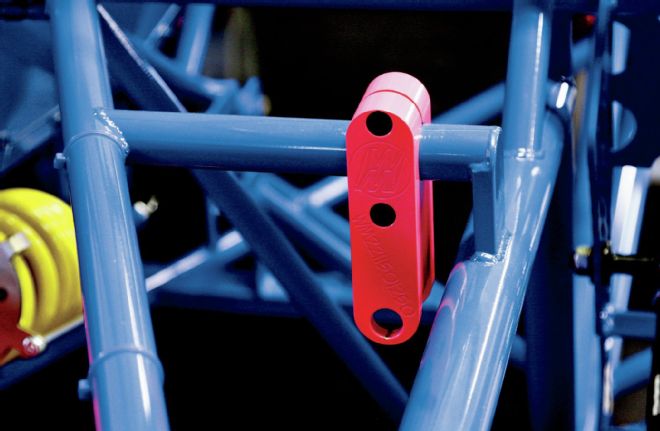 This little gem is more than it appears. It is the top shock mount and can be moved inward or out to do two things simultaneously. When moved in, it increases the angle of the springs, effectively reducing the rate the car feels and softens the rear spring rates. It also narrows the rear spring base causing a further softening. So, when you start out the night, you run these outboard for more tacky conditions. Then when the track starts to dry out, you move them in toward the center to gain bite. It is very easy to do and very effective.
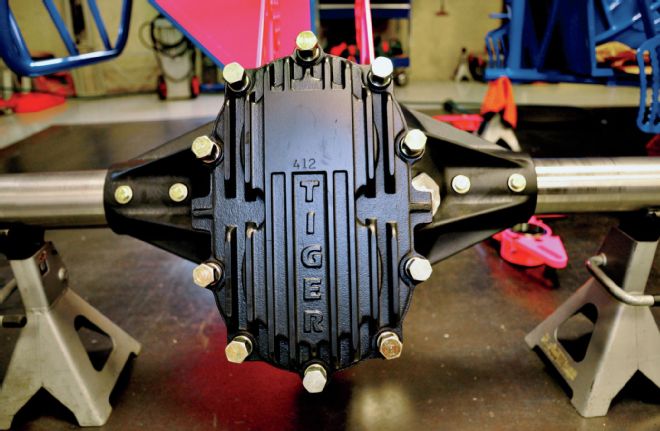 Beak uses the Tiger rearend for this project. Tiger has a long history of participation with our project cars. They continue to turn out high-quality products that are both durable and efficient with very low drag.
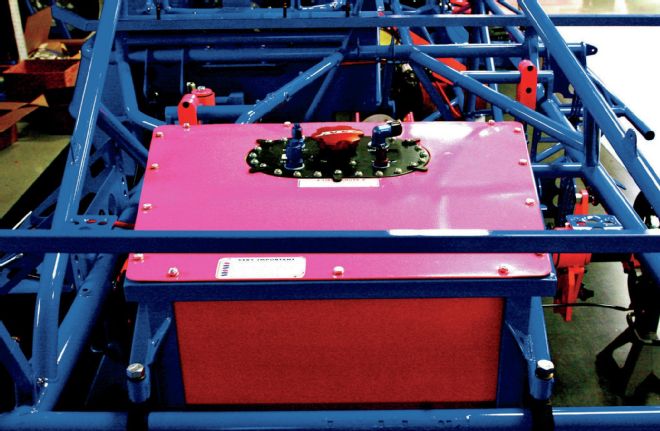 The ATL fuel cell fits nicely in this framework. It is mounted high to promote side bite in this modified design. Here we get a view also of the shock mounts that are adjustable and we can see where the spring base can be changed easily.