Ric Grassmick; Chandler AZ: I've really loved reading all your Chevelle- and El Camino–related articles over the past few decades, but I can't recall one about your '65 Malibu and the frontend setup for track use. I am retiring my '66 Malibu from drag racing and want to redo it with a bend toward open track and Pro Touring. As always, cost is an issue, so I can't afford an SC&C conversion or some kind of Corvette setup, which appears to be hot now. However, I can fabricate almost anything. For the rear, I plan on removing the ladder bars from the 9-inch and installing a three-link with coilovers and a Watts link. Since the car has a 12-point cage and has been back-halved, there are plenty of options for attachment points, and the tubs will allow any size tire (where a lot of money will have to be spent). I already have a Jeep 12:1 steering-box-conversion setup and a set of B-body spindles with 1LE brakes and a 15⁄16 T/A front sway bar that was on the car 25 years ago. I know nothing about front spring rates or control-arm relocation, like the Guldstrand mod on an early Camaro. Can you do this to a Chevelle? Everyone I've seen on the Pro Touring forums says this stuff is junk and a waste, but I can't afford $4,000 on an AST setup. Can you share any ideas?
Jeff Smith: This is a deep subject that, frankly, I'm not as conversant as some experts on the Pro Touring websites. But beyond expounding on the virtues of zero bumpsteer and minimal scrub radii, as you've discovered, it's easy to quickly become overwhelmed with opinion that is often presented as data. So let's back up a bit. It sounds like what you're asking is if you can come up with a basic, entry-level front suspension that will allow you to compete at Pro Touring events and to not be embarrassed by your car's performance. For many years, I ran my '65 Chevelle with a front suspension configuration that many people now consider to be borderline crude, but it worked very well. So let's first take a look at how you could reproduce that, and then we'll transition to the rear.
My original front suspension consisted of a 1-inch-taller B-car front spindle, Global West tubular upper control arms, stock lower control arms with Global Del-A-Lum bushings, Koni single-adjustable shocks, a 900-pound-per-inch front spring rate, complemented with a 11⁄8-inch front sway bar from a second-generation WS-6 Trans Am Firebird. Along with a fast-ratio steering box like from an '88 Monte Carlo SS, you would have what I would estimate at 75 percent of a full-blown Pro Touring front suspension. I'd place the camber at negative three fourths of a degree, with 5 to 6 degrees of positive caster, and 1⁄32-inch toe-in. There are people who will immediately throw rocks at this setup because they claim the B-car spindles produce horrendous bumpsteer. My response would be “show me.” Basically, they are correct that there is bumpsteer inherent in using the B-body spindles, but it is so negligent as to not be an issue. In 25 years of road racing my Chevelle (including running a top speed of 167 mph in the Pony Express Open Road race in Nevada and averaging just under 150 mph for 90 miles), I have never experienced anything that I could call bumpsteer—and nothing even remotely close to “rip the wheel out of your hand” bumpsteer issues that others want you to believe. I have heard opinions that claim “I can show you massive bump with that combination,” which is true, but only if you measure bumpsteer at the extreme ends of the suspension travel. Their contention is there is significant bumpsteer at full suspension deflection—in other words, when the upper control arm bumpstops contact the frame. In that situation, the tires are barely contacting the pavement, so bumpsteer doesn't matter because the driver has very little control of the vehicle anyway! The opposite situation (where the suspension is fully loaded) can also produce bumpsteer. But if your car has fully compressed the front springs to the point of hitting the fully compressed bumpstops, this means that your front spring rate is way too soft to allow the car to compress that much. So increase the spring rate so the front suspension will no longer hit the bumpstops, and any bumpsteer response will disappear. So what we really should be talking about is roughly 1 to 11⁄2 inches of suspension travel on either side of ride height because that's where the car will spend 90 percent of its time. This will probably elicit a bunch of responses from the experts, but the reality is that there's nothing wrong with running B-car spindles on a Chevelle. Is there a reason to change these spindles and improve the overall front suspension performance? Absolutely, and there are spindles out there to do that job. We're not talking about the ultimate front suspension here. We are talking about a front suspension that you can easily bolt on and go out and have fun with your car.
You also mentioned the Guldstrand upper control arm modification that was popular for the early Camaros. This was done to help compensate for the short Camaro (and Chevelle) spindle by relocating the upper control-arm mounting (pivot) point lower. You don't need to do that when using the Global West tubular upper arms with the taller spindles. One thing you might consider is improving the front suspension's anti-dive. In my experience, the stock Chevelle performs very poorly in this area. Even with 900-pound-per-inch front springs, the nose still takes a serious dive under hard braking. If you look at the front upper control-arm mounting points on a C4 Corvette from the side view, you'll notice that the front mounting point is significantly higher than the rear mounting point. Effectively, the upper control arm points up at the front. This is one way to create what is called anti-dive. If you have an understanding of rear suspensions and how 100 percent anti-squat works, then this is a similar situation except under braking. We don't want to achieve more than 100 percent anti-dive because then the front suspension will rise under hard braking, and there are many reasons why this isn't a good idea. But improving upon the stock Chevelle's bad habits is a good thing. The trick is to not overachieve. I would suggest calling Global West and talking with Doug Norrdin about this, if you are serious about moving in this direction. He has developed a new product that will help with this, but I had to promise not to talk about it in print because Doug says he's tired of educating his competition. The solution is incredibly elegant and is bolt-on simple.
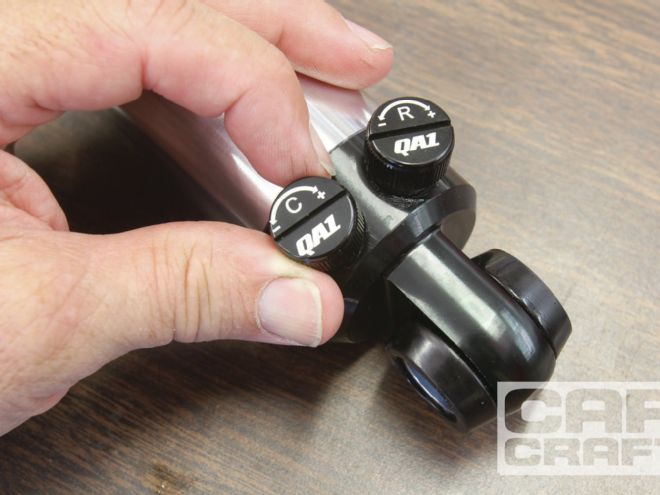
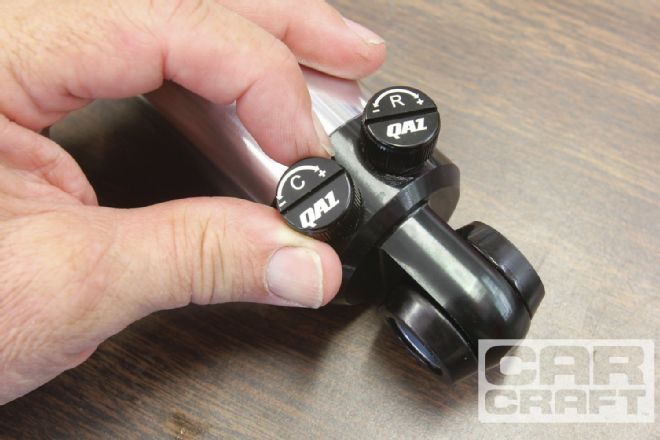 Double-adjustable shocks like these QA1 versions are adjustable for compression (bump) and extension (rebound). Single-adjustable shocks generally tune for rebound only, and often the compression valving changes with the rebound adjustment. This is why separate adjustments are necessary. The latest thing now is to separate the low-speed valving from the high speed.
You also mentioned the Guldstrand upper control arm modification that was popular for the early Camaros. This was done to help compensate for the short Camaro (and Chevelle) spindle by relocating the upper control-arm mounting (pivot) point lower. You don't need to do that when using the Global West tubular upper arms with the taller spindles. One thing you might consider is improving the front suspension's anti-dive. In my experience, the stock Chevelle performs very poorly in this area. Even with 900-pound-per-inch front springs, the nose still takes a serious dive under hard braking. If you look at the front upper control-arm mounting points on a C4 Corvette from the side view, you'll notice that the front mounting point is significantly higher than the rear mounting point. Effectively, the upper control arm points up at the front. This is one way to create what is called anti-dive. If you have an understanding of rear suspensions and how 100 percent anti-squat works, then this is a similar situation except under braking. We don't want to achieve more than 100 percent anti-dive because then the front suspension will rise under hard braking, and there are many reasons why this isn't a good idea. But improving upon the stock Chevelle's bad habits is a good thing. The trick is to not overachieve. I would suggest calling Global West and talking with Doug Norrdin about this, if you are serious about moving in this direction. He has developed a new product that will help with this, but I had to promise not to talk about it in print because Doug says he's tired of educating his competition. The solution is incredibly elegant and is bolt-on simple.
Now, we can move to the rear suspension. Of your options, I really like the three-link idea. The problem with the Chevelle's splayed upper control arm rear suspension is that the arms are very close together in the middle of the car. In the case of a left-hand turn, the left-side rear control arm front locating point pivots upward as the body rolls to the right. The right side front location point moves downward, but these arms are also twisting slightly, which in this case is good because it keeps them from binding. A typical aftermarket upper control arm is very rigid, and if the ride height has been lowered, these arms can easily bind. I bent two stock upper control arms in my '65 Chevelle during competition before Doug at Global discovered the car was too low and binding them under body roll. The arms would completely lock up under body roll, and then the rear axle would literally bounce off the pavement in the middle of the corner because the rear suspension effectively became completely solid. As the car was bouncing, it was imparting tremendous loads through those upper arms, which then collapsed. This twisted the housing in the car and shoved the rear tires up into the rear wheelwell—not a pleasant experience at 50 or 60 mph in the apex of a corner as you lose all control! I ended up in the weeds off the track both times.
Preventing this problem means eliminating the bind. Global offers a spherical bearing that installs in the upper mounting ears on the rear axle that effectively minimizes the bind, allowing you to use a tubular upper control arm in the rear. But an even better idea is a three-link that uses a single pivot point in the rear. Unfortunately, this also eliminates the centering effect of the splayed upper control arms that locate the body over the rear axle. That's why, as you've correctly stated, you need a Watts link—or a Panhard bar. The Watt's link is more complex, but offers tuning advantages over the Panhard bar. We could spend another page or two on that subject, but for the sake of brevity, we'll save that for a question from a different reader.
I have purposefully not talked about shocks because that is yet another area that could take an entire book to discuss. This may be a bold statement, but I think that if you have only money for one product (not counting tires and wheels), I would spend more money than you can afford on double-adjustable shocks. A high-quality shock absorber can do more to improve the handling of your car than almost any single other component. Of course, this means you must have a decent front suspension geometry that doesn't roll into positive camber under body roll. But once that is achieved, then the next most important thing you can do is spend money on the shocks. That's even true for a drag-race car. I don't think that quality shocks can be overemphasized. There is a plethora of shocks available for a Chevelle. I would again talk to Doug Norrdin at Global and all the intelligent folks out there racing their cars. I would talk with QA1, Ride Tech, Koni, and a newcomer company called JRi, run by Jeff Ryan, who put Penske in the shock-absorber business. The price can range from affordable to downright crazy expensive, but having experienced the tuning nuances of a high-quality Penske shock, it's worth the money if you want to go fast. Of course, then you have to learn how to tune your suspension in order to get the value out of this investment. If you just want to bolt on parts and then go out and have fun, don't bother with adjustable shocks. But if you are serious (and it sounds like you are), then double-adjustable shocks will pay off immediately once you learn how to tune them correctly. Unfortunately, shock tuning is an art form all its own that I don't pretend to fully comprehend. But even the basics will still get you 75 percent of the way there.
Lastly, tires are the overall key. With a sticky tire, a properly tuned suspension will allow you to negotiate any corner faster with more control and faster exit speeds. The tires are the final and ultimate contact patch between your car and the road, and all this suspension talk is just to be able to put more tire on the road for the entry to, the middle of, and the exit to the corner as fast as possible. Lighter wheels are better along with softer tread. Nearly all of the Pro Touring events now require 200 treadwear ratings on the tires. Also, pay attention to when the tire was built. I bought a set of tires once only to discover that three were dated with the current year, but the fourth was three years old, despite the fact that they all were “brand-new” tires. You can determine this by using the federally mandated date code required on all tires. The date code is the last four digits located in an oval box on the sidewall that will say something like "2613." That means the tire was built in the 26th week of 2013. If the tire was built on or before the year 2000, it will be a three-digit code like 269, which means the 26th week of 1999. There are an increasing number of road events now that require the competitor's tire be no more than three years old. If you only race a couple times a year, that can get expensive, but it's all in the name of safety. Have fun with your Chevelle—send us photos and an update.
Scott Weaver; via CarCraft@carcraft.com: I love reading your Ask Anything column! I have always paid close attention to your cam recommendations and the relation of cam duration versus torque and at what rpm that torque occurs. Most stock small-block Chevy cams are around 190–200 degrees of duration with around a 5,000 rpm redline, while most street performance cams run around 230 degrees of duration. Is it possible to exploit a short-duration cam (like 170–180 degrees) for more torque at lower rpm, say, with a 4,000-rpm redline? I'm thinking of something like a 350ci small-block that would put out around 180–200 hp and 400-plus torque at around 3,000 rpm, something that would be right at home in a work truck. Or am I overthinking cam duration?
Jeff Smith: There's nothing wrong with your idea, Scott. In fact, that's why the OEMs use short-duration camshafts. But there are details and implications galore that make for a fun bench-racing session that you can use to amaze your friends with your newfound knowledge. Basically, torque is most closely tied to displacement. The easiest way to make a large amount of torque is with a large-displacement engine—it's really that simple. That's why those old Cadillacs from the '30s used huge engines. They couldn't spin them to make horsepower, but they made awesome torque due to their large displacement. But I think what you are asking is how much torque can a small-block Chevy make? A working estimate for torque and horsepower is to multiply the displacement times a number that ranges from 1.1 to 1.25. This is admittedly a rather large range; we'll get into that a bit later. For now, let's take a typical 355ci small-block and apply the entire range estimate for torque. On the low side, 355 times 1.1 equals 390 lb-ft of torque. The high-side estimate is 355 times 1.25 equals 444 lb-ft. That's a difference of 54 lb-ft of torque. The difference in power between these two estimates is based on how well the engine breathes. But first, let's show the effect when we try different displacements. A 302ci engine making 1.1 lb-ft/ci will make 332 lb-ft, while on the high side it can make 377. If we then take a 406ci small-block, it has a range of 447 to 507 lb-ft. Even at a mild 1.1, a 406ci small-block Chevy, Ford, Chrysler, or AMC has the potential to make great torque. That's the beauty of displacement and the truth behind the oft-heard line, "There's no replacement for displacement."
So if your goal is to make as much torque as possible with a short-duration camshaft, there are some trends worth inspecting closely. We mentioned that a good-breathing engine would make good power. This puts a premium on efficient airflow in and out of the engine. Another good idea is compression. If all you do is add compression to an engine, you will make it more efficient, and it will make both more torque and more horsepower. But here is where you have to be careful. There is an important relationship between cam timing and compression. What you don't want to do is pump up the compression to 10.0:1 and then add a very short–duration camshaft. This will radically increase the low-speed cylinder pressure, and the engine will detonate. One way to evaluate an engine's combination is to measure cranking cylinder pressure. Typically, a cranking pressure in excess of 200 psi could be excessive and cause detonation. Let's get into this a little deeper. By the way, you might have guessed by now that one of the best ways to increase that 1.1 hp/ci number to something closer to 1.25:1 is to increase the static compression ratio.
Short-duration camshafts open the intake valve later and close it sooner than a longer-duration cam. The most important point of the four intake and exhaust valve events is the intake closing point. For most long-duration performance cams, a later closing intake point allows the intake port more time at high rpm to fill the cylinder. Remember that at 6,000 rpm you have exactly half the amount of cylinder filling time in actual milliseconds to fill that cylinder compared to 3,000 rpm, even though the intake valve duration has not changed. Since we're talking about making more torque at around 3,000 rpm, we would want a shorter-duration intake lobe that will close the intake valve sooner. This might sound counterproductive, but the reality is that at lower engine speeds, the intake port has time to fill the cylinder. By closing the valve sooner, this captures more of the existing air and fuel in the cylinder. Remember that we cannot begin to compress the mixture with a rising piston until the intake valve closes.
Let's look at an example of a short-duration intake lobe. We chose a Comp High Energy 240H cam with 192 degrees of duration at 0.050 tappet lift. The Comp timing card says the intake valve opens at 9 degrees before top dead center (BTDC) and closes 50 degrees after bottom dead center (ABDC). These specs are for the intake lobe at the advertised duration figure of 240 degrees. We can calculate the duration by adding 9 plus 180 (the duration in degrees between TDC and BDC) plus 50 equals 239 degrees. Comp probably just rounded the figure off to 240 degrees for simplicity's sake. Let's compare this to an Xtreme Energy flat-tappet hydraulic 284-advertised duration cam with an intake opening point of 34 degrees BTDC and an intake closing of 69 degrees ABDC. Right away, you can see that the critical intake closing point on the longer-duration camshaft is a massive 19 degrees later than the short-duration camshaft. This means the longer-duration camshaft will have a much lower dynamic cylinder pressure at low engine speeds because the intake valve closes much later than it will with the short-duration lobe. This is also why longer-duration cams require more static compression in order to run decently at lower engine speeds because they are losing lots of cylinder pressure with that late-closing intake. You can measure this again by looking at the cranking cylinder pressure of an engine. Add a long-duration intake lobe and watch the cranking cylinder pressure drop. That's all due to the later-closing intake valve.
Conversely, you can probably also now see why too much static compression with a short-duration intake lobe can create excessive cylinder pressure at low engine speeds. This will almost always result in detonation. I've driven a small-block Chevy with 11:1 compression and a 190-degree short-duration hydraulic flat-tappet camshaft (it's a long story), and the half-throttle detonation sounded like eight rocks clattering in a three-pound Folger's coffee can*. This is something you definitely want to avoid.
*A long time ago, coffee came in cans. Back to the story…
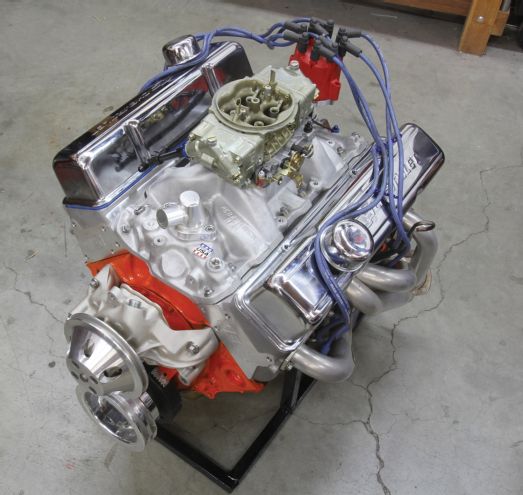 To put this discussion into perspective, our All-Star small-block 355 in the Jan. ’14 issue made 423 lb-ft of torque at 3,000 rpm with a flat-tappet hydraulic Lunati cam that measured 233 degrees at 0.050. The engine also enjoyed a 10.2:1 compression ratio. Peak torque was 4,300 rpm.
While your idea for a short-duration camshaft to build torque might sound like a good idea, something closer to 210 to 215 degrees of duration at 0.050 for a 350ci engine is probably a better idea. This will allow the engine time to better fill the cylinders while still making decent top-end power. A good cylinder head will really help produce power at all engine speeds. My good friend, the late John Lingenfelter, said it best, “An engine with the best cam in the world but poor heads will be a slug. But a great set of heads will make good power even with a lame camshaft.” Truer words were never spoken. A good choice for a budget small-block Chevy would be the iron 1.94/1.50 valve size Vortec truck heads, since they flow well and are inexpensive. Or take a look at our small-block cylinder head comparison (“Eight Budget SBC Cylinder Head Shootout,” Sept. '09). The choice of camshaft should be based on the size of the engine. A larger small-block like a 383 or 406 could use a slightly longer-duration camshaft than a 283.
A 355ci small-block Chevy with a set of Vortec iron heads would be very torquey with a camshaft with around 210 degrees of duration at 0.050. You might be able to get away with increasing the lift with a set of 1.6:1 rocker arms, since all short-duration cams are valve lift–limited. This discussion is basically around a flat-tappet hydraulic camshaft. A hydraulic roller will produce more lift, but there are limitations to these short-duration cams that actually make the flat-tappet cam a wiser choice. If you want to know why, write an email to Ask Anything, and we'll take on that subject at a later date. This short-duration torque cam would work well with a 9.0 to 9.5:1 compression ratio, especially if the piston-to-head clearance is held as tight as possible. This improves quench and reduces the engine's sensitivity to detonation. A good exhaust system will help even a short cam, and long-tube headers will enhance low-speed torque as will a longer collector. Of course, a good dual-plane intake (we did that test, too, “Dual-Plane Intake Comparison,” Sept., '13) is the only choice for an intake manifold and a Quadrajet or a 600-cfm Holley carburetor will also help. Throttle response should be very crisp, with 400 lb-ft of torque, and this is more than enough power to make for an excellent street small-block that will be loads of fun to drive.
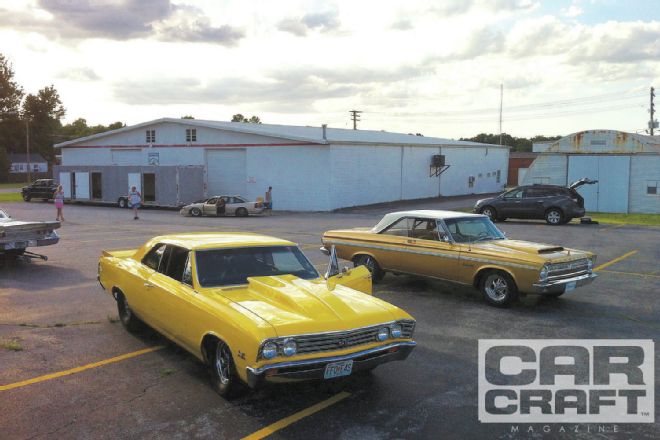
Here's a behind-the-scenes shot from one of the photo shoots we did during the Street Machine Nationals.
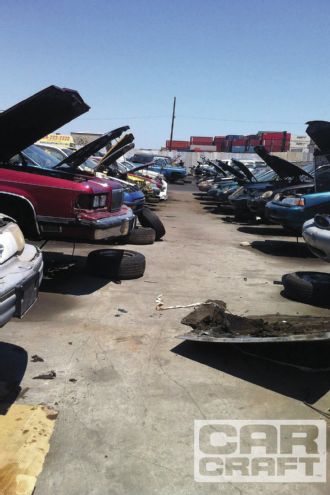
On a recent trip to our local junkyard, we were looking for old Chevy pickup steering wheels, and some random pulleys and brackets. We left empty-handed this time, but that's how it goes sometimes. Did you score something in the junkyard recently? Send pictures to CarCraft@CarCraft.com.
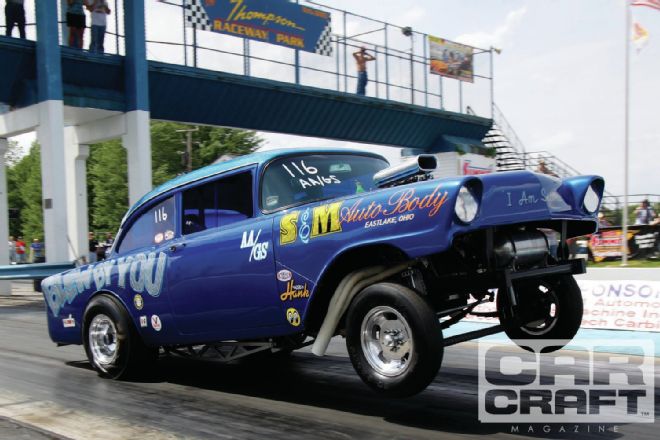
Do you love nostalgia drag racing? We're working on the Spring 2014 issue of Elapsed Times, our newsstand only publication dedicated to retro drag racing.
CarCraft@CarCraft.com
CarCraft.com
Car Craft Mag
831 S. Douglas St.
El Segundo, CA 90245