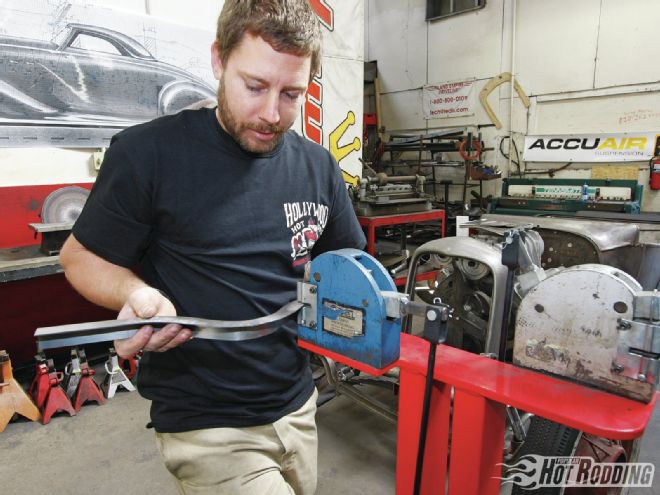
We’re big fans of fabrication; it truly is the hot rodder’s ultimate artistic expression. Mastery means you can make whatever you want, limited only by your imagination. After all, you don’t take on an ambitious project car like our own Max Effort ’67 Cougar without embracing the fact that you’ll be building a lot of stuff from scratch.
While we’ve wowed you with the wondrous ways Ryan Kertz of Kertz Fabrication and Norm Archer of Archer Metalshaping have bent and shaped steel to create highly advanced pieces of metal art that will make up the mettle of Max Effort, we’ve not delved too much into how you can get started in fabbing and shaping. Well, we’re going to fix that starting now.
However, rather than dive in, we figured it would be good to take a moment to familiarize you with some of the most commonly used tools in any fab or metal shaping shop. While many of these are professional-level tools, nearly all have home garage counterparts. We’ll even tell you where you can get reasonably priced versions. You certainly don’t need to run out and get all of them at once, but you’ll have a good wish list.
So, to get a primer on some of the basic tools commonly used in any fab shop, we headed over to Hollywood Hot Rods in Burbank, California. Troy Ladd’s shop hosts a multitude of intimidating power-shaping machines, but we zeroed in on 16 tools that the shop simply couldn’t get by without. Some may be more than your particular project needs, but we guarantee that the deeper and more passionate you become about making your own parts, the further down this list you’ll find yourself going.
The Shear
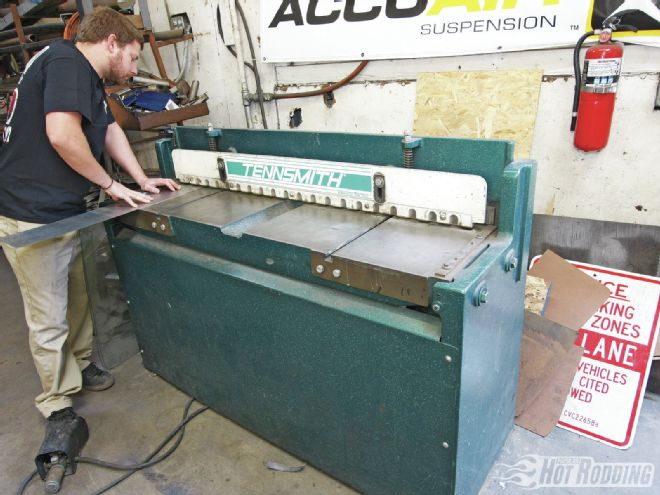
The shear is really just a large-scale version of tin snips or metal scissors. Those will work for small jobs, but if you plan to work with sheetmetal of any real size you’re going to need a way to make clean, consistent, straight cuts. Hollywood Hot Rods and most fab and metal shaping shops will use a large pneumatic shear like this Tennsmith, but smaller, manual versions are available.
Tin Snips
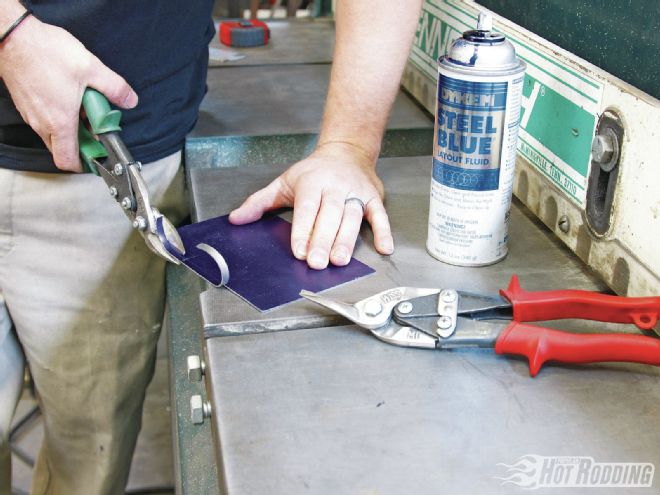
Speaking of tin snips, a good set of these is one of the most valuable metalworking tools you can have for fabrication since their precision is unequaled. Properly sharp snips can cut a line the width of a human hair. Troy Ladd at Hollywood Hot Rods has sectioned whole cars using little more than these. Also, note the can of Dykem Steel Blue; this is the blue layout fluid used by fab shops for creating a surface to lay out designs and scribe clean lines that are easy to cut.
Pro Tip: In the fabrication world, there is no such thing as “left” and “right” shears; the cut of the blades is designed for one clean and one waste side, and differ to accommodate the location and direction of the cut.
Shaping T
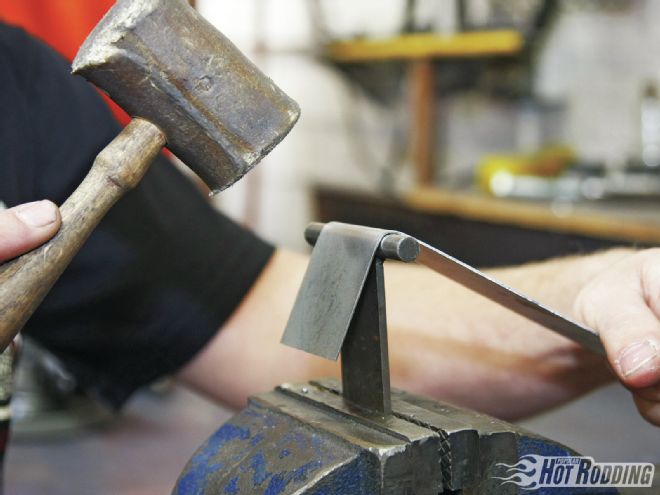
We’re not aware of anyone who sells these Ts, but they’re extremely simple to make using round bar and a piece of flat stock. Plus, making them yourself allows custom tuning of the arc to your project. After deciding the size and arc needed, the T is clamped down in a vise and the sheetmetal is laid across the top, according to where the roll is to be started. Tapping along the edge of the sheetmetal that hangs past the T begins the roll; hammering on top of the T will result in stretching and deformation. Along that same line, be aware of your hammer choice; a dead blow or leather hammer is best as these will control stretching better than steel. This technique is handy for numerous projects, such as making panels where a rolled edge would be more aesthetically appropriate than a sharp fold.
Sheetmetal Brake
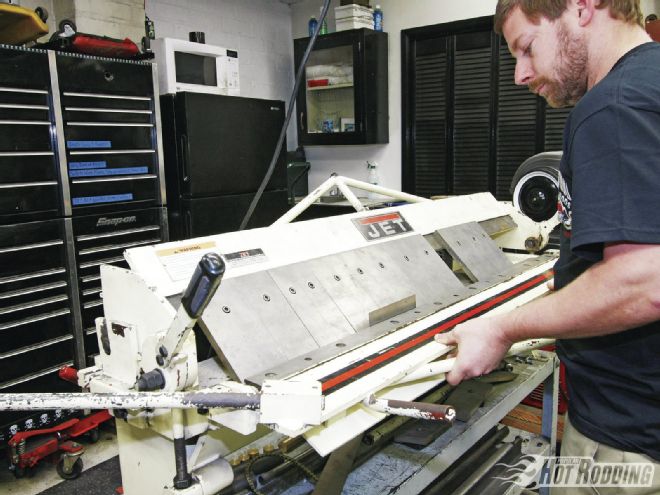
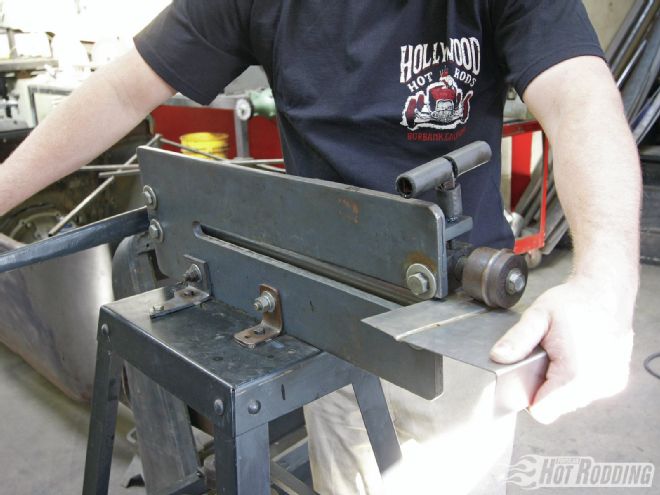
The sheetmetal brake is a foundation tool that anyone serious about building their own parts will need regularly. The point is very simple; the clamping jaw and swinging plate create a clean bend in sheetmetal at any degree from 1-120 degrees or so, depending on the machine. A finger brake, such as this one, has a clamping jaw that is split into several smaller sections. This allows the ability to easily alter the position of the brake’s “fingers” to accommodate different styles and sizes of bends or boxes not possible with solid jaw.
The Bandsaw
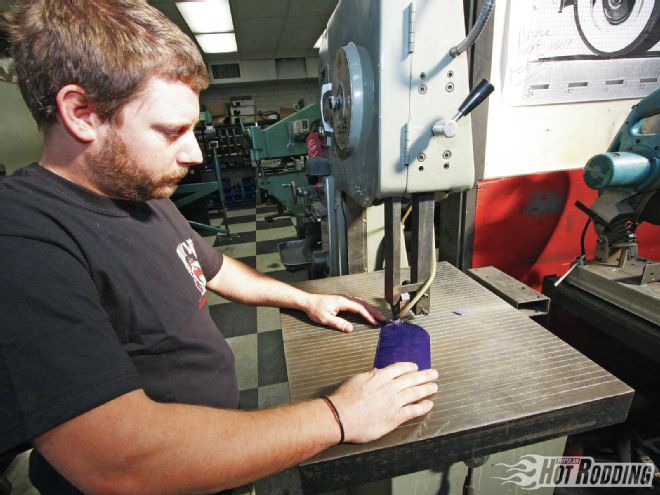
Depending on the scope and scale of your projects, you may not need a large freestanding bandsaw such as this, but a small tabletop one can make life much easier. Bandsaws are most useful in fab shops not only for basic cuts, but also roughing in shapes, curves, and contours that can be cleaned up afterward with more precise means. The rounded end of the sheetmetal shown here is a quick operation on a bandsaw; it’s easy to maintain consistency.
Shrinker & Stretcher
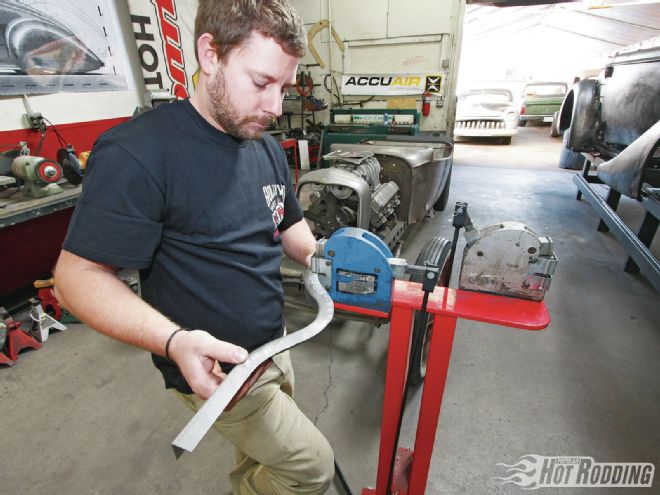
The basic principle of shrinking and stretching relies upon squeezing the metal together or pulling apart to stretch. Shrinkers and stretchers accomplish this with a pair of ribbed jaws that bite into the metal and then slightly move either inward or outward. If the arc is too great, stretching along the same path will open it back up. Hand-operated tools are always the cheapest, but foot-activated ones will speed your work and control since both hands are free to guide the metal. The result in this case is a piece of 90-degree angle sheetmetal that curves fluidly. Note that the marks are only on one side of the 90-degree stock; this technique is handy for making custom parts and patches as well as flanges for joining panels, or even templates for cloning existing parts.
Disc Sander
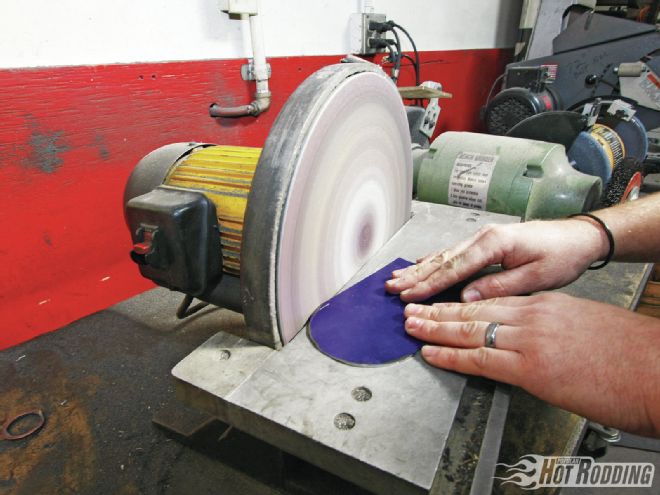
Bench grinders are useful, but for cleaning up edges after cuts, nothing really beats a disc sander. Not only can they quickly deburr and smooth the edges of metal, they can also be used to clean up the fluidity of a cut.
Slip Roll
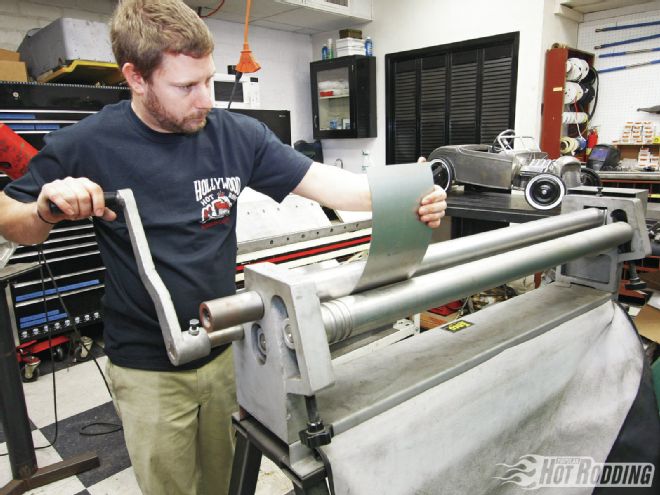
The slip roll is essentially a movable set of rollers that you can crank either sheetmetal, or small-to-medium diameter round bar through, to create curvature. It’s always best to sneak up on the shape you need, so you always begin with a mild clamping load that creates a slight bend, then tighten the rollers a little closer together and run the material through again. Arcs like this piece of sheetmetal are ideal for beginning patch panels on curved areas.
Pro Tip: You can get a three-in-one machine with slip roll, metal shear, and sheetmetal brake capabilities from Harbor Freight.
Clamping/Flanging Pliers
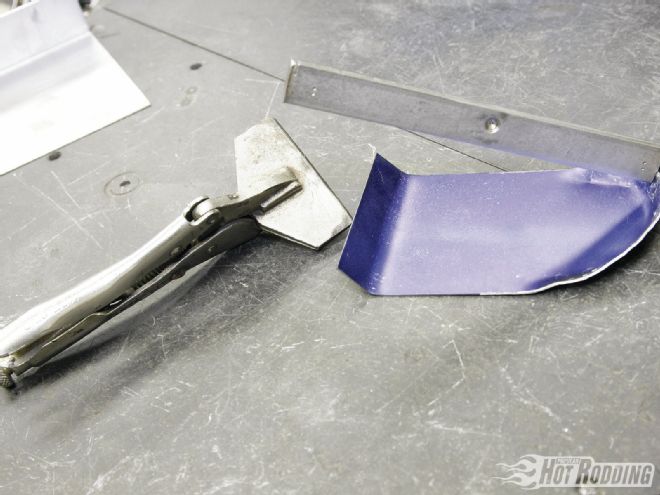
There are several variations on the clamping or flanging pliers design, but they all have basically the same dual-purpose function. On the most basic level, these are perfect for clamping and holding pieces together when welding or fitting sheetmetal. They are also useful for making quick breaks in small pieces of sheetmetal—though the result will not be as crisp as a sheetmetal break without some additional work. The flanging/shaping tool to the right provides an easy way to make a custom piece, and the crew at Hollywood Hot Rods uses it regularly. The small bite allows bending around a curve on sheetmetal, but will require work with the shrinker to smooth out the bend as the sheetmetal will naturally buckle and fold.
Bead Roller
Here’s the tool that makes it possible to create perfect strengthening ribs in panels, such as a floorpan, or even body lines in sheetmetal. Bead rollers operate by using two sets of round dies with complementary shapes to stretch the metal and create beads. There are literally thousands of possible die combinations that can create innumerable effect, limited only by your imagination. In any case, the beads are always formed in multiple stages with each pass exerting a little more force on the material by cranking the dies closer together. This version is hand-crank operated, but much more convenient versions driven by electric motors are available as well.
The English Wheel
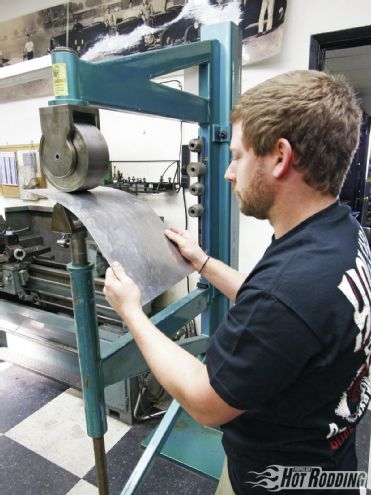
This tool is the gold standard of metal shaping and is a must-have for creating panels with complex curvature. The wheel works by passing the sheetmetal between two roller wheels. In most cases, the large, flat-top roller is constant, but the smaller lower wheel is switched for varying degrees of curvature, depending on how much shape needs to be created. Wheeling is a very slow process when done correctly, since the goal is to make the steel flow and conform to a new shape. Trying to put too much shape in too quickly will only buckle the metal and ruin the panel. Large freestanding versions like this one allow working large panels, but small tabletop versions are available as well.
Sandbag
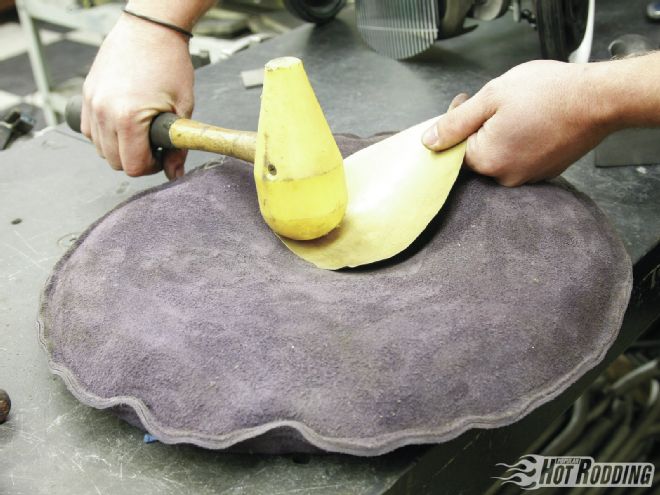
Sandbags are filled with various media depending on the company and intent for the bag, but all are used for stretching. To work metal, such as this piece of brass, start at the center and work outward. Not all areas will receive equal attention and most of the hammering will be concentrated toward the center, since it needs to be stretched the most. As you hammer, the moves underneath the blow force the metal to stretch and bend.
Dollies
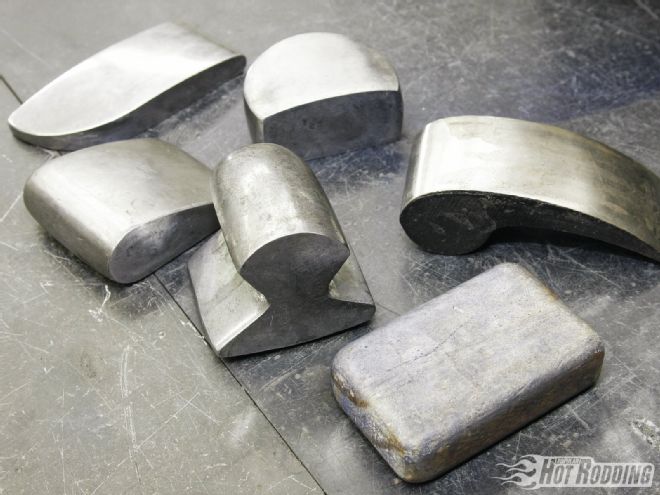
Dollies are the most basic form of metal shaping tool and are chosen to complement the shape needed, or oftentimes simply what will fit into the location needing to be dollied. Sheetmetal is actually fluid, and hammering on-dolly is used for stretching. Hammering off-dolly is used to equalize highs and lows—like working out dings and waves in sheetmetal. The exception is with a wooden dolly, or forming block, which will form without stretching the sheetmetal. Clockwise from the top left we have a toe dolly, heel dolly, comma dolly, a wood forming block, general-purpose dolly, and a teardrop dolly.
Throatless Shear
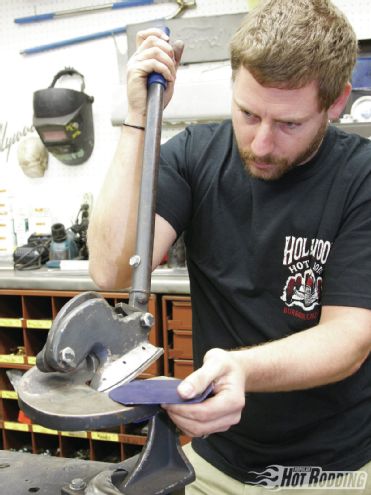
This highly versatile hand shear can make simple straight, complex, or curved cuts in light- and heavy-gauge sheetmetal. They’re very useful in that they allow the material to be turned in any position while cutting, and are ideal for getting the basic shape of a piece started.
Hammers
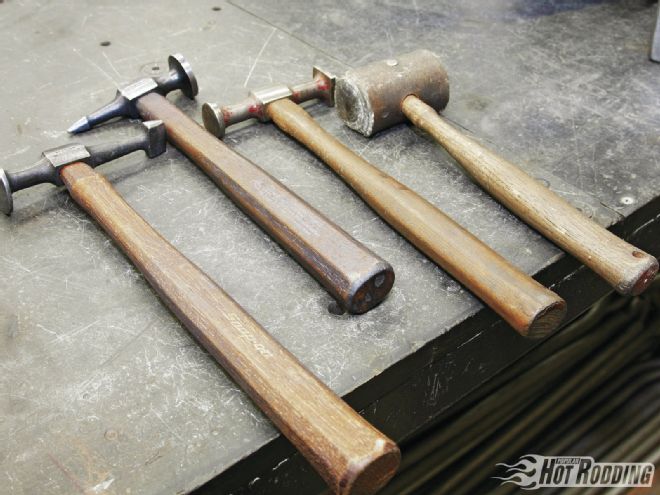
The type and style of sheetmetal working hammers is nearly as limitless as dollies, but these four are a good basis to start with. The main consideration when choosing which hammer to use is the type of work that needs to done and where. Some hammer heads will just suite a location better than others. Specialized tips, like the two picks shown, are used for dents or reaching into bends or tight areas. The leather hammer is a deadblow style that is used for shaping without stretching.
The Stump
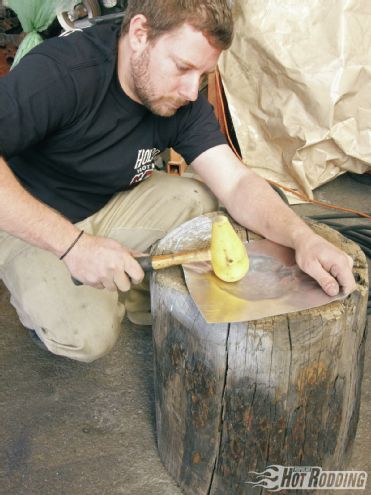
We saved our favorite for last: the stump. Occasionally referred to as the “old Italian method,” since it’s been long rumored that early Ferrari race cars were crafted this way, stump forming holds a great deal of possibilities with very little expense. To begin, find a solid stump from a hardwood tree that doesn’t hold a lot of sap—southern pine trees typically aren’t a good choice, for example. There’s no strict guideline on how large or deep the hole needs to be, and in truth, it doesn’t really need to be symmetrical either. The metal is placed over the hole and the hammer strikes fall in and around the hole. Wood and plastic mallets with rounded heads are usually the weapon of choice. Whereas sandbags work more slowly and subtlety, stumps can create a lot of shape quickly.
Where To Get ’Em!
Don’t have room or can’t afford the professional-level tools like Hollywood Hot Rods uses? The good news is nearly all of these tools are readily available in budget-friendly home garage versions from either Eastwood or Harbor Freight Tools. Find what you need and start building your sheetmetal-assaulting arsenal today!