
There are two firmly entrenched and opposing schools of thought when it comes to air conditioning: that less is best and A/C should never be intentionally added to a hot rod, and that power and comfort can coexist harmoniously. Thanks to the growing trend of bringing hot rods up to new-car specs for comfortable daily driving or long-distance road tripping (Power Tour(r), anyone?), that second group has been growing substantially, and the aftermarket has responded with a quality array of systems for almost every car.
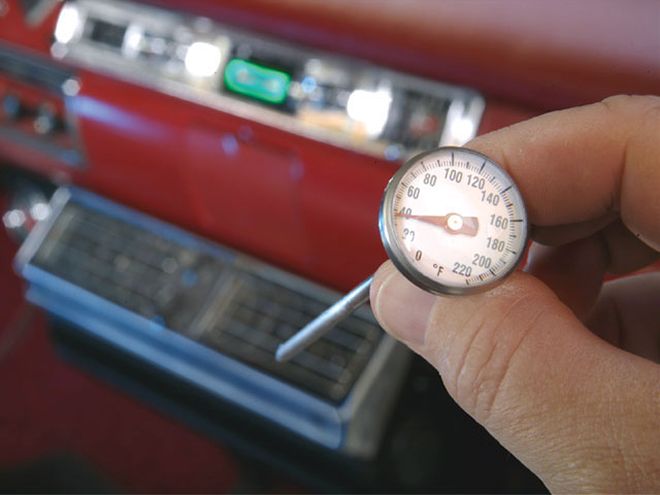
There are basically seven major aftermarket A/C companies that cater specifically to hot rods: Vintage Air, Hot Rod Air, Classic Auto Air, and Southern Air (by Southern Rods and Parts), Old Air Products, Nostalgic Air Parts, and Air-Tique. We spoke with all of them to get a rundown of what you should know about air conditioning and how to put it in a car. Though there were some minor disagreements on some of the components, particularly regarding retrofitting an old system, the one thing that was consistent is that A/C is not rocket science; you can do this yourself.
We're not trying to persuade anyone to change their lose-everything-that-adds-weight ways, but next time you're stuck in traffic sitting in a puddle of sweat and pondering exactly what it would take to put some cool air in the cabin, you'll know where to go, what your options are, and what you're up against.
What's Available For My Car?
Though a large section of aftermarket A/C revolves around the universal or underdash style units, the musclecar boom has led to development of complete bolt-in kits for most popular cars. Don't worry if your car is not on the list, since all of the companies we spoke with have done plenty of custom installations and can work with customers to devise a system that may not be a direct bolt-in, but will fit without excessive hassle. Below is a list of the vehicles with complete bolt-in kits available.
Vintage Air Chevrolet:
'55-'57 Chevy
'59-'60 passenger car/El Camino
'58-'67 Corvette
'67-'69 Camaro
'64-'69 Chevelle/El Camino
'66-'69 Nova
'47-'86 truck
Ford:
'6411/42-'68 Mustang
'64-'65 Falcon/Ranchero
'53-'56 truck
'66-'77 Bronco
GMC:
'47-'86 truck
Pontiac:
'67-'69 Firebird (non-air cars only)
Toyota:
'73-'80 FJ-40 Landcruiser
Hot Rod Air
Chevrolet:
'58-'82 Corvette
55-'57 Chevy
'55-'59 truck
Ford:
'6411/42-'66 Mustang (underdash)
VW:
'58-'94 VW Sedan Type 1
'65-'74 Karmann-Ghia
'73-'79 Super Beetle
Classic Auto Air (CAA):
Chevrolet/GMC:
'47-'72 Chevy/GMC truck
'55-'57 Chevy
'58-'68 sedan/Impala
'64-'72 Chevelle/El Camino
'58-'76 Corvette
'64-'67 GTO/LeMans/Tempest
'67-'78 Camaro
'63-'74 Chevy II/Nova
Ford:
'6411/42-'73 Mustang and Cougar
'64-'65 Falcon, Ranchero, and Comet
'55-'66 T-bird
'55-'56 Ford Fairlane/Crown Victoria
'48-'72 truck
'66-'77 Bronco
Mopar
'67-'72 A-Body
'66-'72 B-Body
'70-'74 E-Body
'66-'67 Charger
Pontiac
'64-'67 all models
Southern Air
'55-'57 Chevy
All other systems built to order by car
Old Air Products
Chevrolet:
'55-'57 Chevy
'73-'87 C-series truck
'67-'81 Camaro
Ford:
'6411/42-'66 Mustang
'67-'79 F-series
Pontiac:
Kits fits most cars with 350-400ci engines
Many other kits available upon request
Nostalgic Car Parts:
Chevrolet:
'55-'57 Chevy
'69 Camaro
'63-'67 Corvette
'47-'72 truck
Ford:
'65-'73 Mustang
'55-'57 Thunderbird
'53-'72 truck
Air-Tique:
All systems built to order by car
How Does Air Conditioning Work?
All air conditioning systems work in the same basic way, relying upon the principles of evaporation, condensation, compression, and expansion, and consist of the same seven major components: the compressor, condenser, receiver-drier, orifice tube or expansion valve, evaporator, hoses, and of course refrigerant.
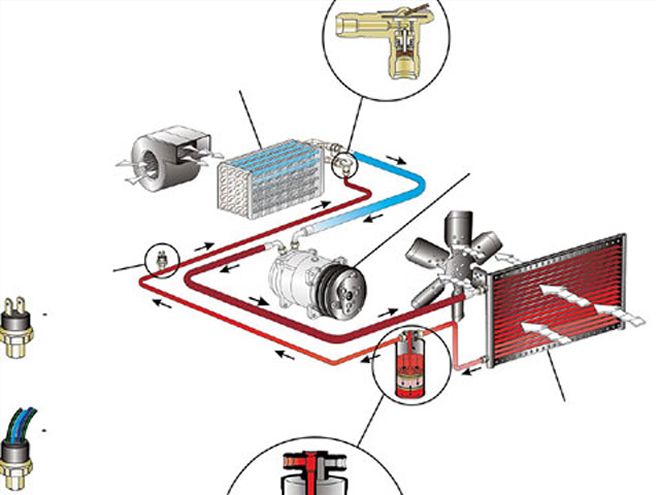
The refrigerant, which is now HFC-134a (R-134a), boils at around -15.9F, which means it is typically a gas under standard atmospheric pressure. One of the basic principles upon which an A/C system operates is Latent Heat of Evaporation, which means that the refrigerant must be able to evaporate, so it must first become a liquid. If you're unfamiliar with the Latent Heat principle, it's the same idea as how sweat helps regulate your body temperature on a hot day. When you sweat, the moisture evaporates from your skin, absorbing heat in the process and creating a cooling sensation. With R-134a, to raise the boiling point high enough for the refrigerant to condense to a liquid at more realistic ambient temperatures, it must be highly pressurized.
The A/C system is a continuous loop that is split into a high-pressure side and a low-pressure side by the compressor. The high pressure created by the pumping of the compressor pushes the now heated and pressurized gaseous refrigerant through a hose into the condenser, where much of the heat is then lost to the air blowing through the condenser's fins. This loss of heat causes the refrigerant to condense into a liquid state. The still-highly-pressurized liquid then flows into the receiver-drier, which contains a filter to remove any debris within the system as well as desiccant material to remove any moisture or impurities from the refrigerant. (Moisture combined with refrigerant can form a corrosive acid.) The purified liquid refrigerant flows through the A/C hoses and into the cabin of the car, where it is then forced through a small orifice, either in the form of a fixed orifice tube or thermal expansion valve. The resulting fine mist that is metered by the valve (think of a finger over the end of a hose) blows into the evaporator located in the heater box under the dash. The drop in pressure caused by the expansion valve is sufficient to cause the refrigerant to vaporize as it moves into the evaporator, absorbing a good deal of heat in the process. A fan located in the heater box blows ambient air across the now-chilled evaporator, which absorbs heat from the air, and the resulting cooled air blows through the vents into the cabin. Because the cooled air has less capacity to hold moisture, the evaporator also dehumidifies the air.
Condensation develops on the evaporator and the water drips away through a drain in the evaporator box and causes the puddles usually seen under vehicles with the A/C running. Depending upon the system design, as the now-gaseous refrigerant is sucked back toward the compressor, there may also be an accumulator attached to the outlet of the evaporator that serves to ensure no liquid refrigerant or moisture makes its way to the compressor.
R-12 vs. R-134a
For decades the refrigerant used in all automotive air conditioning systems was a chemical known as R-12. R-12 is actually a very effective refrigerant, but it's also a chlorofluorocarbon (CFC) compound that doesn't play nicely with ozone. Under the Montreal Protocol, many countries agreed to halt the manufacture of CFCs by 2000, but the U.S. stepped up the deadline and its production of R-12 was ended by December 31, 1995. For the replacement refrigerant, automakers chose to go with R-134a, which is an efficient and more environmentally friendly refrigerant with some minor differences in how it operates. Why should you care? If you're purchasing a new system it doesn't matter, since R-134a is the industry standard (though some manufacturers still offer R-12-compatible systems). However, if you have an old system that operated on R-12, you'll need to decide whether you're ready to perform the necessary upgrades to R-134a or track down some R-12, which even if you can find it is now hideously expensive. Eventually, an upgrade will be almost unavoidable.
The Individual Parts
If you're buying a complete aftermarket A/C kit for a specific car, there aren't very many options available when it comes to the crucial parts-but not everyone has a popular car with an available kit. In that case there will be some improvising involved. Thankfully, the major A/C companies can walk you through it, but we're going to explain some details on the individual components if you feel like piecing it together yourself.
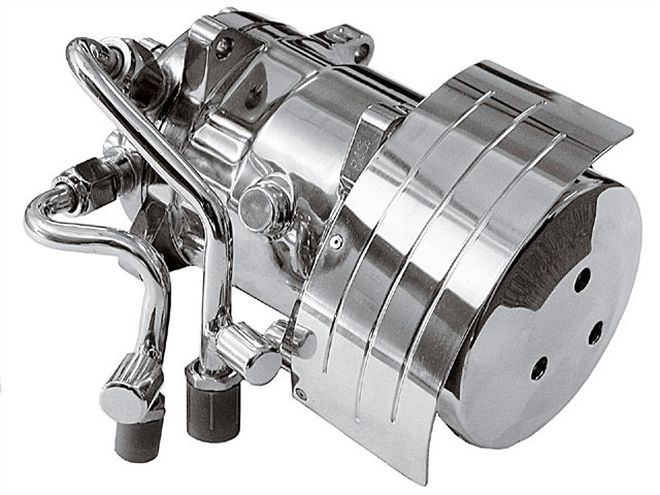 The Sanden SD-508, such as this polished one from Hot Rod Air (with optional hard lines), is the most common unit for all aftermarket systems due to its efficient design and easy adaptability.
The Compressor
A compressor is just a pump, but the essential point to consider is the capacity of the compressor relative to the rest of the A/C system. Contrary to popular belief, bigger is not necessarily better, and in many cases too large a compressor can actually result in decreased cooling and component life due to excessive pressure. In most cars, a compressor with 8-9 ci of displacement is enough to cool sufficiently. In almost all cases in the aftermarket this will be a Sanden unit, usually the SD-508 rated at 8.4 cfm, unless you specify that you'd like to use something else (such as a vintage York/Tecumsah or Frigidaire compressor or a late-model unit such as a Nippondenso or Harrison). Any system can be adapted to work with these compressors, but efficiency could suffer depending upon the application. Ask the tech guys at your A/C company of choice for specific recommendations.
No matter which compressor you choose, you'll be mounting it to the front side of the engine in some way. If you're beginning with a car that had factory A/C or an A/C option, the factory brackets and pulleys can often be used with little to no modification (depending upon the compressor). Otherwise, multiple mounting options are available from the various A/C companies as well as pulley specialists like March Performance and Billet Specialties. Whatever bracket system you choose, just make sure the belt makes at least one-third of a wrap on the compressor pulley, and that there is a way to maintain proper tension on the belt in the form of a tensioning link or an idler pulley. Also remember that you'll need a crank pulley with a groove that lines up with the compressor if the engine isn't equipped with one, so if you're pondering upgrading to a serpentine belt or more aesthetic brackets, this is the time to do it.
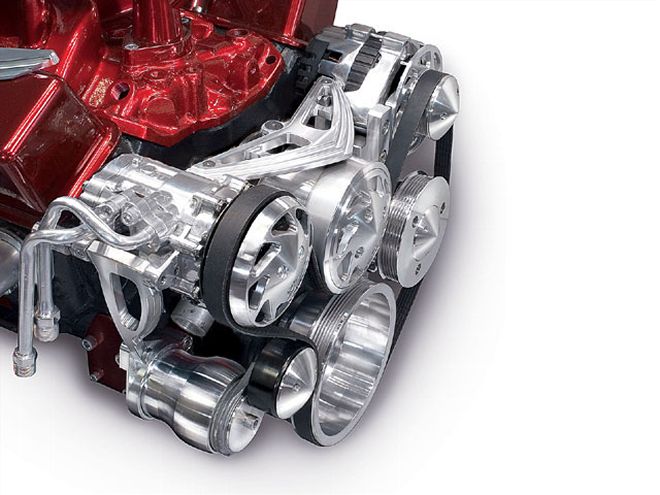
Aftermarket bracket kits such as this one from March Performance can add style to the front of an engine and allow custom mounting locations to accommodate for engine swaps. Remember, if the compressor mount deviates from the stock location, make sure allowances are made on the length of the A/C hoses.
The CondenserEvery company we spoke with said that the condenser is probably the most important element of the system since its performance will determine how well the A/C system can cool. Ideally you want to use the largest and most efficient condenser that can be packaged into the car. For cars with bolt-in kits, this will already be scienced out. However, with custom applications and street rods the amount of space available will vary, so careful measuring will be necessary to determine what fits.
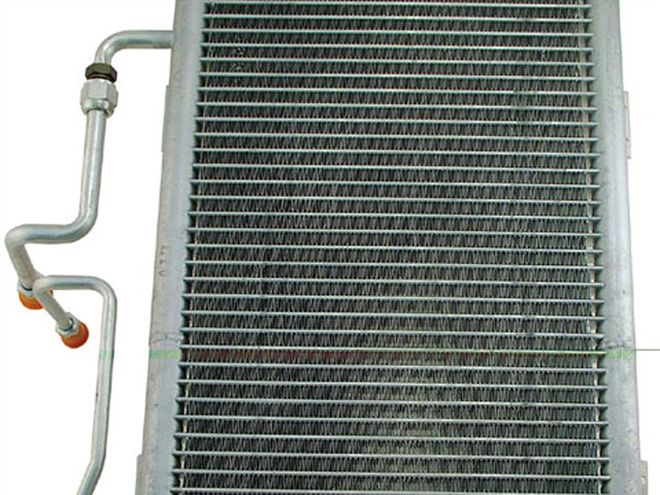 The new parallel-flow-style condenser offered by most aftermarket companies is easily identifiable by the tanks located on either side of it, like this example from Southern Air.
Packaging is generally not a problem in most '50s, '60s, and '70s cars, which have ample room between the grille and the radiator support where airflow is best. Space can be at a premium on many pre-'50s rods, but a highly efficient condenser can help make up the difference. Vintage Air's general rule of thumb is to plan on a minimum of 264 square inches on a standard old-style two-row 51/416-inch copper tube-and-fin-type condenser, or at least plan on a newer, more efficient condenser such as the parallel flow design used in most new vehicles. Hot Rod Air prefers a greater surface area with at least 330 square inches of condenser surface for efficient cooling.
More important than size, airflow is the key to how efficiently a condenser can operate. Even the biggest, best condenser can only do so much without good placement in an airstream. Refrigerant is much more sensitive to temperature than water, so to receive the coolest air possible the condenser is always placed in front of the radiator rather than behind it, and there should be a gap of at least 31/416 inch to prevent heat transfer from the radiator. None of the companies we spoke with recommend remote-mount condensers (such as those mounted under the car) if there are other mounting options, since the warm and sluggish airflow under most cars will be insufficient without at least a separate electric cooling fan, but most of the companies do have kits available nonetheless.
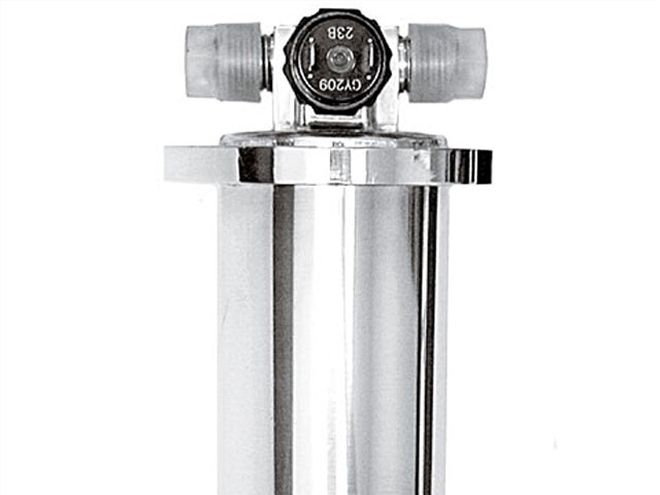 This polished receiver-drier from Vintage Air has the pressure safety switch incorporated into the cap to simplify installation.
Receiver-Drier
The receiver-drier's job is to filter the refrigerant to remove moisture and contaminants from the A/C system and ensure that only liquid refrigerant passes to the expansion valve. According to Vintage Air's Jack Chisenhall, in a correctly installed and sealed system the receiver-drier's filtering job should be basically done in the first couple weeks of use. Since receiver-driers are mostly standard sizes relative to the rest of the A/C system, the only real option here is whether you'd like to upgrade to a rebuildable unit like that available from Vintage Air, or stay with the standard one-time-use variety. The desiccant material has a limited ability to absorb moisture, so always make sure to leave the rubber caps installed until it's ready to be connected.
Often the receiver-drier will already be mounted to the condenser, but sometimes they are separate due to space concerns. Though not as critical as the condenser, the receiver-drier benefits from a constant supply of fresh air to ensure that the liquid refrigerant doesn't heat up and encourage evaporation-so resist the urge to completely hide it. It's also important to keep it mounted vertically so it can separate the liquid from whatever gaseous refrigerant escapes from the condenser.
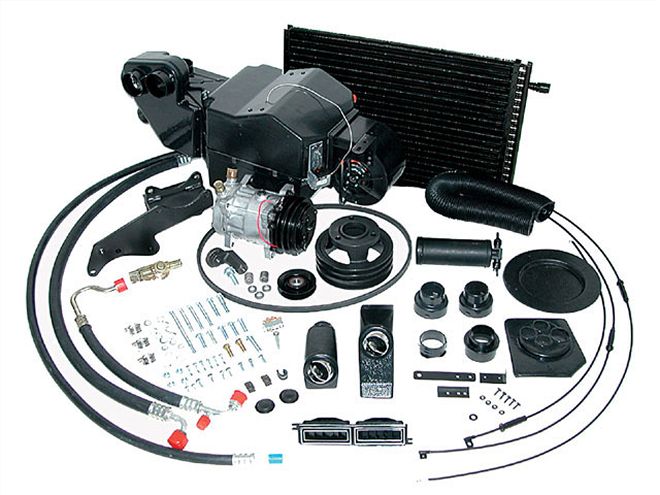 This Perfect Fit System for '67-'68 Mustangs and Cougars from Classic Auto Air already has the hoses fitted, which means you need to route them according to the directions to ensure a proper fit.
Hoses And A/C Lines
Rather than the rubber hoses used with R-12, R-134a requires a new style of hose, referred to as a barrier hose, that's designed to eliminate the possibility of refrigerant escaping through the pores of the hose. Also, the hoses use O-ring-style fittings to ensure a proper seal on the other components rather than the old flare-type fittings. All current kits on the market use this type of hose, so there's no guesswork there. If you're purchasing a direct bolt-in style kit, the lines will usually already be built for you unless you specify otherwise.
Some complete kits come with premade hoses, but if you want to route the hoses differently (or hide them), you can get an A/C-hose- specific crimping tool and make your own hoses. However it's done, the high-pressure lines carrying the liquid refrigerant to the evaporator should be kept away from radiant heat as much as possible, since that will only encourage the refrigerant to evaporate too soon. The low-pressure (suction) hoses are not as sensitive to temperature, since the heat will only help ensure that the refrigerant stays in a gaseous form and no liquid gets back to the compressor.
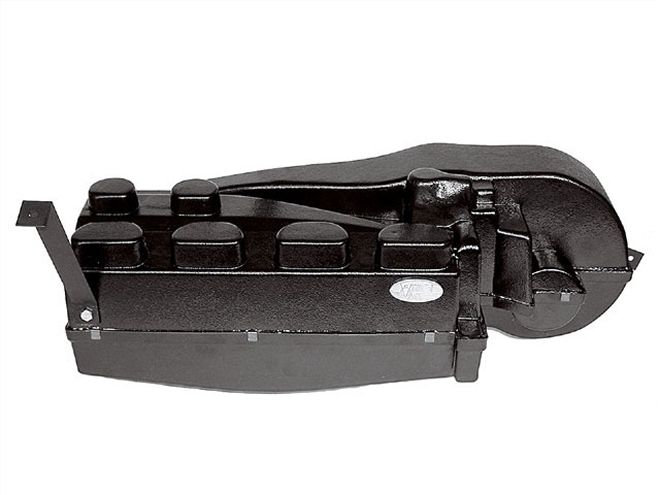 Vintage Air has mockups like this available to ensure proper fitment and help visualize necessary brackets on custom installs before ordering a system.
The Evaporator
The evaporator, which is housed in the heater box inside the car, is another example of "bigger is better," since this is the piece of the system that actually removes heat from the air and creates the cold air you feel from the vents. Since no one wants to redesign a dash around A/C, packaging is going to be the determining factor when selecting an evaporator. Evaporator design can come into play here as well. Many companies combine the evaporator and heater cores for space savings, but some, such as Classic Auto Air, prefer to keep the two separate as they feel both will function more efficiently that way.
As far as configuration, the two distinct styles of evaporators are underdash and in-dash, and choosing one is often less about aesthetics and more about how much space is available. Underdash units have built-in vents and can either be the old '60s-style units like those found in early Mustangs or a more modern, slim variation designed to be less noticeable. These underdash units are often credited as having better cooling characteristics than in-dash, since the cool air comes directly from the evaporator and out through the vents. In-dash units have the benefit of being completely concealed behind the dash but must use hoses to route the cool air to vents, which usually results in a few degrees of temperature loss.
If in-dash is the look you want and there's not a bolt-in kit available for your car, it's important to measure very carefully to determine how large an evaporator will fit, and where. Mockups are the recommended way to determine what will fit, and you can make one with cardboard. With either style, ensure that the vents are directed toward the occupants of the car, and allow a hole for the condensation to drain to the outside. Good box and fan design are essential to creating strong airflow, and all of the companies we spoke with have taken time to design boxes that work with the number of outlets provided. Vintage Air specifically warns against sealing up any of the evaporator box outlets, since it will lead to a significant decrease in overall airflow and cooling. Also, if your expansion valve is located inside the cabin, it's a good idea to wrap it with black cork tape to ward off unwanted condensation drips on the carpet.
Options
Most readers have a car for which there are several complete bolt-in kits, but as with a lot of things, aftermarket A/C systems have numerous options. Here are a few things to consider when buying a system.
Controls
You have to be able to control the temperature, fan speed, and direction of airflow. If your car wasn't originally equipped with A/C, you'll probably be choosing from one of the aftermarket control options available from the company you purchase your kit from. However, if you're updating a stock system or want to retain the factory controls, just let your supplier know and it can provide a system that will accommodate. For most kits there is a standard controller and an optional upgraded version. Some musclecars, including Mustangs and Camaros, have a standard option of retaining the factory-style controls. If you have a less mainstream car but would like to retain the factory controls, Hot Rod Air offers a service called Factory Adapt that allows the factory controls to work with the aftermarket A/C system, even if they were never meant to work with A/C.
Cooling System Recommendations
The added load and drag on the engine while the compressor is engaged will of course contribute to extra heat in the cooling system, so if the car is already close to overheating, A/C will likely kick it over the edge. But if the car is within the means of the cooling system and everything is functioning normally, it should be fine. Vintage Air reports that an A/C system should only add 3-5 degrees to the operating temperature. If you'd rather play it safe or you plan to turn up the wick on the power eventually, a high-efficiency radiator is a good place to start. Also remember that the condenser is usually mounted in front of the radiator, reducing airflow somewhat even at highway speeds. Plus the air that the radiator receives will already be slightly warmed from passing through the condenser. If you've been getting away without a fan shroud, those days are likely over. On a hot day an A/C system can build pressure on the high side faster than the engine gets warm, so when using an electric fan, tie it into the air conditioning system so that it will switch on and cool the condenser to keep pressure at bay. Also, though not absolutely necessary, it wouldn't be a bad idea to upgrade to a high-flow water pump just for extra insurance.
Dress-Up Parts
Some people like the shiny stuff, and all of the companies in this story have dress-up options for everything from the compressor to the A/C lines. Also, if you chose an in-dash unit for a car that does not already have factory dash vents, you'll need to decide what style vents best suit the car's interior. If you're worried about placement, don't. There's a multitude of special-application vents and styles available to work with all kinds of custom interiors.
Prepping The Car
Just as the central heat and air in your home is more efficient when air leaks are eliminated and good insulation is used, the benefits of an A/C system in your car can be amplified by sealing it up to keep the cool air in and the warm air out.
Insulation: A good layer of insulation under the carpet goes a long way toward keeping heat from affecting the interior temperature. It also helps cut road noise and vibration. Though any insulation is better than none, look for insulation intended to reflect or absorb heat. Vintage Air recommends Dynamat's line of products, as well as Koolmat for extreme heat control, and LiteWhite for areas that can't use heavy insulation.
Muffler Heat Shields: If the mufflers and/or catalytic converters are close to the floorpan (and they usually are), fabricate some heat shields and mount them between the mufflers/cats and the floorpans.
Window Seals: That loud rushing sound caused by poor window and door seals isn't just annoying-it's also allowing the warm outside air in and allowing the cool air from the A/C to creep out. Without good rubber the A/C is fighting a losing battle.
Typical Installation Notes
Armed with a basic understanding of what an A/C system consists of and where things need to go, we wanted to see what it actually takes to put an in-dash A/C system in a car that never came with it. Since in-dash is the choice for many because it offers a factory appearance, we followed along with Vintage Air as it puts one of its Sure Fit kits in the most ubiquitous musclecar, a '69 Camaro.