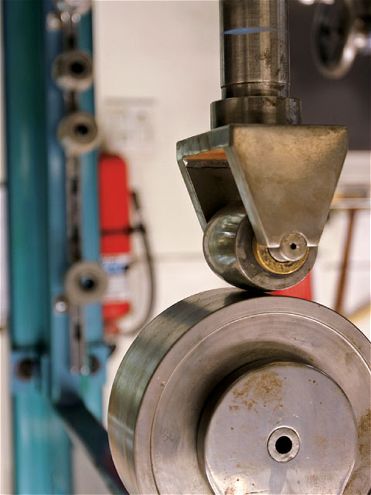

Following on from last month's installment on dent removal, we thought a further look at some more advanced metal fabrication might be in order. After all, if you're contemplating tackling the bodywork on a steel car, there's a distinct possibility that you'll be undertaking somewhat more-than-simple dent removal.
However, patch panel installations and the such have been covered many times before, and with the increased availability of metalworking tools-such as English wheels (or wheeling machines to use the correct terminology) and power hammers aimed at the hobbyist rather than purely professionals-perhaps a look at how these tools are used or could be of use to you might be more ... useful.
As is often the case, there is usually more than one way to achieve the same result, and metalworking is no different, so bear in mind that the processes shown here are simply the ways in which these guys were taught or worked out for themselves. Some may prefer to use a large mallet to rough out a panel while others might eschew this in favor of forming a panel, from start to finish, on a wheeling machine. No way is any more right or wrong than another, so long as both end up at the same place.
We have tried to stay away from very large and expensive specialist equipment here. However, we have included a large wheeling machine with a cast-iron frame that is not so readily available, as well as a Pullmax machine, which is probably beyond the scope of all but the most dedicated hobbyists. With that said, knowing what can be achieved with either of these two machines is definitely of interest.
Cut It OutBefore forming, bending, or shaping any sheetmetal, it first has to be cut to size or shape. There are numerous ways to do this, from basic hand shears and snips to using a plasma cutter. Obviously aviation tin snips are going to be the cheapest option, and there are some very cheap versions available. We've seen sets of right-hand, left-hand, and straight-cut snips for as little as $12, but it pays to purchase the best set you can afford, especially if you plan on using them frequently. Next up, at least without moving on to electric or air tools, are various forms of shears, from a hand-operated version to a flatbed industrial sheetmetal shear with a foot-operated lever.
There is a great selection of air tools that will cut sheetmetal if you have an air compressor in your shop, from shears and nibblers to air saws and cutoff wheels, though again you get what you pay for. Good old electric grinders with a 4-inch cutoff wheel can be useful if there's no compressed air available.
Finally, the plasma cutter is becoming more prevalent in hobbyists' garages, and is a marvelous way to cut out complex shapes, though probably best suited for thicker-gauge sheetmetal.
Which Dressing?Once you've cut your workpiece to shape, you'll invariably need to dress the edge to remove any shards or splinters, unless you used some form of shear. Perhaps now is the time to mention that a pair of leather gloves can be a wise investment, as your hands won't forgive you for sliced fingers or even metal splinters.
The simplest way to dress the edges of sheetmetal is to use a hand file, though a belt sander is probably the quickest method. Both air and electric grinders with abrasive pads have their place but can remove material from the workpiece as well if you're not careful.
Fold 'n' RollFolding or rolling sheetmetal is often the only fabrication required, particularly if you're fabricating floorpan repair sections or rolling a transmission tunnel. As with most of the tools covered here, your choice depends somewhat on your budget, as well as how large your workpiece is. If you need to put a 90-degree bend in a 4ft sheet, you'll have a hard time bending it between two pieces of angle iron in a vise, and will most likely need to use a 48-inch sheetmetal brake. For complicated projects that might require more than one bend, a box and pan brake may be what you need.
If you want to roll a transmission tunnel, you might get away with wrapping your workpiece around a gas bottle, but will probably need to use a set of rollers-though it takes practice to roll a tapered section, which is what most trans tunnels are.
You may want to form a 90-degree bend that goes around corners, such as a lip on an inner fender panel to clear a suspension arm, in which case you may want to fabricate a wooden former, or buck, to shape the metal.
Shrinker/stretchers are tools that are capable, as their name implies, of shrinking or stretching the edge of a panel, most often used to work a lip to form a curve. These are all ways to bend metal in one plane, rather than putting curves into the panel.
Compound InterestOK, now to what you really want to know about: how to form panels with compound curves. Invariably, most handmade compound-curved panels start with a mallet and sandbag, used to rough out the shape required. Wood was the staple material for mallets for years until the advent of plastic.
Once the shape has been roughed out, a wheeling machine is most often used to finish the workpiece, stretching the metal to form compound curves. An air hammer will also form compound curves, and is useful on a small panel that simply won't fit into a wheeling machine, such as a small hood blister to clear carburetors, for instance.
One last tool we should mention is a bead roller. This versatile tool can, depending on the wheels fitted, form beads of various widths in sheet steel, form 90-degree bends, and even rolled edges, and is available with manual or power options for one-man operation.