
Last issue's installment was written while on the road; this one comes from the cozy confines of my opulent [sic] office suite back here in good old Anaheim, California. This is a good sign. It means that the Beater and I made it home from our extended break-in trip on Americruise. There were, as you might imagine, a few hiccups along the way, but we'll get into those details at another time and place (Americruise was such a blast in the Beater that our exploits deserve a couple of dedicated pages of their own).
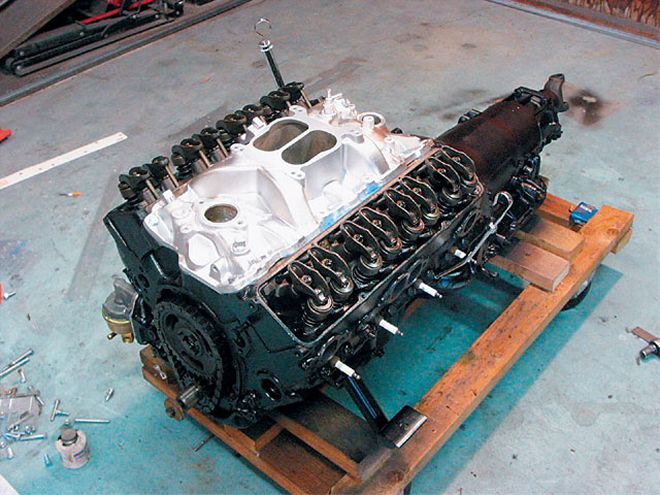
Today I thought I'd get into a bit of background on the motorvational aspects of the Budget Beater. Since the build happened on such a tight and fast-paced schedule, I have to admit I was negligent in many aspects of the buildup coverage. For this I apologize and promise that the next one will be chronicled in a much more professional manner (that's right, there's another home-shop buildup on the near horizon-keep your eyes peeled for future details). Last month I mentioned that because of time constraints the Olds Rocket motor was unable to be used, so I procured an SBC and a TH400 trans from my pal Archie Green and installed it. With the engine/trans combo in place and the pedals and steering figured out and trial fit, it was then time to get that small-block into running shape.
I'd initially power-washed both the engine and trans and replaced a few wear items and gaskets, but that still left me with a squeaky clean long-block that needed dressing. Since I've always been a fan (and chronic user) of Pertronix Ignitor ignition modules, it was a no-brainer for me to go that route once again. Unfortunately, this time around I didn't even have a distributor to put an Ignitor in. I solved that dilemma by ordering a complete Flame-Thrower distributor assembly. It's a nice piece-it has the look of a standard points-style unit, but it comes outfitted with an Ignitor II electronic ignition module. I used it in conjunction with a Flame-Thrower II coil for a quick and easy two-wire installation.
R&C staffer Damon Lee graciously offered up a selection of pulleys, a couple of assorted generator brackets, and a balancer from his collection of Chevy odds and ends, and another pal of mine lent me a Demon Jr. four-barrel carb to try out on the small-block. The engine did come equipped with an old, beat-up pair of what I think are Cal Custom finned valve covers. I tossed 'em into my bead blaster and painted 'em rattle-can semi-gloss black, as I did the block and trans. The local Car Quest parts store had a new flexplate right on the shelf, so buttoning up the trans to the engine was hassle-free.
With the engine and trans ready for a home, I rolled the finished chassis into the garage and hoisted the engine into place for what I hoped would be the last time, and thankfully, it was. Once the engine/trans assembly was bolted in, I called on my pal Don Armstrong of U.S. Radiator and begged for a house call (he's actually practically a neighbor). Don swung by and did the necessary measuring for a radiator. It required this special treatment because I'd chosen to use a '30-31 A radiator shell that I'd sectioned about 7 1/2 inches to match the height of the T's cowl. Since the core size was so small, U.S. Radiator whipped me up one of their Triple-Flow Desert Coolers just to make sure it'd do its job even in SoCal's notorious stop-'n'-go traffic.
At this point all I needed to do was add an exhaust system and the basics would be done. I had spent quite a bit of time trying to decide how to go about it but finally figured to keep it simple. A pair of coated Patriot Lakester headers did the trick, and a pair of slip-in baffles and a couple of homemade block-off plates for the under-chassis exits worked out perfectly. The headers look great, and the baffles did a much better job of muffling the rumble than I thought-plus it saved me a chunk of my budget by eliminating the expense of a full exhaust system. Speaking of budget, you'll have a full, item-by-item accounting of how I fared in the final installment.
Next issue we'll cover the installation of the shifter, windshield posts, and the door latches. Until then check out this month's images.