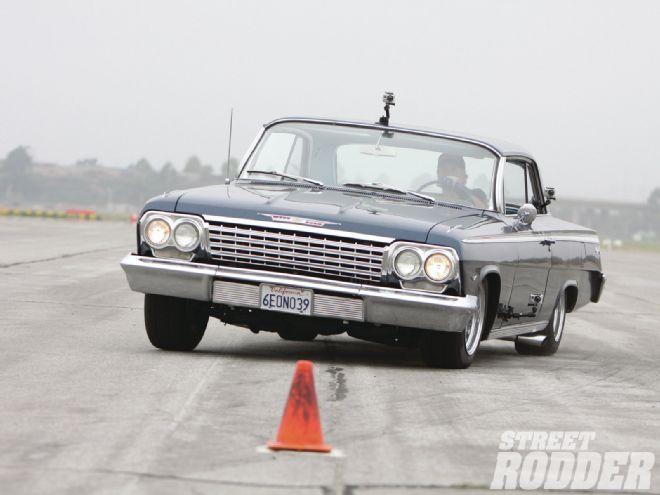
OK, let’s be real here. A ’62 Chevrolet Impala is not exactly a prime candidate for a great-handling car. After all, these things rolled off the production line weighing in at 3,455 pounds, are right at 17-1/2 feet long, and stand almost 16 inches taller than a GT-40. And they are suspended on all four corners with nice soft coil springs attached to an X-frame that is, well, less than rigid. It’s not exactly a combination that begs to go road racing, but then some people’s definition of hot rodding is making a car do things it was never intended to do.
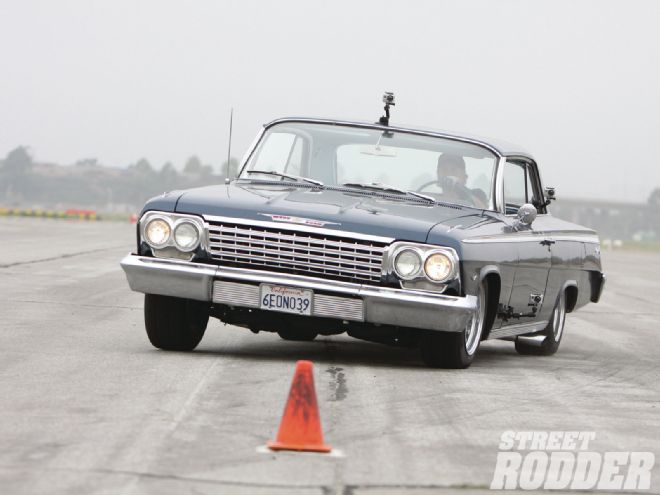 The best time on the slalom course during the initial testing was 7.29 seconds. After the shock and sway bar changes were made, the car achieved a best time of 6.74 seconds; more than a half of a second quicker! The latest time is comparable to a new Camaro.
Of course we’re not building a car to go racing, rather we’re looking to improve the street handling and performance enough to participate in the autocross events that have become so popular at Goodguys Rod and Custom shows. These timed events are a barrel of fun and will test both the car and the driver. To that end we contacted some industry experts and installed suspension upgrades that made a marked improvement in the handling of this ’62 full-size Chevrolet. The components are not exotic by any means, both front and rear sway bars are of the non-adjustable variety and since the car rides on stock coil springs there is no means to corner balance or even establish accurate ride height on all four corners. It’s a street car that needs help handling, and that is exactly what it received.
When it came time to improve our Impala’s manners we opted for a matched component suspension upgrade from Chris Alston’s Chassisworks. His G-street kit supplies shocks and antiroll bars matched to our Impala. The installation is straight forward and something almost any shade tree mechanic should be able to handle.
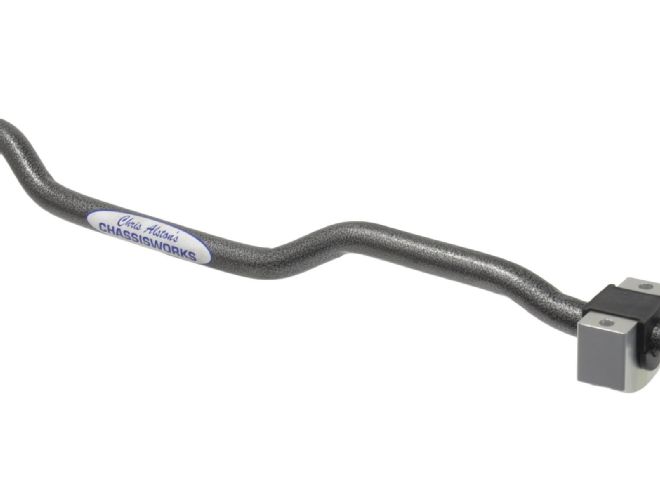 Here’s the complete front sway bar from Chris Alston’s Chassisworks. Assembly and installation of the complete G-street kit is only a one-day job in the garage.
Our first upgrade involved installing a set of VariShock double-adjustable shock absorbers. These high-quality shock absorbers allow us to adjust the rebound (extension) and compression (bump) of the shocks. These adjustments will go a long way to stabilizing the suspension. Curing excessive dive under braking is done with a combination of stiffer front compression and stiffer rear rebound. Tuning shocks will go a long way to improve braking and handling since the weight is now distributed more evenly on all four tires. Installation was nearly a bolt-on affair with the aluminum body shocks replacing the somewhat tired “NAPA’s Best” shock. The only real modification to the car was a small notch in the lower control arm to make room for the adjuster knobs. Once again urethane bushings are used to minimize unwanted movement in the shock mounts. Remember, when installing stud-style shocks the upper nut should contact the bushing snugly, but not compress the bushing. With the front VariShocks installed we moved to the rear where the shocks were a true bolt-on affair. The difference was remarkable and the great thing about the VariShock is the double adjustment is easy to access. Two adjuster knobs on the bottom of the shock provide adjustment for both the compression and rebound. It couldn’t be easier, with one knob for bump the other for rebound you simply slide under the car, give the knobs a couple clicks, and your adjustments are complete.
Next up was the installation of some fairly stout antiroll bars to limit the amazing amount of body roll the car demonstrated in stock form. The front sway bar is installed in a conventional antiroll bar arrangement. After removing the factory antiroll bar (often referred to as sway bars), links, and brackets we were ready to install the new Chris Alston sway bar. The bar mounts to the chassis and then each end connects to the lower control arm via two drop links. The links are non-adjustable so there is no way to vary the amount of “bar” stiffness, but the beefy 7/8-inch diameter and urethane bushings are designed just for our application. The Chris Alston bar proved to be very effective in cutting down on dreaded body roll.
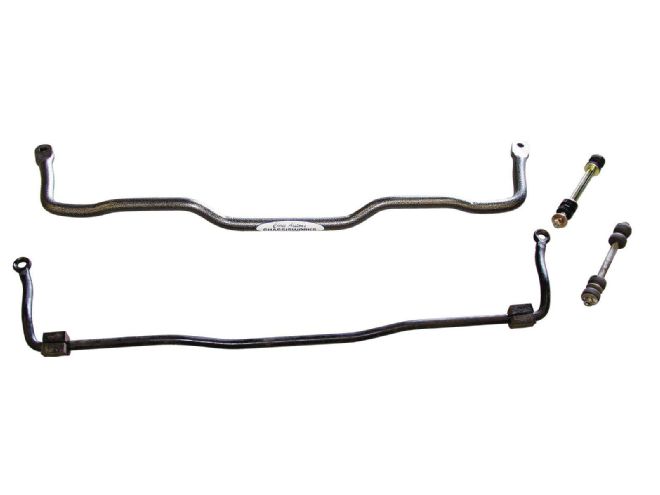 Here is a comparison of the stock bar verses the Chris Alston G-street bar. Our new 1-inch bar dwarfs the old stocker. It should be noted that not all ’62 full-size Chevrolets had a factory sway bar.
The rear sway bar is a bit more unique to the X-frame Chevrolet. Rather than the traditional chassis mount and links, the bar is bolted directly to each trailing arm. The preferred method is to mark the location of the sway bar attaching bolts and then remove the trailing arms and drill the two holes in a drill press. However the holes can also be drilled in place, but we recommend you use a drill with a level sight built in to be certain the holes are square to the trailing arm. Once again there is no adjustment on the rear bar, but the two bars were engineered to work well together. Two bolts and spacer tubes per side complete the installation, and in the process complete our suspension upgrades on the ’62.
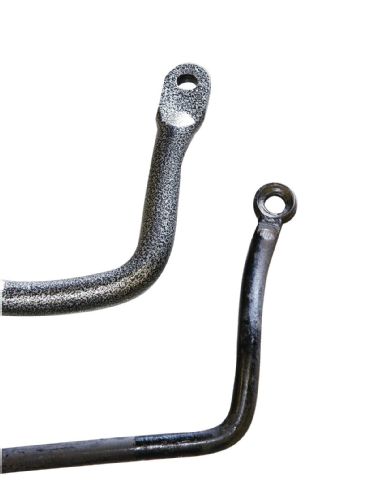 One good look at the ends of these bars illustrates just how much more roll control power is built into the Alston bar. The hammer finish is durable and attractive.
After the modifications were completed, the old ’62 was run through the autocross and long slalom. Eliminating all body roll from an X-frame Chevrolet may not be within the realm of mortal men, but the VariShocks and Chris Alston sway bars worked in concert to keep the Impala noticeably flatter and our times through the course reflected just that. No doubt the car would benefit from a set of stiffer springs too. But here’s the lesson, you don’t have to go to exotic adjustable sway bars or even coilover shocks to improve handling, you can make a big difference with well-chosen bolt-on items.
By changing just the shocks and adding sway bars the handling characteristics of the big sedan was greatly improved. As we mentioned, this helped with the autocross times, but improved vehicle dynamics will also make this car safer to drive on the street, not to mention more fun. Let’s take a step-by-step look at just how easy it is to take your full-size early ’60s GM car from a rock and roll cruiser to a more modern handling automobile.
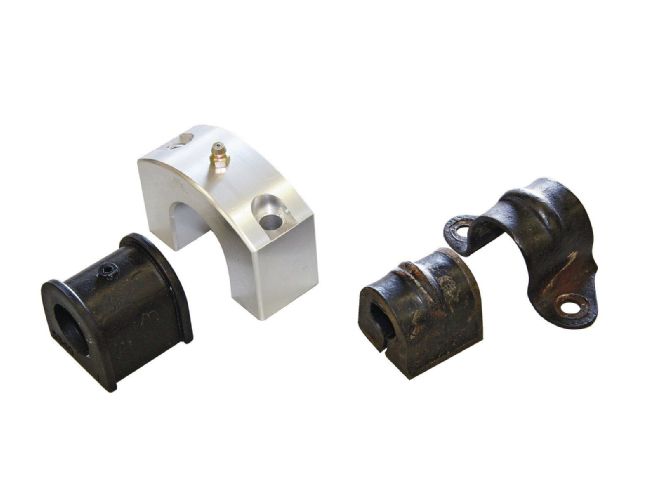 The big billet block with grease fitting and the new urethane bushing are much more substantial than the old clamp and rubber bushing.