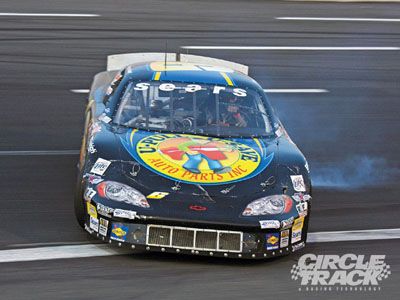
Brakes are often overlooked until there's a problem with them. For instance, how many times have you been racing and all of a sudden the pedal gets soft and starts getting closer and closer to the floorboard? Could this problem have been avoided? Without a doubt, it absolutely can.
What amazes me is that some drivers will go more than one race with the vehicle this way. Diagnosing the problem doesn't seem to be much of a concern for the team, which if you think about it is comical. The one thing that's going to prevent you from slamming the car spinning in front of you is a working brake package.

The point of all this is each week you need to inspect every aspect of your brake package. This will ensure that your brakes are not the cause of problems at the track. If you ignore them, it will catch up with you eventually, and it might just end up costing you a car. I've provided a checklist that every team should go through when inspecting their brake system. These 10 questions will help you make it through this season with little to no problems.
1.Have you chosen a brake package that is right for the type of tracks you will be racing?
Choosing the right brake package is essential to avoiding problems during the season. If you choose a single piston design with very little cooling made for a Street Stock, and put it on a 400hp Modified to save a little bit of money; I can guarantee you'll have problems at some point during the year.
 Things can happen very quickly on the track. Ensuring that your brake system is working properly can help you avoid the impending collision.
We had to choose the right package for our asphalt project car. We knew we needed something that would last 250 laps without getting a soft pedal or worse, loosing the brakes. We decided to go with Raybestos' three-piston-designed calipers and brakes. Their design will keep the brakes, rotors, and fluid cool enough to prevent any problems throughout the year. Plus, their aggressive pad and rotor design will also give a leg up on the competition.
If you run a brake package that isn't capable of dissipating the enormous heat buildup that your brakes will experience, then you will encounter huge problems. Along with your brakes and rotors wearing excessively, the heat will also attack the brake fluid and it will start to boil. This causes air bubbles, and air bubbles in your brake line is never a good combination. This is the most common cause of a soft pedal.
2-3. Was there a problem last week? And is this a recurring problem?
Your prep work during the off-season is meant to avoid any problems at the track. But if you do encounter a problem, diagnosing it correctly is key to not encountering the problem again at the track. If the problem is happening every week you might have to go back to No. 1 and make certain that your brake package is right for your application. If this wasn't a recurring problem, then the next few questions will help you diagnose exactly from where the problem is stemming.
4. Were the brakes bled before the A-feature?
This is such an easy thing to do, but most teams won't even think to bleed the brakes before the A-main. It accomplishes more than just making sure all of the air is out of the lines. After you bleed them and top the master cylinders off with brake fluid, it will also ensure that the master cylinders are full of fresh fluid. If you did forget to bleed the brakes do so now, and then continue on with the checklist. By doing this regularly you're replenishing the brakes and master cylinders with fresh fluid.
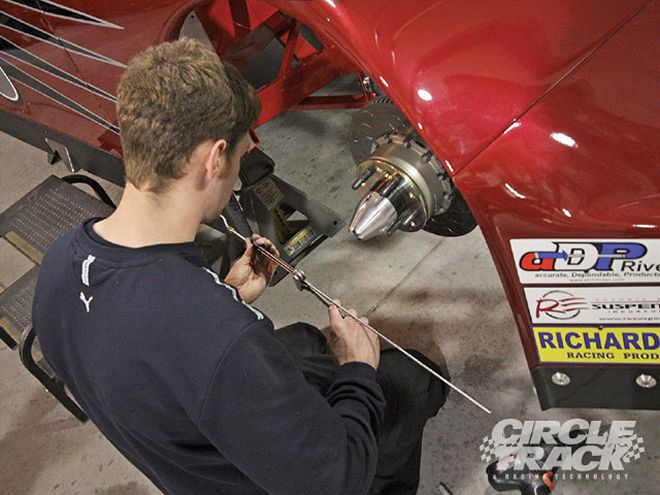 Aahh, the dreaded shiny brake pad. Take fine-grit sandpaper and clean the glaze off the pad so it can be used again.
5. What's the condition of your brake pads?
This could be the root of your brake problems. If you have no brake pads left, then you need to break down and replace them. But let's say there's a lot of meat left on them. Do they have the dreaded shiny glaze? Pads can develop a shine on them from exposure to intense heat. This shine or glaze will cause the brakes to not work as effectively. The glaze will make the pad slide on the rotor instead of stopping it. To the driver, this feels like he or she has lost the brakes. The driver will push the pedal harder in an effort to stop, which will only cause more heat and you're back to boiling the fluid.
It's pretty easy to tell if you've got this problem. Take your hand and run it across the brake pad, if it feels like you're running your hand across glass then you need new pads. Take some gritty sandpaper and run it across the brake pad and take the shine off. It's extremely easy to do. Just make certain that you mark which pad was on the inside and which was outside, so that you don't reinstall them backwards.
6. What's the condition of your rotors?
Rotors have to be inspected after every race, because you don't want one of these coming apart in the middle of a race. Just like the pads and brake fluid, the rotors are going to experience an extreme amount of heat. Under this extreme heat, it's possible for rotors to warp and cause vibrations.
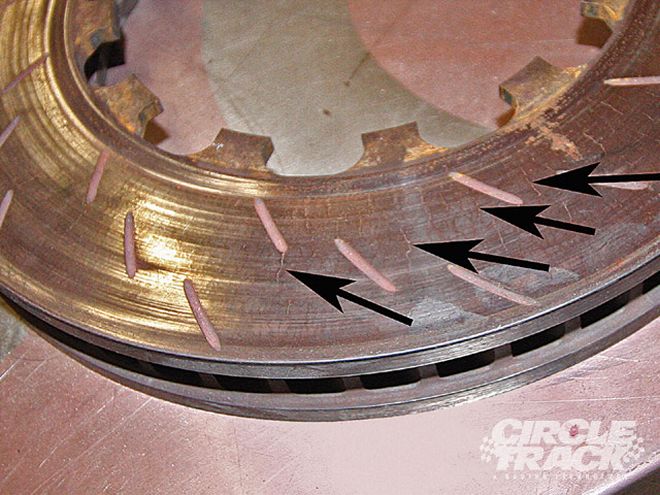 Rotors will often show hairline cracks in the center (see arrows). These cracks are not a major issue. However, if any of them start to move toward the outside/inside edge of the rotor, then the whole rotor will need to be replaced.
Extreme heat aside, if you take a hard driver-side collision, common sense tells you to check the left-side rotor to make certain that it's not bent or warped. A few years ago after a hard left-side wreck, I found out that I actually bent the right front rotor. Unfortunately, our team didn't realize the problem until the next race when a mysterious vibration cropped up. We lost valuable time during practice trying to hunt down the origin of the vibration. Guess what? It was a bent right front rotor, the result of my hard left-side wreck the week before.
Rotors wear just like your brake pads, and throughout a season you need to inspect them each week. Look for hairline cracks such as those shown in the picture (left) with the arrows. While these cracks are not a problem yet, if any one of them start to move toward either the inside or outside edge of the rotor, then it will have to be replaced.
 When running your brake lines, remember to keep them as far from the headers as possible, but also keep them from getting in the way of the upper control arm.
7. What's the condition of your brake lines?
The most often overlooked item when it comes to brakes is your brake lines. Brake lines can either be aluminum or steel. I'd suggest using steel because it's just that much more durable. Plus, whether you're using aluminum or steel, the end of the line where it connects to any fitting needs to be flared so it fits flush. The aluminum lines are more susceptible to cracking at the flared end. This can lead to a leak once the fluid heats up.
The other thing you need to check when inspecting your brake lines is where they have been run in the car. Brake lines need to be as far away from the engine or headers as possible. Also, when running the lines from the master cylinder to the right front wheel, the line should cross the car on the inside of the firewall. This will keep the brake line away from extra heat that the engine produces.
8. Where was your brake balance set?
If every time you get on the brake the car pushes like a dump truck or snaps loose, you can bet that the problem is in your brake balance adjuster. You need to find out how much front brake you're running compared to the rear. All you need is a brake pressure gauge set. They cost around $80 and are available from retailers like Speedway Motors. These gauges can be mounted to the dash, although most racers just use them outside of the car. Have you ever heard, if my adjuster is in the center at 50 percent, then I'm running 50-50 on brakes right? Not necessarily. It all depends on your master cylinders.
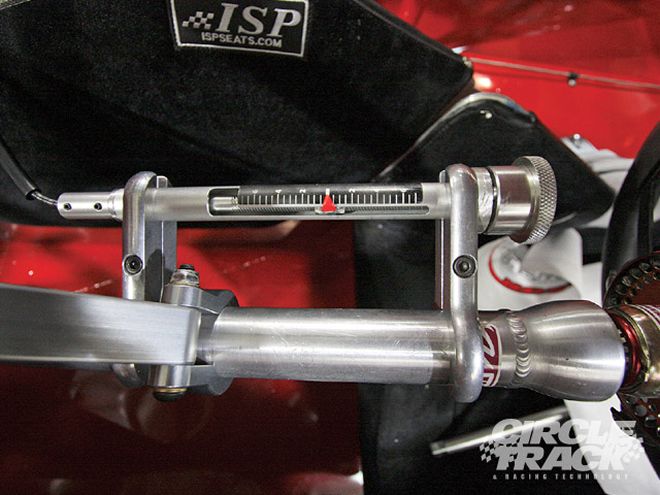 The brake balance adjuster has to be free from interference so you can adjust your balance between front and rear brakes without any problems.
For instance, our car has 7/8 inch master cylinder for the front and a 1 inch for the rear, and the bias is handled by the size difference in the calipers. Remember, the smaller-diameter master is always to the front to generate more pressure. With our brake balance adjuster in the center, it will actually push 62 percent front brake. The easiest way to avoid a problem is to find out how much brake pressure is at each wheel.
9. Are you running enough cooling to the rotors and pads?
Even if you don't plan on running 250 laps, it's a good idea to have some type of cooling going to the brakes and rotors. This will help preserve them. We run an inline blower that attaches to ductwork which routes to a molded carbon-fiber vent that wraps around the caliper. This carbon-fiber vent actually attaches to the spindle and the front side of the caliper, directing cool air onto the brake pads and rotor. But yours doesn't need to be this elaborate, you can attach an inline blower to the tubing, and then wire tie the tubing so that it blows toward the pads and rotor.
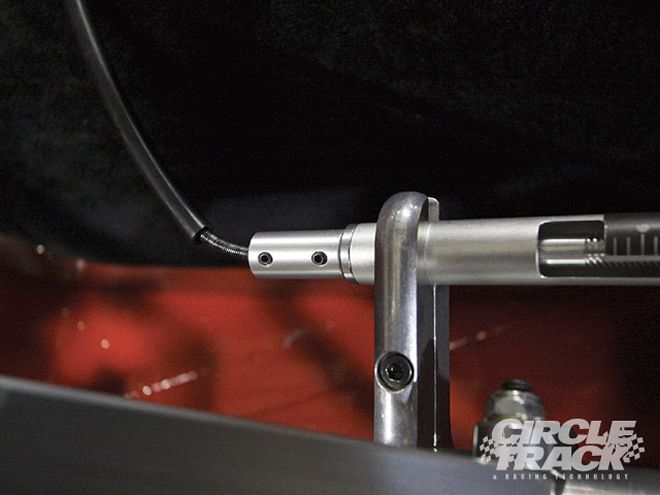 This style of brake balance adjustment is available through a variety of parts retailers. This one is from Leavitt Racing Components in Mooresville, NC.
We also run a bead blower on the front wheels because the intense heat from the brakes will heat up the inside edge of the tire and affect our tire pressures.
10. When was the last time you changed your fluid?
Think about this, the fluid in your caliper that's going through heat cycles will never make it back to the master cylinder. This's why it's vital to bleed your brakes on a regular basis, this keeps putting new, fresh fluid in the lines. But if you haven't bled the brakes in a while, you might want to think of replacing the fluid.
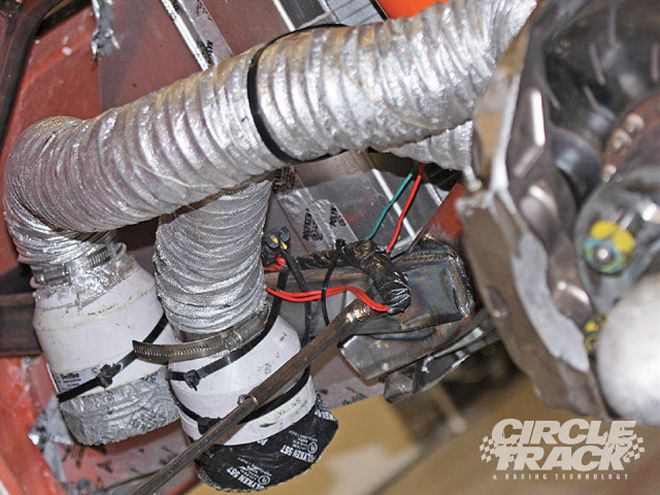 Cooling your rotors and pads is essential to good brake performance and it's easy to do. Simply take an inline fan blower and attach it to the chassis and then run tubing from the blower toward the rotor. Consult your rulebook first to make certain that you can run that type of setup legally.
Now, don't put just any fluid in the line either. We use D.O.T. 5 brake fluid because of its high boiling point. A good rule of thumb to remember is that the higher the boiling point, the better.
If you do your homework and inspect your brakes on a weekly basis, then you can catch a potential issue long before it becomes a major problem. Remember cars aren't made fast at the racetrack. The team that does the necessary prep work at the shop and spends the most time ensuring that the car it unloads is adequately prepared is the one that has the best opportunity to mash the brake pedal in Victory Lane.