
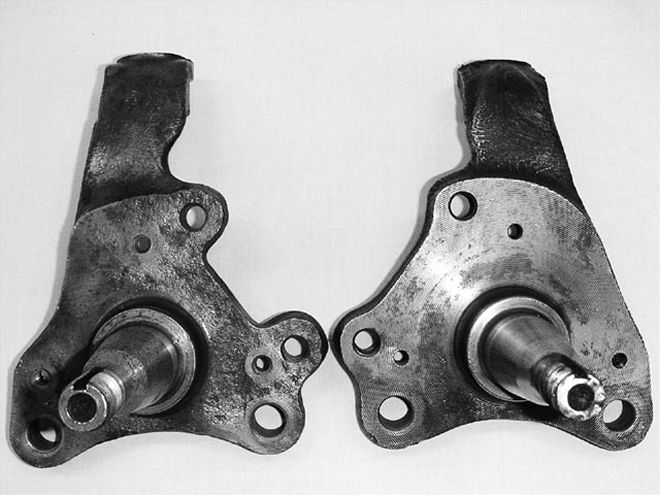
 The changing of A- and B-Body spindles has become a reason of heated debates in recent years even within the pages of Mopar Muscle. So we contacted Suspension guy, Bill Reilly of Reilly Motorsports and asked if he could prove or disprove the validity of the swap. With all the information in front of you, now you can make an informed decision.
A car crusher is an interesting device. As we work, play and sleep, the crusher marches on, eating up everything in its path. Between junkyard visits, acres of cars are replaced with new wrecks, and the parts we saw last week very well might be a soup can this week. Every day, more and more of our cars are sent to Mopar heaven, leaving us with fewer and fewer donor cars to pull parts from. Because most cars came through with drum brakes, this poses a serious problem for those of us needing disc brakes to survive today's traffic. Although the aftermarket is amassing an impressive array of bolt-on kits, the millions of us junkyard-scrounging economy types are left with few choices.
For years, it's been a common recommendation to use the '73-and-up A-Body disc-brake spindles as a starting point, and up until recently, this wasn't an issue. Now, however, the question is if you can find them, not where. Original A-Body disc brake setups are almost impossible to find in the yard as everything's getting crushed to make way for the profitable late-model wrecks. Of course, you can also use the identical '70-'74 E-Body disc spindles, but we all know there aren't any E-Bodies in junkyards.
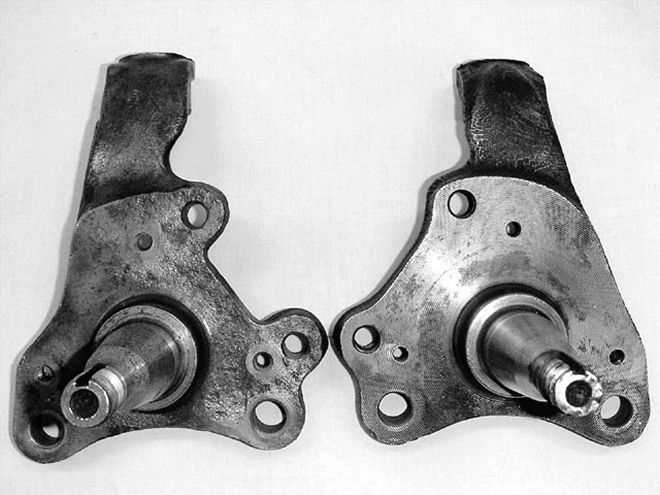 Above, the B spindle is on the left.
So what are we to do? There's a fierce debate going on about the so-called B-Body spindle. This one spindle is actually used in all '73-and-up B-, F-, J-, M- and R-Body cars, which is a huge source for cheap disc brakes. Fifth Avenues and Diplomats are a common site in the junkyards, providing all the disc-brake spindles we could ever need. See the accompanying chart for a list of all the cars in this group.
The rumor is that these spindles cause poor geometry, binding balljoints and other problems, which will lead to the untimely demise of you and your car. Having used these spindles in various A- and B-Bodies with no problems at all, we decided to study the differences, analyze the geometry with some good software and document the honest differences. We're directly comparing the '73-'76 A-Body/'70-'74 E-Body disc spindles to the late B spindle. We'll simply call them the A or B spindle.
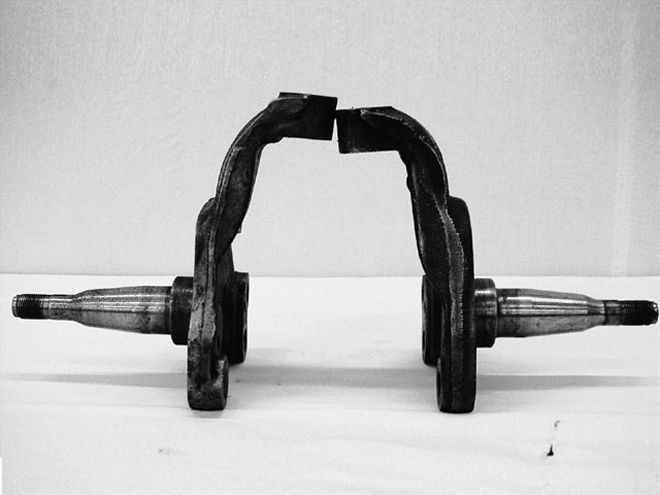 If you have a '63-'72 A-Body, you'll need new upper control arms from a '73-'76 A-Body, which uses the bigger K772 balljoint. Aftermarket tubular a-arms also use this bigger balljoint. Upon inspection, the first thing you'll notice is the height difference. The B spindle is about 3/8-inch taller than the A, and has a more shapely profile, making it 3 poundss lighter, helping unsprung weight. One other item of interest is the SAI, or Steering Axis Inclination. This angle is the major reason for self-centering steering on cars, more so than caster, and within limits, more is better. The A-Body spindle has a cast-in SAI of 7.5 degrees, while the B-spindle has an SAI of 8 degrees, further aiding in stability.
To explain these differences, a little geometry background is required. There are many issues concerning front suspension, but we'll only touch on the major items that are affected by this spindle change.
Toe change can also be called "bump steer," and is the most commonly known term, and the least understood. All suspension systems exhibit some amount of bump steer, because the tie rod does not follow the same arc as the spindle in a double a-arm system. A strut suspension is much easier to work with, but that doesn't apply here. The goal is merely to minimize bump steer and to keep it within an acceptable range. Race car builders try for as little bump steer as possible, but it's basically accepted that it does not affect handling if kept below approx. 0.031-inch or 1/10 of a degree per inch of travel. Factory street cars have a much larger tolerance, usually double this amount. In basic terms, less than 1/16-inch of toe change per inch of travel is acceptable.
Also important to know is how toe-change affects the driver. In a straight line, with the nose moving up or down, both tires change the same amount, essentially canceling out the effects. Through a corner, however, the outside tire carries most of the weight, and determines most of the driver's control of the car. This means toe-change in compression is most important, as it has a bigger affect on handling. If the wheels toe-out slightly under compression, the car will turn less into the corner, called under-steer. This is typically more stable, as the driver will continue turning the wheel into the turn, which is a natural response. If the wheels toe-in substantially under compression, the car will turn more, called over-steer. The driver is forced to turn the wheel out of the turn to correct, which is not natural, causing an unstable feeling.
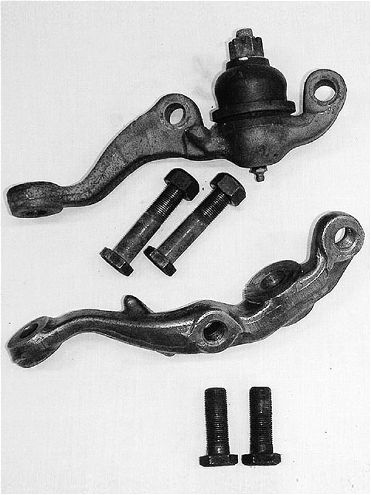 Next, we noticed the lower balljoints are different. On the A spindle, the balljoint is integral to the steering arms, while the B spindle has a balljoint in the control arm, having just a tapered hole in the steering arm. The late A-Body lower balljoint is actually used in '73-'76 A-Bodies, '70-'74 E-Bodies, and '62-'72 B-Bodies. They carry Moog PN K781 for left and K783 for right. These numbers can be crossed referenced at most any local auto parts store. The late B spindles do use the same mounting holes, so the solution is to use the A-spindle balljoint. The only hang-up is the attachment bolt length. The B spindles use a shorter bolt, so you'll need to get your own bolts. Use 5/8-inch by 18TPI by 2.5-inch-long grade 8 bolts. They're readily available at any fastener store. It's best to use squish-type lock nuts as well. If you prefer the OEM bolts, you can find them on any of the above-mentioned cars using the 781/783 balljoints.
Mind you, this is not a visible condition-it's very slight, and is nearly undetectable by the average driver. It would simply feel strange or touchy, but the driver wouldn't know why. Slip Angle is also related to this, which means the car doesn't follow the exact steering angle; forward motion causes the front tires to slide a certain amount in turns, so the turning radius of the car does not match the turning radius of the wheels. Because of the slip angle, minor amounts of toe-change are largely undetectable in a street car. I say street car because a serious race effort has to account for every possible issue to gain the most performance from a combination; in this type of car, everything is important, no matter how slight.
Wider tires are also less sensitive to toe-change and a little more sensitive to camber gain, which leads us to the next topic. Negative camber gain refers to the wheel leaning in at the top as the suspension compresses. When the car is turning, it normally leans to the outside of the turn, and the outside wheel/suspension compresses. Negative camber gain allows the tire to remain flat on the road, maximizing traction, despite the car's tilted attitude. Increasing negative camber gain increases cornering abilities substantially-again, you won't feel much difference, but a stopwatch will see it.
Finally, the last major issue is roll center. It's the imaginary point by which the car will roll in a corner. It tends to have a direct relationship with the car's vertical center of gravity, which is generally up near the cam centerline of a regular V-8. The closer these two points are to each other, the more resistance the car has to rolling in a turn. However, the higher the roll center, the more chance of jacking. Jacking refers to the car rising up as it rolls, decreasing stability. This is seldom seen as a problem in 99 percent of the cars out there, as only pushing a car to its limits will cause this phenomenon. Serious road racing cars will want to avoid a high roll center. It's best to have it near the ground and use a larger anti-roll bar to resist rolling in turns. With a street car, the roll center isn't too much of an issue as the high forces that cause jacking are seldom, if ever, reached.
The Final Outcome
Overall, using the B-spindle will result in geometry changes that are unnoticeable with all but the most aggressive drivers running against a stopwatch. Even at that, there's a good argument that the increased camber gain will have a positive impact on cornering while the increased toe-in through extension will go undetected.
'73-'76 A-body Spindle
Static alignment - 0 camber, 1.18 caster, 0.059 toe-in
DiveCasterCamberRoll Ctr.Toe-In2.254.892-1.2265.6080.0412.004.502-1.0205.7560.0421.754.108-0.8305.9010.0421.503.707-0.6576.0430.0431.253.302-0.5006.1800.0451.002.890-0.3616.3120.0470.752.473-0.2416.4350.0490.502.048-0.1406.5490.0520.251.617-0.0596.6500.0550.001.1770.0006.7350.059-0.250.7300.0366.8000.064-0.500.2730.0466.8400.069-0.75-0.1940.0286.8490.075-1.00-0.672-0.0206.8160.081-1.25-1.163-0.1036.7300.089-1.50-1.669-0.2256.5740.096-1.75-2.191-0.3926.3230.105-2.00-2.734-0.6125.940.113-2.25-3.300-0.8955.3660.122
'73-and-up B-Body Spindle
Static alignment - 0 camber, 1.32 caster, 0.059 toe-in
DiveCasterCamberRoll Ctr.Toe-In2.254.77-1.6976.678-0.0132.004.407-1.4486.848-0.0071.754.039-1.2137.0170.0001.503.666-0.9937.1870.0071.253.289-0.7877.3550.0141.002.906-0.5977.5210.0220.752.518-0.4227.6840.0310.502.125-0.2647.8430.0390.251.725-0.1237.9950.0490.001.3190.0008.1410.059-0.250.9060.1048.2760.070-0.500.4860.1888.3990.081-0.750.0570.2508.5050.094-1.00-0.3800.2888.5910.107-1.25-0.8270.3008.6510.121-1.50-1.2840.2848.6770.136-1.75-1.7540.2368.6580.151-2.00-2.2370.1518.5800.168-2.25-2.7370.0258.421 0.186
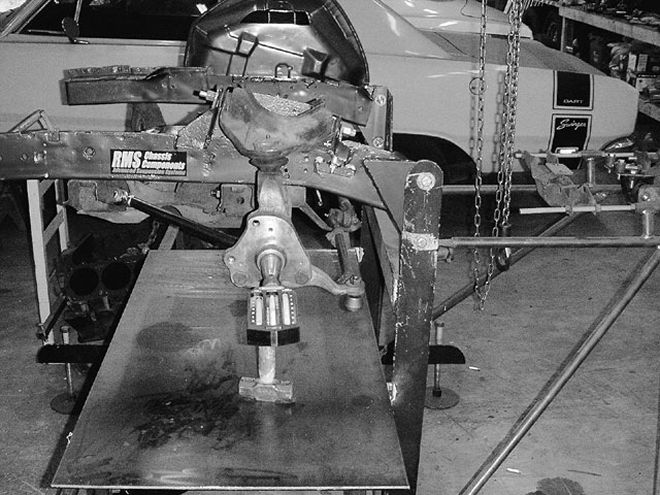 Next on our to-do list was to assemble an A-Body suspension with the two different spindles and compare the geometric differences. For this, we used Performance Trends' Suspension Analyzer, a great piece of software commonly used by circle track and road race teams. The next tool for maximum accuracy is this stand, which allows us to install a front clip from any car, at any angle, and directly measure pivot points, without any parts obscuring our vision. For this test, we set our '74 Dart clip to assume a 1.5-inch rake from front to rear-most cars of today have a slightly raised rear, which directly affects caster, and needs to be accounted for. We set the ride height approx. 1-inch lower than stock, which is also quite common. We set the "ground" level for a 26-inch front tire, and aligned it with a four-bubble camber/caster gauge. Toe-in was set to near 1/8-inch total (0.059-inch per wheel), camber was set to zero for ease of testing. Maximum caster attained with the A-Body spindle was 1.18 degrees.
Another interesting trend you'll find in the charts is caster change throughout travel. Negative caster is typically unstable and should be avoided if possible. Notice that both systems go into negative caster just slightly higher than ride height. You should try for as much static positive caster as possible to stay in positive caster through more wheel travel. It's worth the effort to correct these little problems for a more enjoyable ride.
The only word of warning we could come up with concerning this swap would be initial alignment. After installation, it's necessary to rotate the eccentric bolts a little further back to re-align it, and if your car is already at the inside edge of the adjustment range, you may have to use offset control arm bushings to increase the range. After 30 years of flexing, many of these cars are hard-pressed to achieve proper alignment specs with the original parts, so switching to these spindles may only make an existing alignment problem worse. The offset bushings (called Problem Solvers, Moog PN K7103) can be ordered through most local parts stores cheap, but few clerks know about them, so you have to specifically ask. The K7103 fits all A- and E-Bodies, and all B-Bodies from '62-'72. As with the balljoints, this number typically has to be crossed over to a different brand, depending on the store's supplier.
So now you have the facts, proceed to the nearest junkyard and get your disc brakes.
Chassis Identification ChartA'60-'62 Valiant/{{{Lancer}}}, '64-'66(early)/'67-'72/'73-'76(late) Valiant, '64-'66(early)/'67-'69 Barracuda, '64-'66(early)/'67-'72/'73-'76(late), Dart, Duster, Demon, Scamp, Sport, SwingerB'62-'64 Savoy, '62-'64 Fury, '63-'64 330 and 440, '62-'64 Polara, '65-'76 Coronet, '65-'74 Satellite, '68-'75 Road Runner, '66-'78 {{{Charger}}}, '67-'74 GTX, '62-'70 Belvedere, '69-'71 Super Bee, Cordoba to '79 '75-'78 Fury, '77-'78 {{{Monaco}}}, '78-'79 {{{Magnum}}}, '75-'79 Cordoba, '79 {{{300}}}C'65 {{{Dodge}}} 880, '65-'73 Polara, '65-'74 Fury I,II,III, '65-'76 Monaco, '75-'77 {{{Gran Fury}}}, Newport, '65-'78 {{{New Yorker}}}, '65-'78 Newport, '65-'71 300, '74-'75 {{{Imperial}}}, '66-'69 VIP D'{{{57}}}-'73 ImperialE'70-'74 Barracuda/{{{Challenger}}}F'76-'{{{80}}} {{{Aspen}}}, Volare, Road Runner, RTJ'80-'83 Cordoba/Mirada, '81-'83 Imperial{{{M}}} '77-'89 {{{Diplomat}}}, {{{Caravelle}}}, '77-'81 LeBaron, '82-'89 Gran Fury, '82-'87 New Yorker 5th Avenue, '88-'89 5th Avenue, '82 New Yorker R '79-'81 New Yorker, St. Regis, Newport, New Yorker 5th Ave., '80-'81 Gran Fury