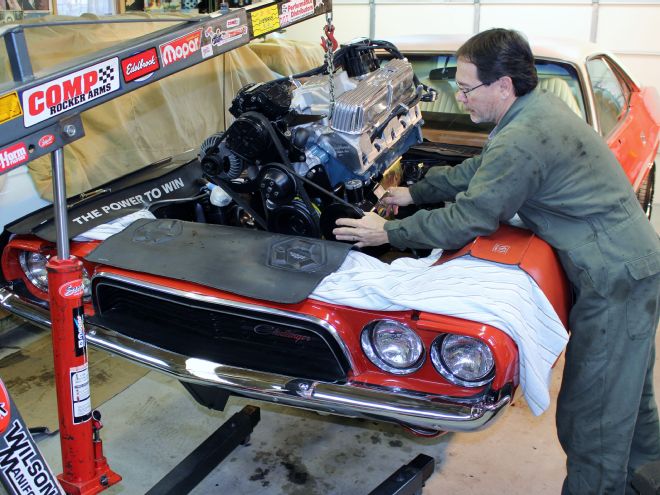
Once we finished the rehabilitation of the suspension system in our 1973 Dodge Challenger project vehicle, we couldn't wait to insert our 416ci stroker small-block between the fenders. For the engine install, we already had many of the parts we needed, but there were a few specialized pieces we wanted to make the job easier, and to optimize this project for sporty driving on the street, and on the track. These items include some Schumacher Creative Industries Poly-Loc engine mounts, a complete TTI 3-inch X-pipe exhaust system, and a TCI racing starter to fire it up. We also had to gather up all the fluids like oil, antifreeze, and power steering fluid.
It's music to your ears to hear the sweet sounds of a stroked V-8 coming out of a TTI 3-inch exhaust system with an X-pipe. A torquey small-block like ours has an unmistakable deep tone that sounds like a classic big-block, but more than that, it's a great feeling when all that hard work pays off and the master plan comes together when you twist the key for the first time. Follow along as we show you the ropes of sliding a warmed-over Chrysler small-block between the fenders of an E-Body.
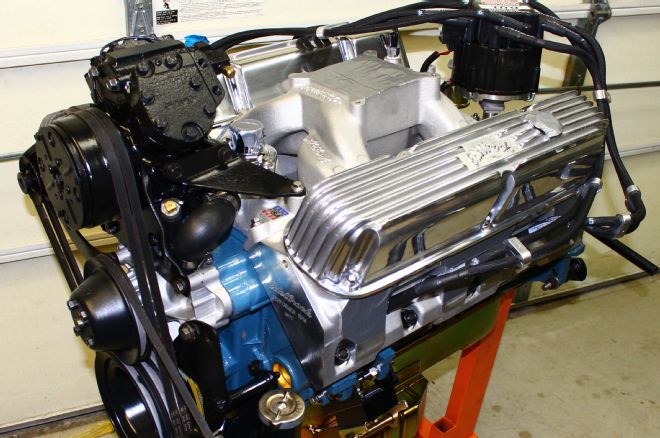
1. Before we dropped in our stroked LA-series small-block engine, the original accessories, pulleys, and brackets were refinished with Eastwood's Underhood Black Semi-Gloss (PN 10024Z, MSRP $12.99). To bolt on the accessories and Schumacher Poly-Loc engine mounts, we used stainless steel fasteners from ARP in their engine bolt kit (PN 544-9601, MSRP $269.39).
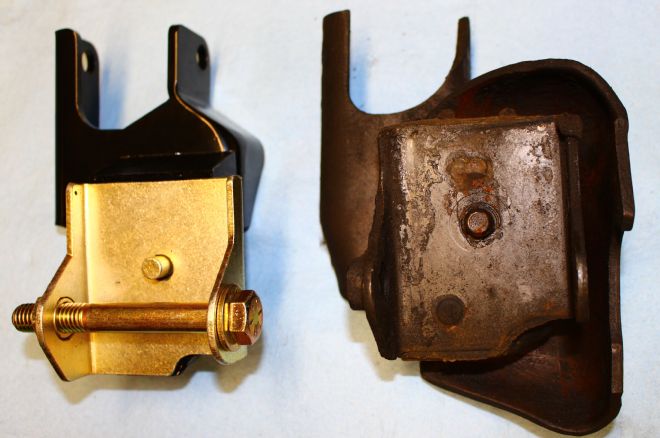
2. The factory engine mount bracket (right) has an ugly heat shield and a rubber insulator that would've blown out the first time we dumped the clutch. To securely hold our engine in place we'll be using Schumacher's 340/360 upgrade kit with unbreakable Poly-Loc insulators (PN BX3L, $264.00).
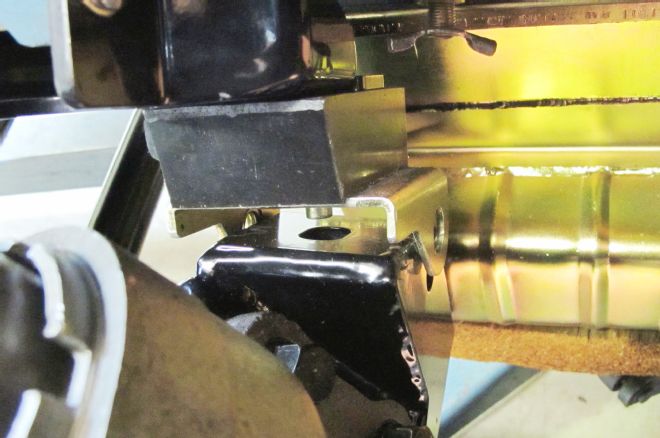
3. It's a tight fit between the left side of our Milodon road race oil pan and the K-member. Still, we found enough wiggle room to drop the small-block in place with everything lining up perfectly using the Schumacher mounts and our QA1 K-member. Notice there's enough room to use a radiator petcock instead of a drain plug for easy coolant flushing.
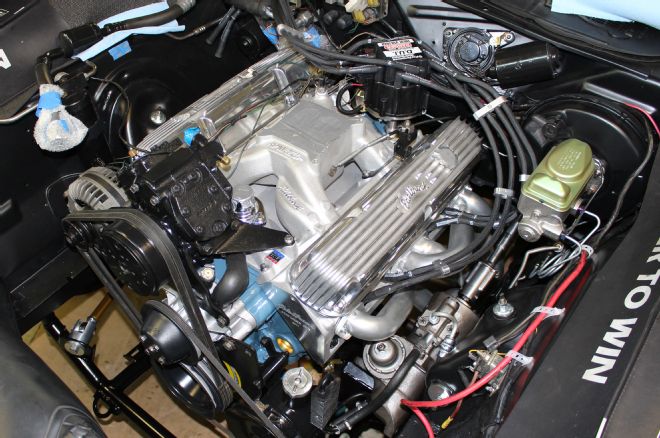
4. TTI's 1 7/8-inch headers for LA-Series small-blocks (PN 340BE17835-C4, MSRP $823.00) fit like a glove with plenty of clearance. We left the through-the-frame engine mount bolts finger tight to allow engine movement for when the trans and its cross-member are bolted in. Check out the original power steering pump and cooler. We purchased new hoses from our local jobber to hook up a new Firm Feel steering box.
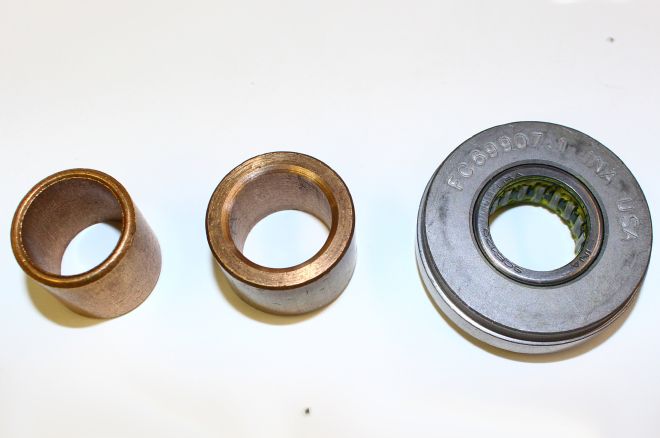
5. Here's two different pilot bushings and one pilot bearing. On the left is a pilot bushing from Brewer's Performance (.940-inch od, .754-inch id, Brewer's PN PB329, MSRP $3.95) for an original four-speed crankshaft. To the far right is a pilot roller bearing/adapter (Brewer's PN PB5300, MSRP $18.95) for the larger 1.815-inch diameter hole of the crankshaft. The pilot bearing/adapter is used in automatic crankshafts to enable use of the A833 four-speed. In the center is a Chevy pilot bushing (1.094-inch od, .650-inch id, Lakewood PN 15976, MSRP 20.95) that will fit our Scat Crankshaft.
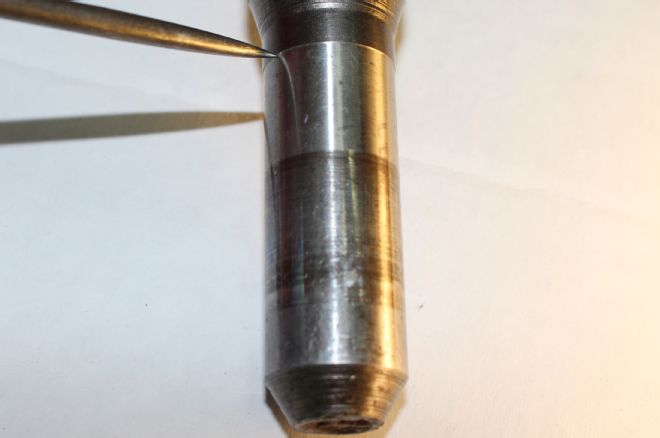
6. The raised lip on the A833 input shaft will bind and gall the edge of the pilot roller bearing/adapter if it is not dressed-down to size. The proper way to trim down the lip is to disassemble the trans and cut the input shaft on a lathe. We've seen many input shafts cut off an inch from the end to fit the automatic crankshaft and make use of the pilot roller bearing/adapter.
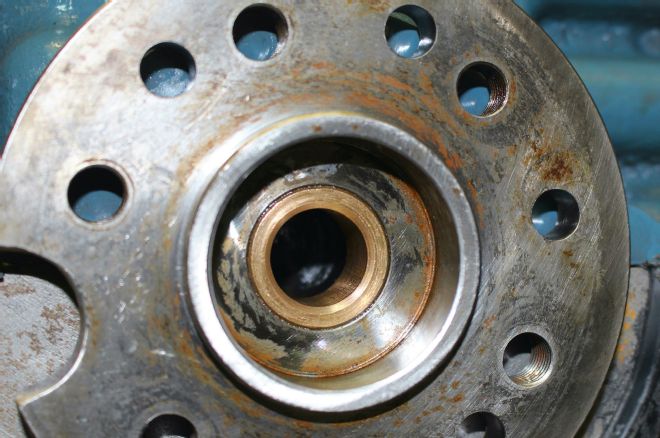
7. All of Scat's 340/360 crankshafts are drilled for the Chevy-size (1.094-inch) pilot bushing. Our friends at IDM Speed and Machine used their lathe to precisely drill the Chevy bushing to the Mopar ID size of .754 inch. We choose to use a pilot bushing—notice it sits deeper inside of the crankshaft to offer more support for the input shaft.
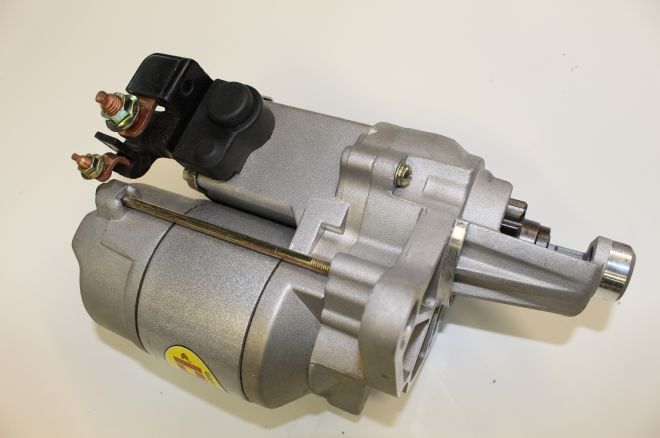
8. TTI Exhaust recommends a mini-starter when using their headers. We decided on a racing mini-starter from TCI (PN 351500, MSRP $252.30). It's a brand-new unit and is half the weight of stock, yet has twice the cranking power at lower amperage, leaving more spark for the ignition system.
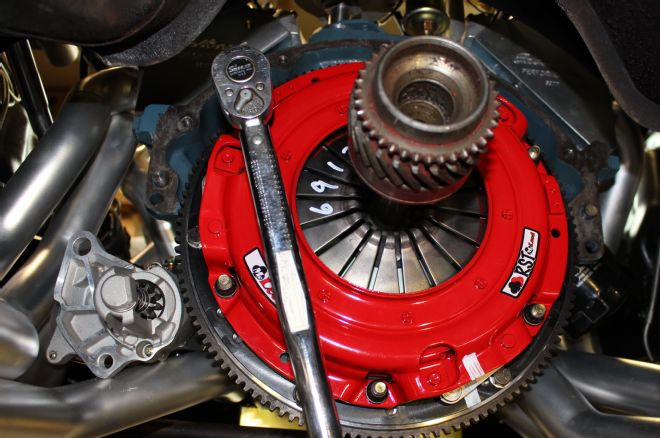
9. Notice the starter is resting in the header cavity space before bolting up the bellhousing, which will capture it. The starter wiring was routed away from the header tubes and left finger tight until bolting it in. Here we used an old input shaft to line up and torque the McLeod RST Street Twin clutch.
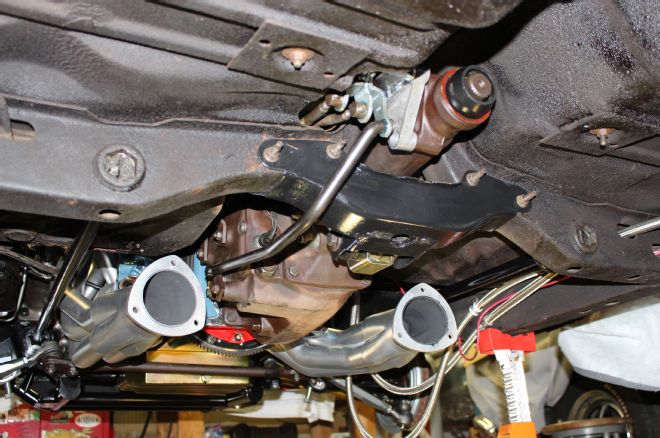
10. The original four-speed slid right in and was mounted in place. Note that to clear the TTI exhaust, we needed to use a '70-72–style shifter reverse rod (PN LR854A, MSRP $56.95) from Brewer's Performance.
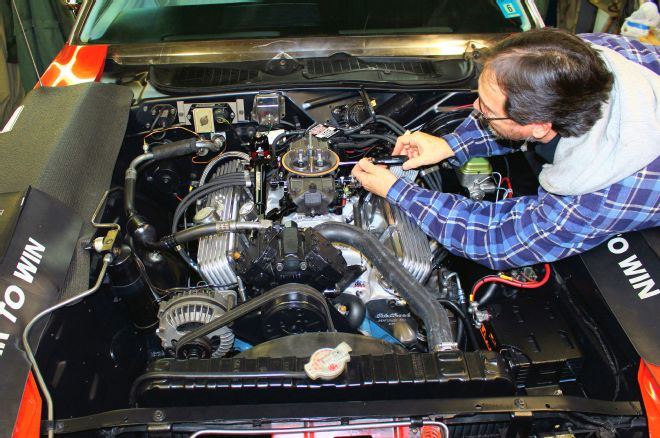
11. We began working from the rear toward the front to install the TTI 3-inch X-pipe exhaust (PN XE30HW-CH MSRP 748.00). First, bolt up the tailpipe hanger receptacles and muffler hangers. Then hang the tailpipes and DynoMax mufflers loosely in position. Here the X-pipe is being slid into the mufflers while being held in place by the hangers and jackstands. Next, another jackstand will hold the X-pipe to make it easier to hook up the width-adjusting slip connectors and header reducers to the collectors.
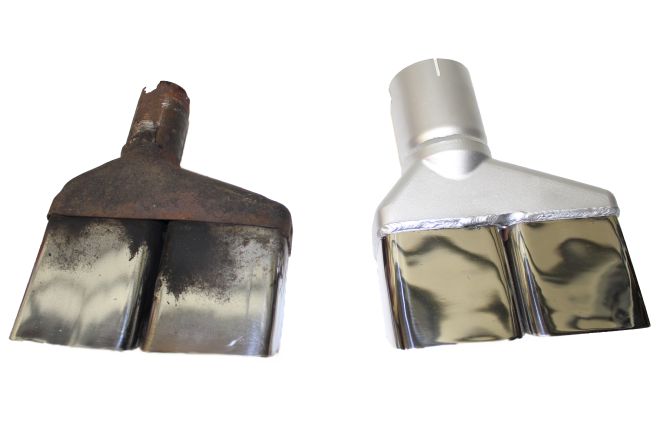
12. On the left is the Challenger's original dual-rectangle exhaust tip with its way-too-small 1 7/8-inch inlet. To the right is the beautiful original-looking, polished stainless TTI tip (PN TIP30-CHA, MSRP 437.00 set) with its nonrestrictive 3-inch inlet which will allow the 3-inch exhaust to efficiently exhale.
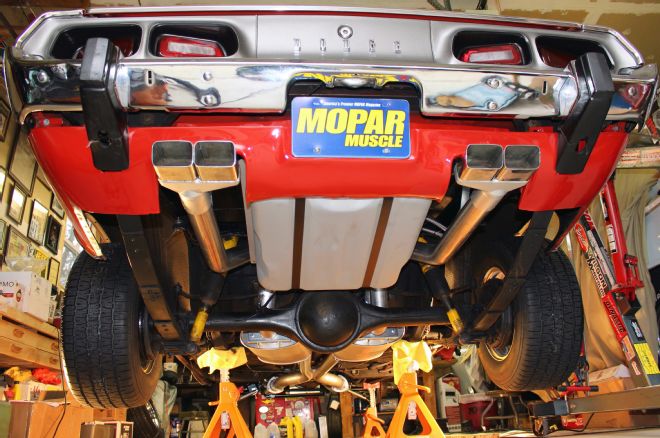
13. The beautiful TTI stainless tips were installed last—we wanted to be certain the entire exhaust system was tight and secure against movement with enough clearance to prevent any rubbing and rattles.

14. Once installed, we fired it up and adjusted the idle mixture on 850 Holley Ultra HP for a smooth 1,200-rpm idle.