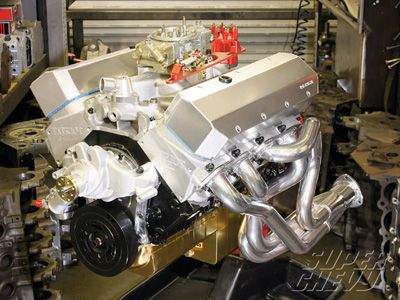
There's an old saying we remember that goes something like, "Horsepower sells cars, but torque wins races." Everyone brags about their humongous horsepower numbers, but when it comes to getting 3,000-lbs or more of steel moving in quick fashion then torque is the answer. Low-end grunt is what makes a street car fun. It's that push your eyeballs back into their sockets and wear a stupid grin on your face kind of deal. A racecar lives its life in the upper rpm, but a streetcar exists on the lower end where objects at rest want to stay put. To get a streetcar from zero to fast in a hurry you need torque and the quickest way to Torquesville is displacement.
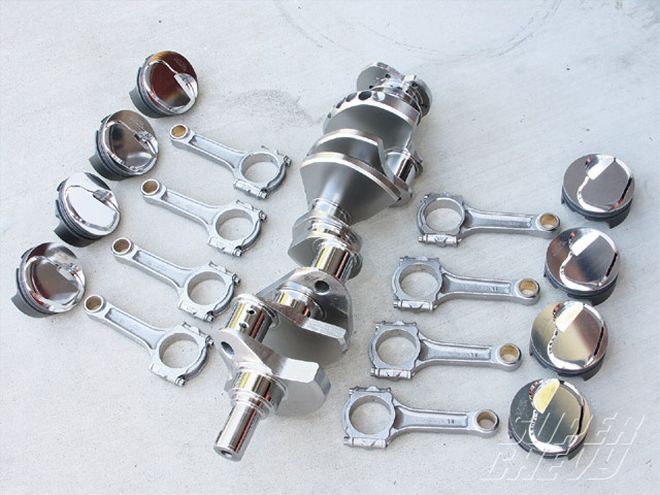 If you want the best "bang for the buck" it's hard to beat a stroker kit and this one from Eagle Specialty Products makes building one a breeze. You get the whole rotating assembly ready to go in one package (PN B18022, $1,406 as-is or $1,594 balanced). Included in the Eagle 496 stroker kit are the rod and main bearings, the moly ring set, and the appropriate pins for the pistons. This sure beats hunting around for all the parts separately.
One of the most common starting points for a big-block build is the venerable 454 Chevy block. You can still find them and the better ones can handle a huge amount of power. Best of all, they're ripe for the stroker treatment. Take a 454, add a 4.250-inch stroke crank along with some 6.385-inch rods and your displacement shoots up to 489 cubes. Now bore those cylinders out a touch, to say .060-inch over and you end up with the venerable 496. Those extra 42 cubes pay big dividends when it comes to churning out torque, and as a byproduct horsepower.
From an economics perspective, if you're replacing your rotating assembly, building a 496 barely costs more than a 454. Even if you were rebuilding a stock 454 it almost doesn't make sense these days to pass on going the stroker route. By the time you recondition your rods, grind your crank and possibly add new pistons, you're just a few bucks away from buying a brand new stroker kit.
The key to ending up with a reliable engine that makes good power is getting the machine work done correctly. We wanted it done right so we employed Andy Mitchell of Outlaw Racing Engines in Upland, California, to do the machine work and assembly. Andy had our '72 vintage 454 block cleaned, checked, and rough bored before finish honing the cylinders, with a torque plate, to .060-over. He also line-honed the block and cleaned up the decks. Could we have gotten away with less machine work? Maybe, but Andy likes to build them right the first time.
After getting organized, Andy started assembling the pistons and rods. Eagle is known for high-quality connecting rods and these forged 6.385-inch 5140 SIR I-beam units are no exception. They're bushed to work with full floating piston pins. The rods also utilize ARP fasteners and have alignment sleeves for easier assembly. They come packaged in weight-matched sets (+/- 2g) or they can be balanced by Eagle like ours were. The forged pistons are Mahle slugs and come coated right out of the box.
Attention to detail is critical when building any engine, especially one that is expected to churn out big power. Here Andy double checks the Clevite cam bearings we picked up from Summit Racing. He also organized the main caps and paired them up with the Clevite main bearings that were included in the Eagle stoker kit. Rather than reuse the old stock main bolts we spent a few extra bucks and went with stronger ARP main bolts (PN 135-5201, $53.95).
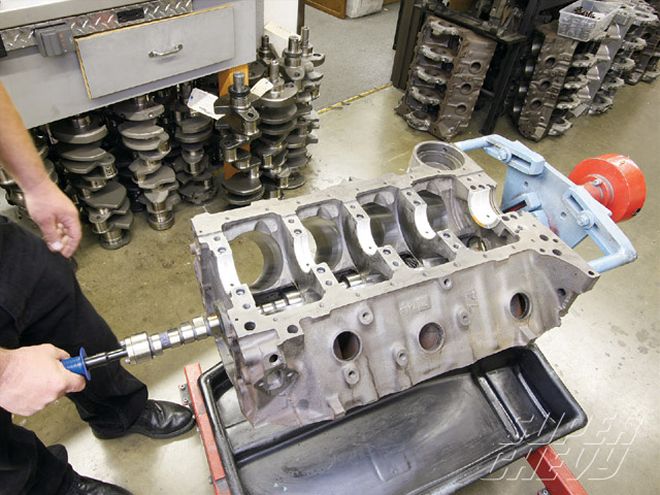
Some guys like to install the cam after the crank, rods, and pistons, but Andy prefers to do it first. He says that he would rather find out sooner if the cam doesn't ride freely in the newly installed cam bearings. The bumpstick we chose was Comp's hydraulic roller grind (PN 11-456-8, $259.95) of 242/248 duration at .050-inch and lift of .566-inch. With a lobe separation angle of 112-degrees this cam should make good power and still be easy to live with on the street.
The kit we went with is from Eagle. It features a very affordable cast crank, budget I-beam rods, and forged Mahle pistons. It offers the kit with hypereutectic pistons, but we splurged on the forged slugs because more power would be just a nitrous kit away. Since our mill would rarely ever wind out past 6,200 rpm there was just no need for the added expense of a forged crank. Another benefit of the Eagle kit was that it included everything needed from the rings to the bearings. They can even send it to you balanced and ready to drop into place. It's automotive instant gratification in its purest form.
For a block we went with a vintage four-bolt main block from around '72. It was caked in grime, but looked solid. All that the block really needed was a cleaning, inspection and bore/hone but we opted for a line hone and to have the decks cleaned up. After all, we weren't trying to be cheap, just smart. Also, since this was geared towards being a street engine, we resisted the urge to dump in some lumpy cam that would barely idle just to get some big number to plaster on the cover of the magazine. Instead, we wanted to find a happy medium, good power and excellent street manners.
With the main bearings in place, and liberally lubed up, Andy could then set the stroker crank in place. According to Eagle, ESP cast steel crankshafts have a higher ductility than O.E. units and feature .092-inch radii on all journals for added strength. They also use O.E. style bearings. Eagle worked over the crank, along with the rods and piston tops, in its new ESP Armor. This finishing process reduces friction, deters corrosion, and aids in oil shedding. Eagle says that the process adds strength to the parts and increases bearing life. Adding the process to the piston tops helps de-bur them and eliminate hot spots.
Here's a handy trick Andy showed us to check all of our oil rings at once for the proper gap. Once this was done he went about file fitting all the various rings to the cylinders. Proper fitting of the rings is critical in regards to making power and controlling where the oil goes.
With the rods hung on the pistons, and the rings in place, it was time to stuff them into the cylinder bores. A ring compression sleeve, from ARP, in the right diameter of 4.310-inch, made this job a snap.
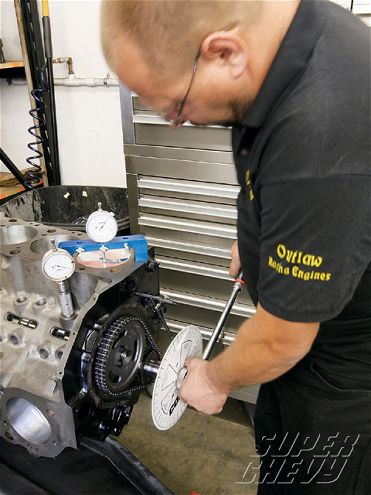
Andy never installs a cam without breaking out the degree wheel to make sure it's exactly where it should be. It takes a little extra time, and some specialized tools, but it pays off big in terms of getting all the performance possible from an engine.
After setting up the cam button, Andy then finished bolting on the Comp Magnum timing set (PN 2110, $38.95) using APR hardware. When running a roller cam on a block that doesn't have a thrust plate, a button must be used to limit the cam's lateral movement. He then bolted on our front cover using ARP bolts from our engine assembly kit (PN 535-9701, $87.95). This kit contains just about every bolt needed to wrench together the 496 and it's better than digging around for various fasteners or using old ones. With this done, we were one step closer to having our short block done. We also installed a set of brass freeze plugs from Milodon (PN 34033, $20.95)
Controlling the flow of oil is not just about keeping an engine alive it's also about making power. Because of this we went with this trick six-quart pan from Milodon (PN 31188, $429.95). The lightweight steel pan features a full-length kick-out and louvered tray assembly. This pan should help us squeeze out a few extra horsepower. We could have knocked hundreds off the price by using a stock pan, but at the cost of reliability and performance. Again, we would rather spend now than fix it later.
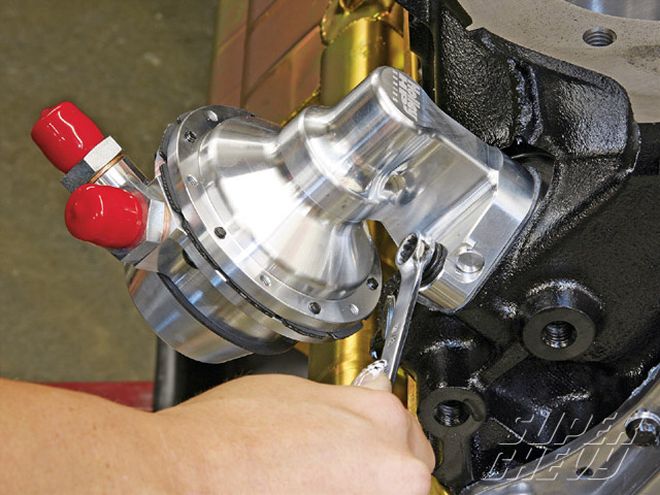
This Holley billet mechanical fuel pump (PN 454-25, $269.95) is more than just pretty, it's functional as well. CNC-machined from 6061-T6 aluminum the pump features -8 AN inlet and outlet fittings and the base can be rotated independently from the top to ensure proper fit. The free-flow rate is 170gph and the pump has a preset fuel pressure of 7.5psi. Making it work is an ARP fuel pump pushrod (PN 135-8701, $15.95)
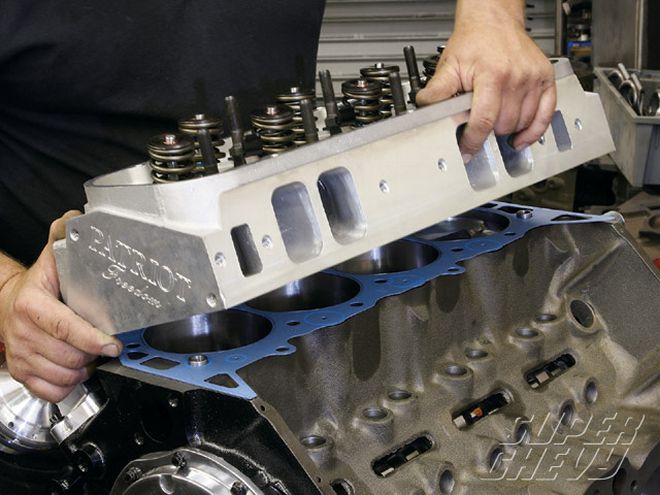
With new dowels in place, Andy carefully put on the Patriot heads. For gaskets we went with quality Fel-Pro units (PN 1017, $41.95) and then secured them to the block with ARP head studs (PN 135-3603, $86.95).
After installing our Milodon high-volume oil pump (PN 18760, $59.95), along with their correct extreme duty pickup (PN 18201 $54.95) and oil pump driveshaft (PN 23060, $14.95), we were ready to put the pan in place. The pan was installed using a crushproof gasket set from Milodon (PN 40200, $13.95) and more ARP fasteners from the accessory bolt kit.
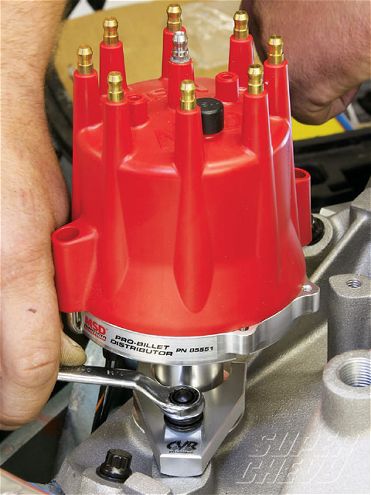
Putting spark to the flame is this MSD Pro-Billet distributor (PN 85551, $232.90). The housing is machined from 6061-T6 aluminum for durability and the oversized shaft has a QPQ coating for friction reduction. Two sealed ball bearings guide the shaft and ensure accuracy even at high rpm. Keeping it locked in place is an equally good looking hold down from CVR High Performance (PN DHB6CL) and an ARP fastener (PN 130-1701, $3.88).
Heads can make or break an engine build, both in terms of performance and budget. For this build we decided to try out the new offerings from Patriot Performance. These big-block Freedom series heads are targeted towards the street/strip crowd and feature 320cc rectangular intake ports. They are small enough to use on the street, but still flow enough to make good higher-rpm power. Our fully assembled heads (PN 2211) sell for only $1,395 and we think that's a steal for what you get. With stainless 2.25-inch intake and 1.88-inch exhaust valves these things flat-out move a ton of air. The 119cc chamber volume also helped us nail down our 10.2:1 pump-gas-friendly compression ratio. Also of note is that they come standard with a 5-angle valve job and manganese bronze valve guides. Sweet!
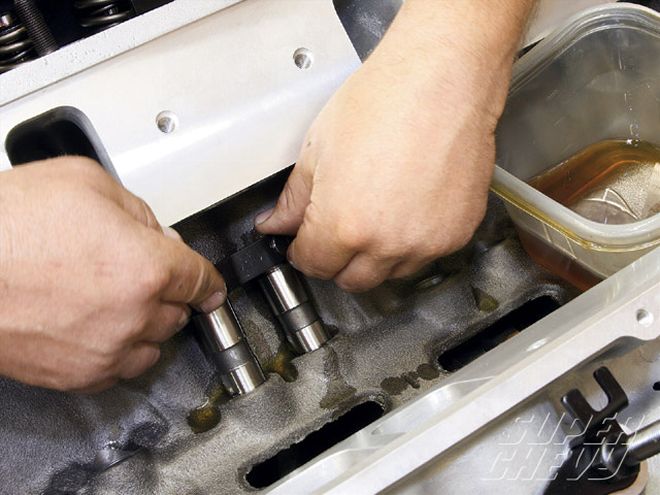
Going with a roller cam means we need roller lifters as well. These Comp High-Energy vertical bar hydraulic roller lifters (PN 854-16, $459.95) made "going roller" with our non-roller block a snap. Before dropping them into the lifter bores we made sure they were completely coated in oil.
When it comes to choosing an intake you need to make a decision on how you're going to use your car. For a strip car that spends tons of time in the upper rpm a single plane intake is the way to go. But the goal of our mill is a street bruiser that's all about low-end grunt. We went with Weiand's dual-plane Stealth intake (PN 8018, $219.95) with this in mind. Its long separated runners are ideal for low and mid-range power, which is exactly what we're looking for.
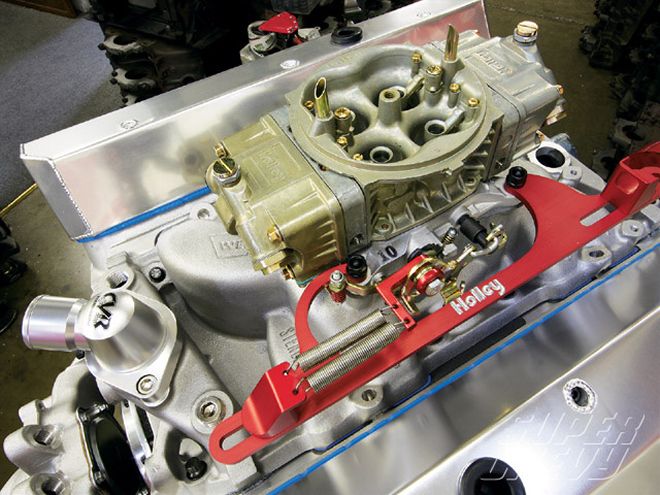
Topping off our 496 stump-puller is a Holley 950 HP carb (PN 80496, $714.95). This carb is all about making power with features like screw-in air bleeds, stainless steel throttle plates, and notched floats. They feature Dominator style fuel bowls that allow fuel line plumbing from either side. We also went with Holley's dual-spring throttle bracket (PN 20-112, $95.95) and a T6-6061 billet aluminum 360-degree swivel water neck from CVR High Performance (PN TSH6CL, $69.95) along with some fittings from Performance Stainless. Hey, there's nothing wrong with looking good.
After Andy measured for just the right pushrod length we could then install Comp's new Ultra-Gold 1.7 rockers (PN 19021-16, $289.95). These lightweight aluminum rockers are CNC-machined to strict tolerances and incorporate some of Comp's most advanced features.
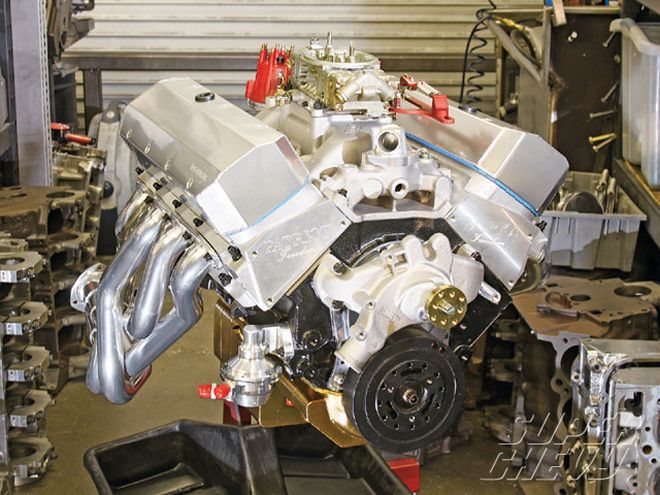
Behold the fruits of our labor; 496 cubic-inches of Chevy big-block goodness. Finishing off the build is a Weiand aluminum water pump (PN 9242, $99.95) and a set of very sweet Doug's headers (PN D320). Doug's has been doing headers since 1958 and these hand-built, mandrel-bent tubes are a work of art. Featuring two-inch primaries and 3.5-inch collectors, they are tuned with the proper size and length to efficiently remove all the spent gases from each cylinder. This reduces pumping loss and the result is more power and torque. The ceramic coating is for more than just looks. It can drastically lower engine bay temps and that equates to more power. Since this engine is externally balanced, Eagle supplied the balancer along with a properly worked-over flexplate. Keeping the valvetrain covered up, and looking great, is a set of fabricated valve covers from Spectre Performance (PN 5041, $136.99) and a set of Fel-Pro molded silicone and steel core gaskets (PN 1635, 42.95) inhibits leaks.
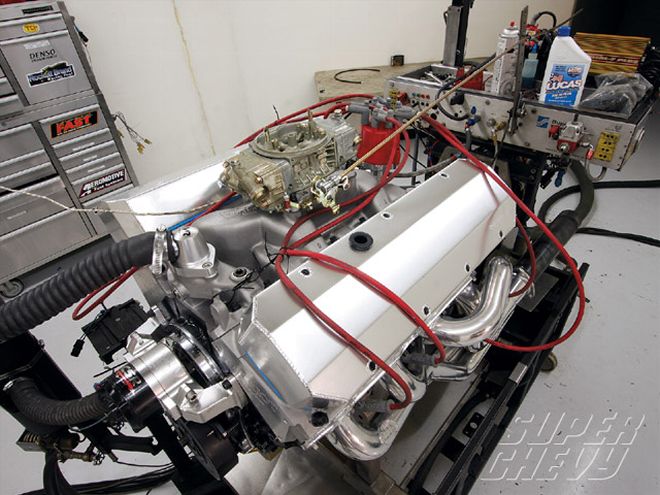
We loaded up the engine and took it over to Westech for a little time on its Superflow 901 dyno. After installing a K&N oil filter and dropping in seven quarts of Lucas oil, Westech dyno guru, Steve Brule, fired up the big-block and started making pulls and adjusting timing and fuel. After a few tries we nailed down a best pull of 593 hp at 5,900 rpm and 595 lb-ft of torque at 4,500 rpm. This was at 38 degrees of timing and 71/83 jets (8.5 power valve). Try as we might, we just couldn't sneak over the 600 mark. Out of curiosity we bolted on a one-inch open spacer and the numbers squeaked up to 596 hp at 5,900 and 598 pounds of twist at 4,500. Even though the peak was up just a touch the lower end of the pull saw a more significant gain.
If we wanted to jump over the magic 600 mark we decided we would need stiffer valve springs, 1.8 rockers, and possibly a single plane intake. Of course we could always go with a more aggressive cam, but that would veer away from our goal of building an easy to live with street engine. Besides, we're going to have a hard enough time hooking up this much power once we find a car to stuff it into.
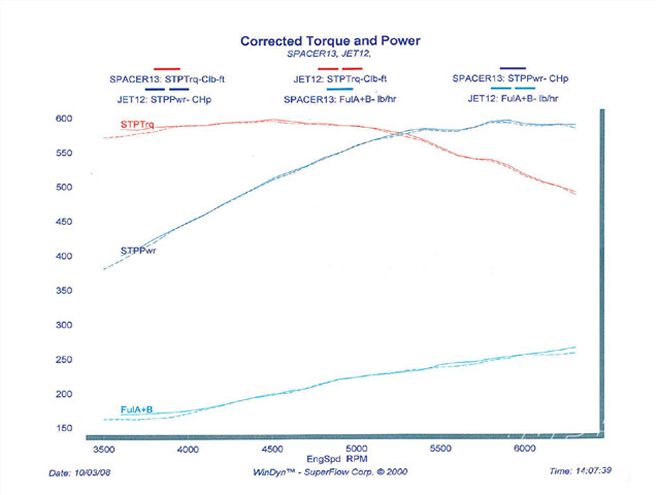 496 Dyno Numbers Two-inch Long Tube Headers, 1-inch spacer TQ HP 3600 583.7 400 3700 582.4 410 3800 586.7 424 3900 588.0 437 {{{4000}}} 588.1 448 4100 588.9 460 4200 592.8 474 4300 594.0 486 4400 595.3 499 4500 598.1 512 4600 595.7 522 4700 592.6 530 4800 592.8 542 4900 589.3 550 {{{5000}}} 588.0 560 5100 585.0 568 5200 580.4 575 5300 576.0 581 5400 567.8 584 5500 556.5 583 5600 545.0 581 5700 539.6 586 5800 538.3 594 5900 530.2 596 {{{6000}}} 516.8 590 6100 507.1 589 6200 499.5 590 6300 491.4 589