As Tri-Power 389s go, this one has about as good a story as they come. It was factory equipped in a new ’65 GTO sold through the legendary Royal Pontiac in Royal Oak, Michigan, just a couple blocks away from Detroit metro’s famous Woodward Avenue. (Though it was sold through Royal Pontiac, it did not receive the Bobcat package.) The GTO took its place in the Tiemann family driveway in May 1965 as a family car, hauling around Mr. and Mrs. Tiemann and their young son, Scott, who would later become one of the world’s foremost Pontiac restorers, and a judge with the GTO Association of America.
In the 1970s, Scott removed the GTO’s 389, replaced it with a big-cube 455, and went racing. Fortunately the 389 was removed intact and stored. When it came time to restore the family ride, Scott retrieved the well-preserved engine, had it rebuilt, and then detailed it with the meticulous attention to detail he is known for in the Pontiac hobby. “My goal is absolute authenticity. Every nut, bolt, and clip, as far as I’m aware, is absolutely on the money,” Scott tells us.
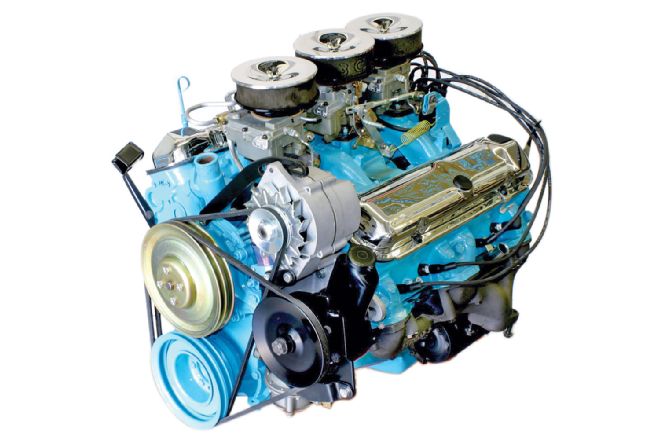 The legendary Tri-Power 389 engine stands tall among all muscle-car engines. It lasted only three years on the GTO’s option list (’64-’66), but the old hot- rodders’ trick of using multiple carburetors for greater airflow and power was never done better. If a Tri-Power restoration is on your to-do list, Scott Tiemann offers some of the supplies and detailing products used on this engine. His contact information is at the end of this article.
Just before the 389 was installed back into the 1965 GTO, HPP’s cameras were allowed in for a look at what goes into making a classic, show-stopping ’65 GTO Tri-Power engine a sight to behold.
There’s so much show-ready detailing on this engine, it’s going to take two parts to show it all. Do you want to make your 389 stand out from the crowd? Let’s get started.
When it came time to restore the family ride, Scott retrieved the well-preserved engine
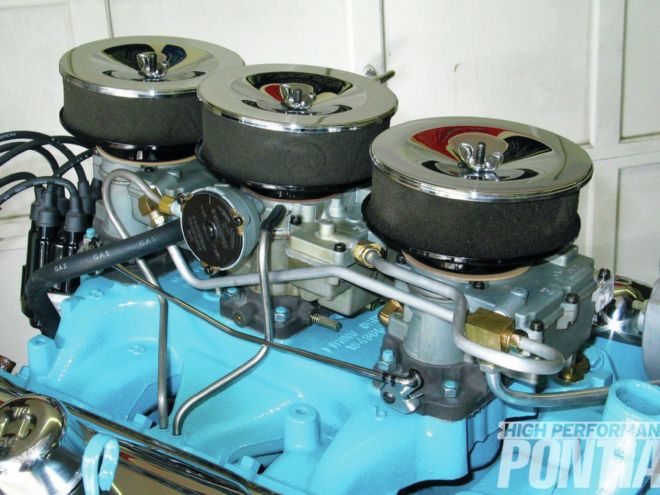
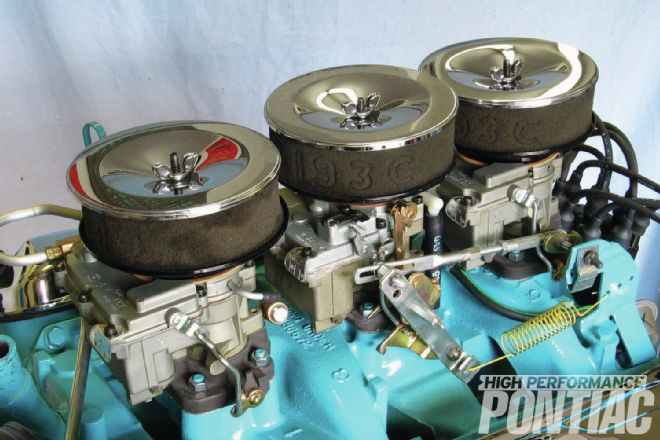
Let’s get right into the heart of the matter—the trio of Rochester two-barrels, correctly plated by Woodruff Carburetor Restoration and cleaner than a hospital room. The throttle-return spring is NOS. Examined up close, the spring’s paint is spotty. Scott says, “It’s an NOS spring right out of the package so I left it just like it was.” The front carb has a vacuum port used with an automatic transmission, but it’s capped for manual transmissions. The cap is also an original, identified by its squared end, and not rounded like modern reproductions. Behind the center carb is another vacuum port; this one taps into the manifold, and connects to the distributor-advance diaphragm via a black-with-green-stripe hose. The short black hose running vertically from the intake manifold to the top of the center carb is one of two—one to each plane of the manifold. They are part of the PCV system. Both hoses are stamped GAS; the longer hose is in larger letters.
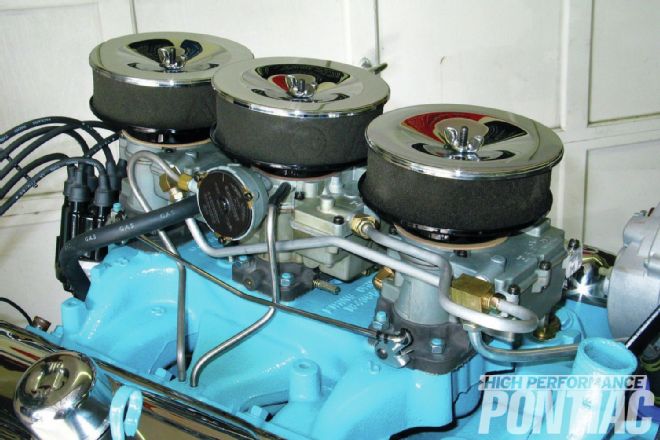
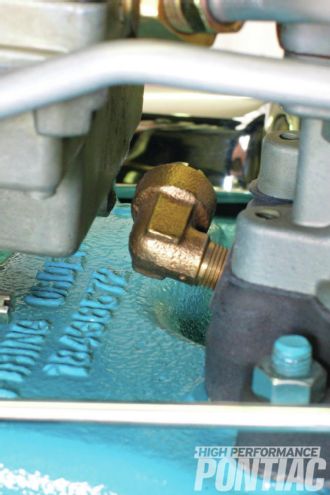
This brass 90-degree adapter is tapped into the rear of the front carburetor, and acts as a vacuum source for the optional power-brake booster. Since this car did not come with power brakes, the original fitting is capped off with a bright silver screw. “The fittings the aftermarket sells now are bigger and heavier,” says Scott.
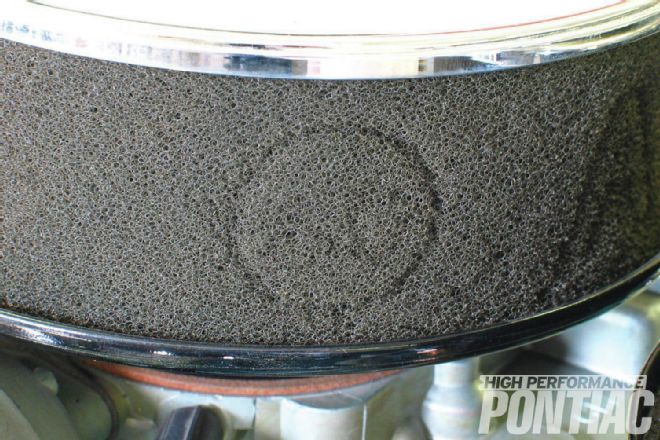
Original breathers are nearly extinct. They were a gray foam stamped with the AC logo and some other branding, but the foam turned to mush or powder over the years, so the best thing we have today are these earlier reproductions with logos. Current reproductions do not have the logos, so restorers just have to do the best they can. Breather bases are gloss black, not the popular semi-gloss. “ACDelco made all that stuff and it’s shiny,” notes Scott. “The original bases are steel; current reproductions are aluminum.”
The linkage connects to the outboard carburetor levers. The outboard carburetors are interchangeable, but the levers are specific to the front and rear. The rear carburetor has a small hole in the lever where linkage for a vacuum diaphragm would connect on cars equipped with automatic transmissions. To accommodate the extra thickness of the diaphragm’s mounting plate, the studs for the carburetor are a little longer on the passenger side. This hole is on the rear carburetor only, and not on the front one.
The crankcase breather is on the passenger-side valve cover. Reproductions are commonly available, but this one is NOS. The OEM breather has a series of crimps at the base (arrows); reproductions don’t.
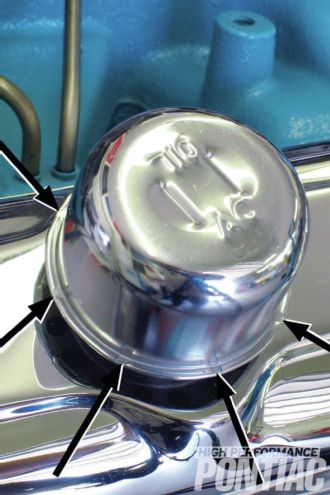 The crankcase breather is on the passenger-side valve cover. Reproductions are commonly available, but this one is NOS. The OEM breather has a series of crimps at the base (arrows); reproductions don’t.
All fasteners on this engine are from a 30,000-mile LeMans also built at the Pontiac, Michigan, plant very close to the same time as the GTO. Scott makes a small deviation from pure stock to the flange-head valve-cover bolts in the interest of preventing corrosion. “In the late ’60s, Pontiac began plating the bolts, but these early ones had an as-manufactured finish. Rather than leaving them bare, I put black zinc on them so they’ll stay dark and not corrode.” The dipstick tube and handle are solid blue, without chrome or other color anywhere on them.
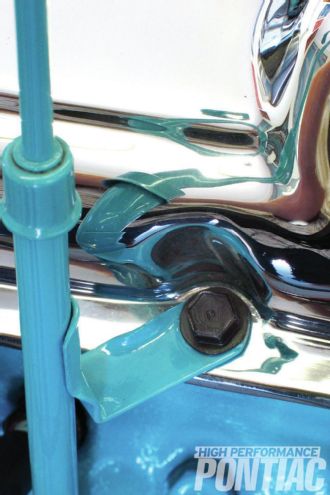
The No. 7 cylinder at the rear gets a 90-degree plug-wire boot, and is the only one that does. Just ahead of that, attached with a self-locking nut, is a plated silver tube which functions as a guide and heat shield for the starter cable. A wiring-harness hanger is attached at the valve-cover bolt. After Scott installs the wiring harness, he bends the hanger closed. Reproduction plug wires are from Lectric Limited and have the correct 1-Q-65 date code and other scripts. Scott has a set of original-issue plugs wires, and, according to him, these reproductions are “…right on the money.” You can’t see them, but NOS AC 44S spark plugs are installed.
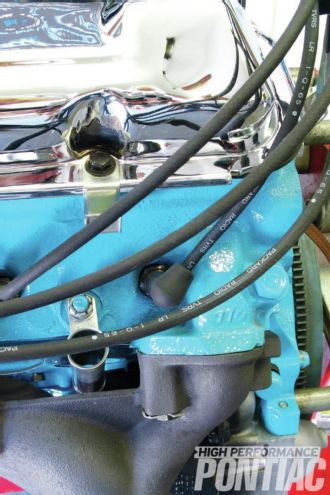
Details at the back of the driver-side cylinder head are harder to get to and often missed, but count just as much as any other details. This four-wire loom keeps plug wires away from potential damage. Its end is dipped in a rubberized coating. Next to it is a braided copper ground strap bolted to the back of the cylinder head and hanging loose for the moment. It’ll be bolted to the body once the engine is installed. Failure to connect this ground can result in baffling electrical troubles.
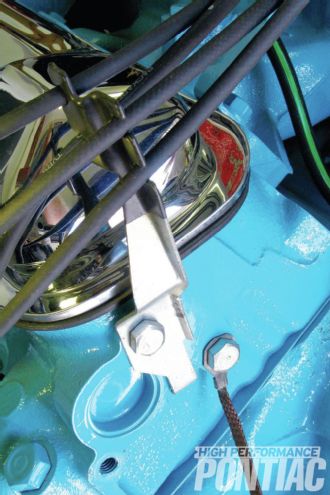
This bracket, which keeps the heater hose off of the hot exhaust manifold and out of the way, is finished in semi-gloss paint and bolted to the front of the passenger-side cylinder head. A hardened-steel bolt with a phosphate finish holds it to the cylinder head. It’s overkill for a light-duty bracket. “I’ve seen different types of bolts used there,” says Scott, “but I remember this car always having that bolt there.”
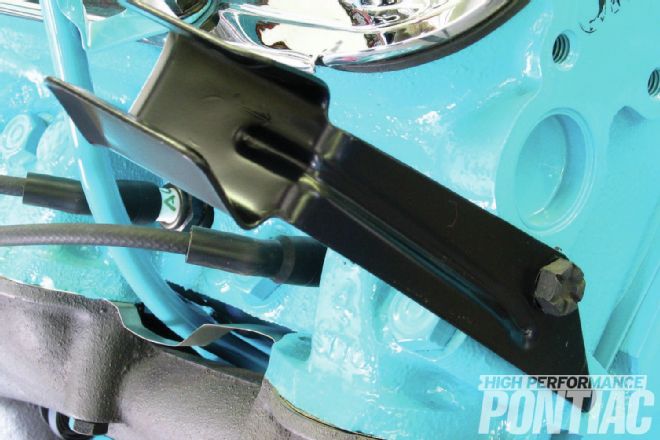
Semi-gloss black is the only color you’ll need for the power-steering pump, pulley, and brackets. The large bracket behind the pump is bare aluminum. “Bolts are zinc- or phosphate-plated,” says Scott, “and they are authentic in all the positions.”
Pontiac used a zinc dichromate-plated water-pump pulley. This one is NOS, so it has a factory-correct look. Scott tells us that some restorers have reported power-steering–equipped GTOs with silver zinc-plated pulleys, but he thinks they were west-coast cars. “Judges don’t seem to care one way or the other at the GTO Nationals, but I’m sure that the double-groove upper pulley was never black. We’ve seen some single-groove pulleys without power steering black or silver.” “Until ’67 or early ’68, Pontiac used this style of water pump. On the bottom bolts, particularly the one that’s near the water inlet (lower arrow), the threaded hole breaks into the coolant passage, so Pontiac used a stud with sealer in that position. There are two more fasteners on the bottom of the water pump that break into the engine crankcase, so they get a stud with sealer, too. The nuts are self-locking, so when you take a water pump off, often the studs tend to come out, too, and people don’t put them back in. This engine has the proper combination of studs and place bolts.”
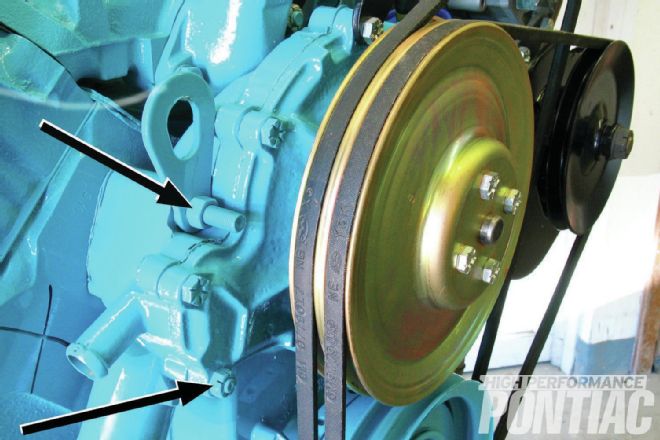
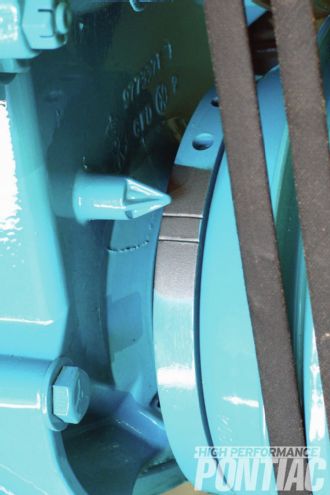
On non-air conditioned cars, the harmonic balancer and all of its fasteners are painted Light Blue, along with the rest of the engine. Air- conditioned cars got a bare pulley. “If the car gets air conditioning, they took the balancer bolt and the entire assembly off and traded it for a hub, pulley, and weights that had no paint whatsoever. But all other cars, whether power steering or non-power steering, get this double-groove balancer that was on the engine when it was painted,” advises Scott.
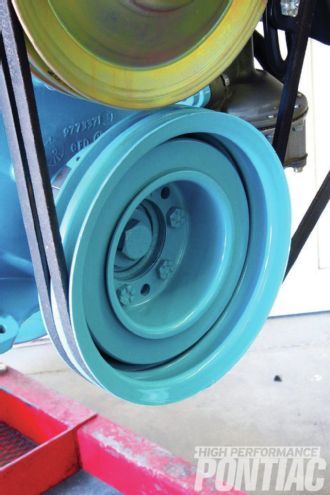
The balancer timing marks get masked prior to painting. There are two marks on the balancer—the first is for 6 degrees BTDC, the second mark is for TDC. “I presume they took a piece of tape and laid it over those marks so that they didn’t fill in with paint. We’ve seen this on original cars and on some of the pictures we’ve acquired over the years,” Scott says.
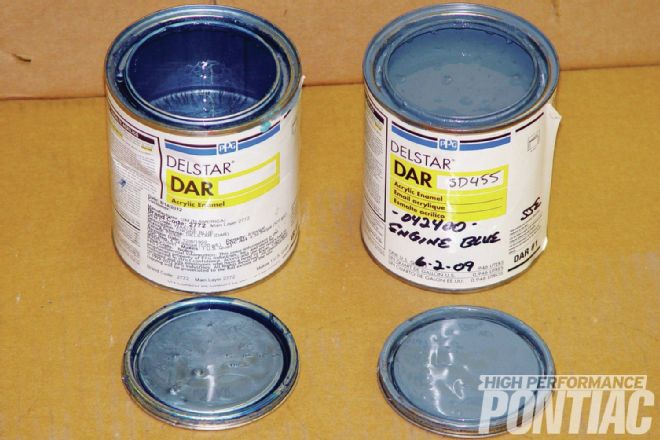
“We’ve had a lot of original, low-mileage Pontiacs over the years, and we’d find places on their engines where paint hadn’t seen oil or sunlight. Upon our request, a paint store mixed this Light Blue color based on those parts. It’s acrylic enamel with a little bit of hardener sprayed from a spray gun. It gets a nice surface to it ,where if things spill on it, it wipes up easily and doesn’t stain. In addition to this color, I have’66-’70 Light Blue Metallic and March 15, 1973, through ’74 Dark Blue, which is correct for all ’73-’74 Super Dutys. If people call me, I can sell them quarts of any of these paints.”—Scott Tiemann
My goal is absolute authenticity. Every nut, bolt, and clip, as far as I’m aware, is absolutely on the money.
Pontiac valve covers use four bolts, and are interchangeable. Even so, there is a right way and a wrong way to put them on. On early valve covers, the edges are different—one side is straight, the other is not. The side without the straight line should be installed closest to the carburetors, leaving the most visible edge just above the exhaust manifolds with the straight line.
Trouble occurs when people try to swap ends to put the pentroof to the front on both sides. The pentroof should only be forward on one side, and to the rear on the other side.
We’ve got a lot more to come next month. Don’t miss the next issue of High Performance Pontiac and Part 2 of “Detailing Tiemann’s Tri-Power 389."
Supercar Specialties