The Build
To refresh your memory, in the October 2013 issue, we let you in on an idea that was presented to us by Richard Nedbal. Apparently, he wanted to build an engine that seems to be conflicted by opposing objectives. Namely, he was going to build a high horsepower supercharged Hemi that is also reliable. The engine would be an upgraded build of a normally aspirated engine that he previously built. Since he knew the internals of this engine, he used computer simulation to predict that 1,400 to 1,500 horsepower should be achievable with only 10 pounds of boost. This month, it’s time to start the process.
During disassembly it became obvious that the original engine was in pretty good shape, even after 300 passes. After inspection, Mopar Engines West (MEW) was given the task of machine work, in preparation for the current build configuration:
01 This engine originally started out as a normally aspirated Hemi that made about 900 horsepower. Using this as a base, we are hoping to build a reliable, blown Hemi making around 1,500 horsepower.">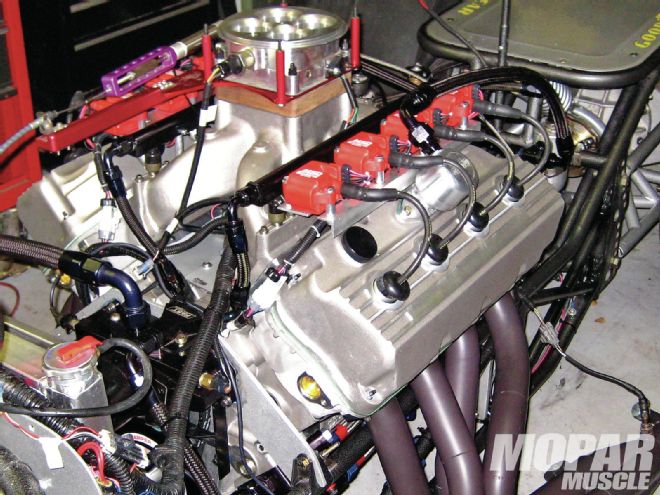 <strong>01</strong> This engine originally started out as a normally aspirated Hemi that made about 900 horsepower. Using this as a base, we are hoping to build a reliable, blown Hemi making around 1,500 horsepower.
Design Criteria
New Parts
Making changes in regards to engine configuration many times means changing, adding or replacing some of the parts. In this case, the only new parts that we need to add are the blower and new fuel injection components.
02 Drift key slots need to be added to the crankshaft, the pistons need gas-porting added, and they also need coated. Not only that, but rebalancing was required, mostly due to the thicker-wall wrist pins that were needed due to the added stress that area will receive because of the blower.">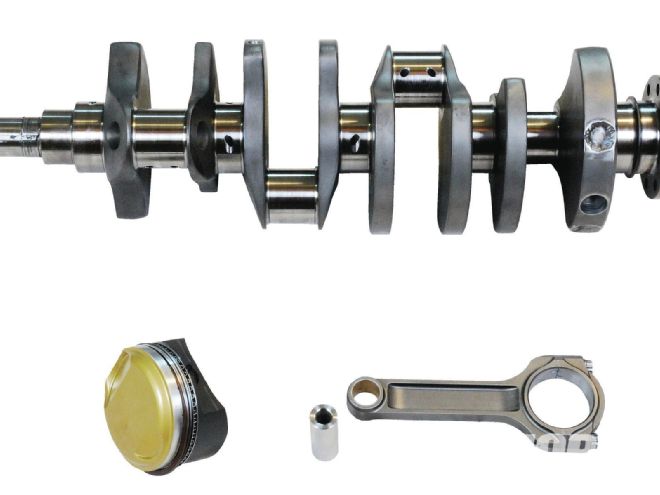 <strong>02</strong> Drift key slots need to be added to the crankshaft, the pistons need gas-porting added, and they also need coated. Not only that, but rebalancing was required, mostly due to the thicker-wall wrist pins that were needed due to the added stress that area will receive because of the blower.
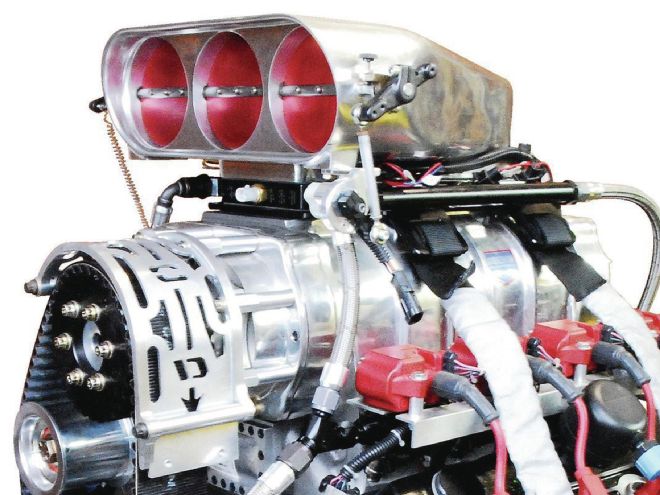
For this engine we bought a used Mooneyham 10-71 blower from a friend. This is a great blower with racing seals, and is probably the reason that it produced a little more boost than the computer predicted. Last month, we told you that the computer predicted that we would have to overdrive the blower slightly, since a 10-71 is a tad small for a 572-inch engine. (Spoiler alert) In reality we ended up at a 1:1 drive ratio with a 14 mm Gates belt.
The upward pulling-force that the blower imparts to the crankshaft snout can easily exceed 1,000 pounds, so the solution is to install a crankshaft bearing-support cradle to help offset the force. Of course that takes up valuable room at the front of the engine, but it has to be done if we really want the bearings to live for any length of time.
Blower Manifold
If you have available room, it’s always better to inject fuel sequentially at each intake port. If using a blower, we feel that you also need to inject fuel above the blower to keep it cool. The intake used is a 16-bolt Indy Cylinder Head manifold. It was easy to use injectors below the blower base, since there is room to mount the fuel rails etc., and we used an injection plate from BDS for the injectors above the blower.
03 Our front bearing support from RCD is a must for this engine. The upward force that the blower imparts to the crankshaft can easily exceed 1,000 pounds, so this crankshaft bearing-support cradle is needed to help offset that force.">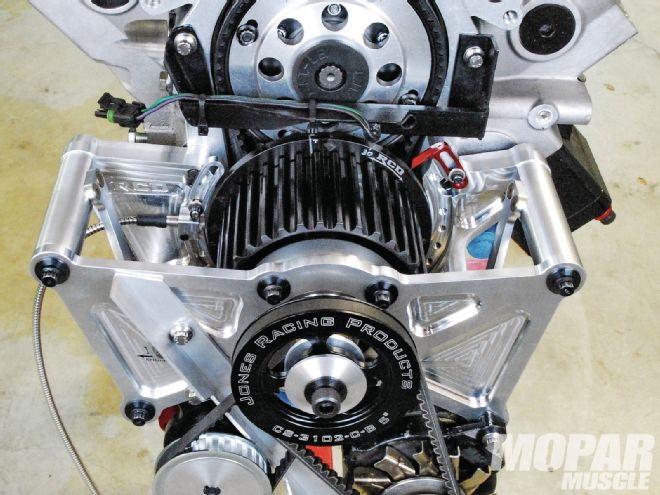 <strong>03</strong> Our front bearing support from RCD is a must for this engine. The upward force that the blower imparts to the crankshaft can easily exceed 1,000 pounds, so this crankshaft bearing-support cradle is needed to help offset that force.
People usually ask about running sequential injection, which makes sense for the port mounted injectors, but how about the injectors above the blower? Those are also run sequentially since it really doesn’t matter up there.
The EFI System
I am a firm believer in the FAST fuel injection system, and use it for all of my builds, and this will be no exception. The EFI computer (ECU) has to be compatible with multiple drivers, since we’ll be driving 16 fuel injectors (rated at 125 lb/hr), instead of just eight. We’ll also be using coil-near-plug technology, so the FAST XIM ignition controller will be used. Sequential injection and coil-near-plug technology both require a camshaft signal. This is so that the ECU knows the beginning of the engine’s cycle. So, we’ll address sensor location as well.
04 We’ll be using AEM coils PN 30-2853. Specifications of these coils state 103 mJ, but on the bench we measured the AEM coil at 113 mJ, so it’s actually hotter.">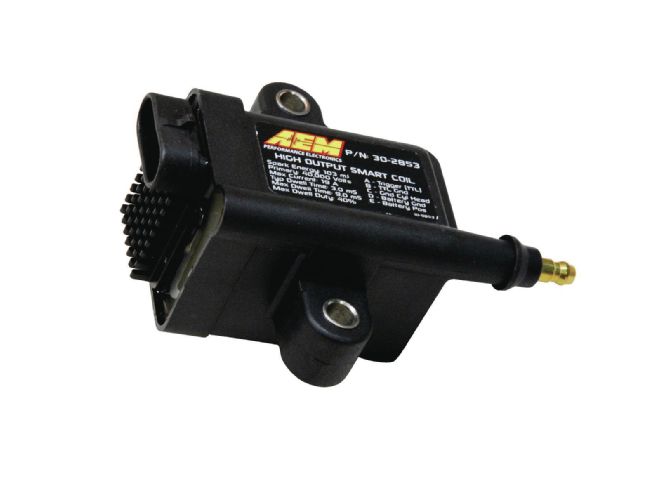 <strong>04</strong> We’ll be using AEM coils PN 30-2853. Specifications of these coils state 103 mJ, but on the bench we measured the AEM coil at 113 mJ, so it’s actually hotter.
Since there’s no room for a laptop in a dragster, the ECU must have internal data-logging capability. In addition, to minimize the corrosive effect of alcohol, our application will also require that the ECU hold two programs. We will need one for running the engine with pump gasoline, and one for running methanol. The reason for this is so we can warm up the engine on gas, and then switch to methanol for the race. Once the race is over, we can switch back to gasoline, thereby clearing the corrosive methanol from the system. We use an electric priming pump with Jiffy-Tite quick disconnect fittings to swap the fuels. It works well and takes only a few minutes to perform the switch.
Fuel System
They don’t make electric fuel pumps that will feed a 1,500 horsepower engine drinking methanol. If you do the math, you quickly see that the real problem is not pressure, but fuel volume at the higher, required EFI fuel pressures (greater than 45 PSI), since you need twice as much methanol as you would fuel. Brake specific fuel consumption (BSFC) for a normally aspirated gasoline engine is in the .5 range, but the BSFC for a methanol engine is twice that, and supercharging steps it up even more. So, if we have a 1,400 horsepower engine x 1.3 (BSFC estimate), it gives 1,820 lb/hr. I use 6.2 lb/gal for gasoline, which is a little light for methanol, but that gives a flow of 293 GPH or 5 GPM. I have to use a belt-driven mechanical fuel pump such as the Aeromotive 11105 to handle this. Since a mechanical pump’s volume will vary dramatically with rpm, you need to use a fuel regulator specially designed for this task. I used Aeromotive for all the fuel system components.
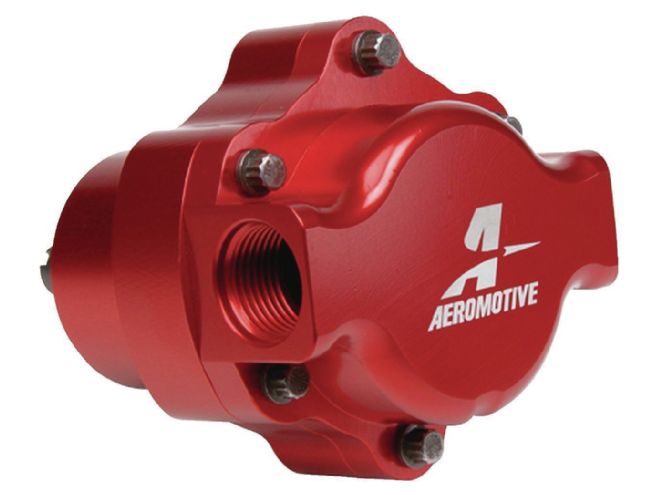 05 Since a mechanical fuel pump’s volume will vary dramatically with rpm, you need to use a fuel regulator that is specially designed for this task. For this build, we used Aeromotive for all the fuel system components.">
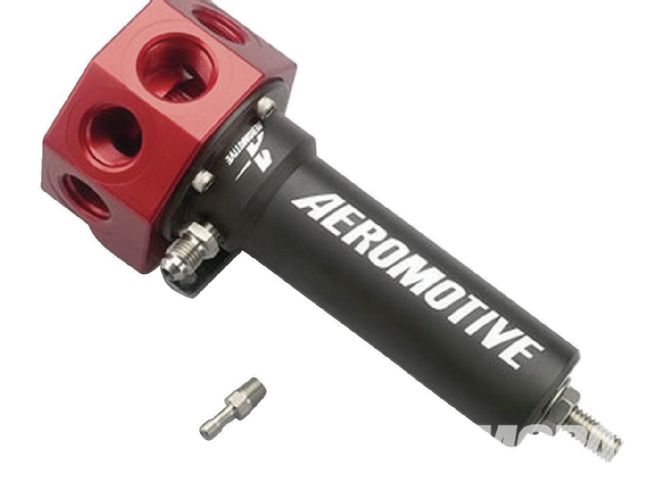 <strong>05</strong> Since a mechanical fuel pump’s volume will vary dramatically with rpm, you need to use a fuel regulator that is specially designed for this task. For this build, we used Aeromotive for all the fuel system components.
Assembly Begins
For the most part, assembly is just like any other normal engine assembly. We used coated Calico bearings, and set the main clearances a tad tight (.0025-inch) to allow for expansion of the aluminum block. We installed the new main studs, and Crower rod bolts with new AMS5844 bolts (rod bolt torque of 95 lb/ft.). We degreed the cam using the Jesel belt drive, and test fit the bearing support cradle. Everything was moving along smoothly. Next, we installed the Milodon 10-quart oil pan and the Titan oil pump.
06 AR Engineering makes these cool adapters (PN AR245) that are required when using a remote water pump. We had to drill and tap extra holes on the side for the -12 AN fittings, because there was not enough room for hoses forward from the block.">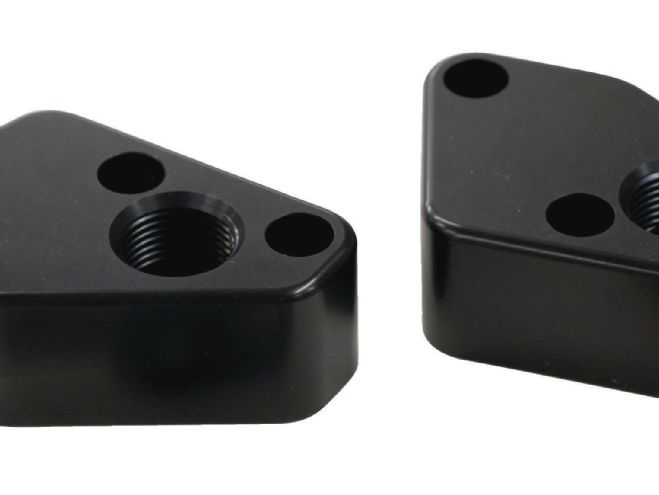 <strong>06</strong> AR Engineering makes these cool adapters (PN AR245) that are required when using a remote water pump. We had to drill and tap extra holes on the side for the -12 AN fittings, because there was not enough room for hoses forward from the block.
Everything was going along smoothly until we tried to mount the Meziere water pump. No matter what was tried, it was not going to clear the blower belt. Most alcohol-fed blower engines don’t use water, so who cares about a water pump? But, since the Top Dragster class is primarily a bracket class where hot lapping is a definite possibility, and we wanted a car that we didn’t have to tow into the staging lanes or back from a run, we needed water.
AR Engineering makes these cool adapters PN AR245 that can be used with a remote water pump. We had to drill and tap extra holes for the -12 AN fittings, because no hoses could come forward from the block. A little drilling, a little tapping, an AN plug for the hole I didn’t use, a remote mounted Meziere water pump, and we have engine cooling!
07 Because MEW decked the block, the pistons were now “out of the hole” about .010-inch. We used Cometic head gaskets with a .051 crush thickness. Piston-to-valve clearance was conservative, and final compression ratio is 10.9:1, which is actually a tad low for a blown alcohol engine.">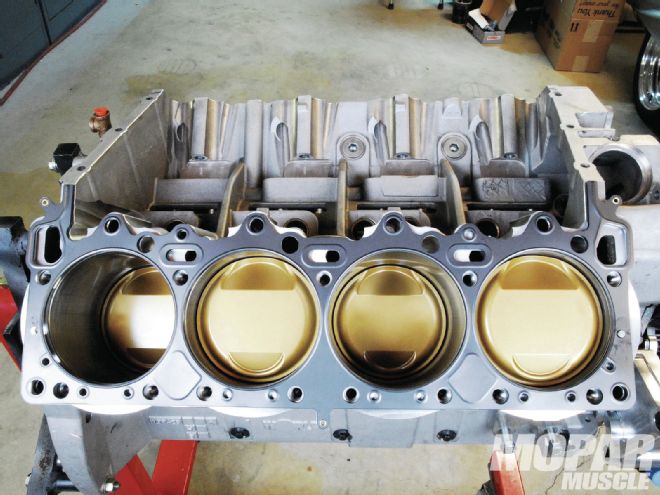 <strong>07</strong> Because MEW decked the block, the pistons were now “out of the hole” about .010-inch. We used Cometic head gaskets with a .051 crush thickness. Piston-to-valve clearance was conservative, and final compression ratio is 10.9:1, which is actually a tad low for a blown alcohol engine.
I would have preferred to use copper head gaskets and stainless O-rings, but because of the large 41⁄2-inch bore size, there wasn’t enough sleeve material between the bores to allow it. We felt the Cometic gaskets would hold up well under the relatively low boost levels.
08 The specs of our degree’d Comp camshaft are 280/288-degrees duration at .050 inch, with .720-inch lift at the valve, and a 112 lobe-separation angle. It doesn’t really stress the valve train, but makes a bunch of power. ">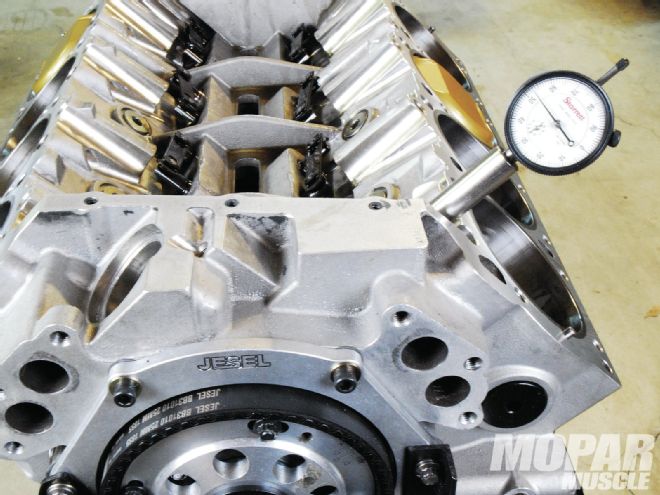 <strong>08</strong> The specs of our degree’d Comp camshaft are 280/288-degrees duration at .050 inch, with .720-inch lift at the valve, and a 112 lobe-separation angle. It doesn’t really stress the valve train, but makes a bunch of power.
09 The Millenium heads were installed, and all bolt torque was set using ARP Ultra Lube. Like we said last month, Millennium heads have raised ports, and therefore use spacer plates when a standard intake manifold is used. Port alignment is spot on.">
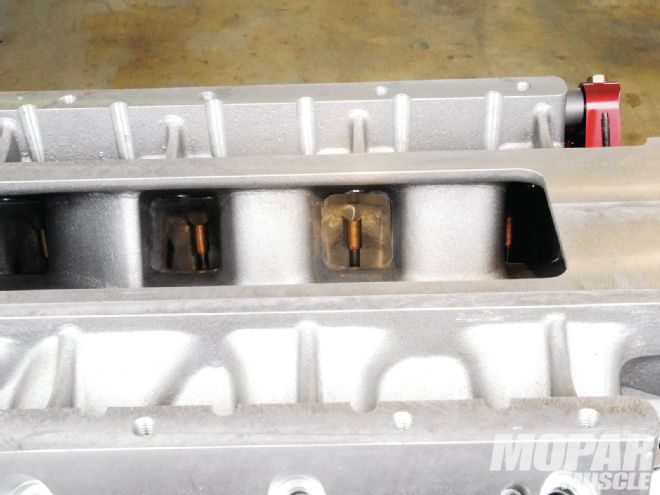 <strong>09</strong> The Millenium heads were installed, and all bolt torque was set using ARP Ultra Lube. Like we said last month, Millennium heads have raised ports, and therefore use spacer plates when a standard intake manifold is used. Port alignment is spot on.
The heads were installed along with the Stage-V rocker system for the Millennium heads. All bolt torque was set using ARP Ultra Lube. Like we said last month, Millennium heads have raised ports, and therefore use spacer plates when a standard intake manifold is used. A neat side benefit to this is that the raised manifold allowed us to use a standard cast aluminum valley cover.
We bolted the blower in place, and used a 36-tooth lower pulley and a 32-tooth top pulley. (Second spoiler alert) Later we will find out while on the dyno that we don’t need any blower overdrive.
What is BSFC?
Brake Specific Fuel Consumption (BSFC), is a measure of how efficiently a given amount of fuel is converted into a certain amount of power. Simply put, it’s the rate of which fuel consumption is divided by the power produced. BSFC allows the fuel efficiency of different engines to be directly compared. To find the actual BSFC of an engine, you need to take the weight-per-gallon of the fuel, times the measured gallons per hour used, and then divide that by the measured horsepower achieved. Typically, fuel weighs around 6.0 to 6.44 pounds per gallon, but the weight of fuel can vary, simply by the changing ambient temperature. If the ambient temperature becomes cooler, fuel becomes denser, and therefore it’s weight changes.
If we burn all of the fuel and capture all of the heat delivered during any given combustion cycle, we would have extracted the maximum amount of potential power. In theory, that seems simple enough, however, the typical internal combustion engine is not usually an efficient one. It is almost impossible for an engine to reach 100-percent efficiency, and you can expect a certain percentage of energy content to be lost.
It is important for those testing BSFC to keep in mind that the results of BSFC while measured on a dyno, only show the efficiency between two values: fuel consumption and power. This doesn’t take into account other factors about the engine or vehicle.
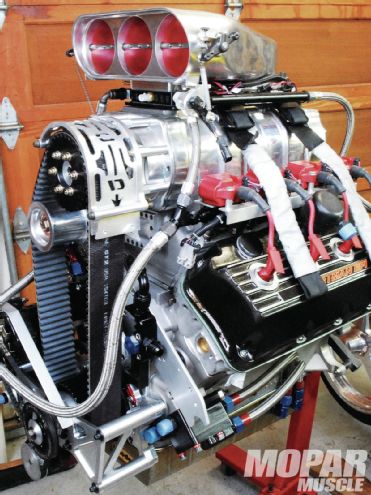 <strong>10</strong> Now, it’s starting to look like something.
PRICE TAG Part Manufacturer Part Number Approx Cost Block World 088515-4500 $5,000 Heads Stage-V S-M2000H $4,200 Crankshaft Crower 95168 $1,500 Rods Crower B93911B-8-UPG $,600 Pistons Diamond Custom $1,600 Coated Main Bearings Fed Mogul 142M1 $150 Coated Rod Bearings Calico/Clevite CB743HN $150 Cam Bearings Dura-Bond PDP-17T $50 Camshaft Comp 24-000-9 $380 Cam Drive Keith Black 63107A + $1,000 Lifters Comp 829-16 $470 Rocker Arms Stage-V IR-417N3/ER-cus $1,700 Rocker Shaft Supports Stage-V S-M2000ST $900 Rocker Shafts Dechellis Machine I45-HB/E45-HA $500 Pushrods Smith Brothers 8 NH314-CB $300 Adjuster studs and nuts Manton Stud# 823, Nut# 851 $200 Oil Pump Titan 426 drag $800 Intermediate Shaft Milodon 21525 $140 Oil Pump Internal Pickup Milodon 21330 $130 Oil Pan Milodon 31160 $375 Blower Mooneyham 10-71 $2,500 Manifold INDY 426-BM $1,250 ECU FAST 30-1004 $1,900 Harnesses FAST 30-1100/1200 $600 Injectors Lucas 621061 $880 XIM coil controller FAST 30-1311 $600 Cam Sensor MSD 2346 $80 Coils AEM 30-2853 $640 Plug Wires MSD Custom $150 Plugs Champion N59YDR $40 Main Stud Kit ARP 145-5602 $115 Rod Bolts Crower AMS5844 $400 L19 Head Studs ARP Special $590 Valve Covers Keith Black 53097FHA-1 $650 Water Pump Meziere WP337S $430 Crank Support Cradle RCD 202600-0004 $800 Total $30,270