It happens to us all; in fact, it happens not only to us but to everyone and everything around us as well. I’m talking about old age, an affliction that doesn’t discriminate between the living or inanimate objects. Time takes its toll.
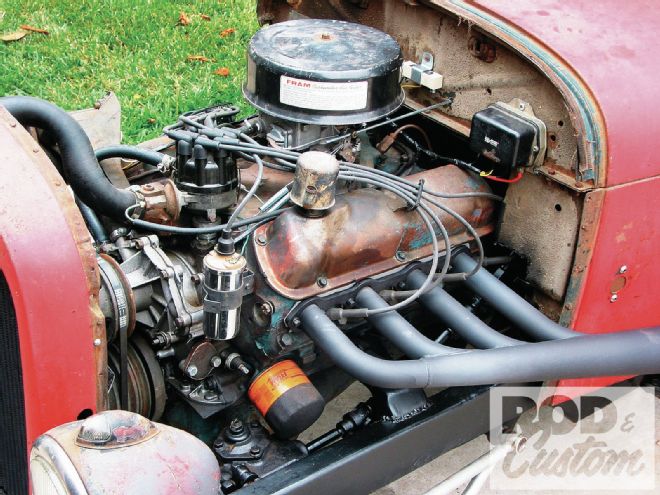 The engine swap was necessitated by a well-worn (actually totally worn) ’64 289 backed by an equally tired Cruise-O-Matic trans. The duo had served its purpose but it was way past time for retirement. I’d initially planned on swapping out some of the old engine’s components to the fresh engine—boy, was I in for an education.
Just like me, it seems as though the driveline in my old hot rod was wearing out. Both of us had begun to exhibit the telltale signs of old age—a lack of power, some wheezing, spitting, sputtering, and on occasion, a bit of smoke out of the old tailpipe—if you know what I mean. But unlike me personally, there was something I could do to refresh my old Model A—I could yank out that tired Ford and rickety Cruise-O-Matic and replace it with fresh new items. This route would allow me to grant that aging hot rod a fresh new life—it wasn’t going to do me any good personally but at least one of us would get a new lease on life.
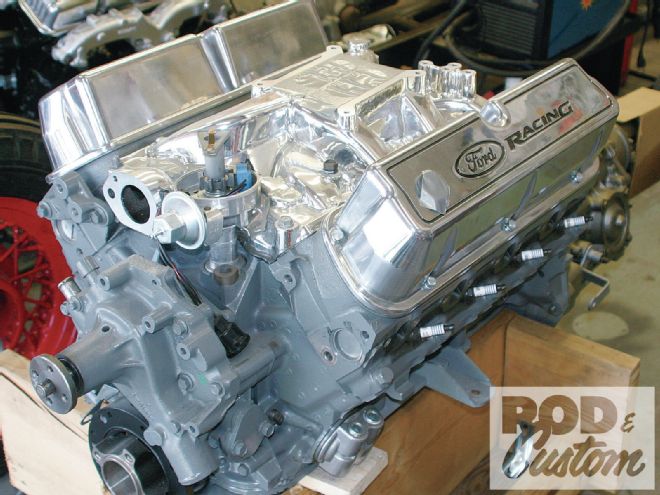
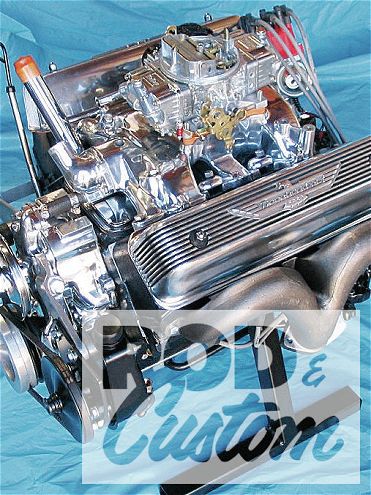
As I mentioned, the A was powered by an old 289—an early ’64 five-bolt bellhousing version at that. I knew I wanted to retain the Ford driveline rather than throw a small-block Chevy in the ol’ gal. So with that in mind I hit the Ford Racing website and began perusing their crate engine listings. It didn’t take me long to decide on which engine I wanted. The crate engine I chose as the 289’s replacement was the M-6007-X302, a 306-cube (at 5,500 rpm) small-block that utilizes an OEM precision remanufactured block and cast-iron crank. It’s also outfitted with forged pistons, a hydraulic roller cam, a set of aluminum 64cc performance heads, and a bunch more Ford Performance components. Not too shabby for a crate engine with a retail price under $4,000!
With a fresh engine like the M-6007-X302, my ol’ Cruise-O-Matic wouldn’t have stood a chance, so I hit my local transmission rebuilder and picked up a fresh C4. My new SBF arrived in just a few days and since I’d already picked up my new trans all I needed was a bit of free time to get out into the garage and perform the swap.
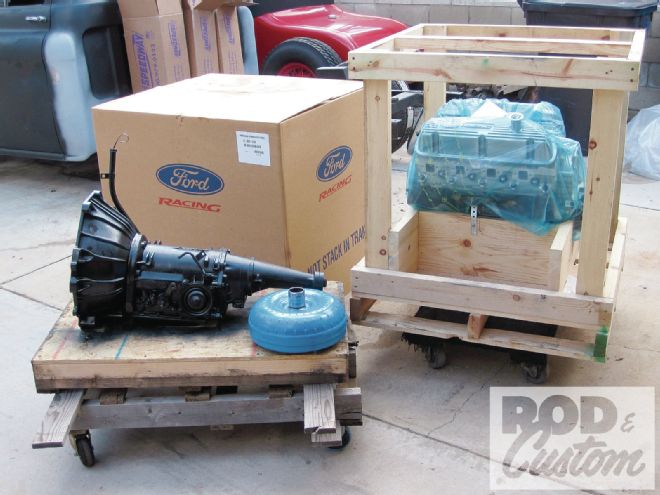 In anticipation of the driveline swap I’d not only ordered a new Ford Racing M-6007-X302 crate long-block, but a newly rebuilt C4 trans and converter from my local transmission shop. Though the tranny is nothing special, the X302 is a powerful 306-cube, 340hp brute that’ll be way more than enough to breathe some life into the ol’ Model A.
Well, a good two or three weeks went by before I had a free weekend but I did finally get out there and got to work. I tore into the old driveline and began tearing it down so I could yank the old 289 and tranny out and begin transferring some of the odds and ends I planned on reusing off the old engine. That’s where I began on the wrong foot. You see, I’m not the most experienced person when it comes to engines, and of course I began thrashing without spending too much time with the installation instructions. I stripped the old engine of its pulleys and distributor, unhooked all the wiring, and drained all the vital fluids. As the fluids were draining I slid under the A and dropped the driveshaft, removed the tranny cooler lines, and loosened the trans and engine mounts. So far, so good.
Once the old engine and trans were removed and sitting on an old dolly I was ready to begin transferring some of the components I knew were still in good shape from the old engine to my new crate engine—and this is where I began getting myself into trouble. To me, a small-block Ford is a small-block Ford. The 289/302s have been basically the same for ages—at least that’s what I thought at the time, but boy was I in for a surprise.
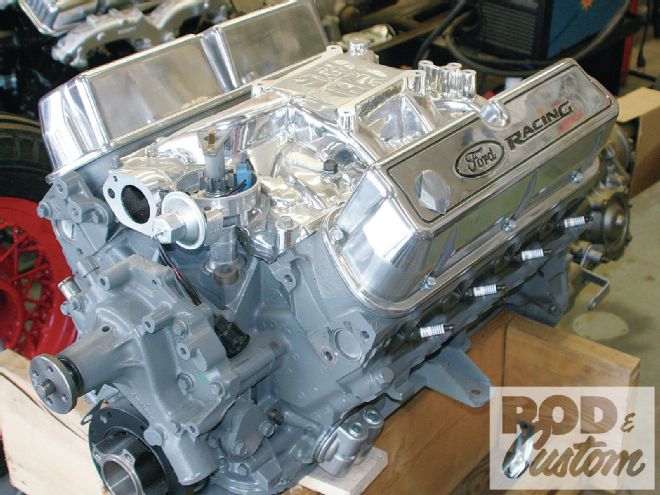
My first inkling that things weren’t going to go very smoothly was when I began to swap the almost-new water pump from the 289 to the X302. I wanted to equip the new engine with the early style V-belt rather than a serpentine setup since the A was built in a traditional style. The pump looked as though it would fit but once I attempted to bolt it on it didn’t take long to see that it wasn’t going to fit, well, it would bolt in place, but it wasn’t going to seal correctly. Jeez, maybe I should’ve taken a look at the installation instructions beforehand after all. Once I did, I learned that there was a recommended water pump listed in the instructions. For a standard-rotation pump the instructions recommended water pump PN M-8501-G351. Luckily for me my local Ford dealership had one in stock. This was just the first situation that caused me to stop wrenching and hit the road on a parts run.
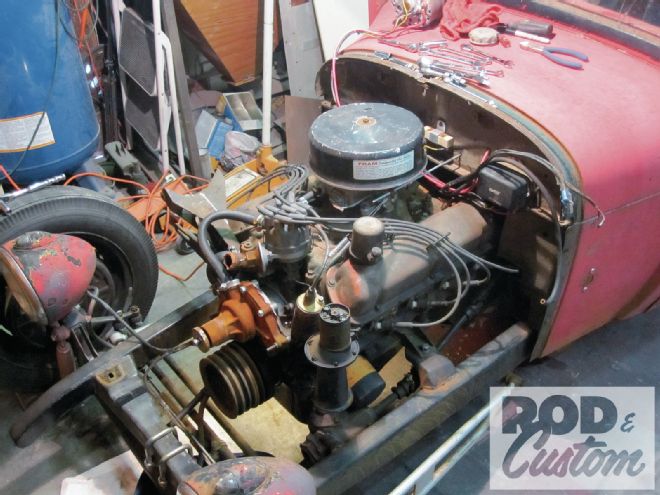 The swap began by readying the old engine and trans for removal. I planned on reusing a few of the newer parts on the old 289 on the fresh engine. I thought that things like the new (sort of) water pump, pulleys, and distributor would work—so I thought.
Once back home I installed the pump without a problem—or so I thought (we’ll get back to this later). Next, I pulled the flexplate off of the old engine and, using a brand-new set of crank bolts, attached it to the crank. After that I prefilled the new torque converter, slid it into place on the fresh C4 trans, and bolted the tranny to the new block. I also swapped the engine mounts from the 289 to the X302 and, using my handy cherry picker, slid the new engine/trans combo into place between the A’s framerails and bolted it into place. It was shortly after this that I ran into a couple more discrepancies.
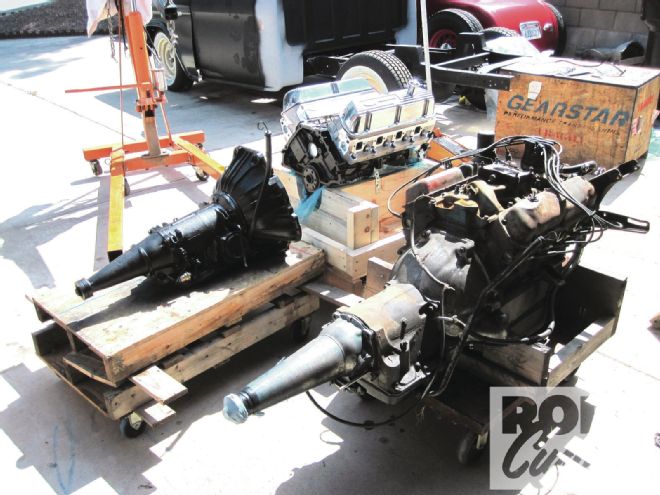 After the 289 and Cruise-O-Matic were out and the new X302 and C4 readied for assembly, I noticed the first big difference between an early and late small-block Ford. The early engine had a five-bolt bellhousing while the new one was a six-bolt. From what I understand small-blocks from mid-’65 and up are all six-bolt.
The first was the realization that the crank and water pump pulleys weren’t going to work. The new balancer had a different bolt pattern and even if it did fit, the crank pulley would touch the bottom edge of the water pump pulley. This was getting to become a bit aggravating. I jumped in the car and headed to the local bone yard to hunt up a set of pulleys that’d fit. After an hour or so I found a later-model F-150 that had a pair of pulleys that looked as though they’d fit and headed back to the garage. Once home with the new pulleys that did fit (thank goodness) I thought it may be to my advantage to research the balance of the task to see if I was going to run into any more surprises. I called a friend of mine who’s a lot more engine savvy than I and explained to him what I’d been through so far. After he stopped chuckling he informed me that the engine and trans needed to be pulled back out and the flexplate from the old 289 removed from the X302. According to him, the early 289 was built to use a 28-in/oz reciprocating assembly and newer (I believe he said post ’81) engines use a 50-in/oz setup. He told me that if I had proceeded I would have rattled the engine to bits because it would have been out of balance. On his recommendation, I hit the Ford Racing Performance Parts website and found the appropriate tech note section for the X302, which indeed stated the need for the 50-in/oz balancer and flexplate combo (the crate engine comes with the correct harmonic balancer). The X302 requires flexplate PN M-6375-A50 for automatics, or flywheel PN M-6375-B302 for manual shift vehicles. Needless to say, I was done for the day, shaking my bowed head all the way to the shower.
The following Monday I started my search for the correct flexplate, finding a TCI Automotive branded plate in my latest Summit Racing catalog. I immediately placed my order and the new flexplate showed up in a couple of days—just in time for another weekend out in the garage.
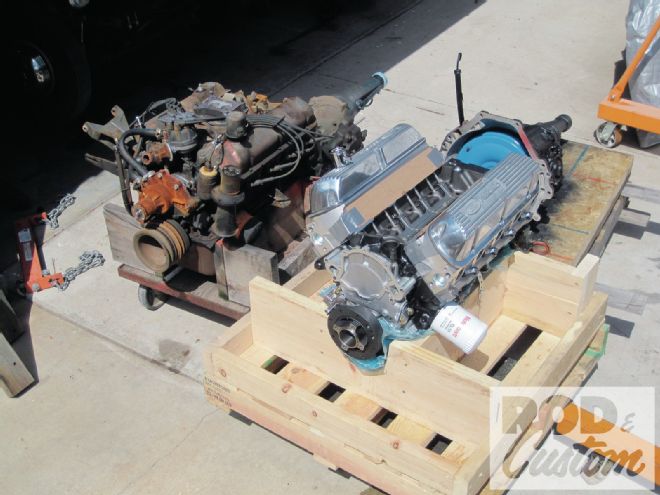 Looking at the front of both it looked as though the water pump, distributor, and pulleys would work on the new engine. At that moment I thought that’d save me a bit of cash as well as time.
Bright and early that next Saturday morning I headed back out to the garage to hopefully finish up what I’d originally thought was to be an easy engine swap (though, if only I’d had the foresight to read the engine installation instructions beforehand I would have saved myself a bunch of work and a lot of heartache). After replacing the flexplate and reinstalling the transmission I went ahead and installed the assembly into the Model A for the second time.
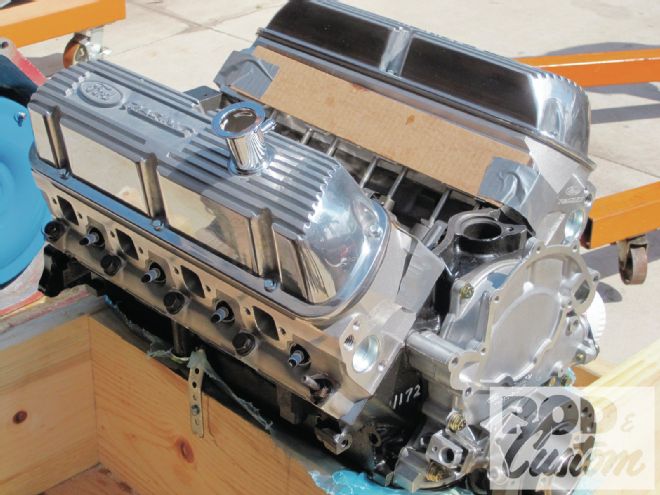 Another thing I noticed about the new crate engine were the partially threaded holes in each of the engine’s aluminum cylinder heads (arrows). A call to the Ford Racing tech line informed me that these were for use with what they call “thermactor tubes”. These tubes are used on vehicles fitted with emissions provisions but in off-road or pre-emissions usage they can be blocked using a plug set available through Ford Racing. I didn’t want to take the time to order the real plugs so I quickly fashioned some out of a quartet of 5/8-11x1-inch bolts.
The Ford Racing M-6007-X302 is a long-block assembly; no intake, carb, or distributor (as well as the aforementioned pulleys, water pump, and flywheel/flexplate). Once the assembly had been reinstalled, my next step was to install an intake manifold and carb. The Ford installation instructions do give you a Ford Racing part number for intake gaskets, and though you’d think I’d have learned my lessons with my previous incorrect assumptions, I went ahead and used a set of Fel-Pro gaskets I’d purchased ahead of the engine swap. Everything seemed to be going along just fine. I installed the new intake and torqued it down in the correct sequence and to the correct specs, bolted up my new Summit Racing 600-cfm four-barrel carb, and dropped the nearly new distributor in place. Then I installed a fresh oil filter, fresh oil, and finished filling the C4 with fluid. I also hooked up the radiator hoses, belts, fuel line, and attached the throttle linkage.
I had just finished double-checking the timing and marking the distributor location so I could pull it and prime the engine before start up when I noticed that the aluminum heads each had a large, partially threaded hole bored front-to-back—what now? This time I had the presence of mind to dial up the Ford Racing parts tech line before going any further. I got through pretty quickly and asked the tech guy what the heck those holes were for. Well, come to find out, the holes are there to accommodate what they call “thermactor tubes”. These tubes are emissions related and normally bridge the holes from side-to-side (one on the front of the heads and one on the rear of the heads). These are not needed on non-emissions vehicles and can be plugged with a plug set sold by Ford Racing. Well, not wanting to stop the install and hold off to the following weekend for a second time, I measured the holes and found they were 5/8-inch diameter with an 11-thread pitch. I jumped in the car once again and hit my local hardware store and picked up four 5/8-11x1-inch bolts to use as plugs. I got back to the garage and cut the hex heads off the bolts and using my die grinder cut slits into the bolts so they could be installed flush to the heads using a screwdriver. Thinking I’d passed the last of my hurdles, I dabbed the newly fabricated plugs with a bit of antiseize compound and sealed all four holes—now I should be ready to fire that baby up.
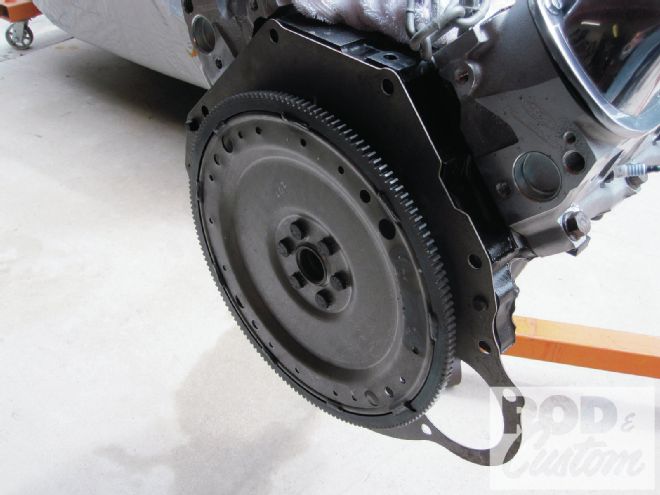 Among the parts I thought I’d use on the new engine was the 289’s flexplate. I removed and mounted it to the X302 with a set of fresh flywheel bolts and lock washers and then mated the new trans to the engine. From there I moved to the front and began to swap the front crank pulley as well—that’s when I found that the old pulleys wouldn’t fit the new X302 anyway. This problem resulted in a bit more investigation and thankfully I learned another important difference between early and late Ford small-blocks. Later engines use a 50-in/oz balancer and flexplate combo not a 28-in/oz setup as used prior to 1981. Come to find out, if I’d been able and did use the older flexplate and balancer/pulley assembly I would have severely damaged the X302. So, the time I saved by making my own plugs for the heads was used to order up the correct flexplate and to find the matching pulleys needed.
After double- and triple-checking all of my connections, fluids (including electrical), and making sure all was ready for the initial fire up, I hopped behind the wheel, pumped the gas pedal once or twice, and turned the key. I honestly expected the engine to come to life almost instantly but, par for the course, all I got was a few pops and coughs. Jeez, maybe I’ve got the distributor off by a tooth? I climbed out from behind the wheel, brought the engine back up to TDC, and pulled the distributor cap to take a look. It looked as though I had it installed on the money, so why the popping and stuttering? I then twisted the distributor, advancing it as far as I could and gave it another try. It turned over and caught for a moment but then backfired through the carb and stalled right out. Now what? I must have pulled and reinstalled the distributor five times with the same result—a few chugs followed by a rather large backfire. At this point I was fit to be tied. What in the world was going on? I went over the firing order and all looked to be fine. The wires were all in order for a 289/302, what could be the problem?
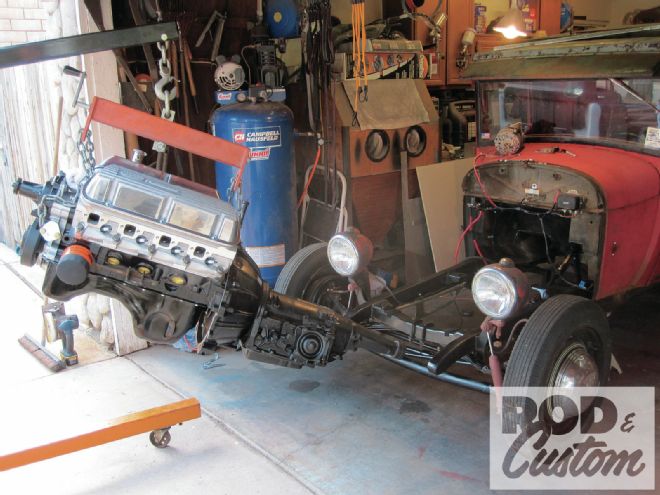 This engine swap was certainly a good learning experience for me. Before attempting this job I had no idea of the differences between vintage Ford small-blocks and late-model ones. Luckily I did no permanent damage, but in my haste to swap out the old for the new I could have really ended up with a mess on my hands.
Close to losing it I grabbed the installation instructions one last time; there had to be a simple reason why this thing wouldn’t run and I was determined to find out what it was. Well, lo and behold, I found the answer. The X302 uses the 351 Windsor firing order! No wonder it wouldn’t run! I quickly redid the plug wires to the correct firing order (1-3-7-2-6-5-4-8), wiped my brow, and climbed back behind the wheel to try again. This time it fired up—but only for a moment. It backfired again and died just like it did before. At that point I left the garage and headed to the patio—more than just disappointed, I might add.
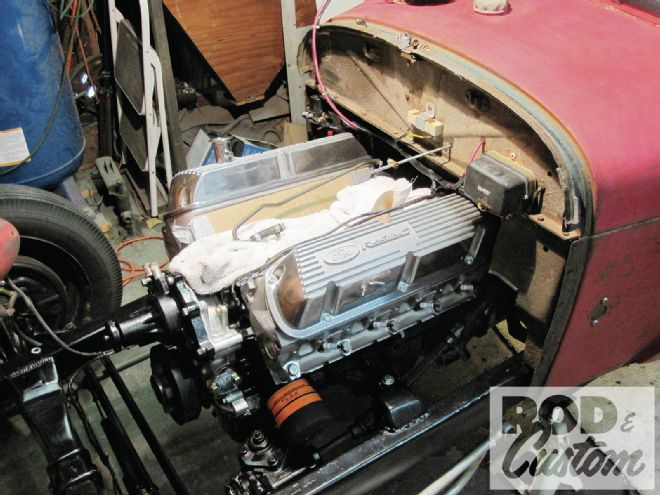 In spite of my ignorance I did finally get the fresh engine and trans installed. I’ve also learned my lesson when it comes to utilizing the installation instructions supplied along with new parts and components.
The following morning I wandered out to the garage and began to go over in my mind all the steps that led up to trying to fire up the X302. As I bent over the engine trying to figure out what I’d done wrong I just happened to notice what looked like small gaps at the junction of the intake manifold and the cylinder heads. Were those dark lines gaps between the intake gaskets and heads or was it my imagination? Using my remote starter switch, I put my finger tips on one of the dark lines and hit the starter. Wouldn’t you know it, I could feel both suction and blow back as the engine turned over. The intake gaskets weren’t sealing the junction of the intake and heads! I had a giant vacuum leak! No wonder it wouldn’t run!
Come to find out, the reason the Ford installation instructions suggest using specific Ford intake gaskets is so situations like this do not happen. As a matter of fact, upon rereading the instructions I noticed that it said intake gaskets PN M-9439-A50 were required, not suggested. Cursing myself I jumped in the car and headed back to the Ford dealer to pick up a set.
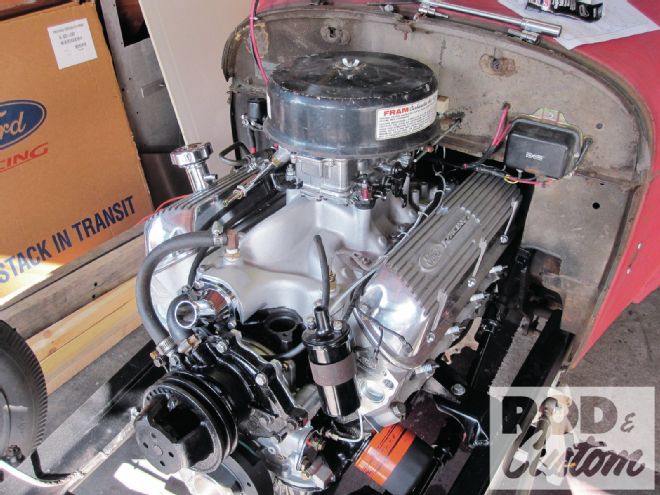 The balance of the engine and transmission swap went on with only a couple more hiccups but in the end it all worked out. Now that the pickup is back on the road I’m more than happy with the new Ford Racing X302 and for a retail price of under $4,000 you can’t find a better small-block Ford crate engine.
After picking up and installing the correct gaskets, my new engine fired right up and purred like a kitten. In fact, PN M6007-X302 is about the most powerful and best running small-block Ford I’ve ever owned. And let me tell you, all of these problems and heartaches could have and would have been avoided if I’d only taken the time to read through the paperwork that came along with the engine. Believe me, I’ll be reading any and all of the instruction sheets I get with any parts, components, and tools I purchase from now on. Hopefully, by exposing my stupidity I’ll have helped someone else avoid the aggravation and heartache I brought upon myself. Just take a couple of minutes and read the instructions, you’ll be glad you did, believe me.
Small-block Fords have been produced in displacements ranging from 221-400 ci, but as you might guess by now, there were a number of different series of these engines. The 221/260/289/302 engines were the Fairlane series, and then there are the 351 Windsors, 351 Clevelands, and finally the 351M and 400s. Interestingly, some aftermarket suppliers don’t classify the 351 Cleveland or the 351M/400 engines as small-blocks, presumably due to the large, canted-valve heads. But since they feature the same 4.380-inch bore spacing as the Fairlane and Windsor engines, and Ford Racing Performance Parts classifies them as small-blocks, that’s good enough for us.
Y-Blocks: Displacement Years Produced 239 1954 256 1954 Mercury (trucks 1954-55) 272 1955-57 (trucks 1956-58) 292 1955-62 (trucks 1958-64) 312 1956-60 Bellhousing pattern is Y-block only
FE Series: Displacement Years Produced 332 1958-59 (trucks 1956-63) 352 1958-66 (trucks 1965-67) 360 de-stroked 390 (trucks 1968-76) 361 1958-59 Edsel 390 1961-71 (trucks 1968-76) 406 1962-63 410 1961-71 427 1963-68 428 1966-70 Bellhousing pattern is FE only
385 Series (Lima): Displacement Years Produced 370 (trucks 1979-91) 429 1968-73 460 1968-78 (trucks 1973-91) Bellhousing is 385 series and 351M/400 small-block
Fresh Horses
Sources
Ford Racing
Performance Parts
(800) FORD-788
www.fordracingparts.com
Summit Racing
(800) 230-3030
www.summitracing.com
Speedway Motors
(800) 979-0122
www.speedwaymotors.com