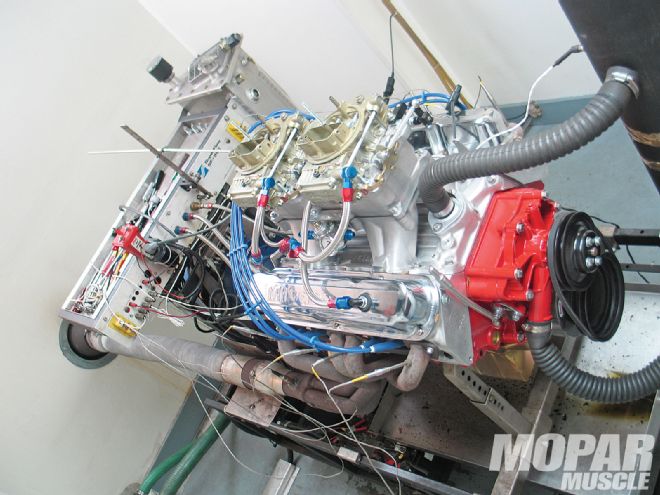
In our July 2010 issue, we showed you how we took a bunch of parts and put them together to build what we're calling an "Old-School" engine. The main premise of the build was to relive a time we remembered when overkill was the norm. It used to be conventional thought that bigger was what it took to build power-a bigger cam, bigger compression, and bigger carburetion. Now, however, smooth idle quality and the ability to run accessories like air conditioning and make power is normal. Anyway, another premise of our build was to simply take a bunch of parts and bolt them together without any trick or fancy machining-except where it was required-and let the horses run where they may.
By not getting deep into performance machining (i.e. head porting, gasket matching, and the like), we have definitely left some power on the table, but we wanted to show you guys what you could build yourselves, without spending a lot of money on machine work.
To give a quick refresher, the engine is a 4.060-inch over-bored 340 resto block, filled with a Mopar four-inch crankshaft, Eagle connecting rods, and Keith Black forged pistons that we got from Summit Racing. The camshaft is a solid-roller design we got from Comp Cams, with .619/.615-inch of lift, and .274/.280-degress of duration at .050-inch lift. Until just recently, adding a solid-roller camshaft to a small-block Mopar required some substantial machine work, but thanks to Comp Cams' new lifters, that's no longer the case.
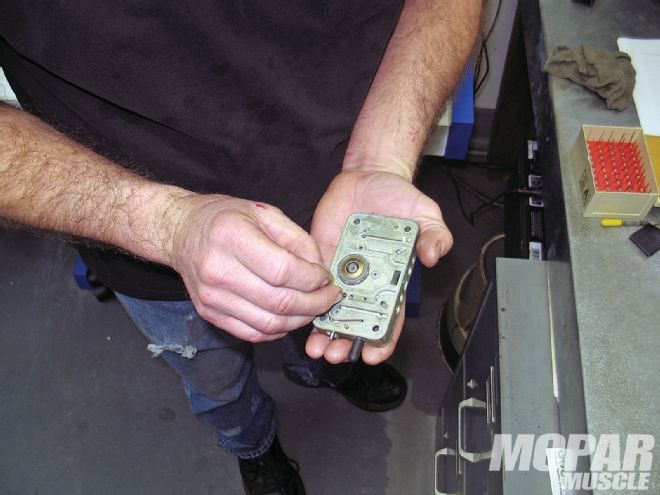 One of the first things we had to do just to get the engine to idle, was change the power valves. We removed the factory 6.5s and finally settled on 2.5s.
Topping off the assembly is a pair of Mopar aluminum heads and a Weiand tunnel ram with two 465-cfm Holley carburetors. This thing looks cool, but how will it run?
On To the Lie Detector
When we got the Old-School engine bolted to the dyno at Automotive Performance Engines, the first thing we needed to do was get some fuel. Remember, this engine is running 11.94:1 compression, so a regular, corner station, pump fuel isn't going to cut it. For our testing, we decided that a quality, higher-octane fuel would be required. Since we have used Rockett Brand fuels exclusively in our AMSOIL/Mopar Muscle Engine Challenge with no problems, we figured that using their fuel for our testing would be a no brainer. What the guys at Rockett Brand recommended was that we use their 100-Octane Unleaded fuel. From idle all the way to 7,200 rpm, we had no fuel related issues.
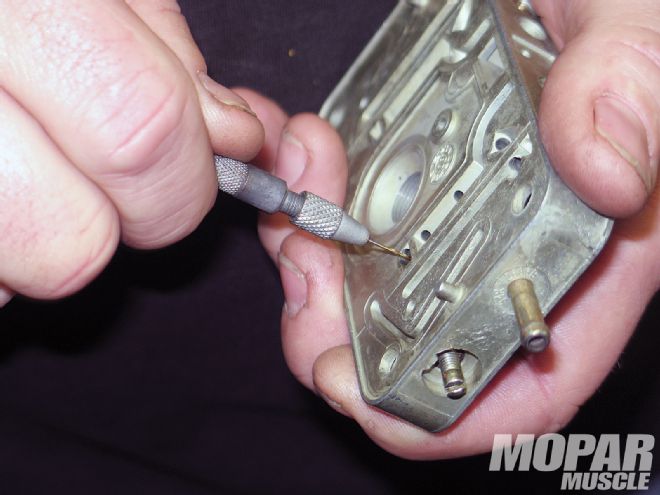 We also needed to open up the idle circuit a little bit. If you don't have any experience with this modification or the use of an o2 meter, this modification may not be for you, as you can really mess up a carburetor by not doing this correctly.
When it comes to breaking in a camshaft-or the engine for that matter-wiping out a cam lobe because of the new oil formulations has become a real concern for car guys using flat tappet camshafts. Although we're running a roller-tappet camshaft, we still wanted to be sure we had a good quality oil to ensure we had no oil related issues-enter Comp Cams. Yes, we said Comp Cams. Who else but a camshaft manufacturer would be able to design a break-in oil to give you the best break-in protection for your camshaft?
When we first fired the Old-School engine, we immediately learned that the factory installed power valves in the carburetor weren't going to cut it. The carburetors came from the factory with 6.5 power valves, and we dropped them to a 2.5 right off the bat. It helped, but the idle circuits in the metering plates also needed some fine tuning. Adjusting the idle circuits requires drilling the orifices. Once we were able to get the engine to idle properly, we made a full "short" pulls just to see where the air/fuel ratio was. We found that we needed to add a little jet to the primary side of the carburetors. After a small jump from the stock jetting up to 64s, the primary sides were good to go.
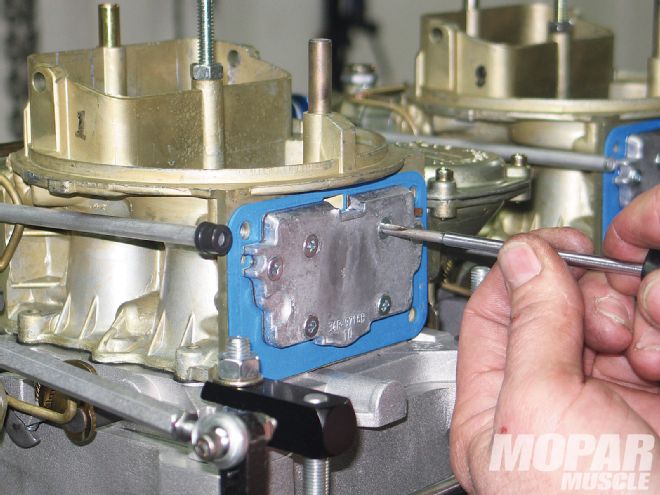 When it came to the secondary sides of the carburetors, simply changing jets was not an option. There are small orifices at the bottom of the plate that get drilled out to richen the mixture. Be careful you don't go too far. Making a drilled hole smaller is harder than making it larger. We ended drilling the plates out to an equivalent of 83 jets.
With the primaries set, we throttled the engine up a little higher to see what the air/fuel mix did when the secondaries opened-it was lean again. Since these carburetors have a metering plate for the secondaries instead of a jet plate, small orifices must be drilled since a "jet change" isn't possible. After a couple of small changes of making the orifices larger, we had our air/fuel where we wanted it.
When it came to timing, we started with 34 degrees of total timing and varied it two-degrees advanced and retarded, but found out that the engine liked 34. The valve lash was set at the recommended .016 inch and .018 inch.
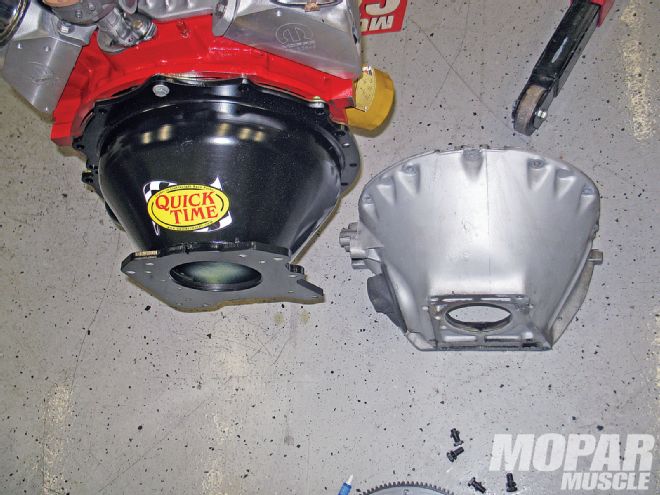 Like we said, we got a Quicktime bellhousing for the added safety of a steel piece instead of the factory aluminum one. The Quicktime unit isn't an oversized, stamped bellhousing, and fits a lot nicer than other aftermarket bellhousings.
After several hours of tuning, we finally ended up with 519.9 horsepower at 6,000 rpm, and 509.7 lb-ft of torque at 4,000 rpm. Like we said, we left a little on the table by not getting in deep with machine work, and the dented 15/8-inch headers we used on the dyno surely cost us some power, but you get the picture. By the way, we placed a challenge on our website for you guys to guess how much horsepower this engine made, so check out www.moparmusclemagazine.com and see who won the horsepower guess.
A New Home
When we got the engine back to the shop, it was time to place it in its new home-Project Valiant Effort. We needed to make a few small changes for the engine install. Things like the 21/2-inch exhaust already on the car were perfect for our original engine, but this thing needs to move more air. Not only that, but we wanted to make some noise. To that end, a Flowmaster Universal Scavenger X-pipe kit and their Super 40 mufflers came into play.
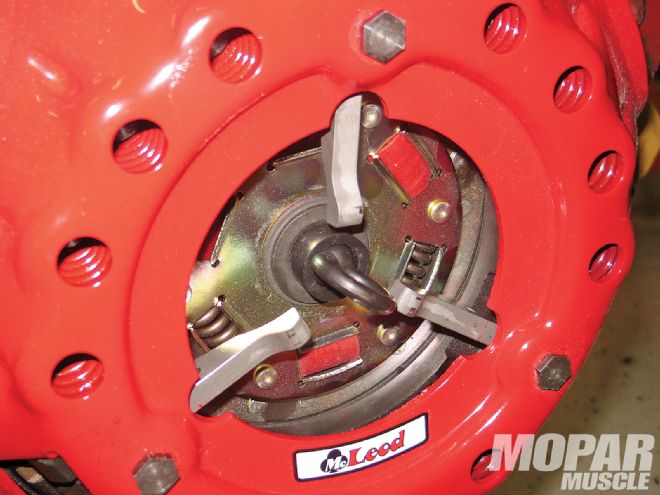 Before tightening down the pressure plate, make sure the disc is aligned.
When you need to transfer a lot of power through a clutch, just any old clutch won't do, so we contacted McLeod Industries for one of their Borg & Beck/Long style of clutches. The McLeod flywheel is an SFI-approved unit, but for added safety, we also contacted Quick Time Performance about one of their bellhousings. The Quick Time bell is not simply "stamped" from a piece of steel. The QuickTime "cone" is spun, and this allows the QuickTime Bellhousing to be the most dimensionally stable bellhousing available. Also, unlike other "stamped" bellhousings, the QuickTime bellhousing also doesn't take up any more room than a factory bellhousing, so you know it will fit
Finally, we know that the Valiant's hood is going to be in the way, so for now it's removed. It definitely looks old-school without a hood, but we might get a fiberglass one to put on the car. The only thing left is to take the car to the track, and after some break-in time, you bet we will-we'll let you know how it goes. Until then, check out the video of the car proving its "streetability," and go along for a ride with our "Old-School" engine at www.moparmusclemagazine.com.
414 HP & Torque RPMTorquePower 3,500474.8339.5 3,600483.0353.9 3,700486.6364.8 3,800490.3379.3 3,900505.3392.9 4,000509.7410.6 4,100505.1430.1 4,200504.6445.6 4,300504.4450.0 4,400499.5455.9 4,500499.0472.0 4,600497.8480.2 4,700494.8489.3 4,800498.6494.8 4,900497.3495.0 5,000494.9509.4 5,100494.2507.3 5,200486.9508.9 5,300480.7510.0 5,400480.0510.4 5,500479.3512.4 5,600462.6514.6 5,700453.4516.1 5,800447.1518.0 5,900445.8518.8 6,000430.5519.9 6,100422.3517.5 6,200410.8514.0 6,300399.0494.3 6,400385.5489.3 6,500380.0489.3