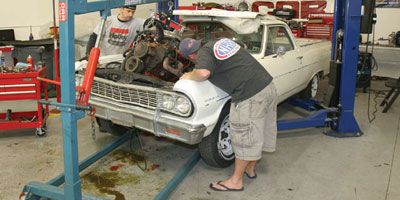
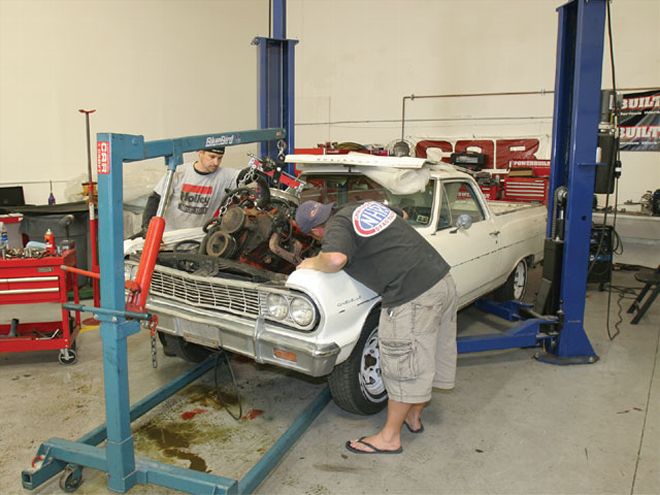
The idea is to get the large hard-parts into the car, then follow up with the details, like dialing in the transmission electronics, the fuel injection, and tidying up the lists of all the little components beyond the scope of this story. The '64 El Camino still had the original 283 V-8 that smoked like the stack at Burger King. We shoved the powerplant into a corner for a rebuild later.
Over the last two or three years, we've noticed the price for a Gen III V-8 has dropped from $5-6K to as low as $1,500 for a 5.3L engine and transmission from a pickup truck, and $2-3K for a 6.0L from a crashed van or Escalade. Aluminum LS1 engines from the Camaro/Firebird are also dipping into the $3,000 zone. We even pulled a truck engine from the yard and built a 480hp 6.0L for less than $3,800. But up until now, we've never tried to put one in a car.
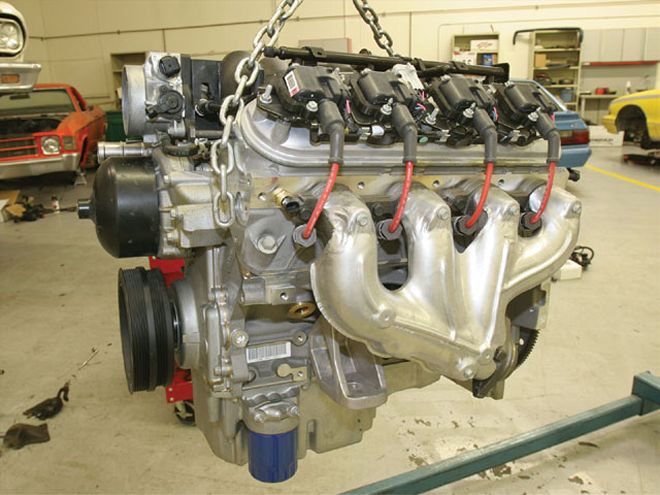
We were told our engine was from an '04 GTO, making it an LS1. We ran the digits on the block and discovered that 12561168 is an LS6 casting number, and the 241 stamped on the head and oval exhaust port meant the heads were from an LS1 (LS6 ports have a D shape). Regardless of where you source your engine, the important things to know are how many teeth are on the crank trigger and if the engine is from a Corvette (Y-body), Camaro/Firebird (F-body), GTO, or truck. You are going to need that basic information to pick pulleys, the oil pan, and a wiring harness.
The reason for our fear largely stems from rumors we've heard about incompatibility and fabrication requirements related to the installation of a Gen III into a musclecar. We've also heard it can get expensive, but we've never seen a real dollar amount. That's all going to change as we do this engine swap the Car Craft way. We'll show you every dollar we're forced to spend, every mistake, and every short cut, so you can spend the good money on only the parts you need to get the engine in the car and running, then decide if you want to go for that new blower.
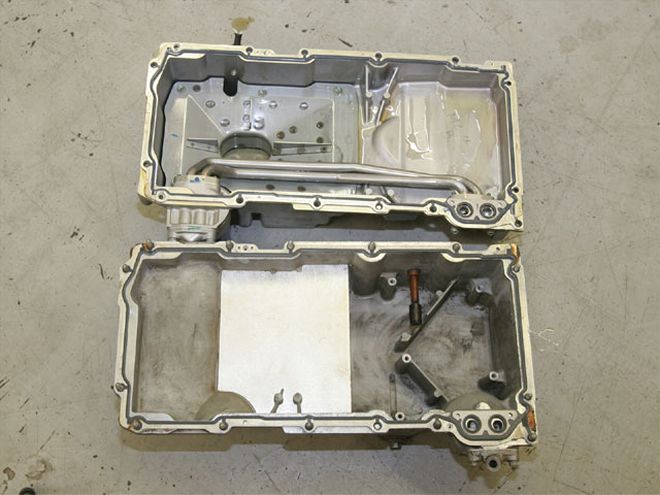
The oil pan from the GTO had a front sump that crashed into the crossmember on the El Camino. We've heard that a stock full-size truck/SUV pan will fit this application but hangs really low. If you score a Camaro/Firebird engine, the pan can be modified to work on your Chevelle or El Camino by Street and Performance (S&P) in Mena, Arkansas, for about $265 exchange. In the photo, the upper pan is from the GTO and the lower pan is the modified one from S&P. Note that the GTO relocates the filter to the front sump (on the left) and the modified F-pan does not. The F-body pan also has an oil-cooler bypass fitting (lower right) that can be tapped for a manual oil-pressure gauge.
The victim is a '64 El Camino we picked up for $2,000, with some real Midwestern rust and truck-like fatigue that guarantees we're giving you the real deal, not some cherry with squeaky-clean floorpans we picked up in Arizona or California. It is a 283/Powerglide car with a 10-bolt differential and dents and problems everywhere. We chose it to prove that you can still find a '60s El Camino any day of the week, and aside from the bed and frame, they are the same as any '60s Chevelle in terms of bolt-ons and engine fitment. And since it is a Chevy, the parts we add will likely work on your early Camaro, C10 truck, and maybe even your Nova. Later, as we add performance goodies, the things we learn will apply to your '98-and-later Camaro, Silverado, Corvette, and anything else with one of these powerplants. Interested? Read on.
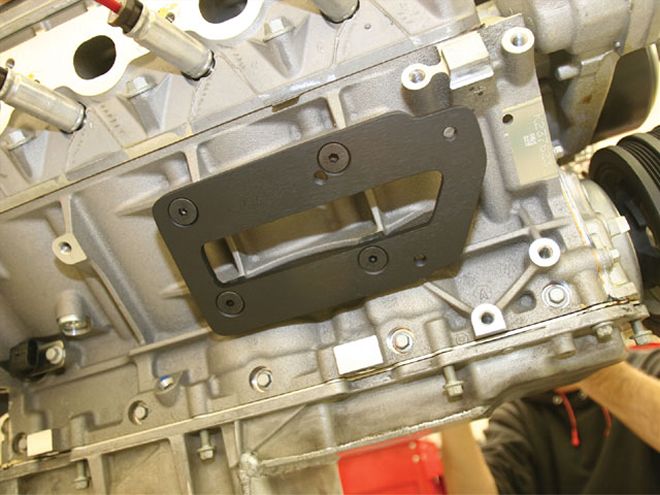
There are several companies selling engine-mount kits for this swap, but it all boils down to a couple of different styles. The weld-in style is flexible, so you can add any combination of engine/transmission you'd like by simply bolting the mounts to the engine, lowering it onto the crossmember, and tack-welding it in place. It's perfect for fitting this combo in a street rod or something with a custom chassis. The other way is to relocate the stock engine mounts on the block using an adapter plate. It puts the engine in the stock small-block location using the original engine perches, helping parts from other aftermarket companies such as headers, modified F-body oil pans, and transmissions bolt right in. The engine adapter we used was from Hooker Headers. It cleared the firewall and all the stock El Camino bits with no problems.
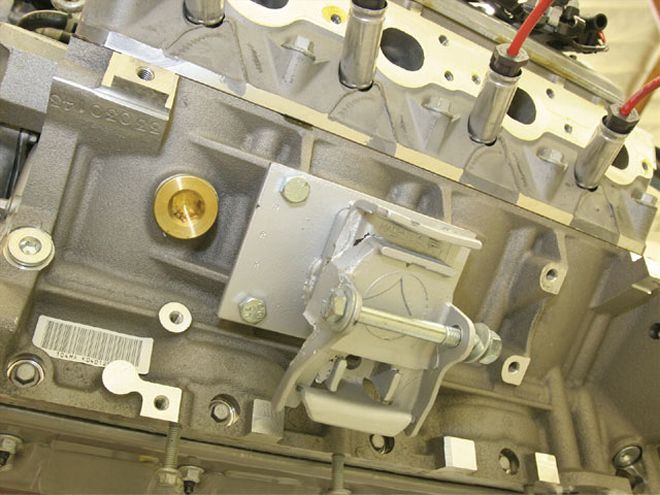
This is the other kind of engine mount offered by BRP. We test-fitted it into the '64 and found that we could move the engine anywhere we wanted under the hood. If we'd gone for a wacky six-speed or an altered firewall, we would have used these.
Accessory Drives
The accessory drive has always been a deal-breaker for this swap. The problem is that the accessories, such as the power steering and A/C compressor, sit low on these engines, and on the '64-'72 Chevelle/El Camino, they interfere with the crossmember and steering box. So when you score that killer LS1 off of eBay for $3,000, you get stuck with that accessory drive.
One option is using a truck accessory drive. It's ugly, but it's the cheapest way we've seen to get everything on the engine. The downside is that both the alternator and the power-steering pump are placed high on the driver side of the engine and will interfere with the stock throttle body on an LS1 intake. So you either swap to a truck EFI intake, swap to a carbureted intake (which is a whole other story), or modify the idler pulley location and bend the outlet on the water pump to 90 degrees to clear the belt. We've seen this mod performed by the guys at Speartech Fuel Injection Systems. It's pretty hard-core. Also, the truck crank pulley is longer than the F-body and Y-body pulleys, moving everything closer to the radiator.
Most of the engines we've seen in the wrecking yard and online have a 4L60E hanging on them for just a few dollars more. Nearly all the companies we talked to assumed that's what you'll use. And why not? The 4L60E has a 3.06:1 First gear and a 0.70:1 Overdrive. If you are using a transmission sourced from the classifieds or somewhere else, check the number of pins on the large gray wiring harness connector. If it has 13 pins, you can use it for this swap. If it has 12 or even 15, you'll need a different flexplate to get it to correctly bolt to the torque converter. If you don't get the engine and the transmission as one package or you are using parts sourced from different places like we are, you can buy a complete kit from Keisler. The company calls it the A 41. It's essentially a 4L60E that has been rebuilt and upgraded to handle 450 to 650 lb-ft of torque, prepped for an electronic speed output, and is fully programmable. It even comes with a crossmember, a driveshaft, cooler lines, a shift linkage, and a lockup torque converter, and you can use it behind virtually any GM engine-fuel-injected or not.
The next best thing is to use the Corvette (Y-body) pulleys. We've seen them new for $600 on eBay, but that doesn't include the alternator or power-steering pump, and good ones will cost about $600 more from places like Rock Auto online. The Y-body system puts the alternator and power-steering pump up on the driver side in a less grotesque fashion than the truck pulleys, but we've been told by Mark Campbell at S&P that the Vette power-steering pulley can hit the upper A-arm on the Chevelle/El Camino.
You can always sell the F-body drives to a first-gen Camaro guy and do what we did: use the pulleys from Street and Performance. At $958, it's expensive until you add up the time and money it takes to cobble together a junkyard kit, not to mention the fact that this system is an actual engine dress kit, so it looks awesome with a trick power-steering pump and a rebuildable 140-amp alternator with an internal regulator included. We've used the phrase "spending the good money" before, and this is what it looks like. We rarely gush about off-the-shelf solutions, but we traded money for time here, and the serpentine system went on so easily we were laughing. If you have the cash, this is the way to go.
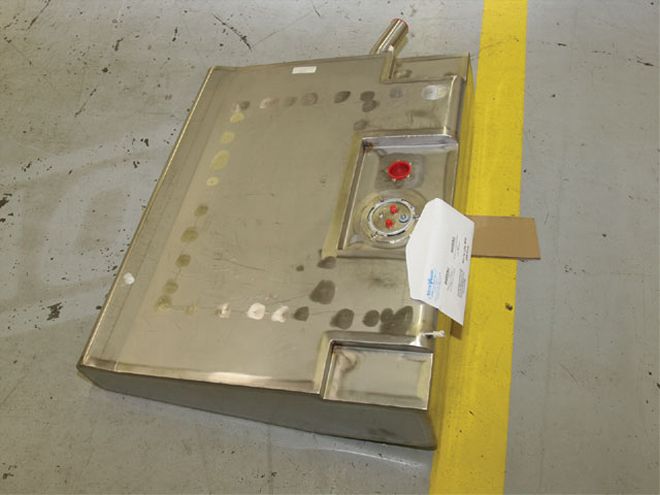
Rock Valley sells a modified El Camino tank for $910 that includes an LS1 pump already installed. Or you can upgrade for $200 more and get a stainless tank with a built-in pump, mounting hardware, and internal baffles for drag-racing or road-racing action.
Fuel System
We stuck with the fuel injection to keep with the salvage-yard theme and therefore we need to run something other than a mechanical fuel pump squirting 7 psi. In fact, we needed about 53-63 psi to run this system. There are a couple of ways to handle it. Competition Engineering sells a fuel sump kit to feed an external pump, but that comes with a cost. Puller pumps are less efficient and usually louder than in-tank pumps. Or you can send out your stock gas tank and have a pump kit installed, buy a new tank and send it out for a fuel pump, or buy one that is ready-made. If you do the math, a stamped-steel tank will cost about $200-$250, the pump kit is another $325-$375, and the labor is about $225, depending on the application. That's about $850 plus shipping to rework a stock tank. The alternative of course is to buy a tank that is ready for the job.
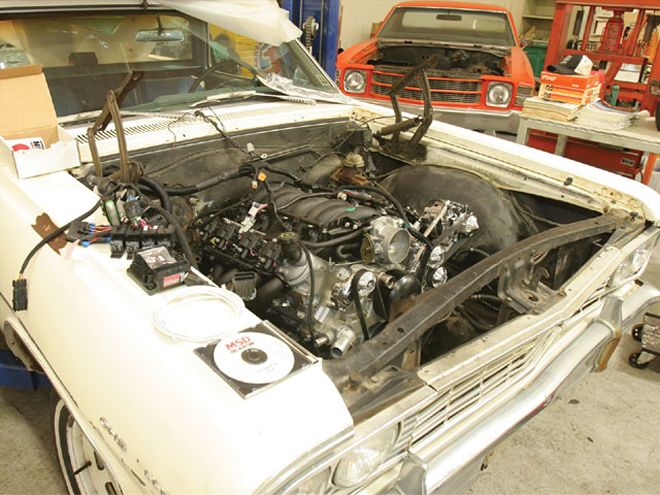
Since we aren't really interested in keeping the stock harness, we used the LS1/LS6 MEFI4 system from MSD. It allows us to tune the engine "live" or simply use one of the dyno-tuned calibrations that are preinstalled. It also allows us to switch from the factory mass airflow (MAF) system to speed density. All F-cars used MAF from the factory. There are also systems from FAST, Accel, and others that offer tunability. We'll run the wiring and tune this car up in a future article.
Wiring
If you are using an engine and transmission combination from a wrecked car or truck, you can have the original computer and wiring harness modified for your application by companies like Wait4Me Performance for about $300. By using the factory harness, you can utilize aftermarket systems like the FlashScan V2 stand-alone data logger and ECM reprogramming system from EFI Live or HP Tuners' VCM Suite to control the engine. You can also buy a premade factory harness from S&P for the same effect.
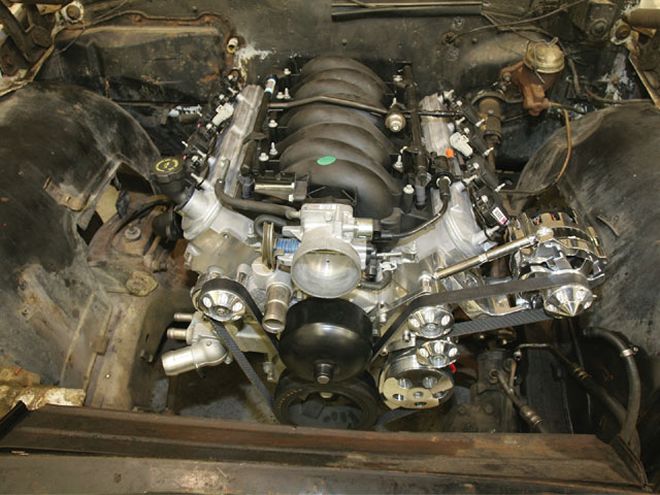
OK, so along with this huge story, we also managed to get the engine bolted into the car. When the radiator and headers get here, we will slap those in and write a story about how to wire the car and tune it along with some detailed information on the transmission controls. By then, your project might have caught up if you get to work now.
I've got a what?
If it says Corvette on the valve cover, it's likely a Y-body engine right? How do you know? Below are some quick spotters' tips for identifying your LS engine.
You might be asked if you have a 24x or a 58x crank trigger. An easy way to know is by the color of the plug near the flexplate or flywheel at the rear of the block. Gray is 58x; black is 24x.
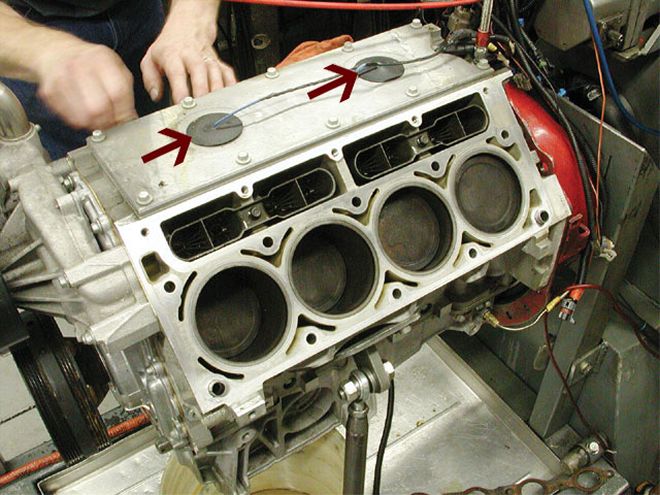
All Gen III LS1 and LS6 engines use an aluminum block. Truck engines used iron except for the aluminum LM4 5.3 that arrived in the SSR. The LS2 will have 6.0 cast into the block behind the flywheel. The LS1/LS6 will be 5.7 liters with a 3.89-inch finished bore, and the LS2 will have a 4.00-inch finished bore. LS1/LS6 is Gen III and LS2 is Gen IV. Gen IIIs also have a knock sensor under the intake and a cam sensor on the rear of the cam under the intake. Gen IV has knock-sensor locations on both sides of the block, and the cam sensor is in the front cover.
PARTS DESCRIPTION PN PRICE Boneyard LS1 N/A $2,500.00 GMPP LS1 Crate Engine 17801267 4,899.95 GMPP LS6 Crate Engine 17801268 6,295.99 Keisler A 41 transmission kit N/A TBA S&P accessory drive N/A 958.35 S&P modified oil pan N/A 263.{{{62}}} Rock Valley stainless fuel tank N/A 1,{{{100}}}.00 Milodon oil pan 30915 389.95* Milodon windage tray 32150 69.95* Milodon pickup 18290 87.39* MSD MEFI4 controller 240010 1,895.00* Hooker engine swap mount kit 12611HKR 75.00* MSD spark-plug wires 32813 64.40* Chevy LS1/LS6 V-8 Book N/A 13.{{{57}}}** Lokar throttle cable LOK-TC-1000LS1U 45.95 *Prices from Summitracing.com **Amazon.com