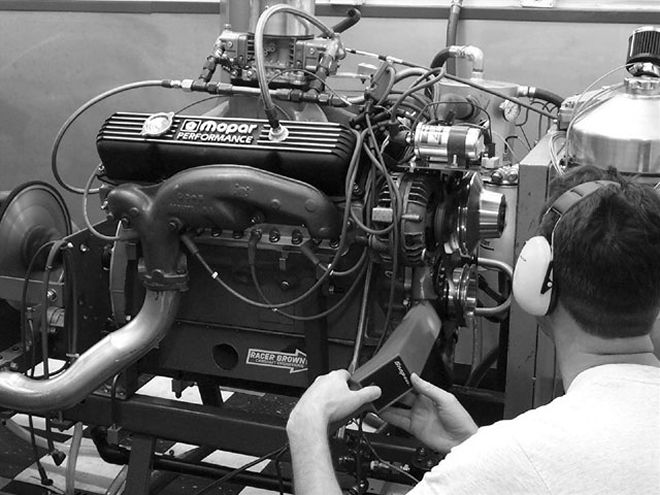
 With the right combination and tuning, respectable horsepower and torque numbers can be had using factory HP manifolds.
Bolting a set of headers onto your musclecar has to be one of the most popular modifications in the history of hot-rodding. Very few modifications add as much power as quickly and easily as a good set of headers. But given that, there are still a lot of people who for one reason or another don't want to put headers on their car. Maybe a guy wants to maintain an appearance of originality, or he doesn't want to deal with the extra heat and noise that a set of headers can cause. Sometimes there just aren't headers available for certain combinations of engine and body style, and, of course, there are the horror stories of poorly designed headers that don't fit until beaten into place with a sledgehammer and a torch. So for whatever reason you might have to stick with manifolds, we have some tips that will show you how to make big power without headers.
The Situation
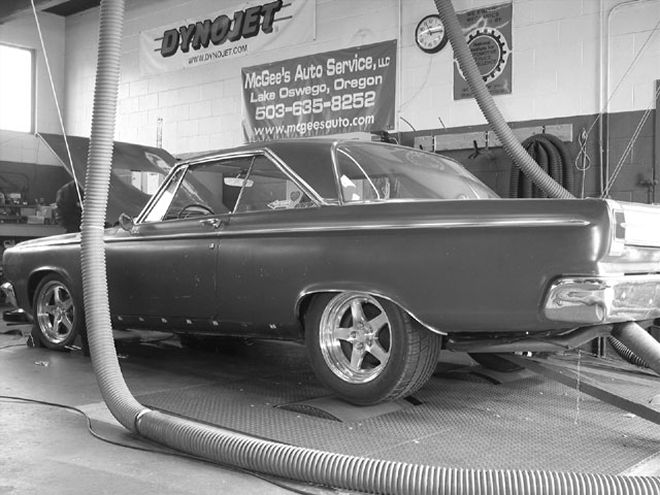
Our current project is a '65 Dodge Coronet 500 that we're setting up as a Pro Touring car. This car came from the factory as a 426 wedge, four-speed combination, so we could have just dropped the stroker motor into the factory location. But the motor is positioned fairly far forward on these early B-bodies, and that location isn't the best for weight distribution. So when we swapped out the factory four-speed for a Doug Nash five-speed, we went ahead and moved the motor back about 1.5 inches to improve the weight distribution.
The unique motor location in turn required either severe modifications to standard headers, or a set of custom headers. Neither of those options seemed too desirable to us, so the choice was made to go with a set of factory HP exhaust manifolds.
The Short-Block Combination
First off we have to say that this motor is not a drag race motor, but rather it was designed as a street combination with a big, flat (think Viper) torque curve. So it was important to us that we have a nice stable idle at less than 900 rpm and with 12 or more inches of vacuum. We also wanted to see a lot of torque on tap below 3,500 rpm, since that is where you use it in a street car. Banging through the gears at 6,500 rpm is a lot of fun, but it also tends to attract the type of attention that leads to court appearances and big insurance premiums. Now that we're old enough to join the hair club for men, we focus our attention more towards the lower end of the torque curve.
When it comes to street motors with big torque curves, cubic inches are your friend. Therefore, when we built this motor, we used the popular trick of stuffing an offset ground 440 crankshaft into a 400 block. The RB crankshaft we used came from the scrap pile at a local machine shop since it was undersize and had a couple of spun bearings. We salvaged the crank by grinding the mains down to 2.625 and offset grinding the rod journals down to the Chevy size of 2.200. This small investment in machine work turned our scrap yard refuge into a polished stroker crank.
Offset grinding the rod journals on an RB crank down to the Chevy 2.200 size is a quick way to pick up some cubic inches, but it does create a problem with rod side clearance since Chevy rods are slightly narrower than the Mopar ones. We solved the rod side clearance issue by locating a set of Manley 14279 connecting rods. These rods are Mopar length and width, but use the Chevy 2.200 and 0.990 pin sizes Sad to say, Manley recently stopped production on these connecting rods, and there aren't any other known solutions currently on the market. Maybe if enough people request these rods from Manley, they wiill do another production run.
In order to maximize quench and reduce the chance of detonation, we wanted a flat-top piston with zero deck clearance. But since our stroke of 3.875 inches is rather odd, we had to order a set of custom pistons from JE. Our pistons needed to be rather short (for a Mopar) due to the longer stroke and the 440-rod length, but JE didn't have any trouble coming up with a lightweight design once we provided them with our VISA card number!
All engine machine work, as well as the engine dyno tests, was done at Gray's Auto Machine in Tigard, Oregon.
Cylinder Heads, Cam And Intake
While the short-block has a few nice parts in it, what really makes this motor work is the Edelbrock cylinder heads. The set of heads on this motor were some of the very first heads produced by Edelbrock, and they were initially bolted on right out of the box. The nice thing about the Edelbrock heads is they are ready to make good power without any touch-up work or porting required.
We initially installed a Mopar Performance .528 solid cam in this motor just because it seemed like it would be a good match. At the time, we didn't realize how good of a match it was for our motor. After the motor had been in the car for a while, we started to test other camshafts, and we had a hard time finding anything that worked better than that old MP .528 grind.
Of course, given enough time and effort you can always find a camshaft that works better than the first one you start with, but for some reason the MP .528 works great when combined with the Edelbrock heads and cast-iron exhaust manifolds. Apparently, the wide lobe centers and the fairly mild profile of the .528 are a good match for the restricted exhaust, but we're not sure exactly why. If we fully understood why the .528 worked so well, we would be in a better position to design a cam that made even more power.
One thing we did learn in a hurry while testing other camshafts was that if you put too much duration into a motor like this, the torque curve falls right out of bed. In this particular motor we found that duration greater than 245 degrees at .050-inch lift killed the low end of the torque curve. Worse yet, the motor wouldn't make anymore power upstairs with the big cam than it did with the smaller lobe profile. We also found out that this motor doesn't seem to like dual pattern cams. One would think that with the restricted exhaust you should leave the exhaust valve open longer to blow out the spent gases, but that theory didn't work as planned when we tested it, so we're back to square one.
Manifolds And Head Pipes
When building this motor we had several sets of HP manifolds to choose from, but one particular set of castings caught our eye since they didn't have a heat riser. These castings originally came on a 400 HP motor in a '73 B-body car, but there might be other applications these manifolds could be found on. Manifold casting numbers for the set we selected were 3751068 and 3751071.
We didn't test any of our HP manifolds on a flow bench, so we don't actually know how well the various castings work. It is possible that some of the HP manifolds flow better than others, but we haven't yet gotten around to being that scientific about this project.
One thing that we didn't do is extrude hone the manifolds. The extrude hone technology is very interesting and would seem to be effective for this type of work. But the process is rather expensive, and we had heard that it didn't actually increase the power in their combinations. So we bolted our combination together with basically stock manifolds and hoped for the best.
An area that we did spend some attention on were the head pipes. We machined some special adapters out of stainless steel that allowed us to bolt 3-inch head pipes directly to the manifolds. We then built some head pipes out of sections of mandrel-bent 3-inch exhaust tubing. The goal was to get the exhaust gases out of the manifold and into a smoothly flowing big pipe as soon as possible. The last trick was to install bungs in each head pipe for the wide-band O2 sensors. We consider a pair of wide-band O2 sensors absolutely mandatory for tuning, so everything we build gets a set of the bungs welded into place.
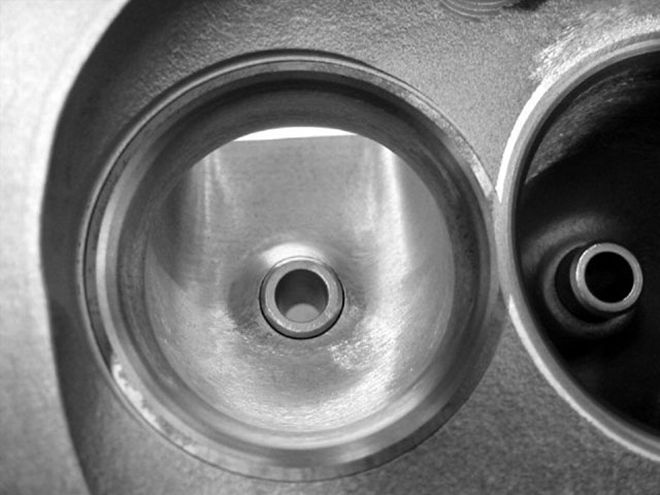
 In a search for more power, we eventually pulled off the heads and sent them to Porter Racing Heads in Vermont. Dwayne Porter polished up the exhaust ports and redid the valve job. Final flow numbers were 292 cfm on the intake and 220 cfm on the exhaust at 0.600 lift.
Tweaking The Combination
The Edelbrock heads were initially bolted on right out of the box, and they worked great with the motor making 550 hp at 5,700 rpm on the engine dyno. Once the motor was off the dyno and into the car, we started to tweak on it a bit and ended up swapping a number of parts around before hitting on the current combination.
One of the first things we tried once the car was up and running was an Edelbrock Performer RPM manifold. The thinking was since this was a street car, the extra torque from the dual plane design would be beneficial to us. in fact, that was exactly the case, as we noticed a fairly big jump in low-end torque when comparing the Performer RPM to a Victor 383. We're fairly certain the exhaust manifolds influenced this test, since they kept the motor from using all of the flow available with a race intake. Just like with the big cam test, the big intake manifold killed the low-end torque, but didn't make any more power on the top end.
We also spent some time testing a few different carburetors and found the Edelbrock 800-cfm units to be a great choice. We ran both the AVS and the AFB versions on this motor and saw identical power curves. According to our contact at Edelbrock, the AVS version received some internal improvements when the tooling was produced, so the AVS should provide a slight increase in performance. We didn't see a horsepower improvement, but we did find the AVS carb would make the same power as the AFB, while using one size smaller jets. that means the AVS version is a little more efficient of a design.
 We overlaid our chassis dyno results with those from an '02 GTS Viper. Our 466 cranked out an additional 67 lb-ft of torque and 49 rwhp over the Viper. Who says you need headers to make power?
Test Results: Dyno And Track
It is a little tough to summarize the dyno testing that this combination has seen. In the last year alone, it has racked up more than 40 pulls on the chassis dyno. At one point, we had a standing date at the chassis dyno every Friday morning! The purpose of all of this testing was to sort through the choices on camshafts, intake manifolds, and carbs. Even with all of that testing, we still haven't fully explored rocker arm ratios, spark plug gaps, timing curves, and so on. When it comes to flogging a motor, lets just say that the win light probably goes to the guy who works the hardest.
But we can say the best dyno numbers posted to date were pulled down when running the MP .528 cam with the Performer RPM manifold and the Edelbrock AFB 800 carb. We rolled into the dyno shop one nice crisp morning, and the big 17-inch Goodyears spun the dyno up to 527 lb-ft of torque and 474 hp. Given a 15-percent powertrain loss for a manual transmission, we estimate the power at the flywheel to be in the neighborhood of 560 hp for that set of pulls. The car has spun the dyno up over 460 rwhp dozens of times, but that 474 is the best pull to date.
Taking this car to the dragstrip is a bit of a lesson in how hard it is to hook up a stick shift car on street tires when you have a ton of torque. Our first few passes resulted in huge wheel spin and low 13-second quarter-mile times at 113 mph. Based on the mph, we knew the car had plenty of power, but getting it hooked up has been a challenge. Of course, the car is set up for Pro Touring mode not drag racing, so it has big stiff torsion bars and low profile 17-inch tires. Neither of those really helps the traction situation at the drag strip.
We did compromise the pro-touring setup a bit by bolting on a set of BFG Drag Radials and that gave us enough traction to dip into the low 12s, but the car is still posting slow 60 foot times. No doubt if we bolted on some slicks and tweaked the suspension with some old drag racing tricks, we could see some high 11s at the track. But those suspension mods would ruin the handling of the car, so we'll just have to settle for having a 12-second car that can corner. Maybe at some point in the future, we'll work on the suspension some more and get it to a point where we can have our cake and eat it too.