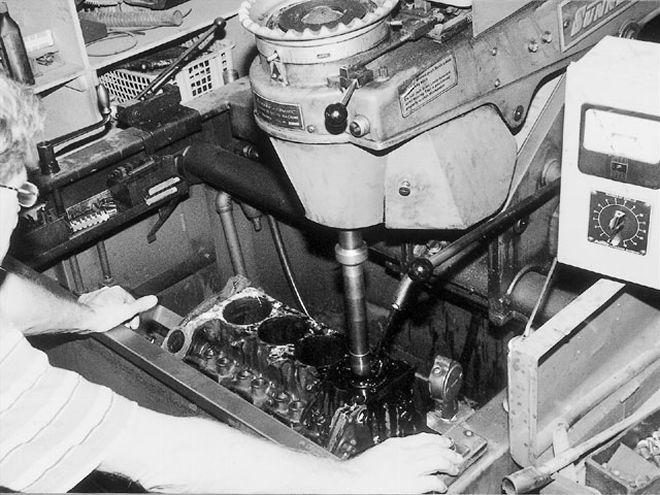
 The only machining operation to the block was having Jerry Goodale at Specialized Motor Service hone it to the next oversize, +.040-inch.
Last month, we tore down and inspected the tired 340 engine extracted from an original '70 Dart Swinger 340. Some of what we found was normal wear, though the engine had obviously seen some amateur wrench work in the past. It was clear from the cheap .030-inch over cast-replacement pistons and .010/.010-inch under crank that this engine had seen a complete rebuild before. This time around our goals were simple: build a reliable powerplant as close to factory-original specs as practicality would allow. We intended to build the engine to last, while keeping cost to a minimum.
Minimalistic Machining
We wanted to keep a budget approach, and stuck to the philosophy of, "If it ain't broke, don't fix it." Usually, shops take a comprehensive approach to machining in a complete rebuild, but we held the line on machining operations, saving money which can be applied to higher-quality parts elsewhere in the buildup. Why pay for decking the block if the decks are already flat? Ours checked out okay, so we left them alone. Same goes for line-honing the mains; often done as a matter of course, it is frequently unnecessary. Ours remained untouched. In fact, the only machine-shop operation done to the block was to hone the already .030-inch oversize bores to the next oversize, .040 inch. Unlike the other steps we passed on, good bores are vital to making the engine perform as new.
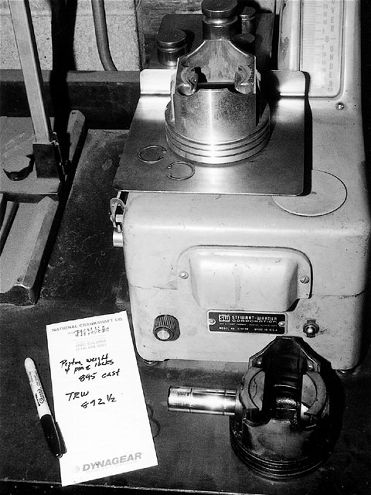
 The engine had obviously been custom balanced as part of the last rebuild. We weighed our new TRW pistons and compared them to the old cast-replacement pistons and found them within 2.5 grams. We subtracted the weight of the carbon and varnish on the old ones and decided they were probably bang-on. The weights were much closer than production tolerances, so we opted not to rebalance the engine.
Our crank was already reground .010/.010 inch on the rods and mains, dating to the last rebuild over 20 years ago. The crank journals showed some mild wear, but mic'd right at the middle of specs, so we just had the journals polished rather go for a regrind. This saves dough and saves the next-undersize regrind for the future. The rods, however, needed the full treatment. The most likely part of the engine to blow is the rods, especially with tired old bolts. The rod bolts would get replaced, which meant that the big ends would need to be resized. Inspection revealed that the small ends, factory bushed for full-floating piston pins on this 340, were worn out. Though replacing the piston-pin bushings will more than double the cost of reconditioning the rods, ours really needed them.
Of course, the heads would need machining. Our heads were rough, with extensive valve-seat recession. The only practical way to fix it was to have 16 inserts installed. Some of the seats already had inserts, and they were gone too, making the job even more complicated. We took the easy way out and replaced the heads with another set. I've had a set of '70 340 "X" castings collecting dust on the shelf since 1986, so it was time to put them to use. These were treated to a performance valve job by JMS Machine, a new set of guides installed, a .006-inch clean-up surfacing cut made, and hardened inserts were added on the exhaust side for use with unleaded fuel. Basically, the heads got the works; there was nowhere to cut corners here without hurting performance, so we did what was required.
So that's it for machine-shop operations; just a hot tanking, fresh machined bores, resized and rebushed rods, a polished crank, and rebuilt heads. Some engines may need more while others can get away with even less, but we did the minimum needed to get factory-fresh performance from this 340.
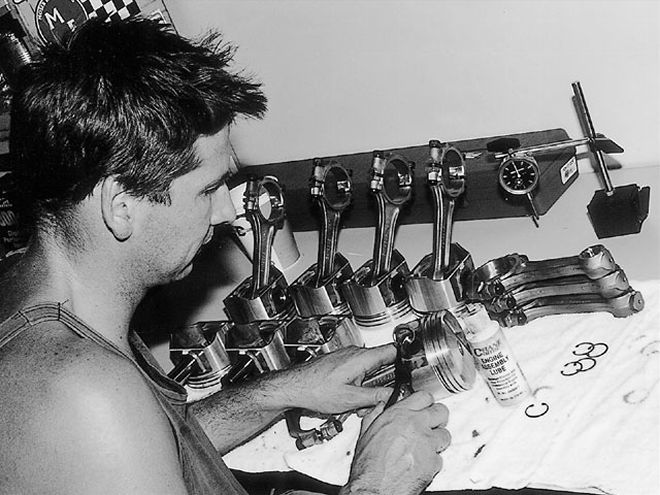
 The rods, since they have floating pins, can be assembled at home. The TRWs came with locks, which can be installed with regular snap ring pliers.
Rebuilding an engine is a two-sided money-spending affair, machining out of one pocket and buying parts out of the other. We went to PAW for a rebuild kit and all of the additional parts because they offer quality parts at a competitive price. Even better, their huge inventory of engine parts means minimal waiting to get what's needed. We ordered a master engine-rebuild kit, which included pistons, rings, rod and main bearings, gaskets, oil pump, cam, lifters, and timing set. The camshaft and lifters can be any of the PAW house-brand Super Stock Industries pieces, which we have used successfully in many prior engine builds. Since this is to be a pure-stock build, we wanted the original 340 cam. Luckily, the factory blueprint 340 HP cam is one of the OE grinds available under the SSI label. The lifters are also PAW's SSI brand, rounding out the parts included in the kit.
Any component in their kits can be upgraded at additional cost, and we chose to do so in the areas we felt essential for maximum high-rpm durability in our engine. We wanted a bulletproof bottom end, so we anted-up for forged TRW pistons (L2316; '70 340 factory-replacement type), and a high-volume oil pump. We strongly favor bore-friendly moly rings over rebuilder-type iron, so we paid for an upgrade here to Federal Mogul non-file fit moly rings. We changed to Fel-Pro gaskets and a PAW double roller timing chain. Besides the parts in the kit, we ordered all new OE replacement stainless-steel valves (stock 2.02 int./1.60-inch exhaust size), ARP rod bolts, a PAW SSI-brand valve spring and retainer package matched to our cam, SSI hardened keepers, new cam bearings, a freeze-plug kit, a Carter high-volume mechanical fuel pump, and a TRW water pump.
With the parts and machining out of the way, there was nothing standing between the stack of components and a free-revving 340 but some assembly work. We reused all the factory hardware, including the original head bolts, which saves money and looks resto correct. The bolts and miscellaneous parts were cleaned up with an overnight soak in carb cleaner and then wire-wheeled clean. The valvetrain we pulled out went back in, and was likewise soaked to clean the muck. Doing a resto-build saved money since we retained the stock valvecovers and oil pan.
As opposed to our usual technique of painting each component individually prior to assembly, this resto engine got bolted together in bare metal, and will be painted once complete for a more resto-correct look. The exceptions were the crank damper and some of the outer brackets and accessories, which we will add later once the basic long-block is painted. This way we can get more complete paint coverage behind these components. The nuts-and-bolts of putting it together was service-manual style assembly work. It's amazing how quickly and simply things go together when using all of the factory stuff-it all fits. Next month we'll hit the dyno and find out what kind of power a stock 340 can actually put out. With that settled, we'll add some speed equipment to the mix and see how much can be gained from a basic 340 with bolt-on mods. It should be interesting.
ItemPart #BrandCostEngine KitIncludes:DMRMOP340APAW$471CamSSI 11310SSILiftersPAW 2011SSIGasketsKS-2114Fel-Pro 23*Main Bearings MS963P.010 Clevite 77 Rod BearingsCB481P .010Clevite 77Oil PumpM72HVDynaGear 16*PistonsL2316F .040TRW Forged103*RingsE286K .040Federal Mogul17*Timing Set103PAW6*Rod BoltsARP-144-6001ARP41Cam Bearings SH875SKing 20Springs & Retainers Kit10760SSI75Intake Valves40103-202DynaGear 71Exhaust Valve40103-160DynaGear 72Valve LocksSS1-10201SSI 6Fuel PumpM6902Carter 50Water PumpFP1539TRW 37Total Parts$1008
*Extra cost of upgrade to kit