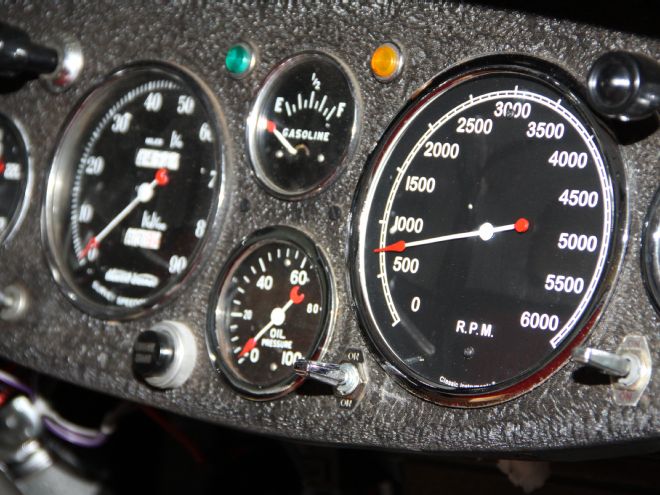
This saga began actually decades ago when Brian Brennan, Chris Shelton, and the author rescued a Flathead Ford V-8 from the roof of a former psychiatric hospital—a fitting place for any activity the trio was involved with.
Thanks to a cooperative crane operator the engine that once powered a backup generator, the stand it was mounted to, and an instrument panel with some vintage Stewart-Warner gauges were lowered into a waiting pickup. Unfortunately the engine turned out to be junk but the gauges, which included a cool mechanical tachometer, found a home in our daily driver Ford Model A.
The tach's cable was spun by a right angle drive that was connected to the crankshaft pulley retainer bolt with a short, keyed drive cable. When first installed the tach worked fine for a few months then it suddenly quit—the culprit turned out to be sheared drive between the crank and drive unit. Since making the necessary repairs meant pulling the hood, headlight bar, and radiator, fixing the drive was put off for a while. But the big 5-inch tach was too cool not to work and we wanted to be able to watch that big needle swing, so off came the front of the truck.
With a new drive in place we to got watch the tach work for another few months before the needle again stubbornly refuses to move off zero. We finally came to the conclusion that the drive system would live when operating at the consistent speeds of a stationary engine, but running up and down the rpm range in street use took its toll on the somewhat delicate drive cable.
After several attempts to create a more reliable drive system were thwarted (we even toyed with moving the right angle unit and using a small toothed belt drive), the decision was made to call on the guy who knows more about instrumentation than we ever will, John McLeod at Classic Instruments.
The Classic Instruments' crew is known for their impressive offering of instruments, building one-of-a-kind gauges from scratch, and retrofitting original instruments with modern electronic movements. Not to be confused with restorations, the retrofitting process makes it possible to fit gauges in stock locations, using the original housing with the benefits of Classic's cutting-edge technology. That's just what we were after.
Given what we've seen the Classic Instruments Custom Shop accomplish we were confident they could convert our tach from mechanical to electronic operation. As John explained the process the original housing would be gutted and a new electronic movement would replace the mechanical innards. A new face would be designed with an increased rpm range and the lighting would be internal as opposed to the rather ineffective exterior bulb that only illuminated part of the face through a slot in the case. We had the tach out of the dash and into a box before John could hang up his phone.
When our tach came back from Classic Instruments it exceeded all our expectations. On the outside it still had the vintage look to go with the rest of the gauges while internally it now has the latest electronics for accuracy and reliability. It's the right combination of the old and new for one trick tach.
1. Our updated tach still has the vintage look we wanted with contemporary accuracy and reliability.

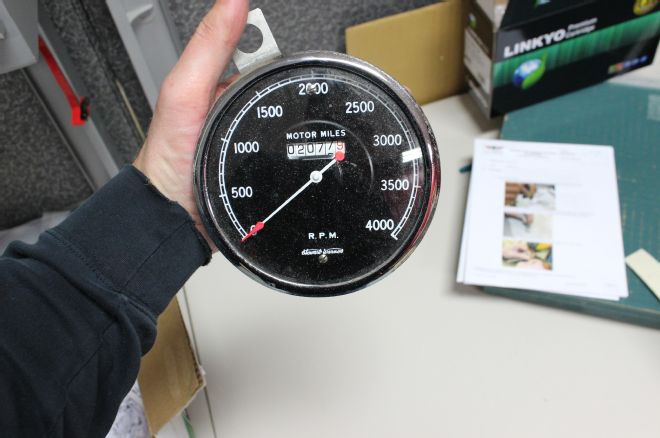
2. In its original form our mechanical tach included a "motor miles" readout and a maximum rpm of 4,000. The bracket with hole is for the eternal gauge light.
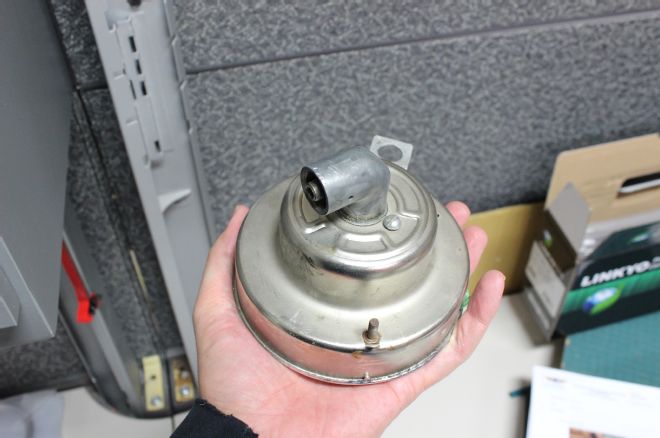
3. Viewed from the back the connection for the cable drive can be seen.
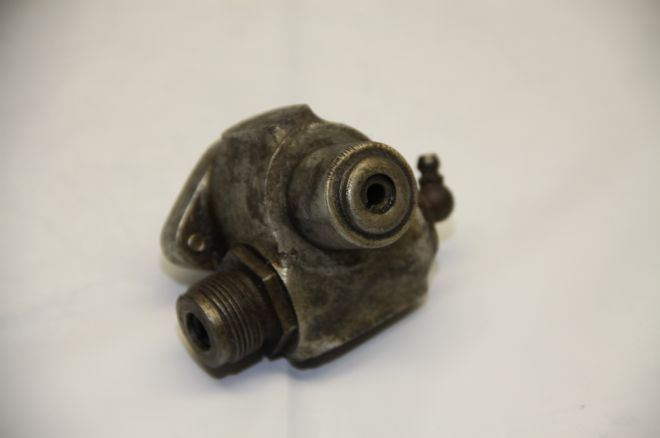
4. This is the right angle drive that mounted to the front of the engine. The drive from the crankshaft fit into the hole at the top right, the cable to the tach attached to the threaded piece on the left.
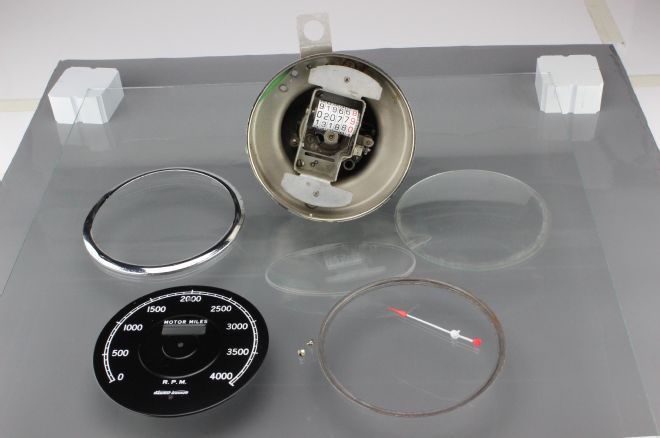
5. The conversion began with the removal of the bezel, lens, pointer, and faceplate.
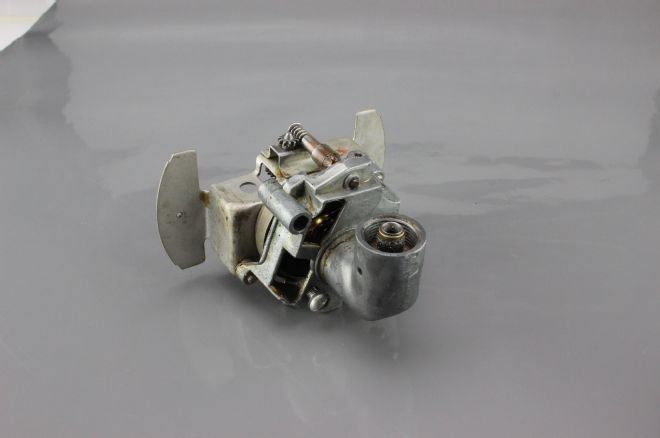
6. Last to come out was the actual mechanical tach assembly.
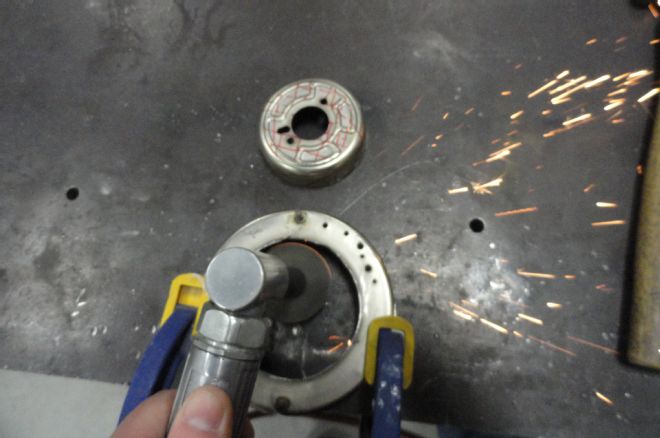
7. To accommodate the new electronic innards the extended portion at the rear of the original housing was cut off.
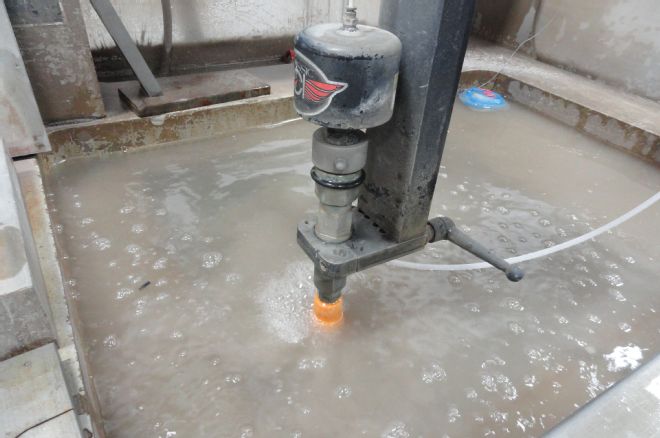
8. A water jet was used to cut an adapter plate for the back of the housing for a new faceplate.
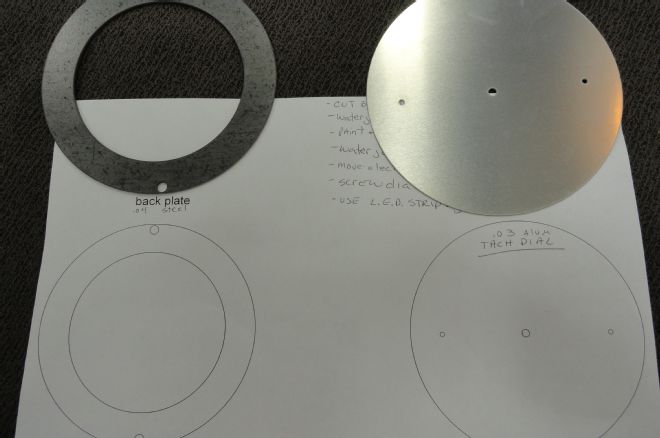
9. Fresh from the water jet are the adapter plate (left) and the new faceplate.
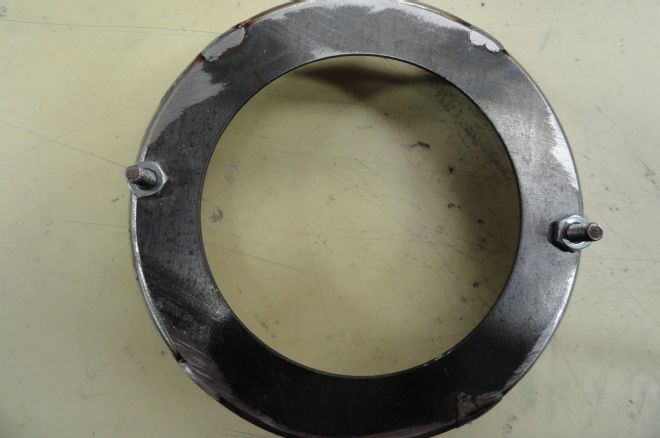
10. This the original tach case from the rear. The adapter plate has been put in place and has ben skip welded around the edges.
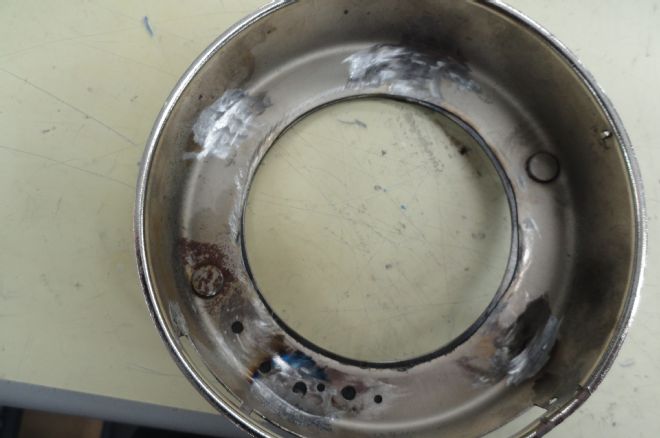
11. Viewed from the inside, the adapter plate stiffens the housing, provides accurate placement of the new electronics, and plugs some unnecessary holes.
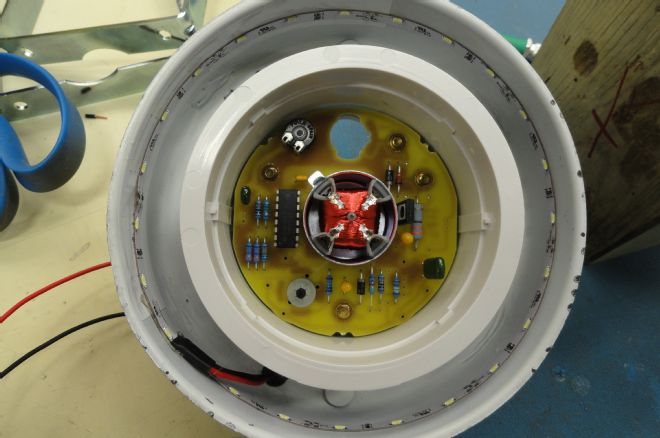
12. Replacing the mechanical innards is the latest in electronic tachometer technology with an air core movement. This design allows the wide needle sweep to match that of the original mechanical tach.
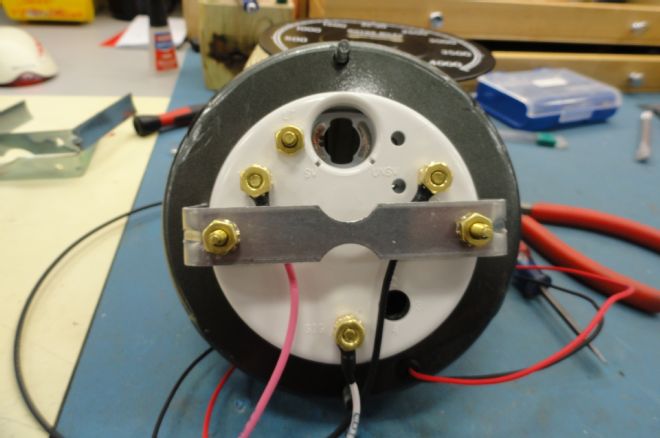
13. Holding the new to the modified tach case is a conventional U-style retainer. The large hole at the top is for the integrate gauge light.
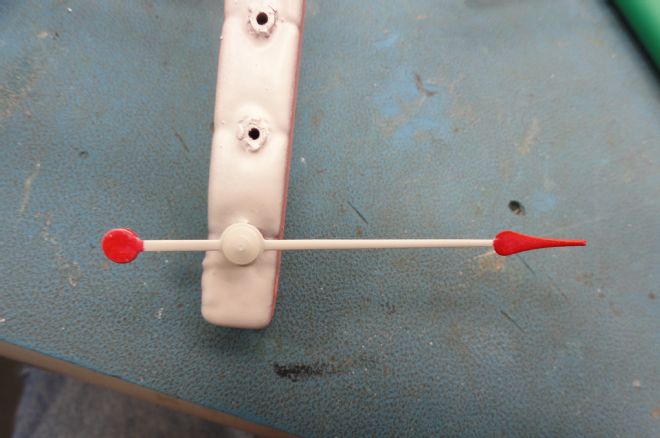
14. Before installation the old needle was refurbished in the original colors.
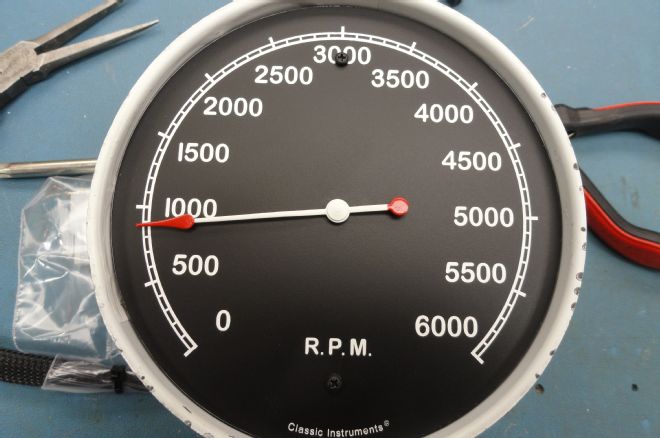
15. A new faceplate eliminated the motor miles counter and the rpm range is now 0 to 6,000—not that our Flathead will ever turn that tight, but it looks cooler.
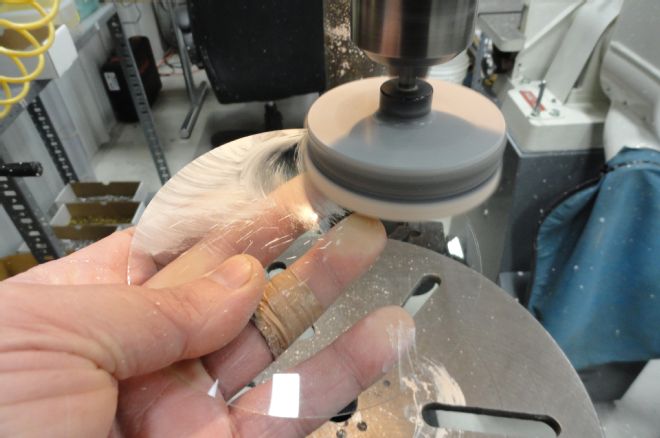
16. The final step in the overhaul was to polish the original curved glass lens.
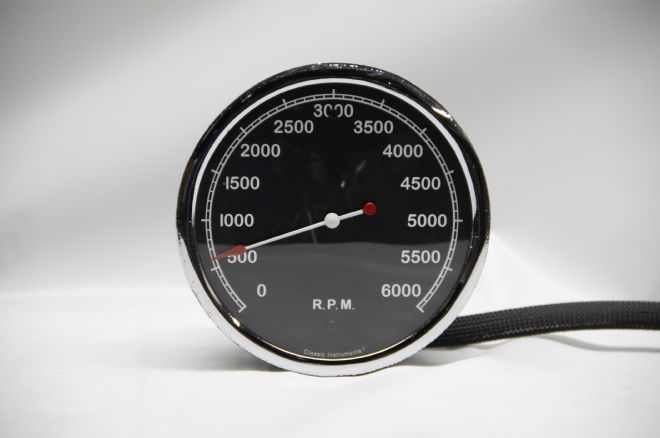
17. Our refurbished tach looks great and thanks to Classic Instruments it will be accurate and reliable.