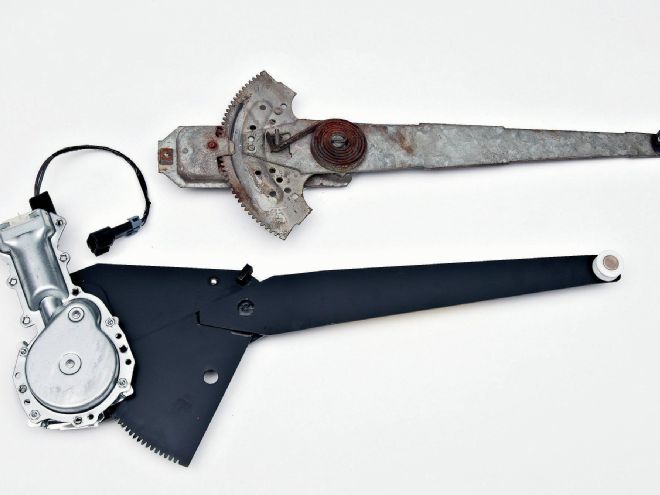
When was the last time you attempted to reach all the way across your interior to try to roll down the passenger window? You know what we mean. You've just gotten off the highway with your B-Body and are wanting to take a slow cruise down the main drag on a nice summer evening but it's just not the same with the windows up so you try to reach the passenger window crank without hurting yourself or someone else. But even if you do manage to get the front windows down, there is no way you are going to reach the back windows without pulling over somewhere so you can crawl into the back seat.

We know it doesn't seem like a big deal to have to reach across the car to roll down the windows or to unlock the door so you can take a friend for a ride, and maybe we've all gotten a little too spoiled by having power everything on every other car we drive, but with everything you need just a phone call or a few clicks on the Internet away, there really is no good reason to do without any longer.
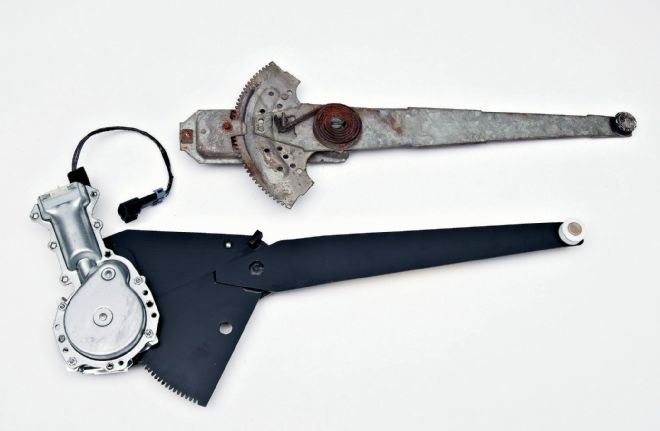
The XV Motorsports power window regulators are made of all-new parts and are direct swaps for your manual ones. They bolt right in and work great.
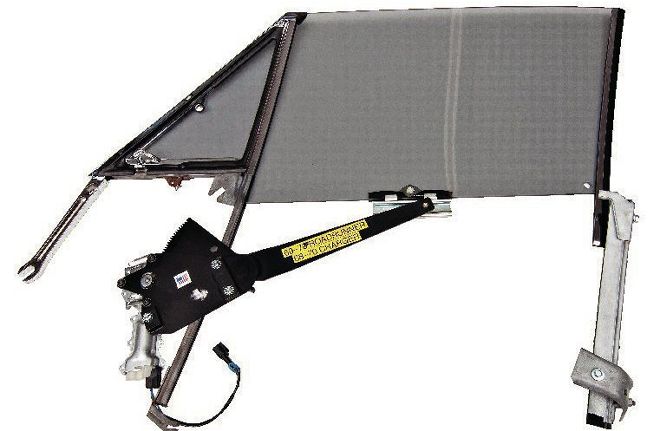
The glass doesn't really need to come out to replace the front regulator but it's still a good idea so you can clean and inspect all the parts and channels. Besides, you'll probably want to polish the glass while it's out.
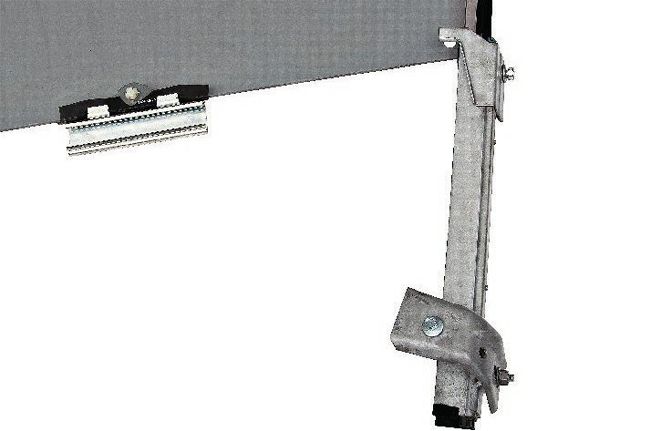
The bottom of the rear track provides an adjustment for tipping the top of the window in or out.
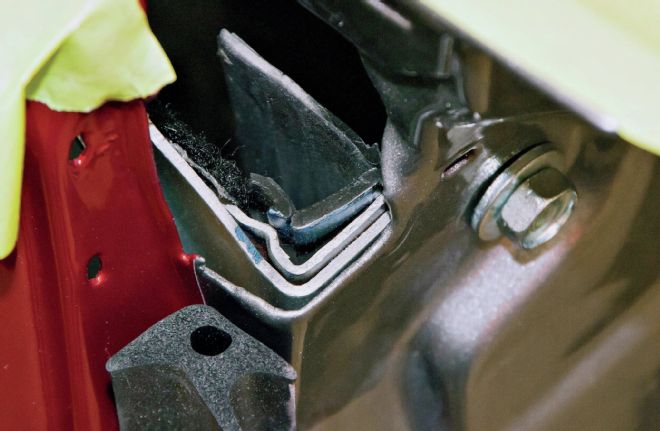
This bolt is for adjusting the rear window stop, which, of course, limits the window's upward travel. Notice the tape on top of the door. That's a real good idea for preventing damage to both the glass and the door as you are sliding parts in and out.
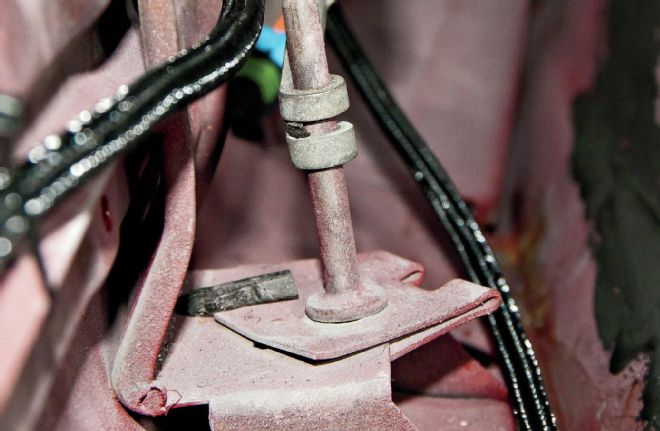
The lower part of the front track slides over this pin, which allows side-to-side adjustments to the front track (through an opening in the bottom of the door) for tipping the top of the window in and out.
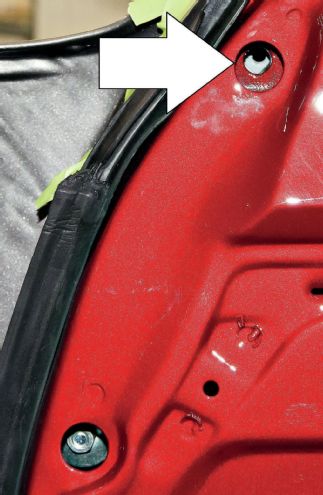
This slotted support under the front tip of the wing window, combined with a similar slot at the top of the front track (rear of the wing), can be used to gain a small amount of rotational adjustment.
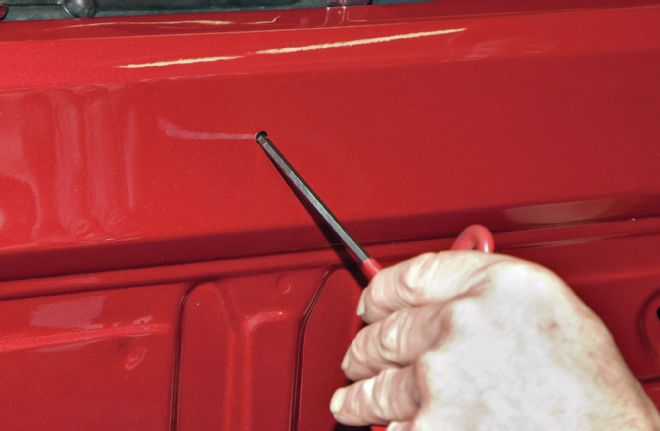
This slot, at the top of the front track just under the back of the wing window, drops onto a short stud inside the door. The nut that pinches it tight is accessed with an Allen wrench through this small hole.
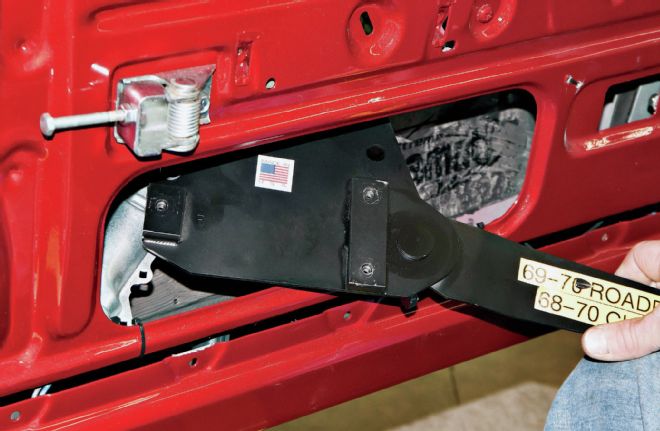
Fitting the front regulator couldn't be easier. Just slip it inside the door with the window about halfway up and be sure to slide the roller into the short track at the bottom of the glass. The three bolts that hold it in place are not adjustable so just tighten them up and you're good to go.
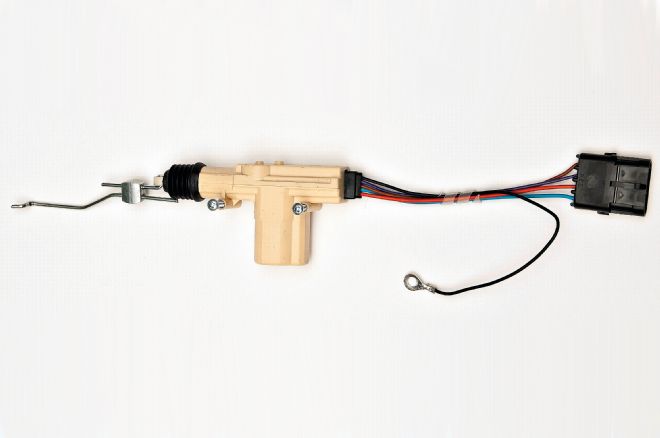
MCR used power lock actuators from Electric-Life. Note how they have cut the rod and fabricated a double set screw block so they could make the length adjustable.
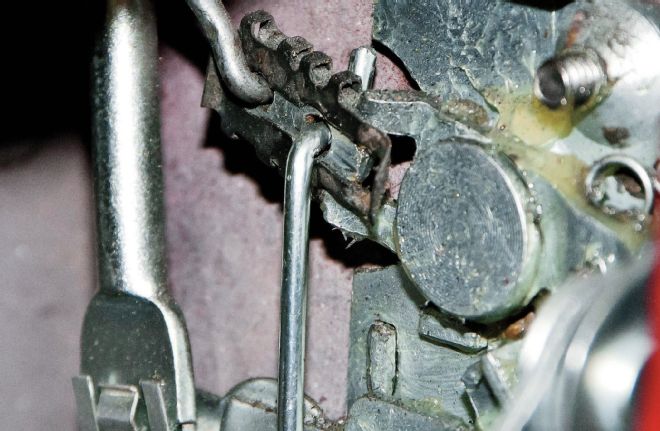
Put the usual bend in the end of the rod and slip it into the latch's lock lever.
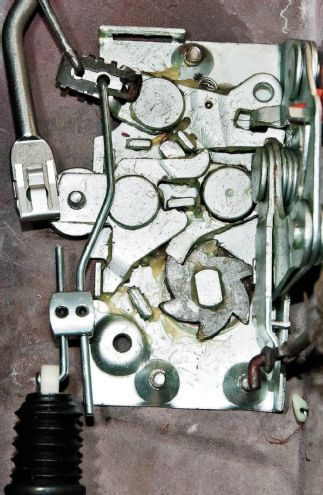
Locate a spot inside the door where the actuator won't be in the way of the window operation, shape the rod so it is out of the way of the rest of the mechanism, and then mark and drill two holes for the mounting screws.
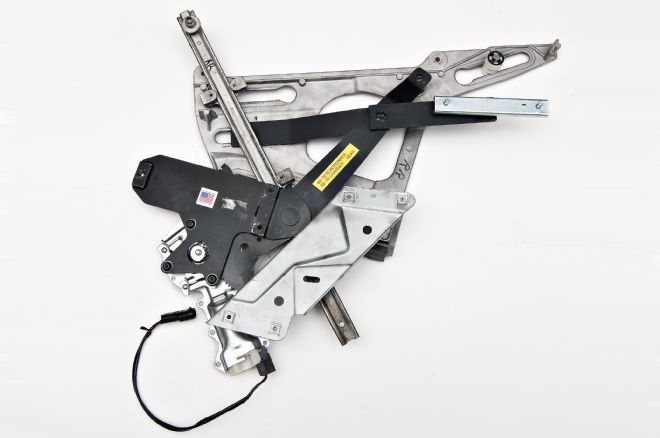
While the front window mechanism is easy to replace, the quarter window mechanicals are more difficult. Plan to pull everything out to clean and lube but if you don't move any of the adjustment bolts, it all should go back together as it came out and minimize any necessary adjustments. Note how the regulator fits into the window mechanism while it is out of the car because you won't be able to see it this easily when it's inside the quarter.
The install we're going to show you is part of a full restoration Muscle Car Restorations is performing on a 1969 Dodge Super Bee, but all B-Bodies will be virtually the same. While you might be tempted to want to just swap out the regulators without removing the glass and the rest of the mechanisms, MCR is pretty adamant about pulling everything out to clean, inspect, and lube all the pivots, guides, rollers, and channels.
Truth is, changing the regulators is a fairly straightforward remove and replace operation. It's getting the windows to properly line up again that likely has some of you a little apprehensive about pulling the glass and the rest of the parts. But trust us, it's more than worth the effort to be sure that your new powered features work smoothly and flawlessly.
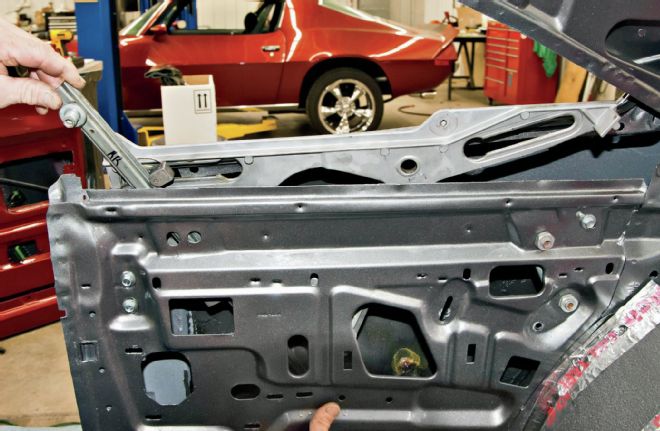
The window mechanism goes in first without the glass. Note that the roller that fits into the slot on the right also fits into the short rear channel already in place just underneath it. The small bolt to the right and slightly above the channel is the rear window stop.
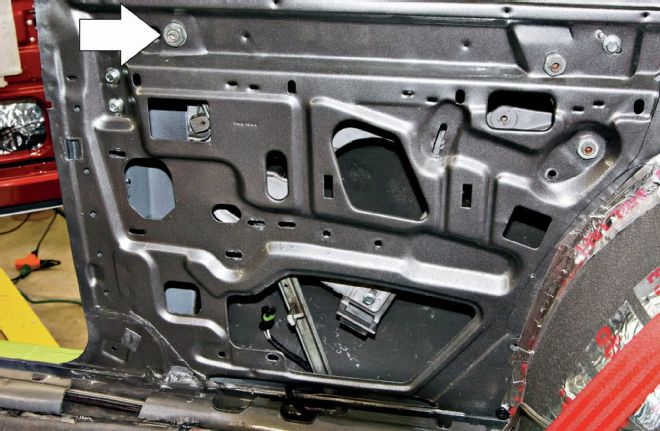
The upper adjustment bolt for the front track is fastened here. Again, if you can avoid changing the adjustment positions of any of these bolts, you should find everything fitting just as it did before.
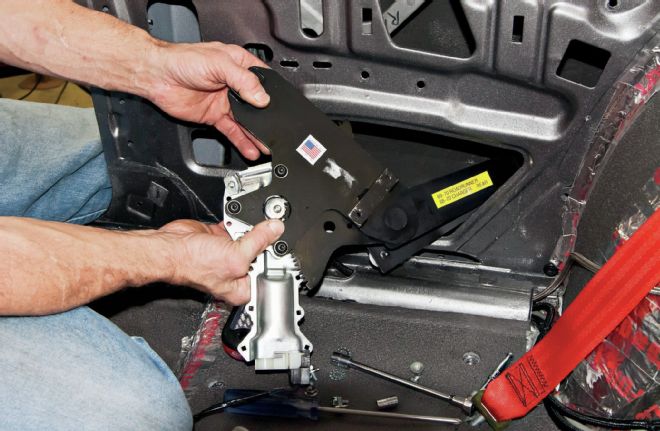
Lift the window mechanism up out of the way before you try to insert the regulator. It may take a little finagling to get it into the opening and into place. Using a pair of simple battery leads, it may be helpful to run the regulator one way or the other to make it easier to fit into the opening.
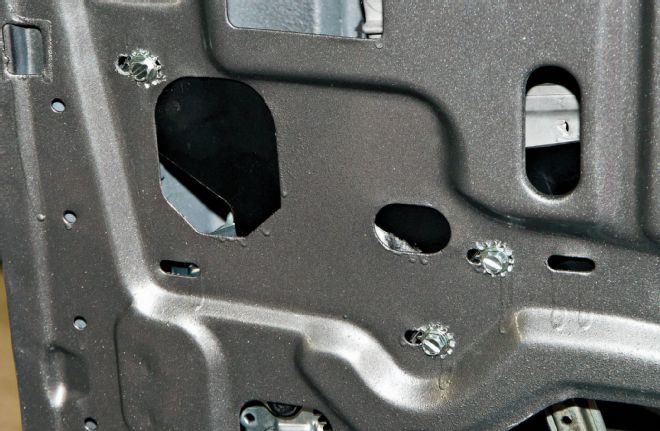
The regulator attaches to these three slotted holes. The slots aid the regulator fit but don't provide any adjustment of the glass.
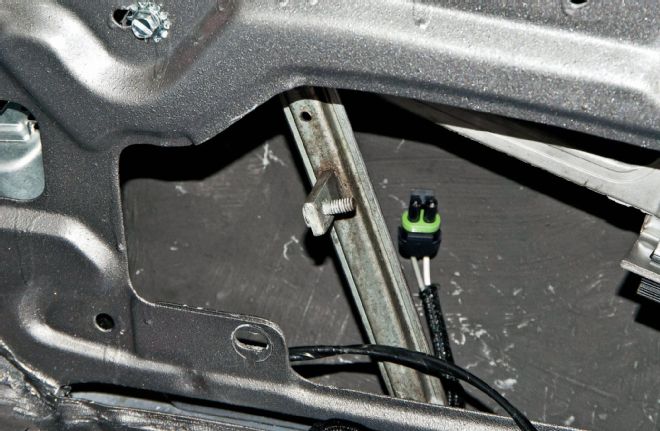
This stud on the lower part of the front track goes into a short slot on the mounting plate to provide some adjustment to tip the top of the glass in or out. There's not much play here but there is usually little or none needed.
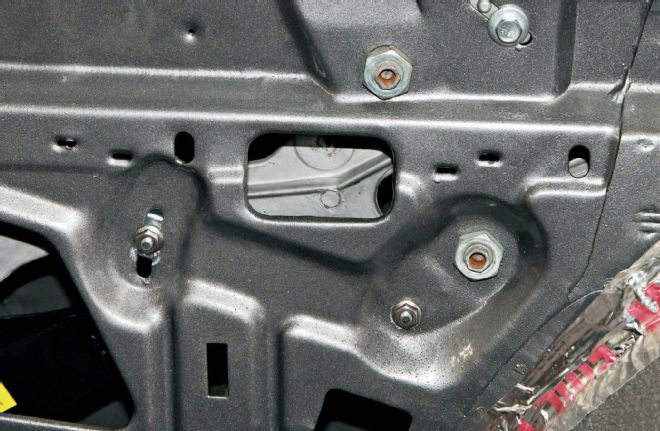
The big nut lets you adjust the front edge of the glass and in combination with the stud at the bottom of the front track, it will tip the top of the window in or out. The small bolts to the lower left are for the front window stop.

The two larger bolts adjust the rear track in or out. The small slot to the left will affect the rotation of the glass when it is in the full up position. The small bolt in the upper right is the rear window stop. You can sort of see the rear window mounting point in the rectangular opening in the center.
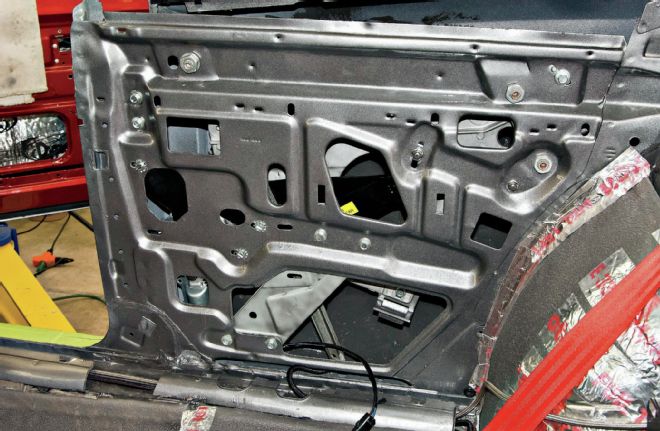
Here you can see (sort of) how everything should look in place before the glass is attached.
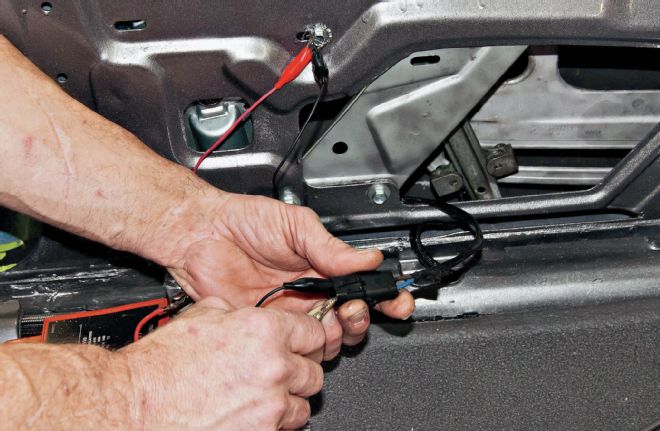
You'll need to apply power to the regulator to position the glass mounting points where you can get at them.
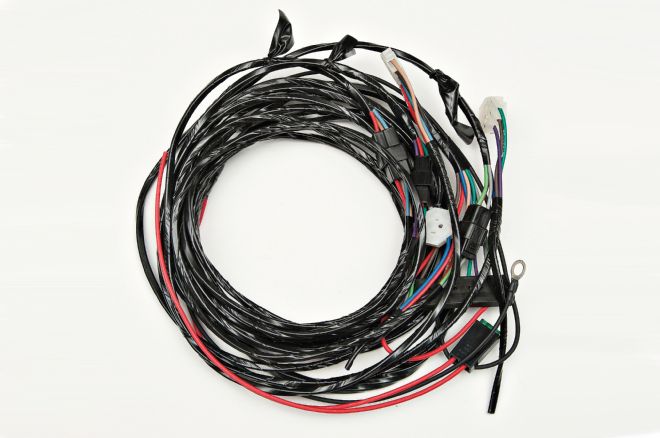
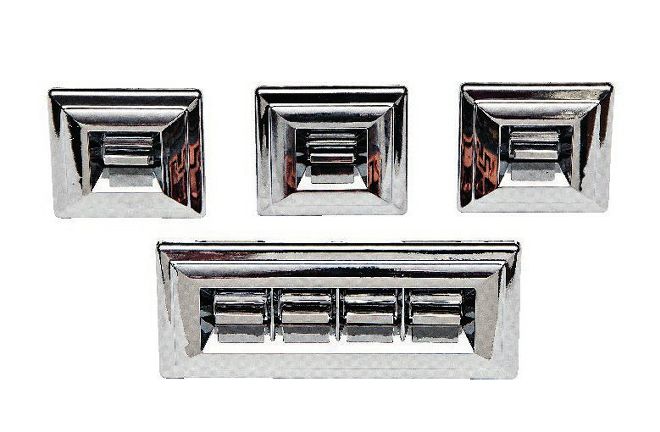
The XV Motorsports power window kit comes with factory-style wiring and switches that work great, but MCR is installing an ISIS Power system into this car, which will greatly reduce the amount of wiring necessary to operate the windows and the locks.
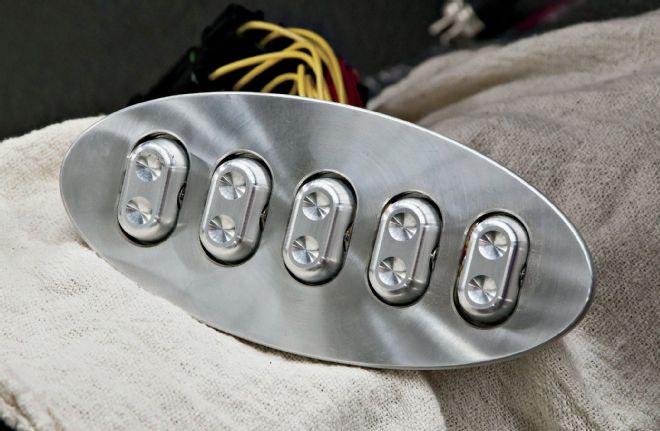
Instead of factory window switches, which require cutting holes in your door panels, MCR is using a five-switch billet panel from Watsons Street Works that will be mounted in a custom console. One major advantage of the ISIS system is that it allows the use of a simple three-wire switch to operate the windows instead of the factory five-wire system. There are two positive leads—one for up and the other for down with a third wire for the ground. It can't get any simpler than that. The center switch activates the locks while the other four control the windows.
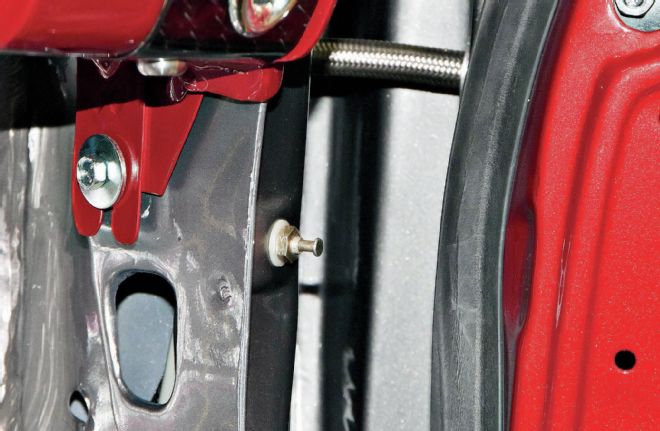
Of course, you are going to need to create a path to get wiring into your door so it will be necessary to drill a couple of holes in the door jam. Frankly, the easiest way to do this is to mark the location of your holes, being careful to avoid any interference with the window, and remove the door to drill the holes. If you can fit a drill inside the door with the window tracks removed, you may get by with the door in place and then pick a location you can access with the kick panel removed. MCR used a billet part from Electric-Life but the factory loom is perfectly acceptable as well.