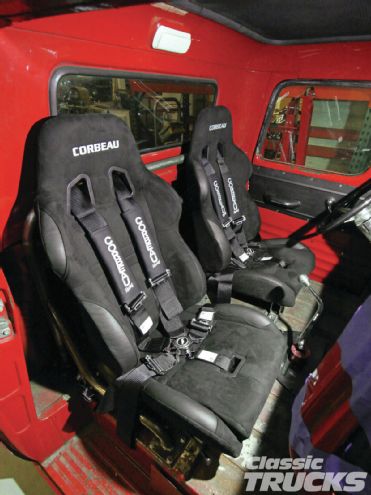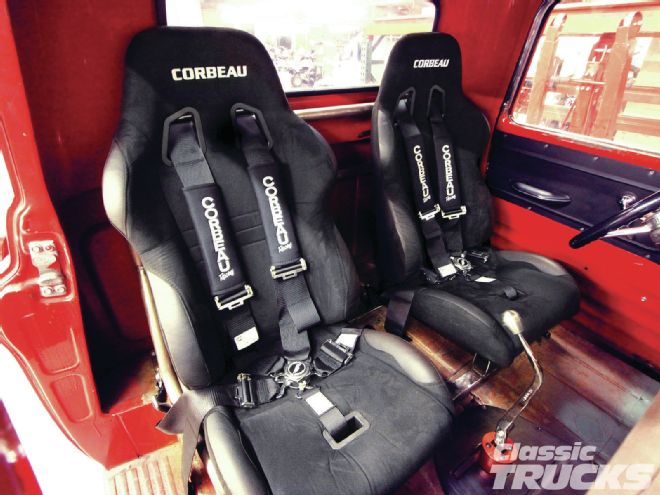
If you have been following along with the ’59 Chevy Apache build then you know I am going to have a street-driven truck that can also be used on the autocross course. So with that said, I wanted to install a set of quality seats that would not only look cool, but keep me secure.
At 6-foot-0 and 235 pounds you would think it would be difficult for me to find a seat to fit my stature. I did some research for a seat that I fit into, but something that wouldn’t make me want to get out every 30 minutes. A co-worker recommended that I look at Corbeau Seats because of the many styles that they offer.
I narrowed the choice down between the Corbeau A4 and GTS II-style seats. I then took a few measurements: waist, shoulder, and the overall seat dimensions to see which would best fit my needs. What I came up with was the A4 wide in suede. The seat not only fit me great, but also gave me plenty of support where it was needed most.
With any race-style seat, comfort is the key to being happy. If you are not comfortable in the seat, then chances are you won’t want to drive it. When I received the Corbeau seats I was really happy with the craftsmanship and the way they looked. The seats featured a reclining mechanism that allows the seatback to be adjusted for a comfortable driving position.
The A4 also has great lateral support for thigh, kidney, and shoulder bolsters that help both the driver and passenger remain in the optimal seating position. In addition to the seat, the fifth slot, otherwise known as a submarine slot, was added so I could use a five-point harness.
Five-Point Harness
If you have ever used a five-point harness then you know they can really help hold you in the seat and truck. A five-point harness has two lap belts, two shoulder belts, and a belt that comes up near your crotch or submarine belt. If mounted correctly, the belts can help hold you and your passenger in the vehicle.
Here is where things get a little tricky and you really need to do some research and homework on. With safety belts of any kind, there are tons of ways to mount them in a safe manner. It is best that you carefully read the instructions from the belt manufacturer and sanctioning body that you plan to race in.
Also it may not be legal for you to use a five-point harness on a public street or highway. It’s a good idea to check the local DOT laws in your area. Just because I am installing my belts one way does not mean that it will work best for you and your truck.
Rollcage or Not to Rollcage
For the serious racer, a rollcage may be in your future, but for someone who wants to enjoy his or her pickup on the street it may not be the best option. A rollcage can be great for chassis stiffness and added safety in case of a rollover accident, but it can also hurt you if you don’t have a helmet on.
In a truck there is minimal room in the cab and adding a rollcage decreases the amount of headroom for driver and passenger. Lets say you are out on a Sunday cruise not wearing a helmet and you are involved in a rollover accident with a cage inside. The rollcage will provide rollover protection, but what it can also do is cause serious injury or death if your head hits one of the bars. So with most of us driving our vehicles on the street 99 percent of the time, is a rollbar the best option? That is up to you to decide.
Because my truck will be on the street a lot and autocrossed occasionally, I chose to only install a seatbelt hoop behind the seat. I wanted a clean look inside the cab and not have tons of room taken up by a cage and still be able to properly mount my shoulder belts in the event of an accident.
I didn’t want to bolt the shoulder straps to the floor because I feel that is not the correct way to keep both my passenger and I safe. By adding a rear seatbelt hoop I can optimize the shoulder strap angle needed to hold me in the seat. Here, I’ll explain why it is important to securely mount the belts and also to position them at the right angles.
01 Seats play a huge roll in keeping the driver planted at the controls of a vehicle. Now, if you want to cruise down the road at a slow pace, a bench seat will work just fine. On the other hand a good set of bucket seats will keep you in the seat and still be able to provide comfortable cushioning. If you look at the Corbeau website you will find several different style seats that will best fit your needs. I went with the Corbeau A4 with the wider seat cushion and back.
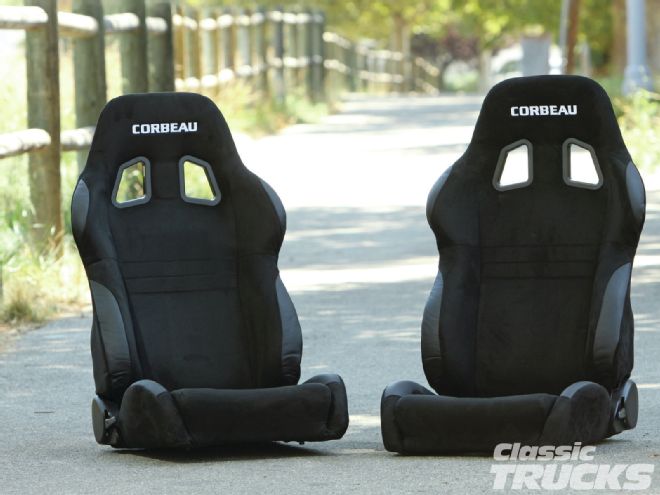
02 Extra strong and lightweight tubular steel is used for the main frame of the seat. Corbeau then powdercoated the inside of the seat so that it would not rust over the years.
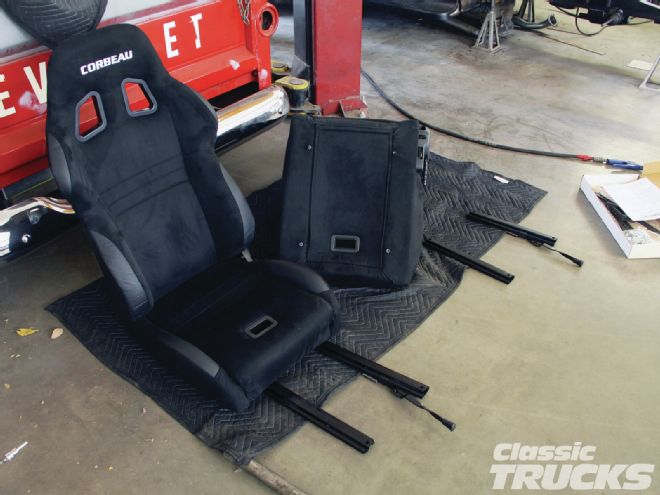
03 I ordered the universal seat tracks so that I could use the sliding mechanisms and adjust my seat position.
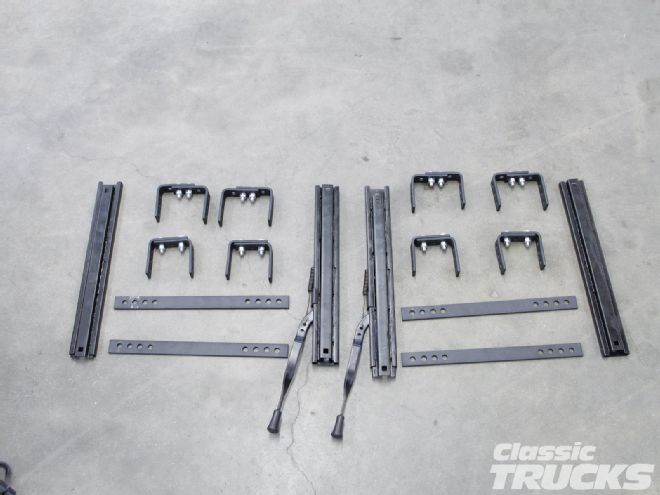
04 The universal seat mounting brackets are fully adjustable so you can tilt the seat and/or adjust the seat height.
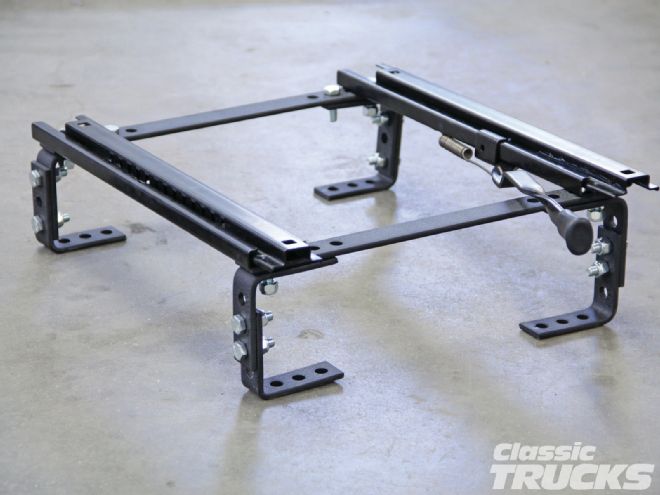
05 After playing around with the universal seat mounts, John from Deuces Wild Hotrods & Customs and I determined that it would be best to make our own seat mounts. We were still going to use the seat track, but without the brackets that raise the seat. Here, John uses wood blocks to position the seat for a trial fit.
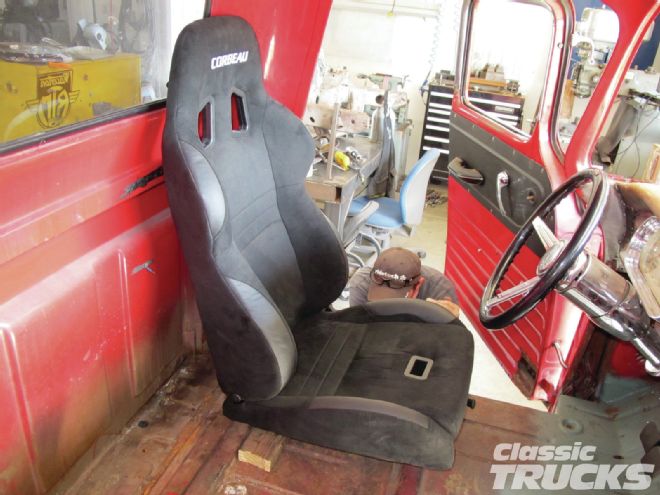
06 After playing around with the seat we went ahead and cut out two pieces of 3x2 square tubing to raise the front of the seat.
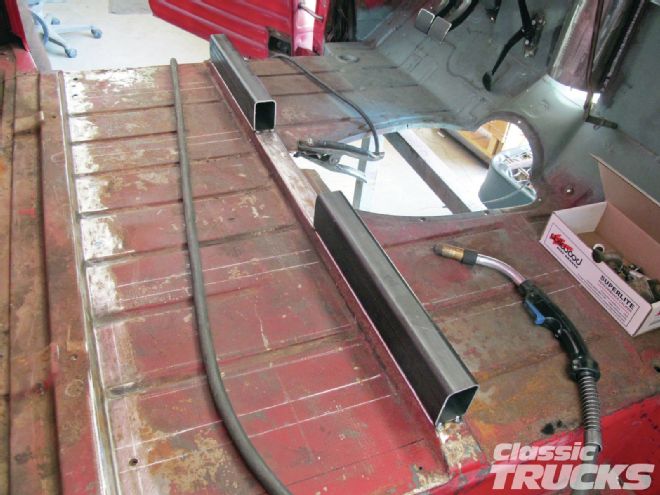
07 For the rear of the seat we used a piece of 2x1 piece of square tubing for a slight downward slope toward the rear of the seat.
08 After measuring the seat placement I used some 1x3⁄8 flat bar to tie the front and rear mounts together.
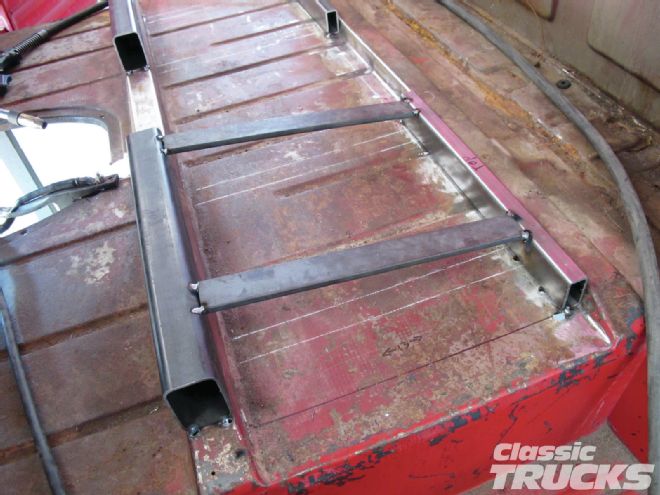
09 After drilling the holes for the seat tracks to mount to, I realized I didn’t allow room for the seat-track adjuster. I simply removed a section of the 3⁄8 plate and welded a longer 3⁄8 plate on the underside of the mount.
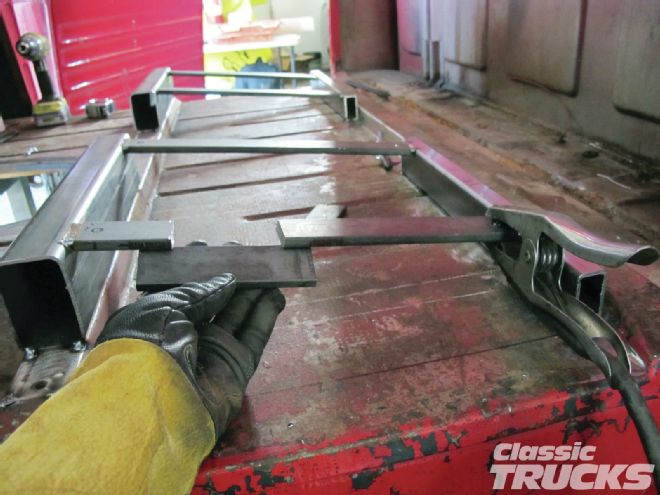
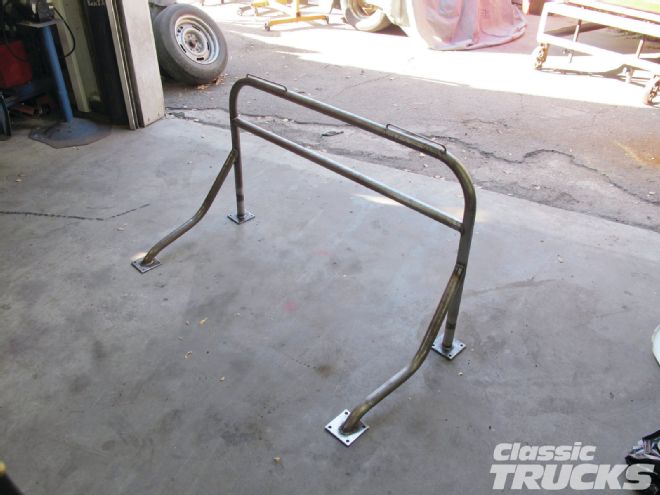
10 Now that I am happy with the seat position I wanted to make a seatbelt hoop for the shoulder belts. This is the start of my homemade seatbelt hoop. Not only is it not safe to mount the shoulder belts to the floor or cab, it could cause serious damage to you and your passenger. I made the hoop so the seatbelt would roll over my shoulders and go downhill toward the hoop at a 10-degree angle. Please read all safety instructions and do your homework on how to correctly set up seatbelts for your truck.
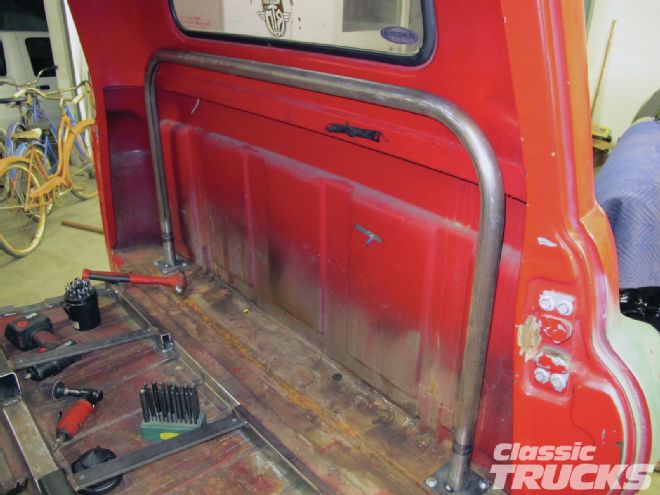
11 I added down bars to the seatbelt hoop because the hoop bolted to the floor alone is not enough to hold the shoulder belts and me in the seat. With the seat in, I routed the down bar almost three-fourths up the seat hoop and tied it to the floor, welded to a 4x3⁄16 square plate. Plates were also used on the bottom side of the cab to support the hoop and down bar. Grade 5 or better bolts should be used to hold the seat hoop to the cab followed up by red Loctite and nylon lock nuts.
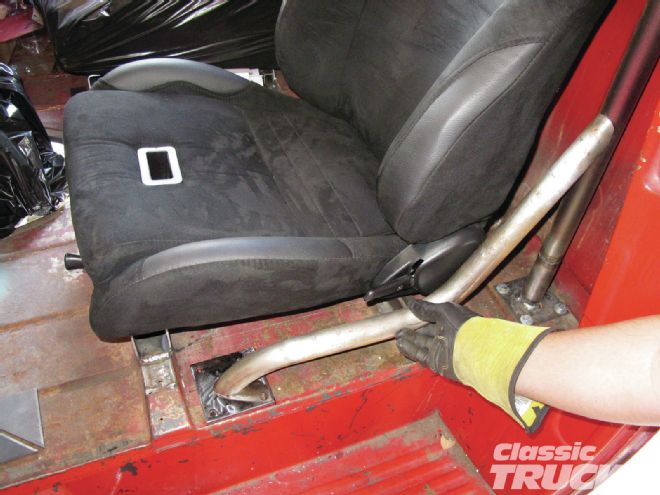
12 After the down bars were made, I was having trouble finding a good place to attach the 3-inch Corbeau shoulder belts. Using the same 11⁄2x0.120-wall tubing, I made a crossbar about 8 inches down to loop the shoulder belts around. This not only gave me a strong location to wrap the belts onto, it also allowed for slight belt stretch during a really hard stop, or God forbid, crash. A small amount of belt stretch is OK because the belt will actually stretch under load and slow your body down less abruptly. Another way to think about belt stretch is the crumple zone on new cars versus old cars. On an old car, when you hit a tree, the car stopped and you went flying forward. New cars will absorb a lot of the impact in the crumple zone thus slowing the passenger’s forward momentum.
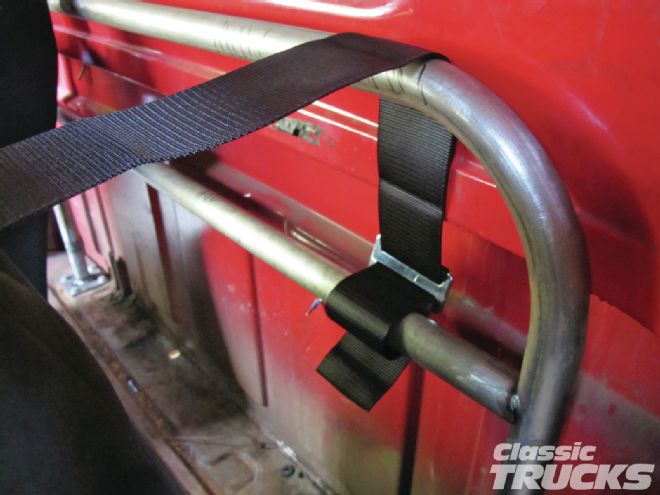
13 Shoulder straps shouldn’t be able to fall over the side of the seat hoop. Don’t count on the seat holes to hold the belts in place during an accident especially if your seat does not have seatbelt holes.
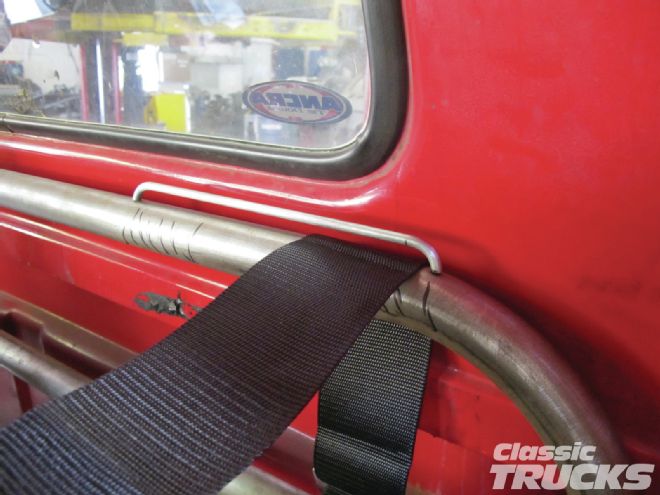
14 An easy fix is to add a small piece of 1⁄4-inch round bar to the top of the hoop. This will hold the shoulder belts in the right spot.

15 With the seatbelt hoop tacked, I removed it so that I could weld the remainder of the tubes. I don’t own a tubing bender, but if you ask around, someone in the area should have one. I simply had a nearby shop bend some tubing and all I did was fit it to the 4x3⁄16 plate. With minimal fabrication skills, anyone could make a seat hoop and either weld it themselves or have a welder do it.
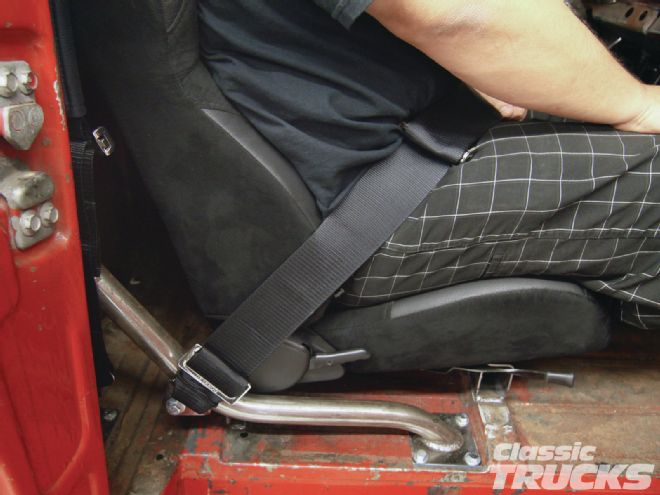
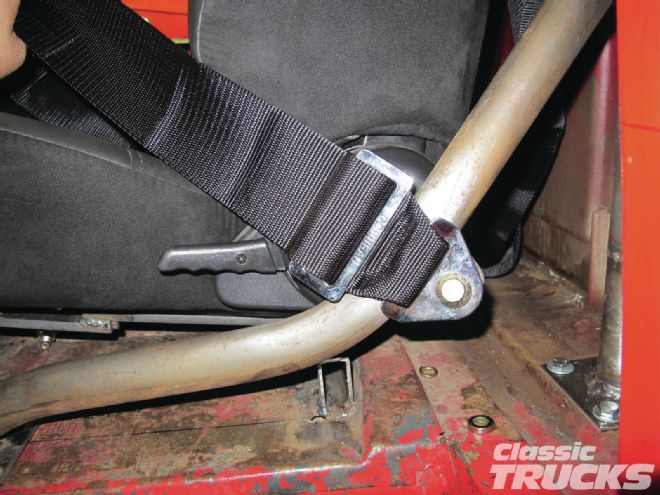
16, 17 Lap belts are important as well because they will hold your hips in the seat while in a corner. I’m sure we all know what it feels like to slide across a bench seat when hitting a corner too fast. Lap belts should be mounted at a 45-degree angle, but no more than 60 degrees. For the outer seatbelt tabs I used seatbelt mounting tabs that are built for tubing and have a slight bend in them for better strength.
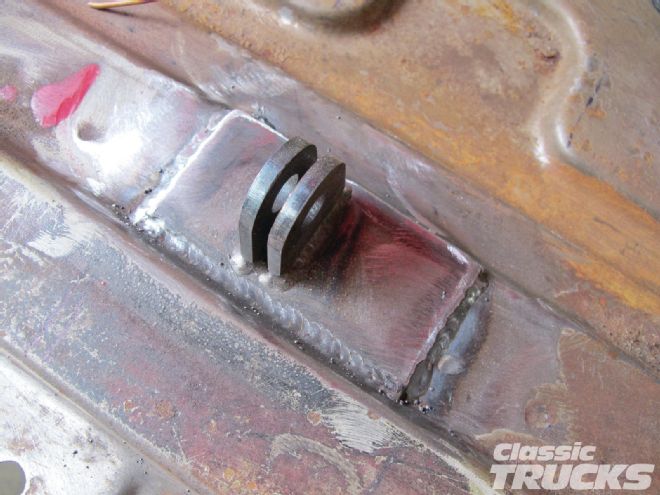
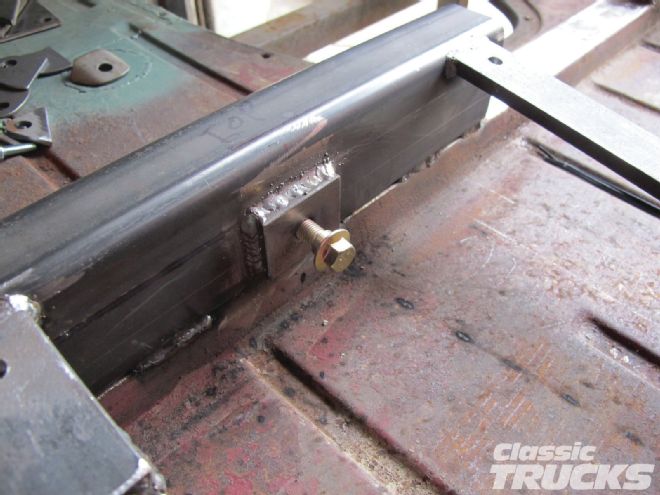
18 I made the inner lap belt mounts out of 3⁄16 plate and tabs from the local metal supply store. Notice how I welded the tabs to a plate and then welded the plate to a strong part of the body. The same 45-degree angle is used on the inner lap belt and a double shear tab with the lap belt bolted in the center of the tab.
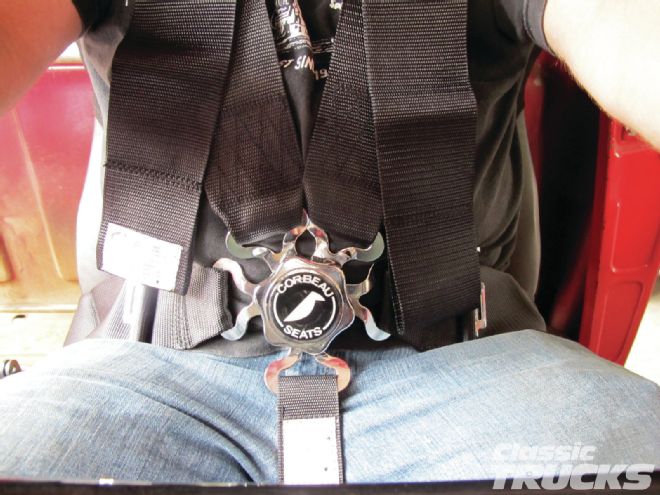
19 Preferably I would have liked the submarine belt to mount further back, but when sitting in the seat the sub belt is in line with my chest. Ideally the sub belt mount should be just behind your chest so that it holds you and prevents you from sliding under the lap and shoulder belts.
20 When strapping in the seat, the lap belts should be put on first, followed by tightening the lap belts snug to your hips. The submarine belt, if you have one, and then the shoulder belts are clicked in so that they are snug, but not too tight. I always leave room in the shoulder belts so that I can turn off the ignition switch if the throttle pedal were to stick or something like that were to happen. Notice the lap belts are around my hips and not around my belly button. A common mistake is to tighten the shoulder belts up before the lap belts causing the lap belts to move up into your abdomen.

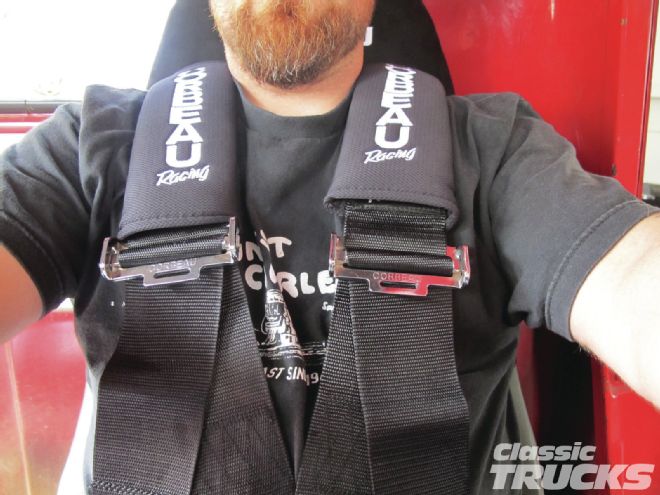
21 The shoulder belts should also be placed so that the adjuster is away from your neck and collarbones. I also added the shoulder pads for increased comfort in and to avoid the belts chaffing around my neck.
22 If you plan on doing any kind of performance driving, then a bucket seat like the Corbeau A4 could be the answer you need. Besides the performance aspect of the seat, I feel they look amazing in my truck and are really comfortable to sit in.
