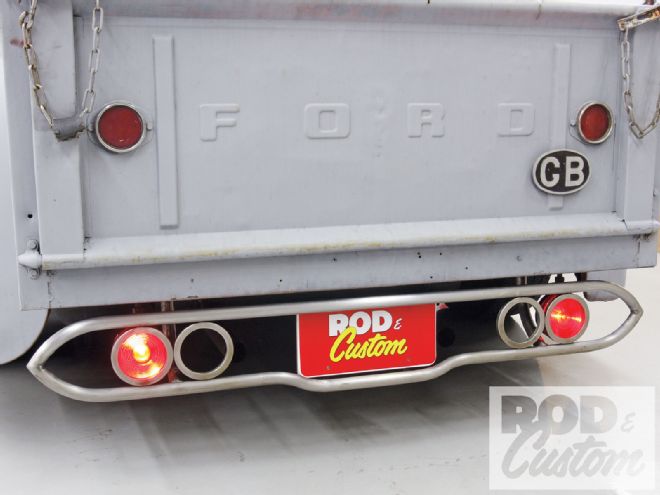
My 1946 Ford roadster pickup sits pretty low, but the large gap under the tailgate has always bugged me. So, I decided to fabricate a nerf bar for the rear, incorporating the taillights. I fitted trailer lights as a temporary measure on the eve of the Rod & Custom road trip to Bonneville in 2008, and of course they're still on there, but look awful. I've kept them, but now they're somewhat disguised.

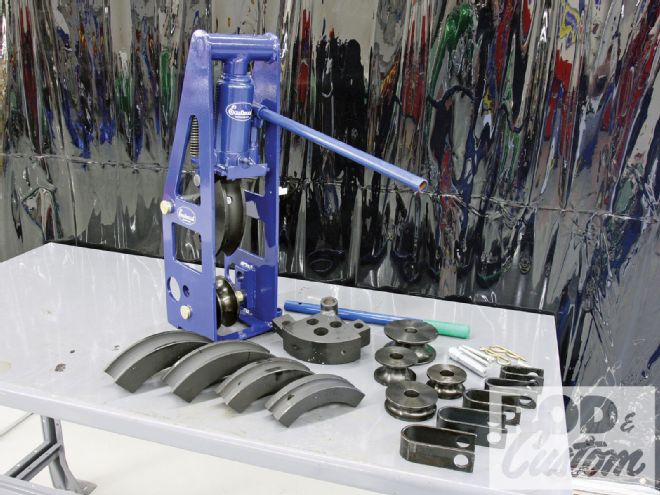
So, armed with a hydraulic tubing bender and a notcher, both supplied by The Eastwood Company, I secured all the materials I figured I'd need for a paltry $15, and set to work. Eastwood states that its bender can produce up to 60-degree bends in steel and chromoly tubing in 1 1/2-, 1 5/8-, and 1 3/4-inch diameter, and up to 90-degree bends in 3/4- and 1-inch tubing, and though I didn't need to produce bends over 45 degrees I couldn't get it to produce more than 60-degree bends in 1-inch tubing. The bottle jack that operates the die required a couple more inches of travel before the die moved. Referring to the instructions, the jack rod could be extended to provide more travel; 90-degree bends were then attainable, though this only applies to smaller-diameter tubing.
 Here's what we used to bend our tubing: Eastwood's Pro Former tubing bender. Supplied with dies and followers to handle 3/4-, 1-, 1 1/2-, 1 5/8-, and 1 3/4-inch-diameter steel and chromoly tubing, it's versatile and useful for any number of small fab jobs during a project build.
In operation, the bender was simple to use and performed effortlessly. It didn't take long before I was ready to break out the welder. In fact, I spent more time measuring and cutting than I did bending.
While the ends of the nerf bar feature the tubing simply cut at an angle and butt-welded, the joint between the lower tube and the mounts required a notch in the end of the latter to fit snugly around the tube before welding. I've done this in the past (and even built rollcages in the same manner) by careful use of a cutting disc in a grinder, and a file, but a decent tubing notcher saves much time Eastwood's tubing notcher makes use of easily sourced hole saws and a regular electric hand drill, meaning perfectly notched tubing is within everyone's reach. Just take it slow with the drill; hole saws don't take kindly to high speeds.
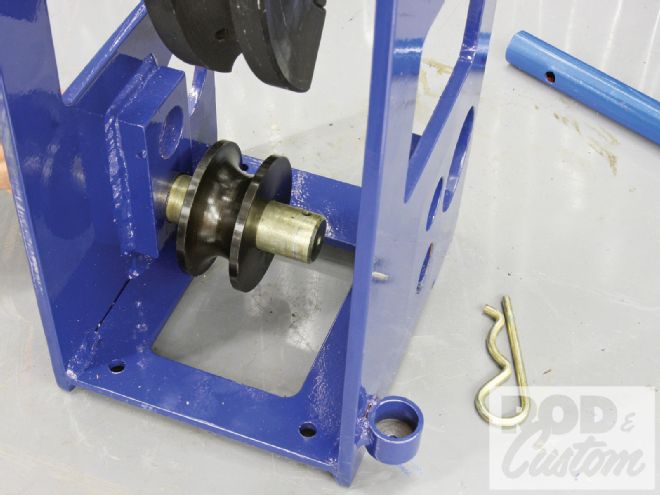
 The corresponding 1-inch follower also required fitting, though this is as simple as pulling the R-clip, sliding out the shaft, and swapping the follower.
A project like this should easily be completed in a day, and can make a big difference to the appearance of any car, for very little outlay. Until you get the bill for chrome-plating that is ...
Light Options
I'll readily admit the trailer lights on the truck were a temporary measure the night before leaving for Bonneville in 2008, and of course they're still there, but hidden behind the nerf bar they're not that bad. Plus, I like the fact that they're so bright compared to vintage lights. However, I had considered a couple of other options when planning the project. Originally I'd planned to curve the ends of the nerf bar around the corner of the pickup bed, and thought it'd be neat to use the lights I took off my other project, the "Purple Pig" '49 Chevy, as this'd provide reflectors too. I think this would have looked rather neat with the lights turned on their side. Teardrops were another brief option, if for no reason other than I already had a new pair, and their shape is very close to the curve of the ends of the nerf bar, but they're somewhat over-used in my opinion. Likewise, the '59 Caddy lights, which also would have had the disadvantage of being the rearmost part of the truck, and most likely would constantly be getting broken.