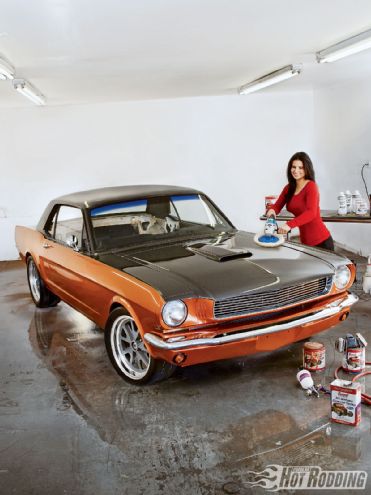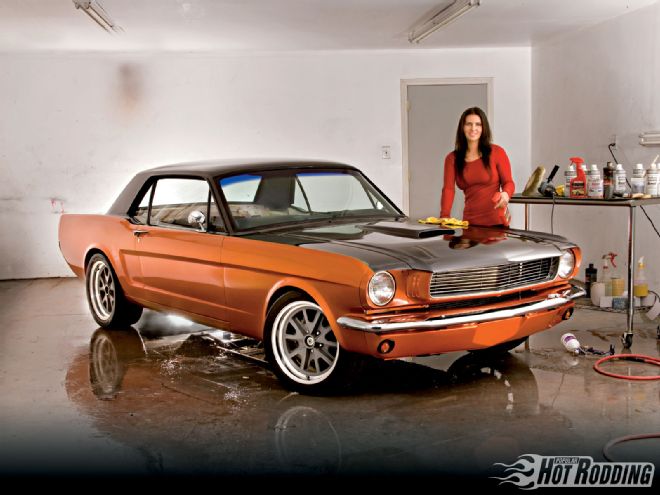
Unless you were lucky or smart enough to pick up a project with a clean coat of paint already on it, you will at some point find yourself at this juncture. Your smarter side says to find someone reputable to take over the project for this phase. Your more adventurous and sometimes self-destructive side tells you it can't be that hard, and that you can do it yourself. We found a happy middle ground for our '66 Mustang, known as Project Street Fighter. Cris Gonzalez, owner of JCG Restorations and Customs in Oxnard, California, opened his shop's doors to us to help teach us how to make it happen. He also lent us his best body man, Leo Alcarzar, for the duration of the project to guide us through the steps. We also got Primo Valdovinos, Cris' lead fabricator to do the rust repair, patch panels, and some welding to clean up the Mustang. Between Leo, Primo, and I, there are over 350 hours of prepping, sanding, filling, welding, taping, painting, and polishing that went into this project. If we were to hand the keys over to JCG and ask them to do all of the work from start to finish, it would be around $8,000. Nevertheless, the more work you can do yourself, the more money you will save, and that's what we were after. Above all else, the idea was to learn the necessary skills, and document them for you. Know that we aren't passing Project Street Fighter off as a low-buck car, but it's not by any means a show-only car either. The idea was to get as close to show quality as possible, while doing it on a real-guy budget-a goal many of you share with us.
In the planning stage, you have to consider how much time and money to allow yourself. If you want to do everything to its highest possible quality, you'll find yourself on a slippery slope to joblessness and debt. If you are cutting corners and skipping steps, you'll end up with a lesser outcome. The goal is to pick your battles-and your materials-wisely.
So far, with exception of the transmission installation, the project has been done outdoors in the apartment complex parking lot where I live. The bare metal and highly porous qualities of body filler make it unwise to perform bodywork outside, especially with the damp morning air. The idea was to do the most of the grunt work myself, while leaving the crucial workings to the experts. With the car at JCG Restorations and Customs, we were in good hands. Before the disassembly began, we decided on a paint system. You may recall in last year's paint and body issue, we wrote about Summit's new line of paints, and we've been eager to try them out since then. The great thing about the Summit system is that it's very inexpensive, and there is a large selection of colors to choose from. Summit has made a one-stop shop for everything you need to do the job of painting your car, from start to finish. Because of the color selection, we upgraded from the black and orange combination of our rendering, to a charcoal and bright-orange metallic to make things a little more interesting.
Our final product was more impressive than we thought it would be. We spent minimal funds on the supplies, and traded money for time getting our hands dirty to help reduce the overall money spent. We were going in with a budget theme, and came out with a show quality paintjob.
Disassembly
The first step is to disassemble the vehicle. Along the way you'll run into many seized screws and broken-off or rounded bolt heads, which can be taken care of with an Easy-Out set from Craftsman and a couple cans of Royal Purple Maxfilm penetrating lubricant. Though it's fun to fulfill your destructive side and yank out every part in sight with the speed and vigor of a mad man, there are a couple things you should slow down for to make reassembling easier. First off, take a lot of photos of the car while it's still together. Things like the interior door assembly are pretty complicated, and can be difficult to put back together without references. The second thing that will save you much time and frustration is putting all of the hardware in plastic bags and labeling them. There are hundreds of bolts that look very similar, but will fight you going back on if they aren't exactly right.
Panel Prep
Anyone with experience will tell you good paint preparation is the key. The actual painting part of the process is a very small percent of the work. If the bodywork under the paint isn't right, the paint won't look good, and it won't last. This phase simply can't be rushed, because in the long run, doing it over again will take much longer than taking your time to begin with. While it's not always necessary to get the panels down to the metal, it's often a good idea. Years of age and bad bodywork can become a problem in the future if it's not dealt with at this stage. We found extensive damage to panels that appeared to be fine because of the amount of filler that they had been plastered with. We wanted a fresh start, and opted to have the panels media blasted. Someone looking to save a little bit of time would work with the filler that's already on the panels and go from there.
Bodywork
Once the car is stripped, it's time to get it smooth. The broad, flat panels on Mustangs are easily turned wavy from years of door dings, accidents, and age in general. Without replacing everything, we can bring the highs and lows to a middle ground and restore the factory flatness. There are more specialized tools that are used to shape the metal than we can list, but we'll go over a couple of the major ones we used on this project. The idea behind repair instead of replacing is to try and keep the car as original as possible. There is a point where the cost of repair exceeds that of replacing the panel. If you're lucky, you can get hold of NOS (new old stock) panels that fits like the originals, because they are. Shopping at swap meets for original panels in good (or at least better) condition is a great option too. In our case, the panels we had were all salvageable and just took some working.
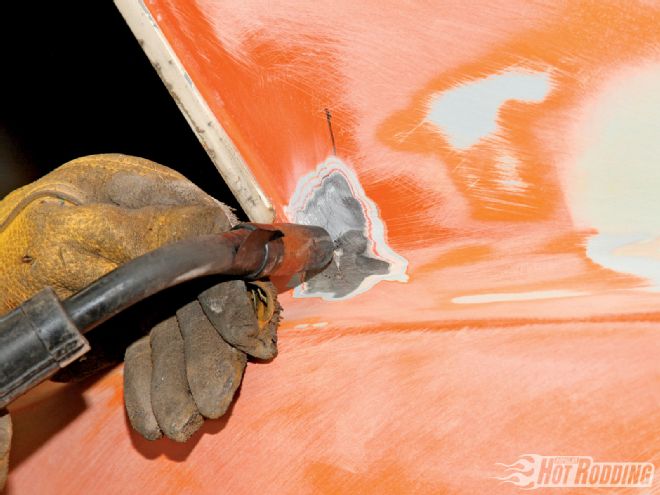 Mustangs, like most frame-less cars, have a problem with body flex. Flex is often manifested at the C-pillar, where twisting stress is transmitted. This makes it a common area on the Mustang for cracks. To fix the damage, I MIG-welded the crack to keep it from showing up in the paint later. The real solution to the problem is to weld in a rollcage, add subframe connectors, or some sort of undercarriage bracing. That will come down the line.
First, we get the damaged metal as close to where we want it using tools like hammers, dollies, slide hammers, and sometimes welders. Once it's close, the finish work is done using plastic body filler, commonly (and usually incorrectly) referred to by the trade name of Bondo. We used Evercoat's Rage plastic filler for the work on this car. The more time you have available, the closer you can get the surface how you like using the metalworking tools, then the less filler you need. JCG Restoration's regular customers usually allow them more time, but because we had a deadline and a budget, we limited the amount of time we spent metalworking.
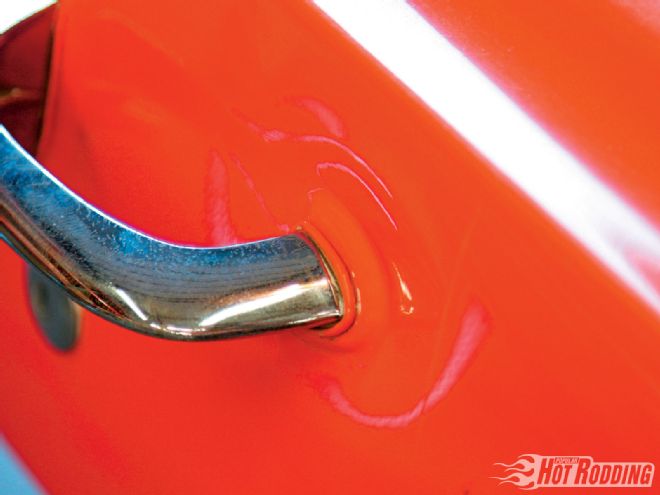 Mustang doors are constructed with far-too-thin sheetmetal, and without a central body line, they aren't very resistant to damage. An enthusiastic door slam, or more often leaning on the handle hard after half-latching, can send the door handle and the door skin beyond its original shape. The way we fixed this was to do the opposite. With the door latched and locked, we yanked on the handle until the metal flexed back into its original location, a lucky fix.
The Primer Coat
Primer clears the canvas after all the bodywork is done. It acts as a sealant between the repairs, and the paint that will soon coat the car. We used Summit's Acrylic Urethane 2K primer which mixes 4:1 with one of their universal activators. To comply with California's laws, we used their zero-VOC activator. The first application of primer is also the final check for high and low spots. Before primer hits the car, the entire surface needs to be sanded to a 160-grit finish. To rough-out the filler, we used 80-grit paper before the 160-grit final sanding. We used Summit's Wax and Grease remover and Surface Wash before paint touched the car. If there is grease on the surface, it will keep the paint from adhering and possibly cause distortions in the paint. Because we don't all have access to top-of-the-line paint booths, chances are there will be dirt in the air that will settle on the car. To help keep this under control, we wipe the car down with a tack rag before every application material. This is a cheese cloth fabric laced with an adhesive material that picks up dirt particles on the car's surface.
Color Coat
Though the rendering for project Street Fighter flaunts a simple black and orange color combination, the palate of Summit's paint line gave us inspiration to mix it up a bit. We chose their Bright Orange Metallic to replace the standard orange color, and a Medium Charcoal Metallic in place of the black. The brilliance of these colors proved to give huge impact that the original non-metallic color couldn't touch. Summit has expanded their acrylic urethane line of paints to 40 colors, with plans to add more in the future. These are single-stage paints, meaning the clear is part of the basecoat, making the base color coat responsible for color and shine. For the at-home do-it-yourself guy, this is a great time-saver, and simplifies the process so your garage isn't tied up for weeks on end. Nevertheless, if you so choose (either before or during painting), you can lay clear over this paint, the same as you would a basecoat in a two-stage system.
The vertical panels that were sprayed orange came out flawless and free of debris, so we didn't need to add clear. The metallic gray, however, needed the clearcoat, because it's on the top, and some dirt found its way into the paint. While it was still masked, we added clearcoat so we would be able to sand it later. It should be noted that with metallic colors, you can't sand the basecoat. (If we had stayed with the original gloss black of our rendering, this would not have been a problem, but hindsight is always 20/20.) Sanding on a single-stage metallic will make the metallic blotchy, and there is no way to repair this. If you end up with a heavy amount of dirt or orange peel, you can bury it in clear, then do your sanding on the clear. This makes the paint much more forgiving.
Cut and Buff
If you've done all the right preparation before laying down your base color coat and clearcoat, the cut and buff procedure can be one of the most satisfying experiences of doing your own body and paint. Laying the groundwork for a flat surface is not easy, but if you take that time, it will reward you with a mirror-like finish at the cut and buff stage. If you are in a rush to the finish line and take shortcuts, the cut and buff stage will be more of a nightmare than anything else.
It is important in the metalworking and build primer stages that large, uninterrupted sections of bodywork are leveled properly with sanding blocks and long boards where appropriate. If these areas have been worked evenly, and special attention to the guidecoat has been given, then it will all show up in the cut and buff stages.
During the cut and buff, the idea is to gradually bring the rough texture of the finish gradually flatter. One thing you are definitely not doing during cutting is surface leveling-that should've been accomplished long before this step. Skipping, or rushing grit stages will result in grooves or scratches that cannot be eliminated in subsequent stages. At odds with this is the finite amount of material built-up during the basecoat (for single stage) or clearcoat (dual-stage) application. If care isn't taken, it's easy to burn through these layers, especially at corners, points, or convex areas. The idea is to smooth the material with your media just enough to remove the fine scratches from the previous media grit.
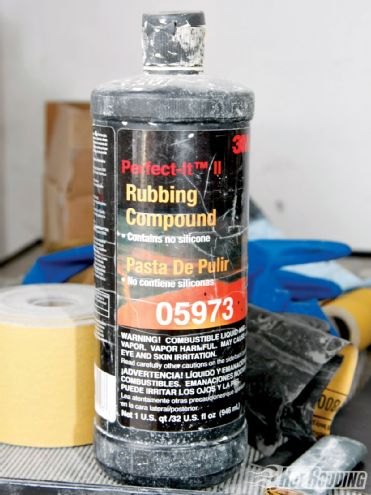 3M Perfect-It II rubbing compound removes the scratches left by wet sanding, and gives the paint the luster we were after. If you let the pad go dry when buffing, you can damage the surface of the paint, so keep a healthy application of this compound on the paint where you're working.
As with block sanding large, flat areas at the primer stage, the cutting stage is done similarly, with flexible rubber blocks, or cawls. This is accomplished with water (wet sanding) during the cutting stage. This provides waste material a way out, preventing the media from loading up, and burning the finish.
Finishing Touches
This was the fun part. After hours of banging on panels, sanding filler, priming, sanding, priming again, painting, cutting, and buffing, we finally got to assemble the car. So much of what we've been doing has been in the body shop and covered with dust that the finished product was hard to imagine. Now that it was time to get it back together, we were finally getting the gratification.
Before the front and rear glass went back in to make the car look complete, the headliner needed to be installed first, since the headliner tucks under the glass. We had a brand-new headliner in the box of parts we got from the previous owner, but a new one goes for about $20 through NPD. Getting the headliner in isn't too difficult, but we had some help with that. We'll explain further in a later story when we dive into our interior overhaul.
Bodywork isn't easy, and there are many difficult steps to take. Problems come up and surprises are to be expected. It's one of the only modifications to a car you can do that doesn't come with a part number or guarantee. A combination of time, effort, hard work, and quality materials are responsible for the final product. And as we've shown, it doesn't cost an arm and a leg to get great results from Summit's paint system.
Media Blasting
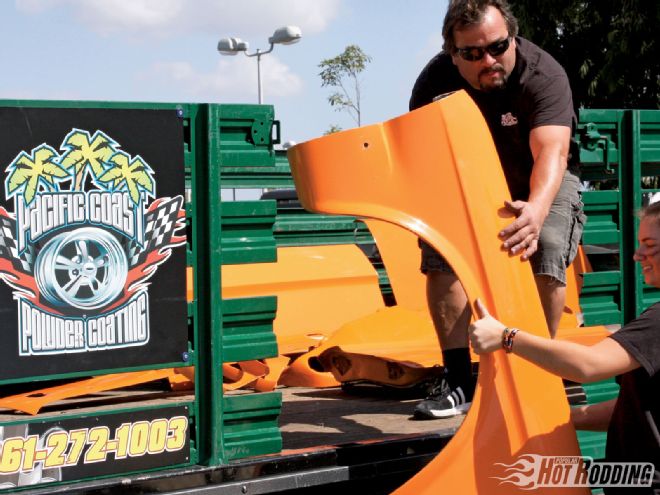
If you can reuse the original sheetmetal without spending a ridiculous amount of time and money to save them, you should. It's no secret that reproductions often don't fit the same way the factory panels do. We took every panel that unbolted from the car and sent them to Pacific Coast Powder Coating in Palmdale, California, to have the paint stripped from the front and back of each piece. Along with surface rust, the media blasting took off the many repairs made over the years. We also got to see exactly how much damage there was. The media blasting gave us a fresh start with bare metal so that there would be no mysteries, and we could do the repairs right. If the car wasn't already fitted with new front and rear suspension as well as drivetrain, we would've had the entire shell stripped as well. Pacific Coast charged $550 to blast the panels, and if we had taken the entire shell with the panels, we'd be looking at around $1,000. If you've got the car stripped, we would recommend doing the whole thing.
Rust Repair
No old car project is complete without some rust repair. We were pretty lucky that there was no structural damage, just some small window frame and driprail rot. The correct way to repair a rusty area is to completely remove it. Just like cancer (as it's also called) it spreads, and if it's not completely removed it will show up again.
Stud Welder & Slide Hammer
Dents are usually concave, meaning they need to be brought up to flatten the panel. Often they can be fixed with a hammer and dolly, but sometimes only the top surface of the metal is exposed. In the example, there were dents along the top corner of the roof that were just over the roof brace structure. There was no room to use the hammer and dolly so we turned to the stud welder and slide hammer to pull the dents out.
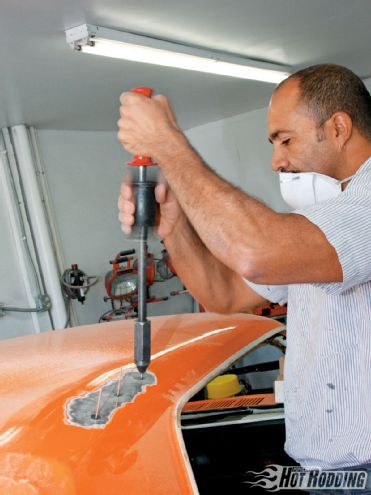 The slide hammer base tightens over the stud. The hammer has a weight that slides up and stops on the handle's lower face. This impact pulls the dent up. When we were happy with the result, we clipped the stud off with a pair of side-cutting pliers and ground the remaining stud down. A kit that includes the stud welder, studs, and a slide hammer by Motor Guard (PN MCJ1000) goes for $209.95 at Summit Racing.
Hammer & Dolly
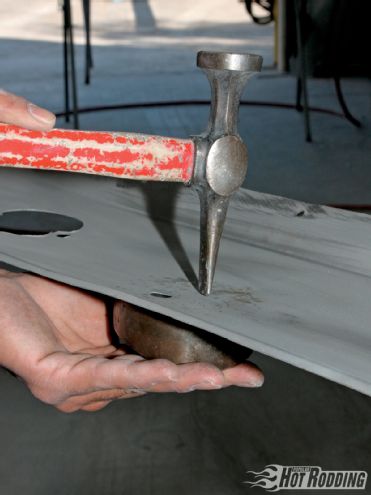
If you can easily access both sides of the panel, a hammer and dolly can be used to bring up lows and push down highs. Using these tools is more of an art than a science, and those who have the feel for it make effortless work out of it. Inexperienced body men can pretty easily make things worse. There are two basic ways to use these tools. The first is to hit the hammer on the metal with the dolly directly behind it. This is called hammering "on dolly." This effectively stretches the sheetmetal because the force of the hammer onto the metal with the dolly backing makes the metal slightly thinner. When the metal stretches, it has no place to go but up. The second way to use these tools is to hammer "off dolly." You hold the dolly under a low spot, and hammer just to the side of it on the surrounding high spots. The rebound action of the dolly after the hammer strikes brings up the low spot while the hammer brings down the high spot. Having the right shaped dolly
can strongly improve your results because the closer the dolly matches the panel's contours, the less work it will take to get a good product. A starter set by Performance Tool can be found at SummitRacing.com for under $20. Ron Covell is an extremely experienced body man, and has made a living creating tools, videos, and books to share his talent. If you're interested in becoming more fluent in the art of metal shaping, he's the guy to watch.
Smoothing
If you're doing a complete repaint like we are, now is the time to make any body changes you desire. We wanted to clean up the look of this car because decorative trim isn't consistent with our Street Fighter theme. Street Fighter to us says nothing too fancy, nothing unnecessary, and a little something racy. This leaves no room for the fancy bright work meant to attract a different crowd.
Block Sanding
Block sanding will make or break your paintjob. If the panel isn't sanded correctly it will be visibly wavy and uneven. After we smoothed out the metal, we applied a skim coat of filler for the final tune. It's next to impossible to make the panel perfect without the use of this stuff. There are many times through the body and paint preparation process that we use block sanding, even in the final sanding of the clearcoat. The Dura Block set from Summit Racing has seven different shaped blocks to cover all of the contours on your car. When used correctly, they ensure a smooth, flat surface through the bodywork and paint prep stages. To go with these blocks, Summit Racing also carries sandpaper in rolls with a sticky back to adhere to the blocks. Another thing that comes in quite handy is a dual-action (DA) sander. Summit offers a sander Value Pack that includes the pneumatic DA sander and four 3M sanding paper rolls that include 80-, 180-, 320-, and 400-grit (PN CMB-17-0032) for $189.95.
Trim Painting
Mustangs have a whole lot of bright trim on them, but the shiny look wasn't going to match the sleek and tough look we're going for with Project Street Fighter. The trim that we didn't remove we painted satin black to help it blend in with the car. Before we could paint, we had to clean and sand the trim. As you can see, the trim had overspray from the last three paintjobs. We used a razor to scrape it off. Once the parts were clean, we hit them with 160-grit sandpaper to give the surface bite for the paint to adhere to. We used Dupli-Color's Trim Black for all the exterior trim and also for the inside of the doors, fenders, and taillight buckets shown here.
Summit Paint
With the help of premium-quality manufacturers, Summit Racing has branded their own line of paint products. Their substantial name in the aftermarket has given them the ability to supply their customers with a simple-to-use acrylic urethane paint system you can apply in your own garage. They've made the process painfully simple, for those of us whose profession isn't refinishing.
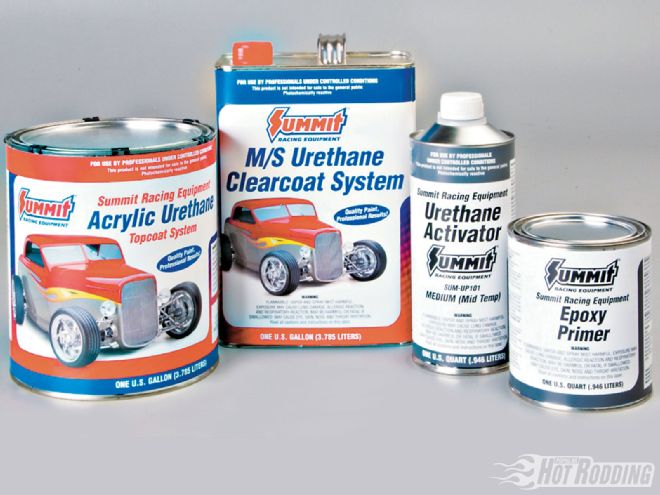
Besides the Summit paint products, the only other things you'll need to get the job done is a 60-gallon (or higher) air compressor, spay gun, and masking and sanding materials, many of which are available though Summit Racing.
All of Summit's paint products mix in the same ratio of 4:1, so there is no confusion. Summit's acrylic urethane topcoat is a single-stage paint, meaning the clearcoat is optional. The exceptions are with specific colors where the metallic content is too coarse to leave without a clearcoat. Summit has found that one gallon of this topcoat will paint the average-sized car, but suggests getting an extra gallon if you're painting interior panels too.
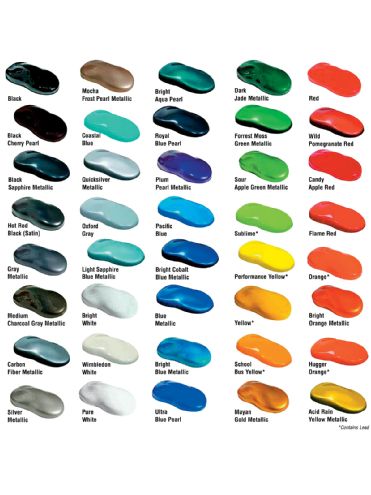
If you've got your heart set on the ultra deep look of a clearcoated car, you have two choices in product. Summit has a medium- and high-solids clear. The high-solids version is simply the top-shelf version with the deepest, longest-lasting gloss.
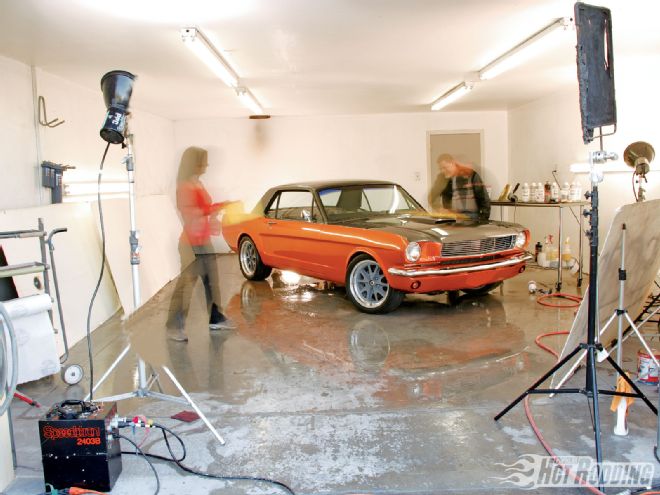
The sanding and polishing process is very similar to other paints, but can be done after only a couple days. The system is made to be sprayed without a climate-controlled paint booth by using temperature-specific activators. This makes it possible to have a show-quality paintjob, without a professional paint booth or high-dollar supplies.
THE PRODUCTS
Prep Solvents
Wax & Grease remover-strong blend of solvents to remove bugs, road grime, oil, and other residue from the body during and after body preparation
Surface Wash-mild wash for the last wipe-down before primer or paint is applied to remove dust and debris.
Fish-Eye Eliminator-to allow the paint to flow over imperfections and avoid the fish-eye effect
Primers
Epoxy Primer-especially formulated for superior adhesion to bare metal. It's mixed 4:1 with epoxy catalyst.
Urethane 2K Primer-high-build primer to conceal low spots in a fast-drying formula. Will stick to sealers, primers, OE finishes, and body filler. Mixed 4:1 with urethane activator.
Paint
Single-Stage Urethane Topcoat-premium formula makes this paint highly resistant to damage from UV exposure, chemicals, weather, and chips. Will hold its color and gloss longer than acrylic and synthetic enamels. Does not require a clearcoat for glossy finish and is available in 20 colors; optional clear for enhanced gloss.
Universal Activators-mix in a 4:1 ratio with Summit's urethane products. Three different activators are offered to compensate for the painting conditions; Fast activator for below 70° F, medium for between 70° F and 80° F, and a slow for 80° and above.
Urethane Reducers-to allow flow and leveling of paint. Comes in fast, medium, slow, and special Zero-VOC to comply with strict environmental regulations. With topcoat, mixes up to 10 percent, for high-solids clears, mix 4:1:1.
Clear
Medium-Solids Urethane Clear-user-friendly operation, standard (but not economy) version
High-Solids Urethane Clear-higher build, deeper gloss version of the medium solid
PRICING Wax & Grease Remover (quart) $9.95 Surface Wash (quart) $9.95 Fish-Eye Eliminator (pint) $9.95 Epoxy Primer (gallon) $49.95 Epoxy Catalyst (quart) $16.95 2K Primer Surfacer (gallon) $39.95 Single-Stage Urethane Topcoat (gallon) $79.95 Urethane Specialty Metallic Topcoat (gallon) $89.95 Universal Urethane Activator (quart) $19.95 Universal Urethane Reducer (quart) $9.95 Medium-Solids Urethane Clearcoat (gallon) $49.95 High-solids Urethane Clearcoat (gallon) $59.95
Where the Money Went
We were able to use all of the tools available to us at JCG Restoration, but here are the supplies we used and some equipment we highly recommend. Everything here is available at SummitRacing.com; we found they have a huge selection of paint products, supplies, and tools to handle any bodywork and painting project.
ABRASIVES Description: Source: PN: Cost: 7-block Set Dura Block ARD-TAI-AF44L $59.95 Sandpaper roll 80-grit Carborundum CDM-70528 $15.95 Sandpaper roll 160-grit Carborundum CDM-70526 $15.95 Sandpaper roll 220-grit Carborundum CDM-70525 $15.95 Sandpaper roll 400-grit Carborundum CDM-70523 $15.95 Sandpaper sheets (50) 600-grit Mirka 21-104-600 $31.95 Sandpaper sheets (50) 1000-grit Carborundum 63872 $17.95 Scotch-Brite 3M 7447 $20.95
SUPPLIES Surface Wash Summit Racing SUM-UP403 $9.95 Wax and grease remover Summit Racing SUM-UP404 $9.95 Air line filters DeVilbiss DVR-130028 $8.95 Strainers and stir sticks (6 of each) Dupli-Color SHW-BSP400 (2) $5.90 Mixing cups Midstate Tool & Supply US36174(6) $7.50 Filler Rage FGE-112 $44.95 Spreaders Performance Tool WMR-W1001 $1.50 Rubbing compound 3M Perfect-It II TRM-5973 $19.95
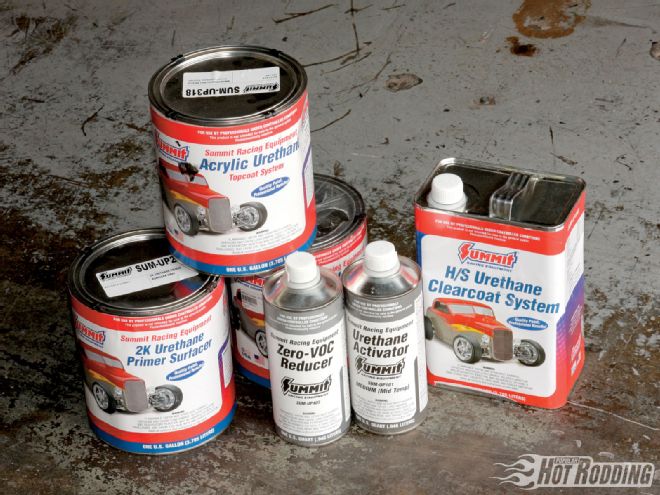
PAINT PRODUCTS Bright Orange Metallic (1 gallon) Summit Racing SUM-UP314 $89.95 Medium Charcoal Gray Metallic (1 gallon) Summit Racing SUM-UP318 $79.95 2K Primer (2 gallons) Summit Racing SUM-UP220 $79.90 High-solids clear (1 gallon) Summit Racing SUM-UP200 $59.95 Reducer (1 gallon) Summit Racing SUM-UP405 $39.80 Activator (1 gallon) Summit Racing SUM-UP101 $79.80
HARD PARTS Hood NPD 16612-1E $499.95 Bolt kit ('66 only) NPD 00001-2K $199 Gas cap NPD 9030-20A1 $90.50 Door hinges (upper) NPD 22800-1A,22801-1A $39.90 Door hinges (lower) NPD 22810-1A,22811-1A $45.90 Total: $1,607.85 THE COST SO FAR Description: Cost: The car $3,800 Battery replace and relocation (11/08) $299 Radiator and fans (12/08) $1,398.12 Spindles, front brakes, wheels tires (1/09) $3,067.04 Trunk rehab and toolbox (2/09) $40.48 Rack-and-pinion steering, column, and wheel (4/09) $3,012 9-inch rear and brakes (5/09) $4,631.02 Rear suspension (6/09) $2,918 Front suspension (7/09) $3,034 Engine bay cleanup with engine sale (8/09) -$394.75 Smeding 427 Windsor (9/09) $9,995 Keisler five-speed swap (10/09) $4,181.55 Paint and body supplies (3/10) $1,607.85 Total: $37,589.31