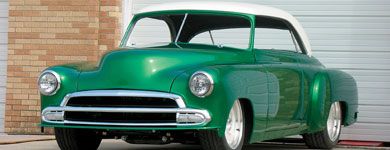

In the earliest days of automobile it was a given that motorists had to be a hearty lot. Travelers venturing near or far expected to be hot in the summer, cold and wet in the winter. In the '30s and '40s automobiles became more civilized, although sizzling interior temperatures in the summer with drafts and drips in the winter remained standard equipment. By the time 1949 rolled around American automobiles had improved dramatically in the area of passenger comfort, and a part of that had to do with better weatherstripping that kept the elements out and the heat (and now the cool) in.
Generally speaking there are two reasons for replacing the weatherstripping on a '50s car-the original rubber is crumbling and ineffective, or it's being removed during body and paintwork so the area can be properly prepped and refinished. Our '52 Chevy Bel Air was a candidate on both counts.
To insulate our Chevy's passengers from the elements the crew at Woody's Hot Rodz turned to SoffSeal for the windshield and back window gaskets, weatherstripping, and various rubber gaskets and pads our Chevy required:
SoffSeal Part Number Description 0540 door weatherstrip 0551 upper door hinge seal E1085 self-adhesive weatherstrip to help further seal the front of the door 0494 trunk weatherstrip, body and trunklid seals 0520 windshield rubber 0530 rear window rubber 0596 taillight gasket 0585 back-up lamp pads SRF 148 beltline weatherstrip Just out of the paint booth (without its painted cove) and with some of the trim installed, our Road Tour car is ready for glass.
There are no special tools needed to install weatherstripping, just the basics plus masking tape, razor blades or a sharp knife, and adhesive (an installation tip-once the adhesive is applied, pull the weatherstrip up and let the adhesive "spider web" for a better bond). SoffSeal supplies complete instructions plus they offer a downloadable installation guide that answers frequently asked questions.
While removing and replacing most weatherstripping is a straightforward operation that most of us are willing to try, the thought of dealing with the windshield and rear window often scares homebuilders, but it's easier than you might think. Removing the windshield and back glass is simply a matter of using a razor blade to cut away the inner lip on the rubber gasket that fits over the flange, or pinchweld, in the body. Normally the glass will come out easily, but if some sort of sealer has been used over the years to stop leaks, it may be stuck in place. If you're planning on reusing the glass, resist the temptation to stick something under the edge to pry-that's a sure way to start a crack. Instead, apply gentle pressure from the inside. Gently slap the glass with the palm of your hand around the edges until it comes loose, or try sitting in the seat and pushing on the glass with your feet. Just make sure to have someone outside the car to catch it once it comes loose. Once the glass has been removed, inspect the area where the rubber fits carefully. Thorough cleaning will be required and, if some rust repair is required, now's the time to take care of it.
The body of our Bel Air was stripped to bare metal and we were fortunate all the pinchwelds and the areas around the windshield and back glass openings were in good shape. So, once the paint was dry, the crew at Woody's could install the new glass from Chevs of the 40s. A two-man operation, the process is usually referred to "roping in the glass" for reasons you'll soon see. Basically the procedure consists of installing the new rubber on the glass, then a cord is placed in the groove that fits over the lip of the body. The glass is placed in the opening from the outside, and then from the inside the cord is pulled toward the center of the glass rolling the rubber over the lip of the opening in the process. You're probably saying to yourself "that sounds too easy" to be true, but trust us, it's not the pain the glass you think it is.