
The irony of a new paint job is that so little of the job is about paint. Maybe 10 percent of the whole process is applying color. The other 90 percent (or so) is about prepping the car prior to paint and then treating the new paint once it's on the car.
Unless you're doing a simple scuff-and-spray, stripping paint and making repairs has probably involved removing and/or replacing body panels. Now that the metal is sorted out, it's time to put it all back together again. This is called the dry build, and it ensures everything goes back together as it should. It's done before painting so the test-fit assembly and any needed changes don't mar a freshly coated surface.
The dry build is more than just hanging body parts. It's the opportunity to check how each panel and part fits with the one next to it. The doors, hood, and trunk lid should open and close without interference and also sit square in their holes. All the gaps and seams between panels should not only be uniform but also the right size. (Ideal gap size varies due to a number of factors ranging from the type and size of the car to whether the front door swings inside the fender or away from it.) It's during the dry build that body-mount bushings are replaced and door hinges refurbished to cure sag. Then note how those changes have affected panel fit.
There are as many ways to assemble sheetmetal and align panels as there are kinds of cars. A '32 roadster doesn't go together the same way as a '69 Camaro, yet some of the basic principles are the same. Start with some fixed point on the car, and use it as a reference to hang and align the other parts.
In the case of the Deuce, we learned from Bill "Birdman" Stewart, when he worked at So-Cal Speed Shop, that "you start up front and work back." Get the grille aligned with the radiator, then get the shell aligned with the grille. From there he'd spend an ungodly number of hours lining up the hood with the shell, then aligning the back of the hood with the cowl, and working his way back to the gas tank sitting snugly between the rear frame horns.
When talking about muscle-era cars, "it's all about the doors," said our bodywork sources. Get the doors to fit right, and they'll serve as reference points for the fenders, which in turn frame the hood and the nose pieces.
"Think about how the factory built the car. It's a logical series of events," explained Craig Hopkins, who runs Goodmark Industries' installation center. "The quarter-panels are welded in place, and the doors are fit to the quarters. You can't do the fenders and then try to bring the doors to that.
It can be difficult to imagine how to line up a door because there are so many ways to adjust it. For Hopkins, aligning the door on a GM car is made simpler if you start by making sure the bottoms of the doors are parallel with the rockers and sit off the rockers anywhere from 18 to 316 inch, depending on the car. "If you start with those rocker measurements, it all should work." Before hanging the door, "make sure the hinges are right, or you're going to have a stupid fight with that door," he said. "I also take the door strikers completely out; it makes the job much easier. Once the door swings in the hole like it should, position the striker so it swings on it, then you're in.
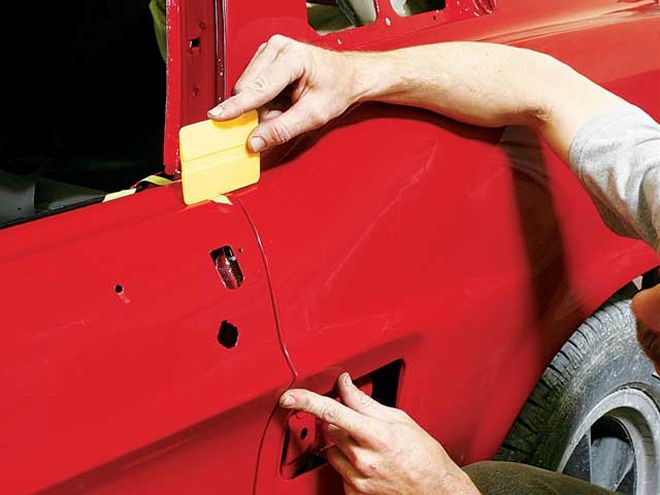
The photo sequences in this month's installment illustrate several other assembly and panel-alignment tips and tricks photographed at a number of shops. You'll note the cars shown here are in varying stages of the paint process. Some are stripped, some are in primer, others have already been painted. Each of these cars has been, and will be, taken apart and put back together a number of times, and the assembly and alignment processes are pretty similar throughout. We shot 'em as we found 'em.
What: Door and Fender Alignment
Example: 1967 Ford Mustang
What: Hood, Subframe and Fender Alignment
Example: 1973 Camaro
What: Fitting and Gapping Doors
Example: 1935 Ford Coupe
What: Body-to-Frame Mount and Alignment
Example: 1932 Ford Roadster
Tools You'll Need