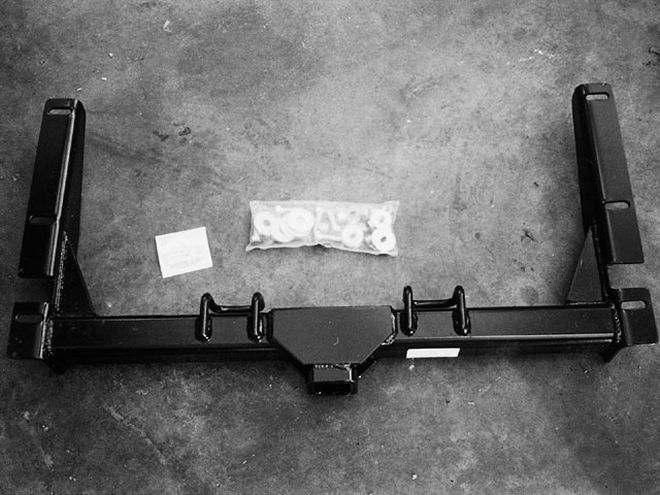
 We started with Street Scene's hidden trailer hitch kit. It's a receiver-style kit, and arrives with all the necessary hardware and instructions. You supply the ball and hitch insert.
You can do a lot to your truck to improve its looks, but for a cost-to-results ratio, it's hard to beat ditching the rear bumper for a roll pan. Traditionally, bumpers are a classic example of function over form; they're really good at doing their job, but they don't look all that great, although we must admit that has started to change in the last couple of years. Even so, a roll pan gives the rear sheetmetal a clean, finished look you can't get with the stock bumper in place.
Roll pan designs are fairly simple, and a lot of companies make them for Rams and Dakotas. When it was time to clean up the back of our Dakota, we chose Street Scene's because it was the only one we've seen that looked as if it was designed specifically for the Dakota. The bottom of the pan has a scallop-or flair-that mirrors those found at the top of the tailgate and on the body sides. We also ordered their hidden receiver hitch kit to mount behind the license plate for towing and to hold Mopar Accessories' bike carrier.
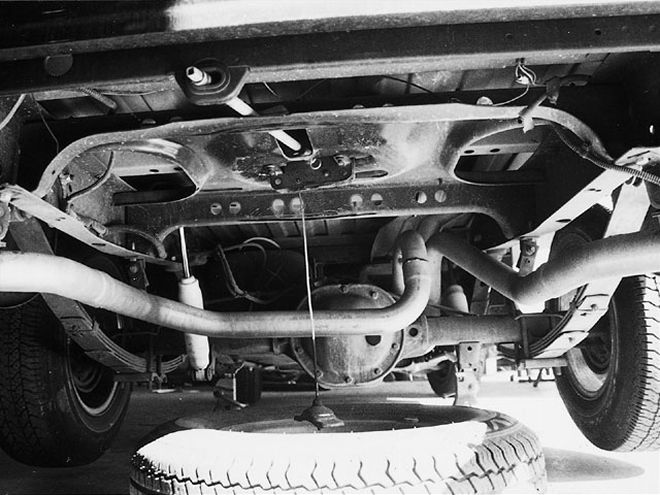
 We removed the rear bumper before we installed the hitch kit. This kit would work with the stock bumper left in place if you so desired, but we would still recommend removing it for the installation. Here you can see the spare tire winch in the "down" position, and the winch's driveshaft, which we'll eventually modify as described in the text.
The hitch kit mounts to existing holes in the frame with six bolts, so no drilling or welding is required. However, one thing we weren't expecting with the hidden hitch was the interference it caused with the spare tire. The stock spare won't fit with the hitch in place-the tire contacts the hitch frame by 2 inches on each side. One solution is to buy a new, smaller-diameter tire and mount it on the spare's rim. A potential problem with this is in case of a flat, you could end up with two different-diameter rear tires, which the differential probably won't like for too long. This is why "Dinky Doughnut" spares recommend 50 mph for no more than 50 miles. Other solutions include throwing the stock spare in the bed, or joining AAA. We've done the latter two, but aren't happy with those solutions. We'll probably mount a smaller-diameter spare, put it on the carrier mount under the truck, and hope we don't have to use it.
Another point of interest in our installation is that the Street Scene roll pan has the appropriate holes molded into it for the spare-tire winch crank, and what we believe is a hole to route any trailer wiring through, though we're not certain. We dropped the roll pan off at A Perfect Image to be painted, and asked shop owner Mike Volpe to 'glass over the holes and clean the roll pan further. This is where we learned the trick about leaving the gas filler door with the body shop, so they can match the paint. Removing the mystery hole doesn't present a problem, but access for the winch no longer exists. We're planning on shortening the shaft that drives the winch, and welding an old socket to the end of it, then operating it with a ratchet if the need ever arises. But the totally smoothed-off roll pan-sans holes-looks great.
Installation of the roll pan and hitch kit is fairly straightforward, and Street Scene provides a highly comprehensive set of instructions. One thing we would do differently is mount the roll pan before we had it painted, then remove it to have it painted. Although we didn't hurt the paint, installing the roll pan with the gelcoat finish the first time would have alleviated a lot of stress.