The 5.0L Coyote Mustang has been one of the best bargains in the performance world over the last few years. It makes great power off the showroom floor, but better still, it responds great to go-fast power or a little forced induction. This is one of the biggest selling points of the Coyote V-8, but as always, too much of a good thing can actually hurt your overall performance.
Wait. What? How can adding power to your pony be bad? The factory clutch has to work harder to keep a positive engagement between the engine and transmission. Too much power will make your stock clutch slip a bit because it’s overcome by larger amounts of power. Eventually it could lead to a lack of momentum as well as one of the worst stenches you will ever smell: the friction pads smoking on the disc. With the new Coyote V-8 kicking out 435 hp at the drop of a hat, it’s easy to see how adding only a few more ponies could spell disaster in the long run.
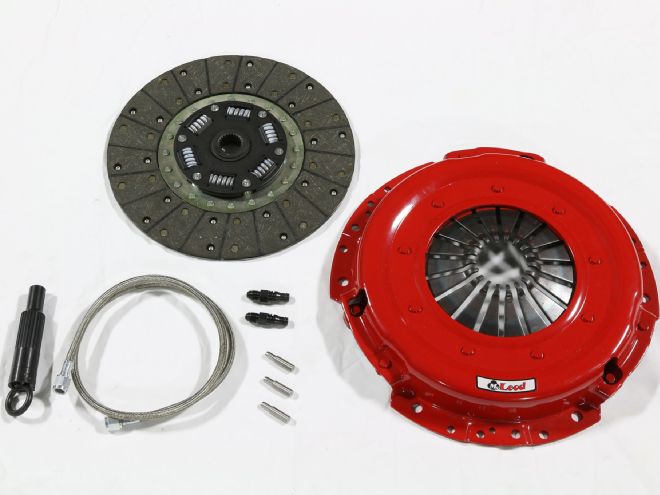
Fortunately, McLeod has just what you need to keep your Coyote-powered Mustang humming down the highway even with a little extra pep in its step. If you’re a street performance or track junkie, you know that McLeod offers some of the highest-quality clutches out on the market. It was a no brainer for us. We ordered up one of the Super Street Pro clutch kits for our 2013 Ford Mustang GT 5.0L and headed over to GTR High Performance in Rancho Cucamonga, California, to spin wrenches and make our pony a little more stout.
Our particular clutch kit is SFI approved and includes a high-clamp-load pressure plate and a dual-faced organic and metallic disc for smooth engagement and superior holding power. So how much power can it hold up to? How does 550 hp of Detroit muscle sound? Keep in mind that this is a general estimate based on mild engine mods with the use of street tires. Stickies will definitely make things a little different, but you can bet it’s going to hold more power than the factory unit ever did.
Check out what’s involved in upgrading the weak link between the 5.0L Coyote V-8 and the manual transmission on your Mustang.
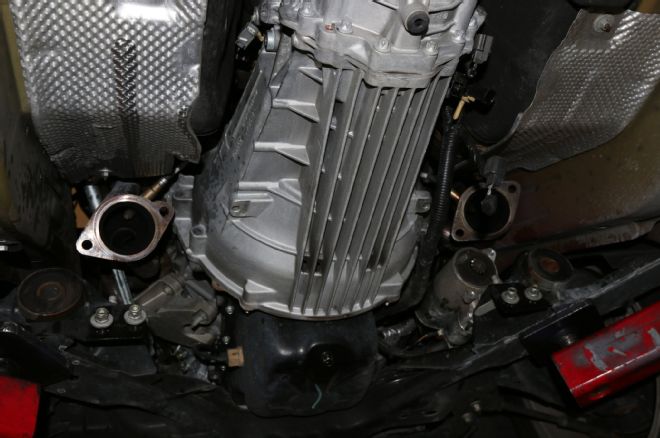
1. If you’re not the envy of every gearhead in the neighborhood with your very own lift in the garage, then keep this in mind: The transmission has to drop a considerable amount before you can free it from the underbelly. Be sure to plan ahead.
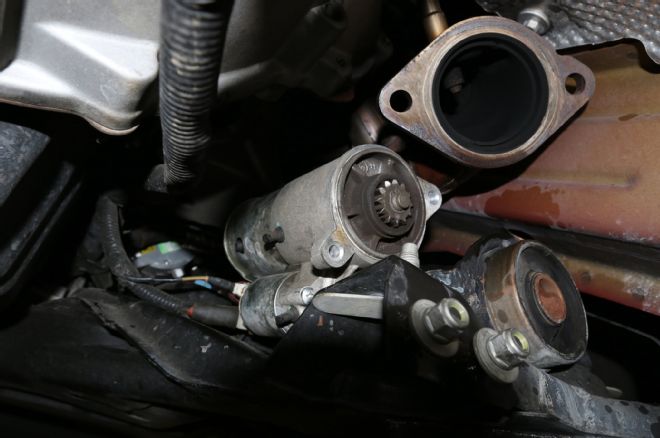
2. Once you’ve got the exhaust out of the way, remove the starter motor from the bellhousing.
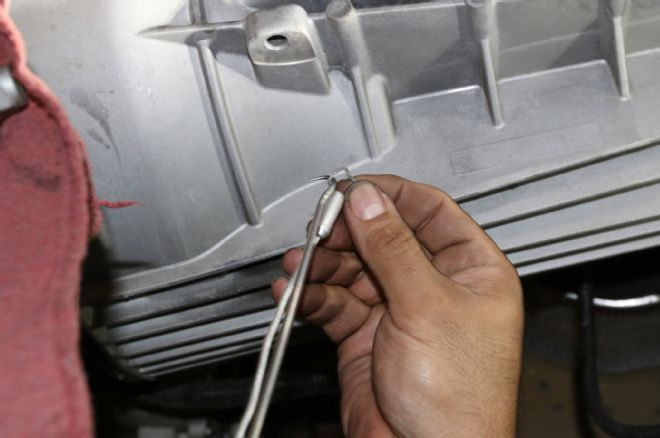
3. You’ll also want to remove the retaining clip on the hydraulic line for the internal slave cylinder. The guys at GTR High Performance tell us that it’s best to remove this clip with a magnet handy, otherwise you’ll risk losing it when it goes flying.
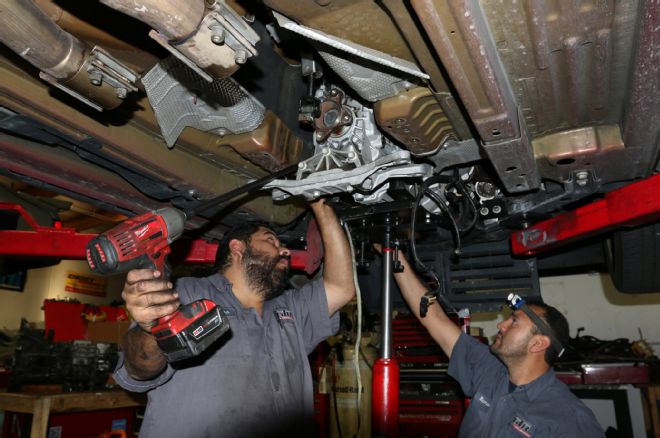
4. Removing the transmission goes far quicker with an extra set of hands and eyes. Pedro Pasoldan (left) and Ricardo Topete (right) made quick work of dropping the transmission and had it out well before lunch time.
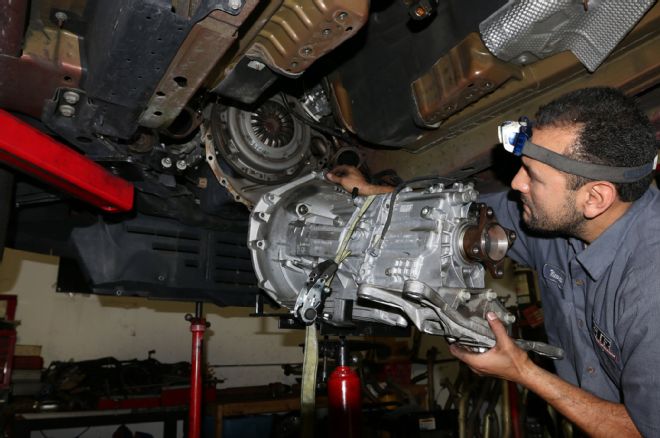
5. As mentioned, you’ll have to get the car up high enough to pivot the transmission out of the way and free from the car.
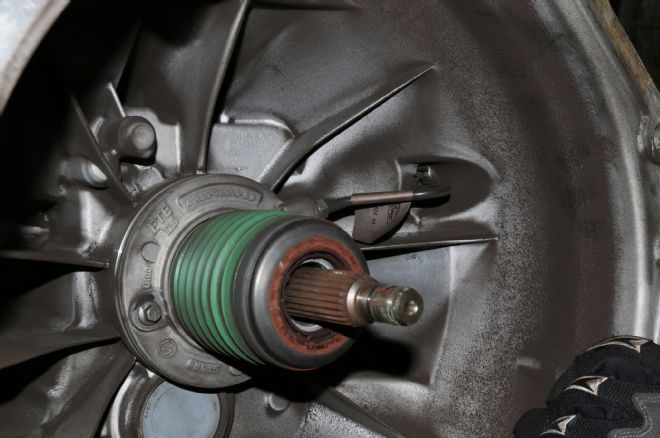
6. The McLeod Super Street Pro Clutch Kit is designed to work with the factory throwout bearing. Our bearing didn’t look too bad, but we took the opportunity to replace it anyway.
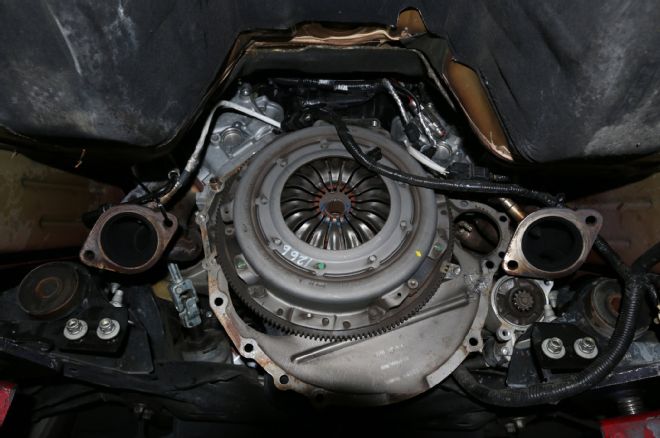
7. Once you get the transmission out of the way, you’ll have plenty of access to the factory clutch.
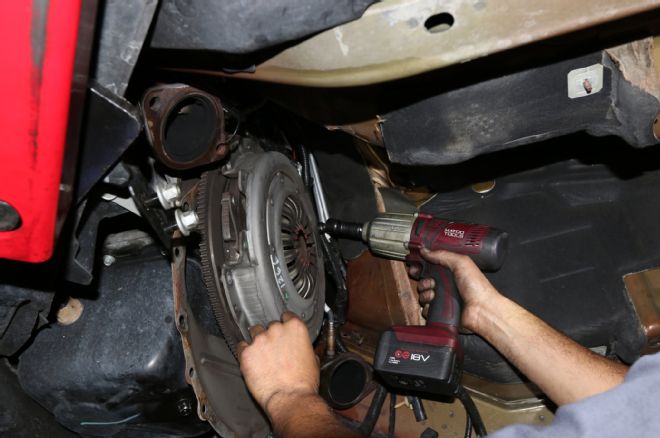
8. Be careful not to remove all the bolts until you’ve got a firm grasp on the pressure plate and clutch disc to keep them from nailing you in the foot.
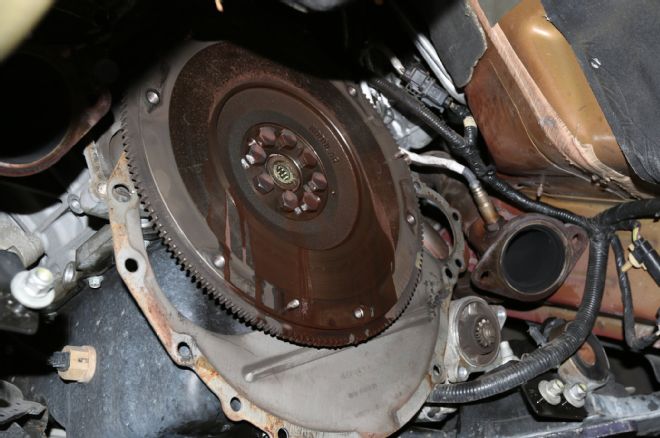
9. To remove the flywheel bolts, it’s a good idea to soak the bolts in a bit of penetrating lubricant.
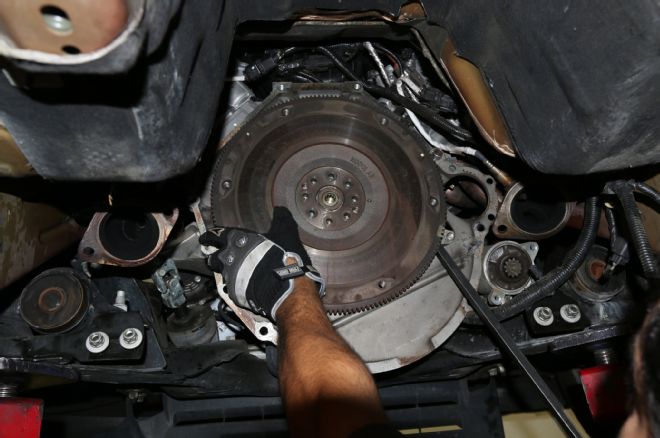
10. Don’t be surprised if the flywheel doesn’t come off quite by hand. Pasoldan had to use a long pry bar to remove the flywheel on our Mustang.
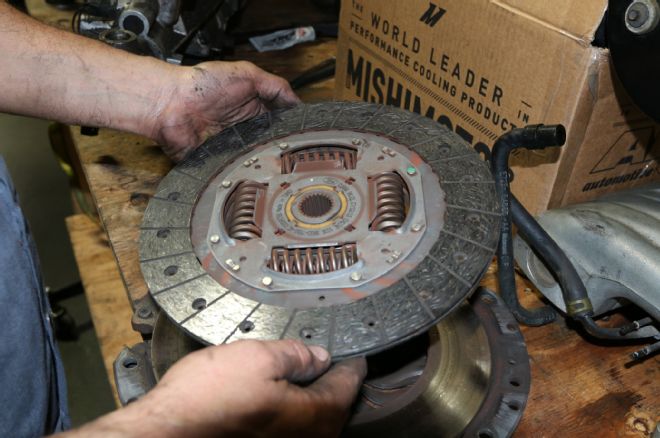
11. We inspected the stock clutch disc and pressure plate for any telltale signs of wear. While the friction material didn’t look too bad, we found that the counterweight springs had somehow worked themselves loose. This is used to help dampen the shock load when engaging the clutch disc. You can see how even a mild setup is enough to wreak havoc on stock components.
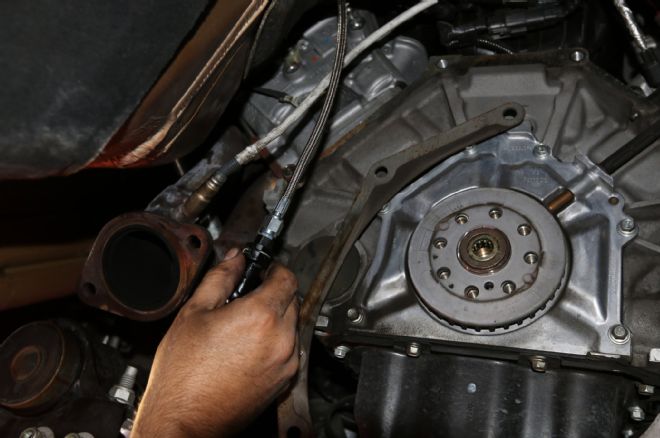
12. We went ahead and installed McLeod’s braided stainless steel hydraulic line to our clutch master cylinder and then moved it aside where we wouldn’t pinch it while we tried to install the transmission.
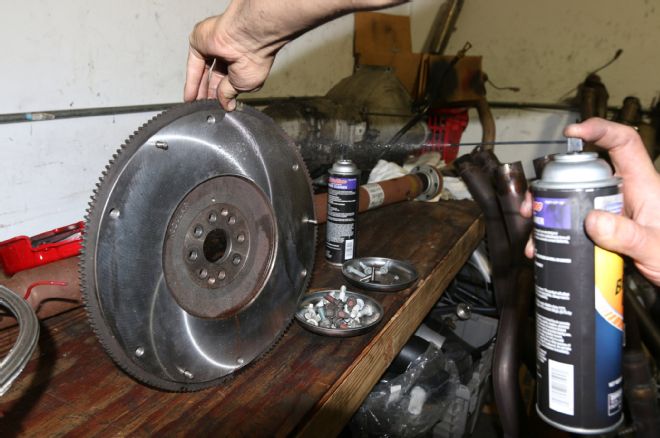
13. GTR High Performance sent our flywheel out to get resurfaced to ensure proper bedding and break-in of the McLeod clutch friction pads.
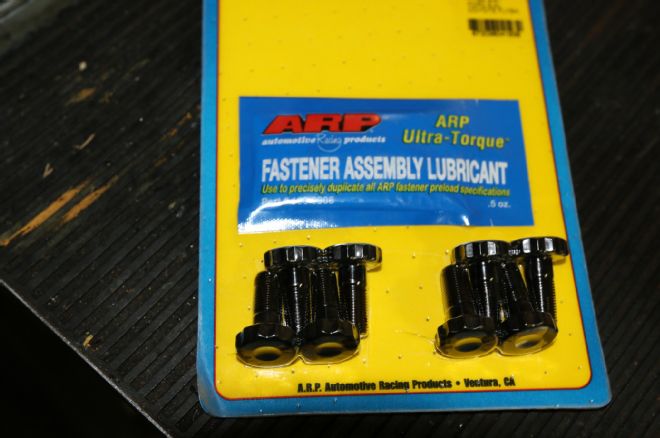
14. Of course, it just wouldn’t be right to install our fresh new parts without a little added insurance with some killer hardware from ARP. These 12-point flywheel bolts are a direct replacement for the factory flywheel bolts and are much stronger and better suited for the harsh use we have in mind for our Coyote Mustang.
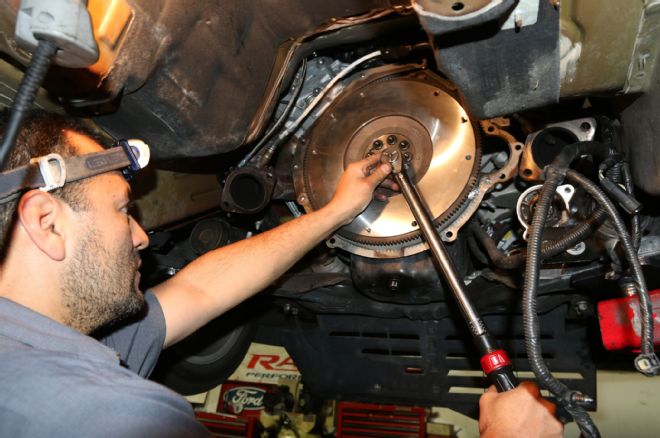
15. Make sure you lubricate the threads with Loctite 242, and torque the flywheel bolts to the specs indicated, using a star pattern. We torqued our bolts down to 70 lb-ft.
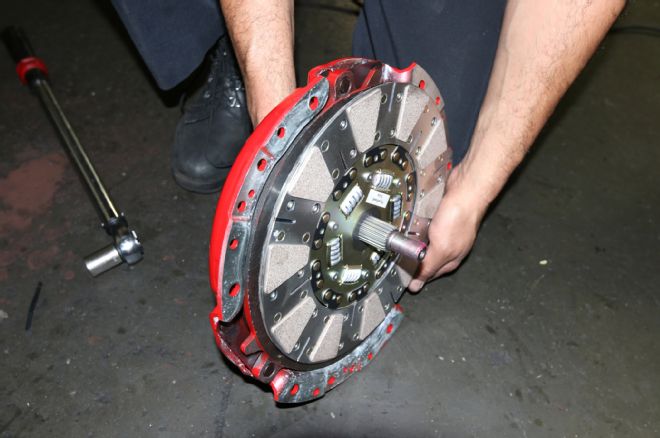
16. The McLeod clutch kit comes with a splined pilot bearing tool,but the guys at GTR like to use their own sawed-off input shaft. You’ll also notice that the friction material has a smaller surface area overall, but the compound is far different than the stock unit. With the higher clamping force, these pucks will grip like nothing else. This is possible because the smaller surface area delivers more pounds per square inch of clamping force as opposed to a stock unit that spreads the load evenly, which reduces the amount of clamping force.
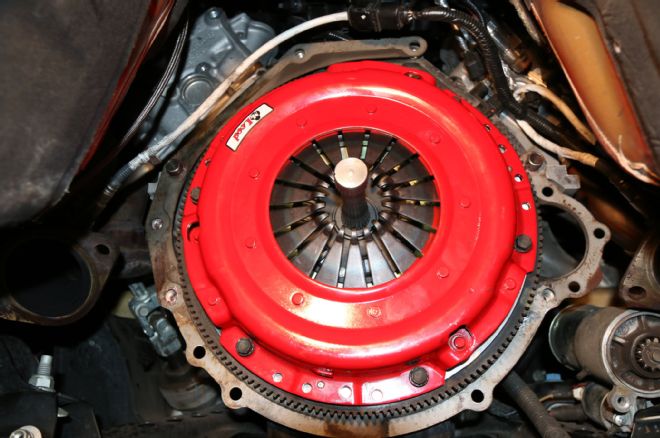
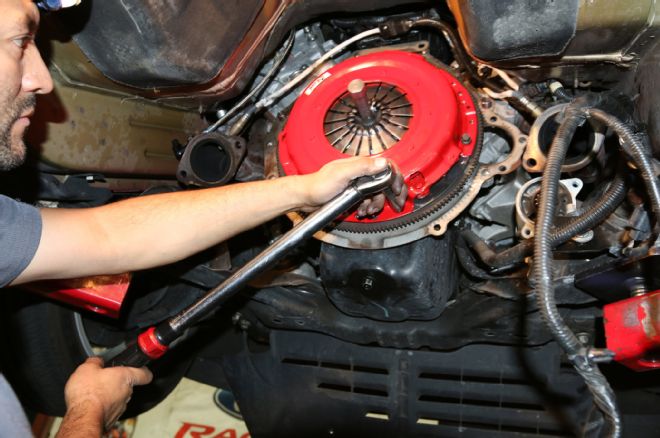
17. Once your clutch disc and pressure plate are aligned properly, go ahead and add a little Loctite to the threads and torque them down to spec.
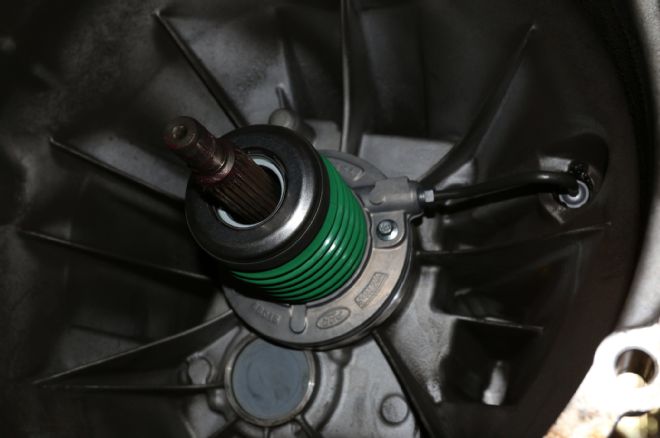
18. Here you can see the new hydraulic throwout bearing that we installed in our transmission as preventive maintenance. There’s nothing worse than having to drop the transmission twice to fix a small issue that could have been addressed earlier.
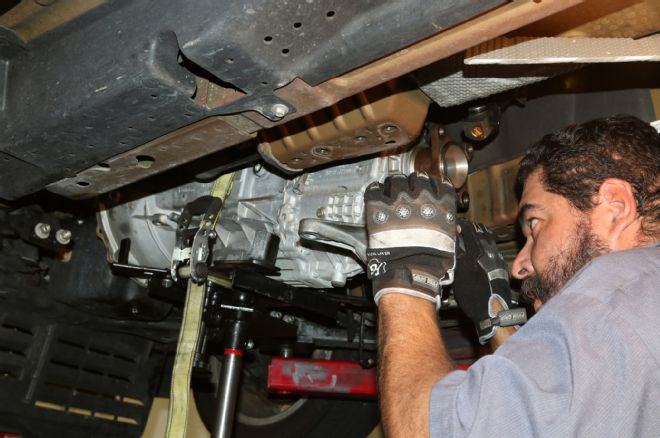
19. Once our new parts were installed, a bit of precision maneuvering of the transmission was all that was needed before Pasoldan had everything buttoned up and ready to roll. After the transmission is bolted back into place, it’s simply a matter of replacing the driveshaft, starter, clutch slave line, and exhaust, and you’re ready to go. It should be noted that the car should be driven regularly for about 500 miles before attempting any dyno pulls or hard launches at the strip.