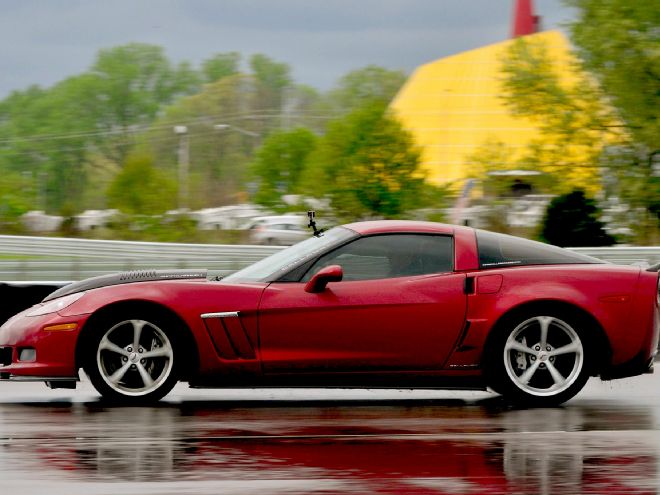
Original equipment wheel bearings that are fitted to fifth- and sixth-generation Corvettes are capable of providing owners with many years of reliable service. However, if you routinely drive your Corvette at track events, the excessive side loading incurred plays havoc on these bearings. When they fail, your dash will usually light up with all kinds of warnings. This recently happened to Team Vette during an evaluation of Callaway Cars long-term durability 2010 Grand Sport test car. This car has seen some severe service during its five plus years, so let’s explore its background.
Callaway Cars took delivery of this Grand Sport on July 9, 2009. Their objective was to rack up as many miles in the shortest time possible. In 2011, when Callaway loaned Team Vette this Grand Sport for an evaluation it had 77,500 miles on its clock due to crisscrossing the country many times while visiting Callaway dealers. It also was taken to racing circuits to demonstrate its handling capabilities. Chris Chessnoe, Program Manager for Callaway Cars’ only request was to “put as many miles on it as you can!” We added 3,000 miles to it during our evaluation. The Grand Sport was featured on our December 2011 cover for the “Paradise Found” story inside that issue. We also covered this car again in our March 2012 issue that was titled “The High-Mile Club.”
Since then we’ve continued to keep close tabs on this amazing Grand Sport’s story. This included inspecting it at Corvette events and receiving updates from Chessnoe. In April 2015, on a cold, miserable, wet day, the Grand Sport turned 200,000 miles at the NCM Motorsports Park in Bowling Green, Kentucky. After this milestone was reached, Chris asked Team Vette to drive it back to our Florida base to get our impressions. All went well until about 850 miles into our trip, when the dash lit up with antilock brake and traction control assist warnings. A visit to our local dealer, Maher Chevrolet, confirmed wheel bearing failure. We contacted Chris about our findings and he contacted VanSteel in Clearwater, Florida, to repair the wounded Grand Sport. VanSteel supplies Corvette suspension, brake, and steering components for all generations. They are also an authorized vendor for SKF, who produces original equipment bearings for Corvettes, including the ZR1. VanSteel’s technicians completed the bearing change out in six hours.
However, during the install it was discovered that the SKF ZR1 bearing housing is thicker than the OE units. The ZR1 units use two bolts the same length, while the third one is 1/4-inch shorter. Upon reassembly we found that the bottom bolt was hitting the wheel studs on the back face of the bearing. All 12 of our bolts were the same length. So four bolts were ground shorter to provide clearance at the lower attachment point. When the work was completed a test drive confirmed that all of the codes on the dash disappeared. We returned the Grand Sport to Chessnoe and he has added another 5,000 miles to its clock. Will it do 300,000? Stay tuned.
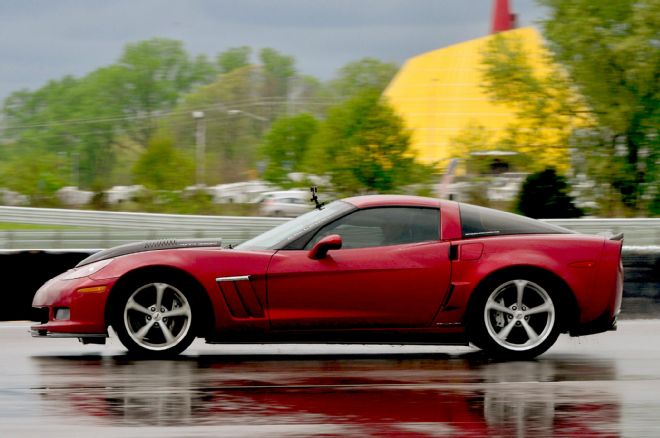
01. This SC606 Callaway sat for two months with 199,964 miles on its odometer at the NCM. On April 20, in very wet conditions, Art Spong lapped the NCM Motorsports Park for 36 miles to reach 200,000 miles. Art retired as GM’s Group Manager Brand Quality for Performance Cars-Corvette.
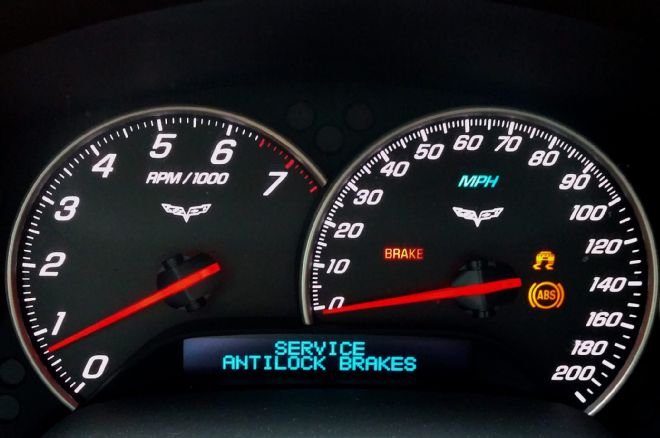
02. When the 200,000-mile goal was reached, Team Vette drove the Callaway back to our base in Florida. Late in the trip the dash lit up with these warnings. We were able to complete our trip, but decided to diagnose the problem.
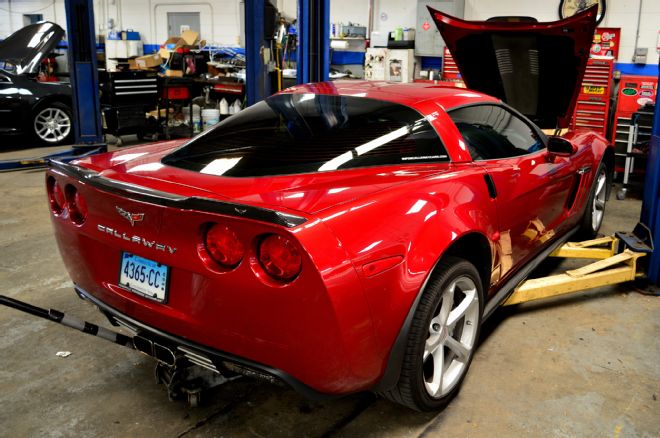
03. We took the Callaway to Maher Chevrolet in Saint Petersburg, Florida, for a TEC 2 diagnosis. Technician Terry Arnold confirmed we had faulty wheel bearings.
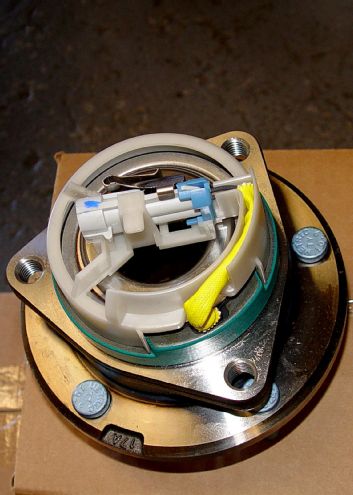
04. Chris Chessnoe from Callaway Cars arranged to have VanSteel install SKF wheel bearings into the Grand Sport that were designed for the ZR1. VanSteel is a SKF vendor. They used part number FBRD-1013-ZR1 (2010-2013 ZR1 Hub Bearing Front/Rear). They retail for $399.99 each.
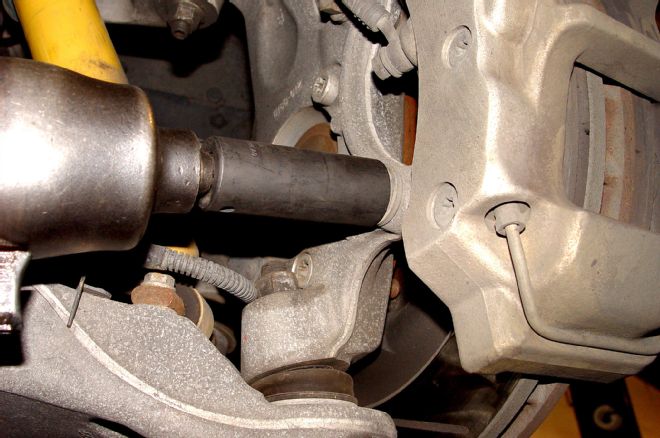
05. FRONT: The bearing replacement began when the car was raised on a four-point rotary lift and the wheels were removed. Remove the two 21mm bolts that secure the brake caliper to the front suspension upright (re-torque to 125 ft-lb). After the caliper was removed it was hung on a wire to keep it secure during the install. Next, the brake rotor was removed.
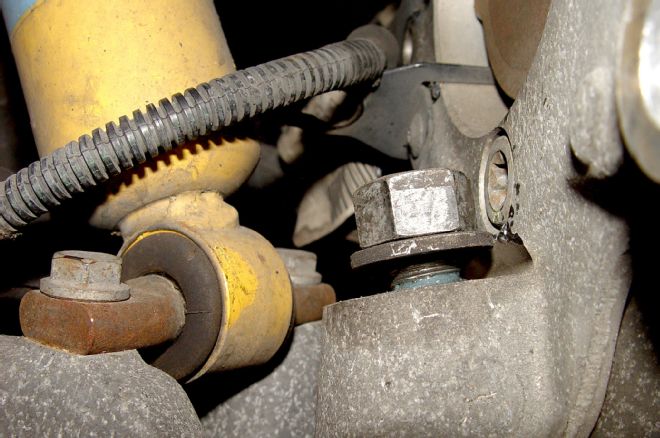
06. A 21mm nut secures the lower ball joint to the upright and must be loosened NOT removed (re-torque to 22 ft-lb – first pass and 60 ft-lb second pass).
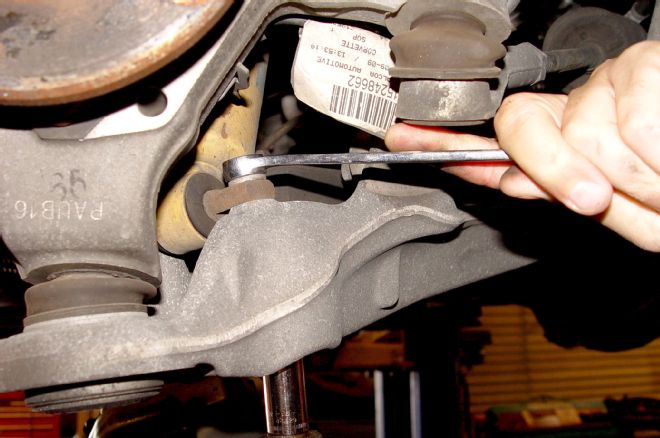
07. Two 13mm nuts and bolts secure the front shock to the lower A-arm and must be removed (re-torque to 21 ft-lb). Remove the upper or lower bolt on the sway bar link so that it swings free from the lower A-arm (re-torque to 53 ft-lb).
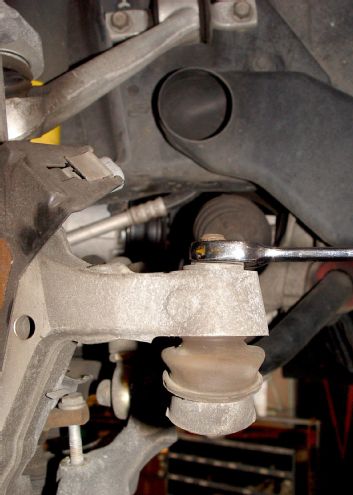
08. One 18mm nut secures the tie rod to the front suspension upright and must be removed (re-torque to 15 ft-lb first pass and 33 ft-lb second pass). This will allow you to pivot the upright so you can gain access to the three bolts that secure the wheel bearing to the upright.
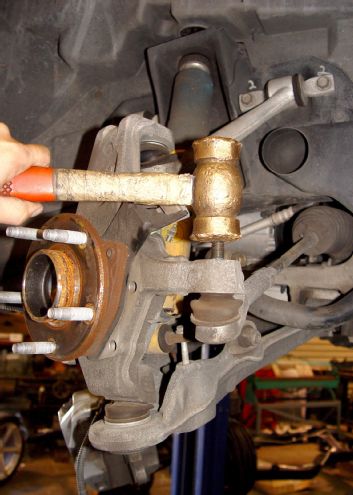
09. A brass mallet was used to gently tap the tie-rod bolt out of the upright. The brass mallet will not damage the threads on the tie-rod bolt.
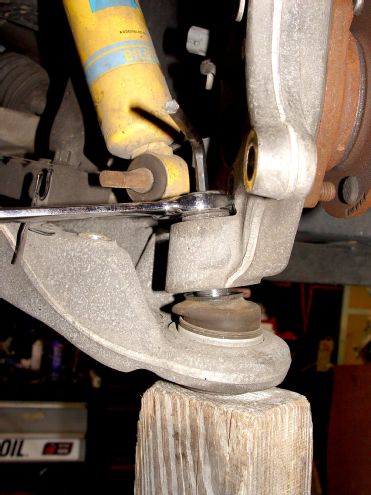
10. The lower A-arm must be supported prior to completing this step. We secured the A-arm with a floor jack and a long piece of wood. Once it was secure, a 6mm Allen wrench was inserted into the top of the bolt to hold it while the 21mm nut was removed.
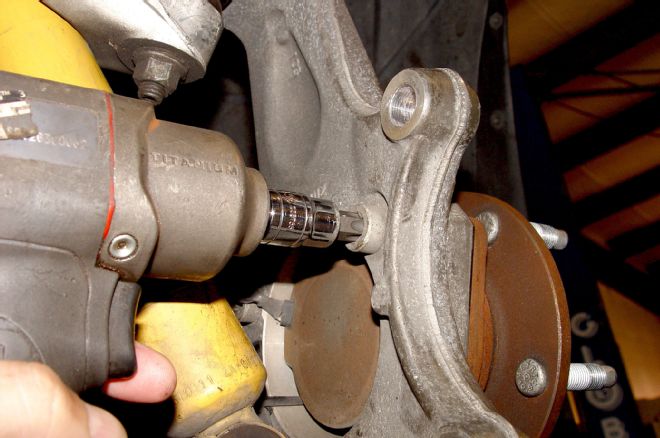
11. Once the ball joint nut was removed, a brass mallet was used to strike the lower upright while the floor jack was slowly lowered. This part of the suspension is under tremendous pressure from the spring tension. It is best to have two people perform this step. This is what the lower A-arm looks like when the ball joint is free from the upright.

12. The front upright can now be rotated outward so the three 53 Torx bolts can be removed. Disconnect the wiring harness from the upright prior to attempting to remove the old bearing.
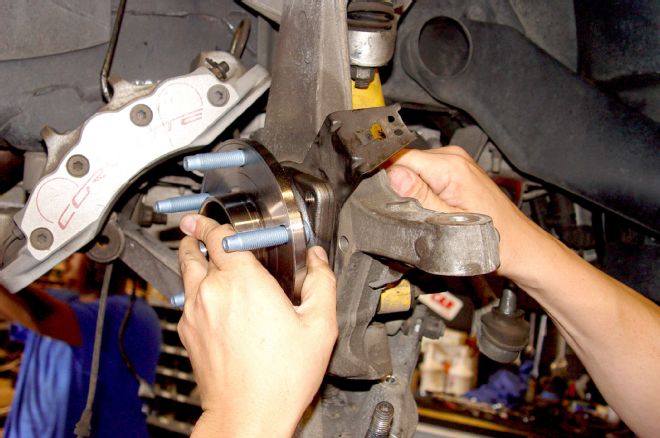
13. After the old bearing is removed, install the new SKF unit, being careful to not pinch the ABS wiring harness when threading the new bearing into its location. Be sure to plug the wiring harness into the factory connector located on the upright. Reverse the removal procedure re-torque three bearing bolts (to 96 ft-lb).
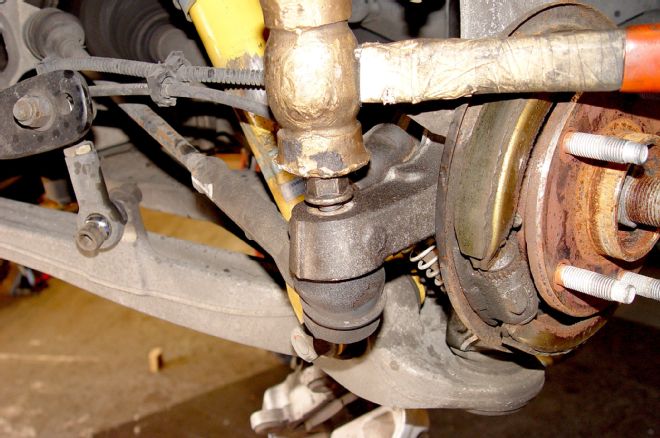
14. REAR: Moving to the rear of the car, the two 21mm bolts were removed that hold the caliper in place (re-torque to 125 ft-lb). Make sure the parking brake is released before removing the rotor. An 18mm wrench was used to remove the nut securing the tie-rod end (re-torque to 33 ft-lb). Tap the nut with a brass mallet to loosen the tie-rod end. Remove the lower bolt on the sway bar so it is free from the lower A-arm (re-torque to 53 ft-lb).
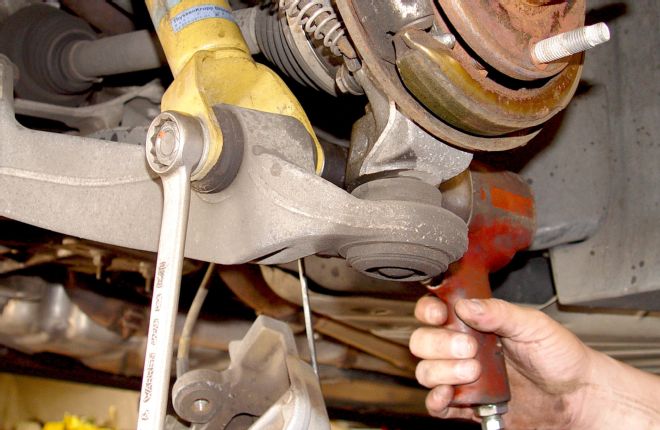
15. Remove the 24mm (15/16-in.) nut and bolt that secure the rear shock absorber to the lower A-arm (re-torque to 162 ft-lb). Once the bolt was removed the shock absorber was pushed back to its closed position and the shock retaining bolt was reinserted into the lower A-arm to hold it in place in order to reach the lower ball joint nut.
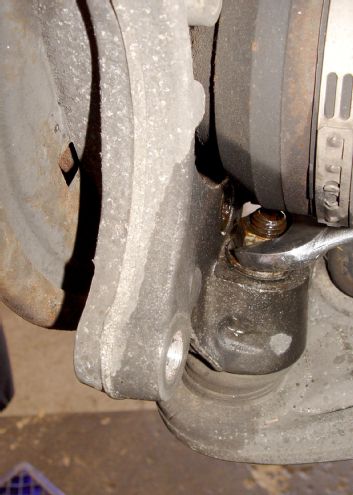
16. The lower rear ball joint is secured with a 21mm bolt that must be removed (re-torque to 22 ft-lb – first pass and 60 ft-lb second pass). Use the same procedure as we did in the front to relieve tension from the spring with a floor jack and board.
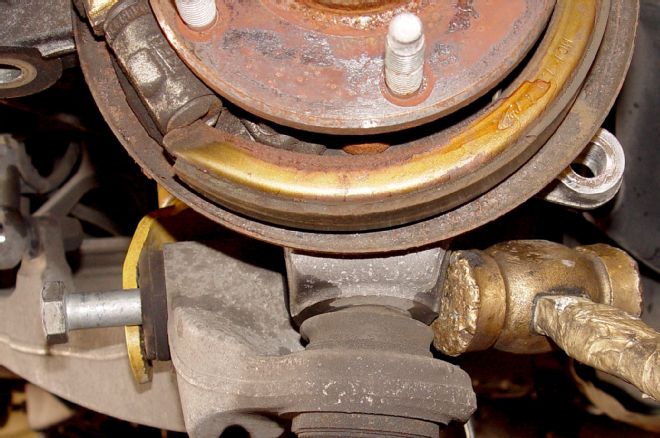
17. Use a brass mallet to strike the upright on the side to loosen the ball joint and lower the jack to completely remove the ball joint stud from the A-arm. This will allow you to pull the upright away from the halfshaft so you can gain access to the three bearing bolts.
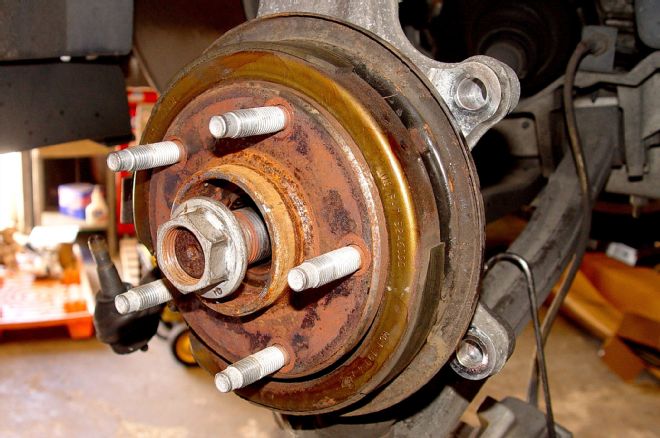
18. Remove the 34mm nut that secures the axle to the rear upright (re-torque to 151 ft-lb). This nut is tightly secured at the factory and might require the use of an air wrench to remove it. The upright can now be shifted to allow you access to the three 53 Torx bolts that hold the rear bearing in place. Remove the old bearing after the Torx bolts have been removed.
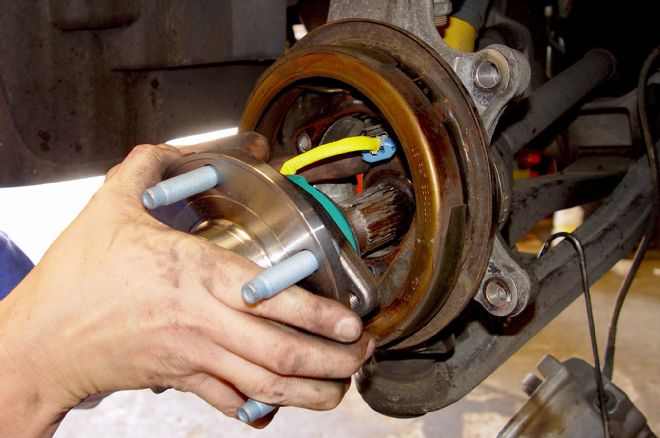
19. The SKF bearing can now be installed. Again, be careful to not pinch the wiring harness during installation. During this step we discovered that the three factory Torx 53 bolts were all the same length. The SKF bearings require a shorter lower bolt, which was installed on all ZR1s. We used a grinder to remove about a 1/8-inch of material so the bolts do not come in contact with the wheel studs on the bearings. Reconnect the wiring harness to the factory connector. Now, the removal procedure can be reversed and tighten all of the 53 Torx bolts to 96 ft-lb.
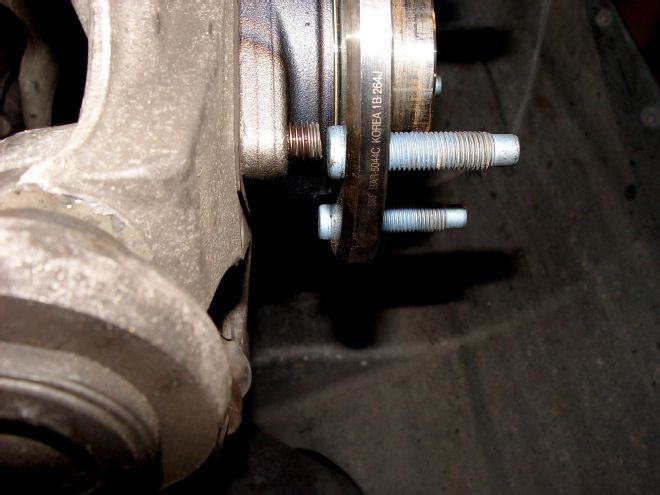
20. This is how the lower bolt looks after 1/8-inch of material was removed. Be sure to check this clearance before completing your installation. Another option is to order four ZR1 bolts from a GM dealership before you start your project.
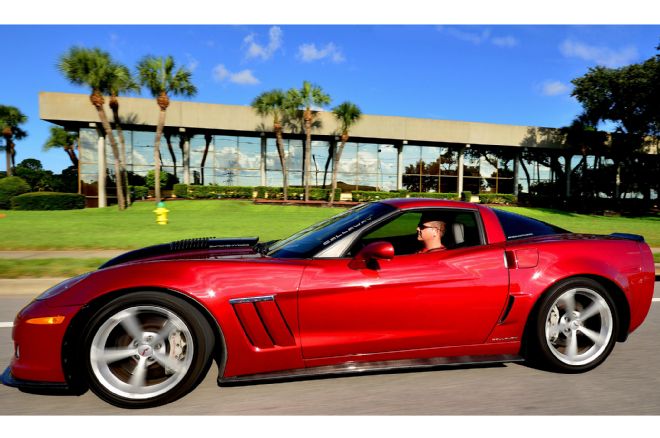
21. After the work was complete, Dan Dorsett from VanSteel took the Callaway SC606 out for a test ride and declared the car was free of any dashboard warning lights. Is this amazing Corvette ready for another 100,000 miles?