 | 1990 Honda CRX Si - Power Pages
* Owner: Joseph Santos
* Dyno & Facility: K&N Chassis Dynamometer
* Installation: Nestor Cabrera & Scott Tsuneishi
 | 1990 Honda CRX Si - Power Pages
1990 Honda CRX Si
Pros:
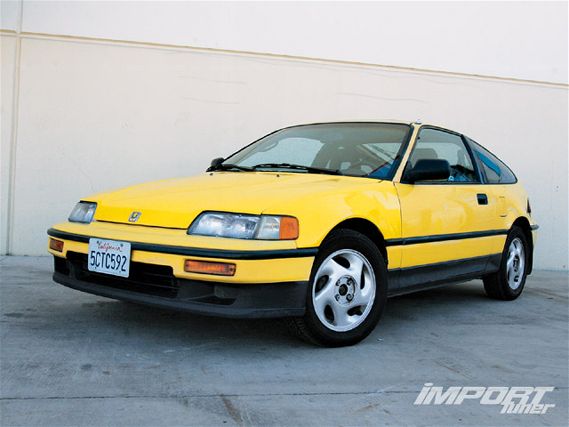
The second-generation Honda CRX became a cult classic among the import drag scene in the early '90s, once drag racing legends like Dave Shih and his Silver Bullet CRX first broke the 10-second barrier with a 10.87 at 136 mph. The CRX continues to be a favorite among the tuner market for its lightweight chassis, economical sticker price and plethora of aftermarket parts.
Cons:
It's one thing to own a CRX these days, but another to have one that's in good running condition. After all, it's been 21 years since the Honda's debut; your odds of winning the lotto are better than finding an unmolested CRX.
 | 1990 Honda CRX Si - Power Pages
Notes:
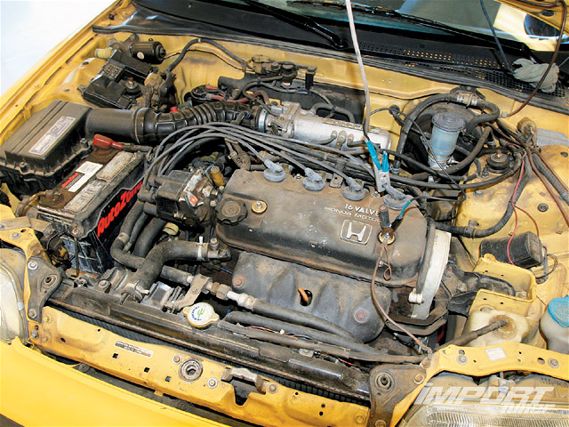
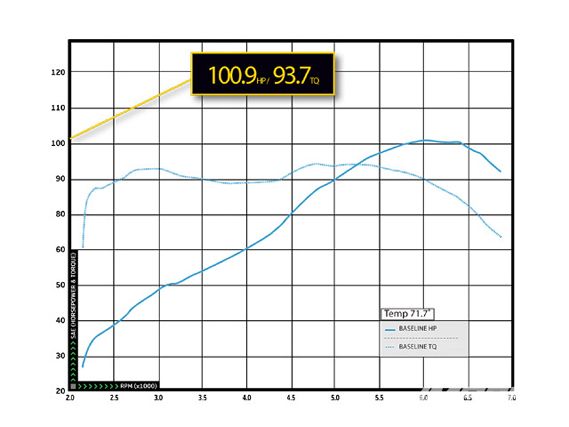
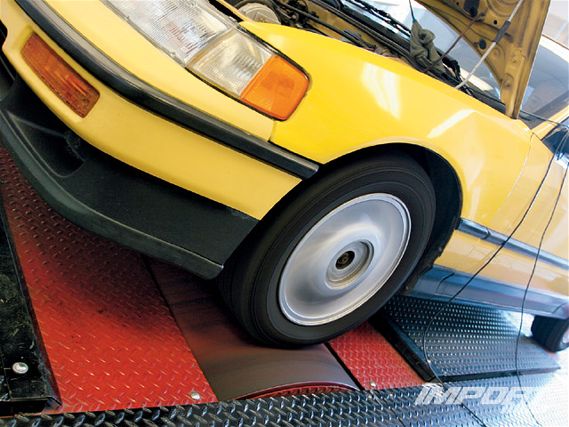
After a colleague of ours offered his CRX SI to test in power pages, the 160K-mile car was given a freshening up with an oil change, plugs and plug wires before dynoing. We should also note that prior to baseline testing, the factory muffler had already been swapped out with an aftermarket unit, but still retained the factory exhaust piping.
 | 1990 Honda CRX Si - Power Pages
K&N Cold Air Intake
Pros:
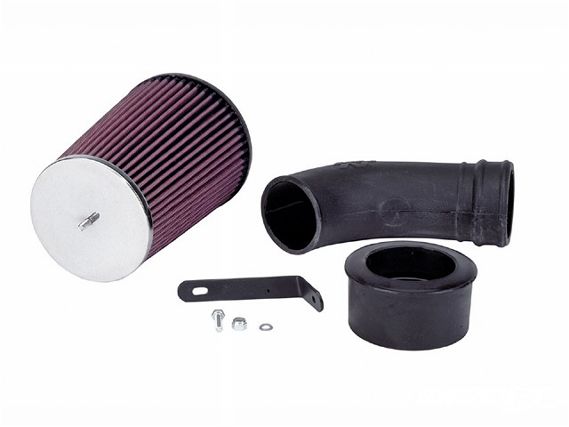
The K&N cold air intake system utilizes a filter that improves airflow characteristics, along with ABS plastic tubing that keeps inlet temperatures to a minimum, for increased power. We like the fact that this intake is CARB legal and includes a sticker to place in your engine bay as proof, if ever you should be harassed by cops.
Cons:
The K&N intake retains the factory Honda intake tubing off the throttle body, which we found unappealing in both appearance and in theory. However, K&N representative Nestor Cabrera reassured us that the intake was designed to keep costs to a minimum, but still offer a significant gain in power and torque.
Parts:
Intake, filter, brackets, nuts and bolts, clamps, CARB sticker, instructions
Tools:
-10mm, -12mm socket, ratchet, extension, screwdriver
Installation Time:
20 minutes
 | 1990 Honda CRX Si - Power Pages
Notes:
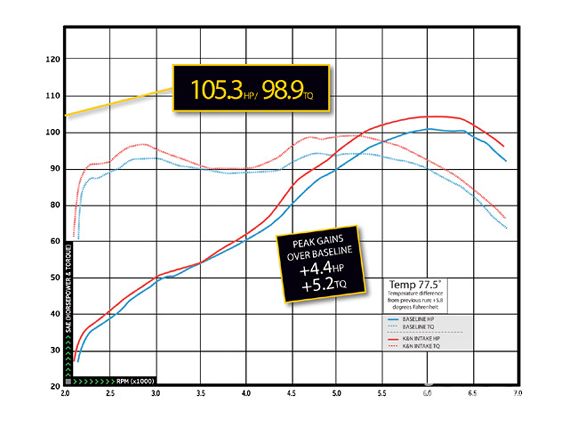
A quick spin on the dyno revealed a peak gain of 4.4 hp and 5.2 lb-ft torque over our baseline numbers. The new cold air intake system increased both horsepower and torque throughout the power band as the CRX saw a consistent gain of 5 hp from 5,000 rpm to 6,000 rpm and 5 lb-ft torque from 4,500 rpm to 5,700 rpm.
 | 1990 Honda CRX Si - Power Pages
Thermal R&D Exhaust
Pros:
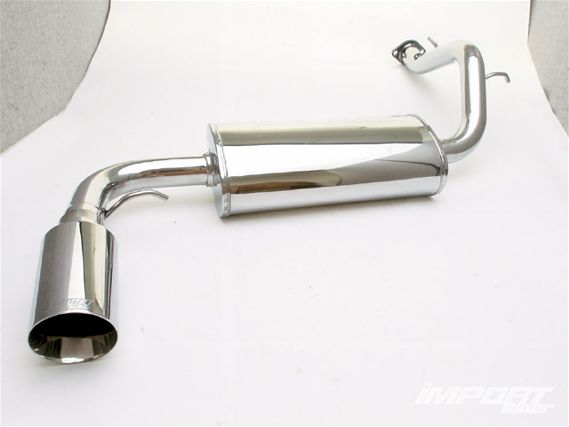
Exhaust specialists Thermal R&D helped propel import drag racing icons such as Tony Fuchs and his '91 Acura Integra to superstar levels back in the '90s, as he powered his turbocharged machine deep into the 10-second mark. In revisiting the old-school CRX, we found it fitting to ask Thermal to aid us in netting some much needed horsepower with their exhaust system. Thermal R&D offers the CRX exhaust in both 2 1/4-inch or three-inch diameter piping for naturally aspirated or forced induction applications.
Cons:
The new stainless steel exhaust was easy to install, and required a simple spray of WD-40 to all the exhaust bushings, but the factory catalytic converter nuts on the other, had been rusted shut and required major oil soaking in order to prevent them from sheering off during removal.
Parts:
Exhaust, midpipe, gasket, nuts and bolts, warranty disclaimer, stickers
Tools:
-10mm, -12mm, -14mm, and -17mm sockets, open-end wrenches, breaker bar, screwdriver, WD-40
Installation Time:
1 hour
 | 1990 Honda CRX Si - Power Pages
Notes:
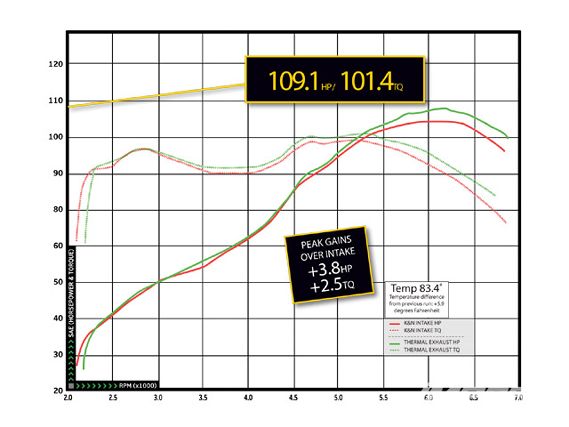
We were pleasantly surprised with the nice, deep exhaust pitch at a modestly quiet decibel level. Dyno testing the exhaust revealed an increase in power and torque throughout the power band, with a peak gain of 3.8 hp and 2.5 lb-ft torque. We saw a healthy gain in the midrange to top-end from 3,500 rpm to redline. These increases in horsepower were especially impressive, considering the car was already equipped with an aftermarket exhaust when we started.
 | 1990 Honda CRX Si - Power Pages
DC Sports Header
Pros:
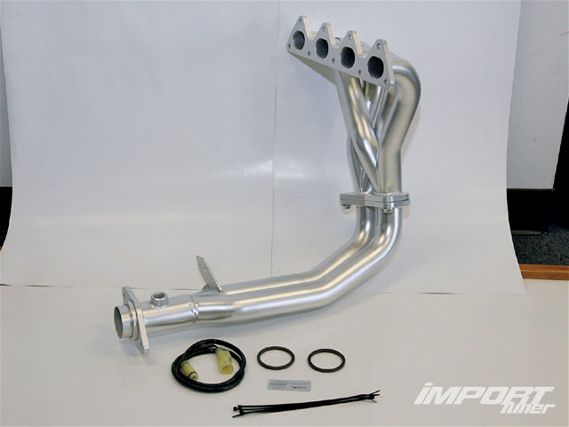
The DC Sports 4-2-1 headers have always been a favorite among Honda and Acura owners alike, and for valid reasons. CARB certification, a 4-2-1 design that enables exhaust pulses to create additional horsepower, and ceramic coating that keeps the header looking good are three of our favorites.
Cons:
Removal of the factory header can be a pain in the ass. Be sure to use the proper tools when removing each bolt. Stripping or snapping them off will extend your installation time.
Parts:
Header, bolts, gasket, O2 wire extension, CARB sticker, instructions, stickers
Tools:
-10mm,-12mm, -14mm and -17mm sockets, swivel, open-end wrenches, extensions, breaker bar, wire cutter, anti-seize compound, WD-40.
Installation Time:
80 minutes
 | 1990 Honda CRX Si - Power Pages
Notes:
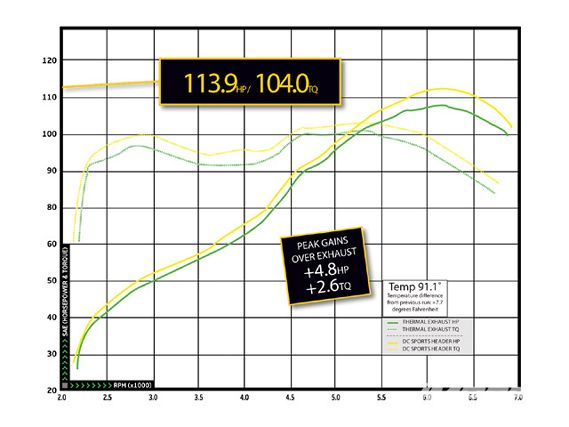
When installing the new DC header, take precaution in removing the factory O2 sensor, and carefully set it aside to prevent any damage. The DC Sports header comes with an O2 wire extension harness which aids in speeding up the installation process. We found it necessary to zip-tie the harness (also included in the kit) to the upper intake manifold bracket to clear the driver's-side axles. The mighty CRX picked up a gain of 5.9 hp and 2.6 lb-ft torque over our previous run, with the largest gains taking place from 5,500 rpm to redline.
 | 1990 Honda CRX Si - Power Pages
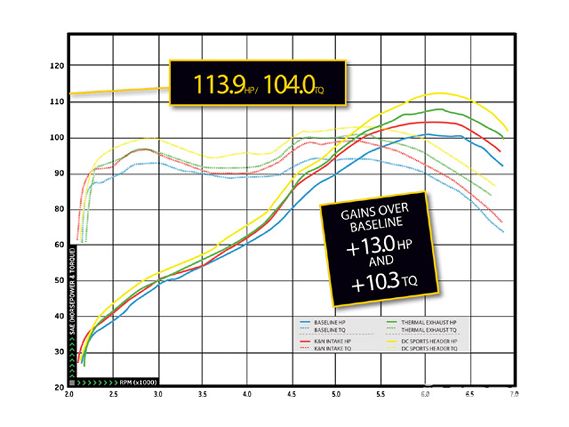
CONCLUSION HP Level +HP TQ Level +TQ Baseline {{{100}}}.9 93.7 K&N COLD AIR INTAKE 105.3 4.4 98.9 5.2 THERMAL R&D EXHAUST 109.1 3.8 101.4 2.5 DC SPORTS 4-2-1 HEADER 113.9 4.8 104.0 2.6 Final 113.9 13.0 104.0 10.3
Conclusion:
Testing our '90 CRX SI with many of the basic bolt-on products managed to net us a gain of 13.1 hp and 10.3 lb-ft torque over our baseline run--an impressive feat for a car powered by a 1.6L non-VTEC power plant.
 | 1990 Honda CRX Si - Power Pages
BANKROLL K&N INTAKE $170.00 THERMAL R&D EXHAUST $576.75 DC SPORTS HEADER $408.03 MSRP Total $1,154.78
