 | Gear Speed HI Performance Tranny Rebuild - Project Blackout Part III
 Project Blackout Installments
Part I
How the project started and Chimpy's plan for the car
June 2005
Part II
Quaife ATB Differential Install
July 2005
Part III
You're holding it, jabroni
August 2005
Part IV: Check out next month's issue (September for those scoring at home) to see what's next. Or, if you email Chimpy the right answer, he'll send you one banana and a lock of his chest hair.
Seven hundred. That's equivalent to the number of times I've been rejected by the opposite sex. However, my main focus is on the B-Series engine, which has reached horsepower numbers reserved for Eurotrash cars. The evolution of ductile-iron sleeving technology coupled with forged internals has all but cemented the legacy. But high-horsepower Hondas and gearbox modifications seem as unfamiliar with each other as Rick's 240 and an actual race track.
The B-based box is good but not quite waterproof. Uh, bulletproof. Sorry, I was thinking about my rubber sheets. We've seen tons of engine builds, but never a full gearbox rebuild. I know that you don't all have the Rain Man-type overall capacity that I, Chimpy, possess. I'm the only 28-year-old alive who still lives at home and references stupid '80s movies starring Tom Cruise, so let me reiterate. No punches, donkey or otherwise, are being pulled for this project. The DA is only going to have the best parts grafted to it, just like Teri Hatcher.
Project Blackout's motor (check out superstreetonline.com for the breakdown) will be seeing 400 hp at the wheels all while Yamz and Jonny will be eating the dust propelled off my back hairs. The last thing I want to do is break down like my deodorant does when I sweat curry, so the 145K tried-and-true YS1 box will have to be rebuilt. Out of a handful, there's probably one real gearbox player out there. Lucky for us, our first-round pick was only a 50-mile ride on a magic carpet weaved out of my chest hair.
Last month, we focused on installing our Quaife ATB differential, but my curse of being a total loser decided to show up again. After dismantling the gearbox, Gear Speed found a couple of worn parts, namely the synchros. With more mileage on it than my Marian's Sea Purse, it was a perfect time to rebuild. I opted to stick with the YS1's 4.40 final drive ratio for reasons I choose to keep secret.
If you've never pulled apart a gearbox, now's probably not the best time. Though this story serves to highlight the steps, we left the labor in the hands of the Gear Speed techs.
The Lowdown
MSRP: $1,400
Pros: OEM-quality workmanship, official supplier for HondaCare proprietary carbon synchros
Cons: Will cost you a weekend in Vegas
Install Difficulty: Advanced
Tools Needed: www.snapon.com
Verdict: Worth every penny, peso, and rupee; essentially a brand-new gearbox
Check out next month's issue as we show you what it took to get our 2,000cc non-VTEC consortium up to spec. For more detailed images of the gearbox rebuild, go to our brand-new Web site, superstreetonline.com. Our content is 100 percent free to all.
Neuspeed Short Shifter
Now that our gearbox is primed and ready for battle, we needed something other than my Wonder Sleeve to shift the damn thing. Neuspeed has been around since Cousin Nads has been hooking up FX16 Corollas. The Neuspeed shifter is made of some pretty strong material that can withstand high heat and friction. Rounding off the shifter is a set of polyurethane shift stabilizer bushings.
Chimpy, with the help of gear speed...
With the gearbox out of the car, loosen all sixteen bolts. Pry apart the casing with a pry bar, and be sure to move the bar around to break the seal.
Here's a quick look at the guts of the YS1 box. Simple, yet complicated, like my Kid 'n Play hairstyle. In order from left to right: the differential, the countershaft, and the mainshaft/input shaft.
The gears are initially wiped clean and then put through a three-stage deburring/cleaning/tumbling process to ensure like-new condition.
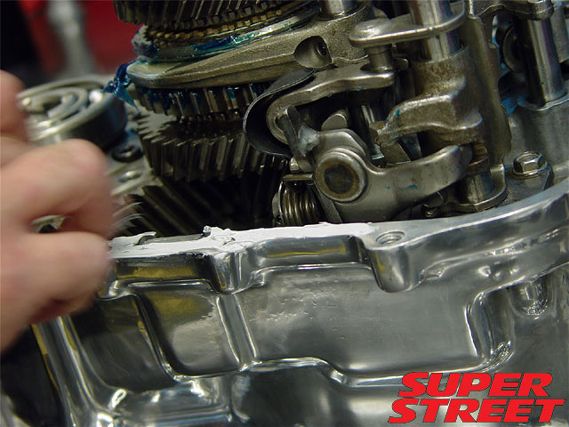
Our gearbox casing had a decent dime-sized hold punched through it. Further teardown indicated that a bolt from somewhere had been hibernating in the corner of the case.
Because our gearbox was getting the full-boat (fine, Roel: full-camel. Happy?) treatment, every part had to get yanked out. There's an order-I think.
After 145,000 miles, the stock synchros weren't prepared for a 400hp beatdown. Gear Speed recommended we go with its very own carbon-coated synchros.
...You'll be grinding your gears in no time...
Every single nut, bolt, washer, and seal that's needed for the rebuild was laid out neatly on the table. This helps avoid any confusion later down the line.
Install the breather chamber plate, a new oil seal, the countershaft, the First gear thrust washer, the synchro rings, and the Reverse gear. Be sure to use a brand-new friction damper.
Jason consummated the ritual by mating the case halves. You'll have to call and beg for tricks to getting the cases to seat properly. Naked pictures of your girlfriend always help.
Brand-new OEM Honda ball bearings are pressed into the case. These bearings are oiled lightly using this state-of-the-art oil gun.
Jason proceeds to slather the mainshaft gears with a decent dose of Ro-dogg's booty lube. The mainshaft assembly is installed and both fork shafts are keyed into the casing.
Reinstall all sixteen bolts using the Helm's manual for the sequence and specs. To gain acceptance, we had the casing polished to a blingin' shine.
...And then you must never call us again.
