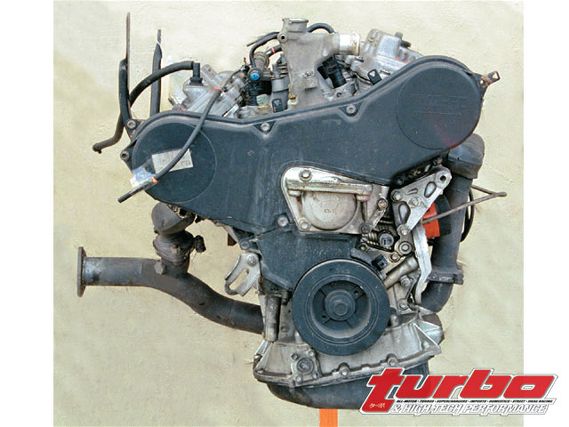
 | Project MR6's Lexus ES-300 Toyota 1MZ-FE engine had more than 100,000 miles on the odometer, normally aspirated, and we ran up another 12,000, most with 5 psi or 10 psi of boost. This is a robust, well-designed modern powerplant, but the weak points must be fortified to run anything more than 10 psi boost.
 With 12,000 miles of low-boost and naturally aspirated street and dyno testing on the transplanted Toyota 3.0-liter four-cam V6 powerplant in our compound-supercharged Project MR6, we were more than ready to stretch for some serious high-boost power in the 500-to-850-whp range.
But first, we'd have to open the engine and address the weak points so it will live long and prosper at big boost.
This project kicked off with the March 2003 Turbo documenting our efforts to experiment with twincharging a V6 '91 Toyota MR2-running both a supercharger and turbo system.
Alamo Autosports, Norwood Performance, and Toyota Racing Development pitched in to swap a Lexus 1MZ-FE V6 in place of the stock 3S-GTE 2.0-liter turbo-four.
We equipped the V6 with a slightly modified version of TRD's positive-displacement Eaton supercharger kit available for the 1MZ-FE powerplant used in the Camry, Solara, Sienna, and Lexus ES300. A MoTeC M48 was wired up, and for the April issue, we designed an intercooled custom turbo conversion package based on Majestic Turbo's 90-lb/min T76 compressor.
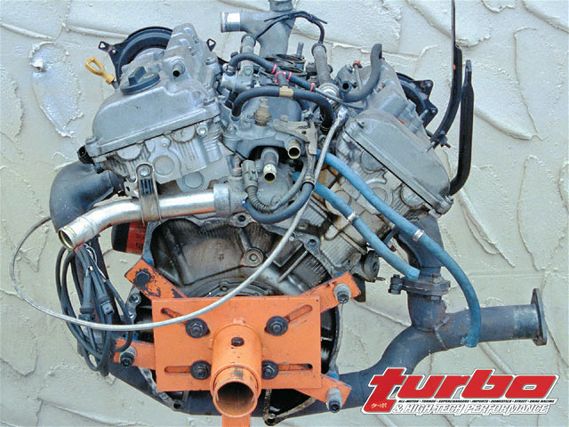 | Project MR6
 Unfortunately, by this time we'd already seen the stock 1MZ's heads begin to lift a bit on one runaway dyno pull at Norwood Autocraft. The powerplant belched a small breath of steam out the side of the aft cylinder head at the end of the run and the writing was on the wall. We needed to yank the 1MZ engine again, this time for internal refurbishing and performance and longevity upgrades.
In the midst of all this, we completed a long road trip from Texas through Arizona to California and back, uneventfully, with the exception of progressively reducing spark-plug gap from .030 down to .015 inches to keep the powerplant from misfiring under heavy loading.
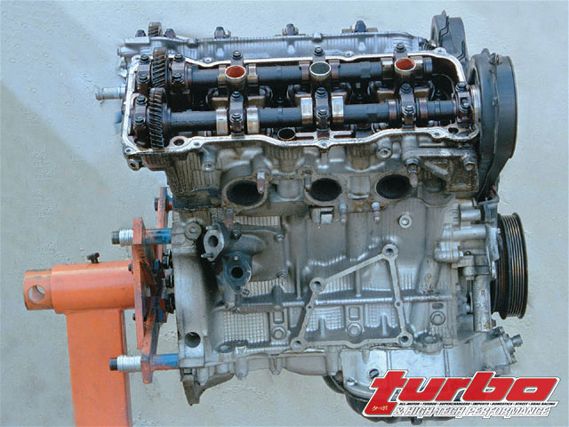 | Cam Covers Off
Working at Alamo Autosports' shop near Dallas, we began the disassembly and analysis by removing the cam covers, which we set aside for welding on brackets to hold down the new Ignition Solutions Plasma-Booster direct coils.
Flash forward: Note that poor factory port matching produces a carbon ring around each exhaust port. Head wizards GTP in Houston found the heads have much potential for gas flow improvements.
Back in Texas, we contacted Ignition Solutions to obtain a set of six special microprocessor controlled, coil-on-plug, plasma-direct high-power coils that were several times as powerful (see sidebar).
Again, we were gearing up to test the new turbocharger configuration at 1 psi boost increments from normally aspirated to head-lifting boost levels, but in the meantime, the engine began making a faint, ominous tapping noise.
Clutch Masters was simultaneously anxious to get a look at the multi-disc Kevlar clutch we'd been alpha testing. We decided this was a good time to pull the engine for clutch examination and internal engine super-duty upgrades before moving to monstrous boost.
Analysis & Teardown: Toyota's 1MZ V6Alamo Autosports, builders of the MR6 turbo conversion, helped us remove and tear down the boosted 1MZ V6 powerplant. Later, we consulted with Dallas supertuner Bob Norwood, Houston cylinder head expert, Craig Gallant, and various performance equipment suppliers to meet the project's high-boost needs.
After removing the turbo and supercharger systems at Alamo's Arlington, Texas, shop, we ran the MR6 up on a lift and pulled the 1MZ V6 and MR2 transaxle as a unit. Then we separated the transaxle from the engine, and sent the multi-disk clutch and aluminum flywheel to Clutch Masters for forensic analysis. We also disconnected the engine wiring harness for evaluation and further fortification against the heat-soaked environment inside the MR6's "engine room."
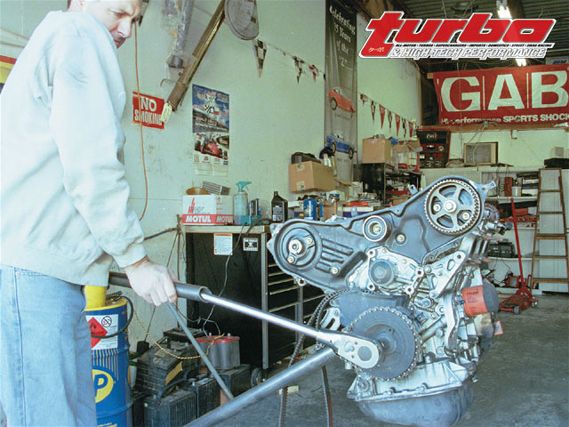 | Removing 1MZ Crank Pulley
Alamo owner Brice Yingling exerts some mild persuasion to remove the crank pulley/damper. Persuasion involved a giant change wrench, a no-shit breaker bar, and two floor-length cheater bars.
With the 1MZ-FE engine mounted on a stand at Alamo Autosports, we yanked the cam covers and set them aside for sandblasting; this would be followed by welding permanent brackets to anchor the six Ignition Solutions coil-on-plug direct coils.
Next, we removed the lower intake manifold and set it aside for shipment with the heads to Gallant Technical Performance (GTP) in Houston. Surprisingly, the gaskets revealed the heads and intake and exhaust manifolds seemed poorly port-matched. Both head and intake appeared to have major potential for porting. GTP would have the final word on that.
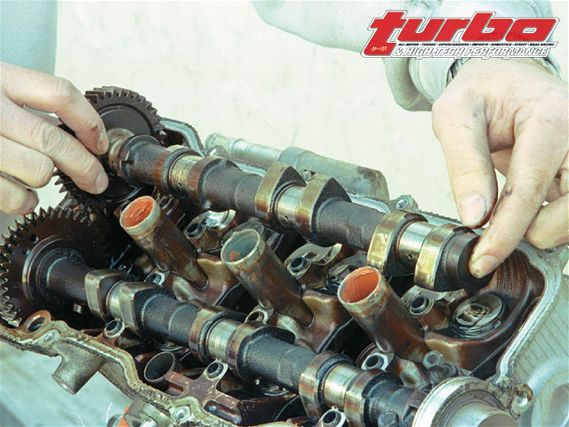 | Head-Cams Out
The 1MZ-FE uses a four-cam, shim-over-bucket system to actuate the valves. This is a highly efficient system capable of very high rpm with high stability, but the large shims are relatively heavy, and boosted 1MZs with extended rpm requirements definitely need stronger springs. For really high-rpm operation, outfits like GTP in Houston can convert to a light-weight shim-under system.
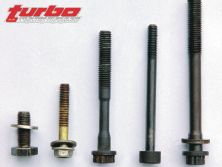
Each twin-cam, four-valve 1MZ V6 head is secured to the block with eight 12-point head bolts arranged around the cylinders, plus an extra Allen bolt in the vicinity of the exhaust-to-intake cam gear-drive mechanism.
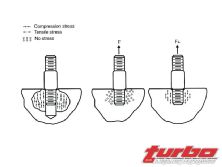
Several of the head bolts are located under the cams, so we removed all four cams prior to removing the heads from the block-which then also required removing the upper timing belt system. As the head bolts are extracted from a 1MZ, the undercut central area of the bolts between the heads and threads become obvious; such bolts are designed to stretch for even head clamp-down and are restricted by Toyota to once-only usage.
We had contacted Automotive Racing Products and knew we'd be using super-duty ARP studs to clamp the heads to the block with increased force. We set aside one of each critical fastener (head, mains, flywheel) for shipment to ARP, where it would analyze them and replace each with high-strength fasteners.
Even though Toyota did not rate the 1MZ-FE as a G-series, twin-cam, sport-type performance engine in any U.S. applications (e.g., 1MZ-GE), the engine has an extremely robust design with all the potential for "G" performance. This includes a high-performance, shim-over-bucket, valve-actuating system similar to the valvetrain on the performance-oriented, sport-type 3S-GTE powerplant used in the stock MR2 Turbo, resulting in a high-rpm valvetrain that is extremely stable at higher engine speeds.
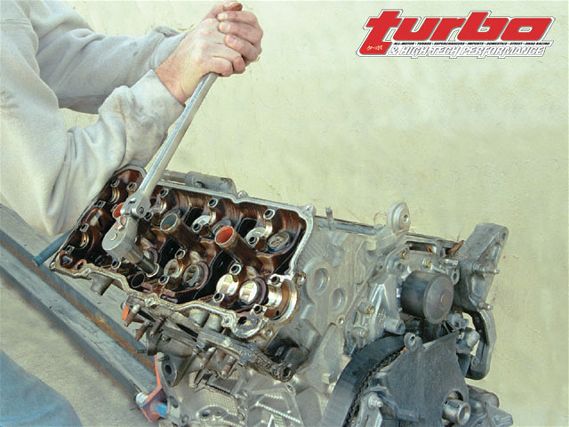 | Loosening Head Bolts
One down, one to go. Brice de-torques the second 1MZ-FE head, which involves eight 12-point undercut bolts and one Allen bolt on each head. Bolts allow head removal in tight engine compartments without engine removal, and the undercut narrow between head and thread area enables each bolt to stretch for even clamping forces across the head. Such bolts can't be re-used and the system can't keep the head from lifting at high boost and combustion pressures. We sent them off to ARP for stronger super-duty head studs.
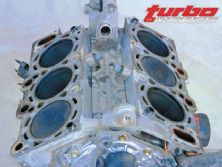
With the heads off the engine, we got our first look at the composition head gaskets and closed-deck interface between the aluminum block and heads. The combustion chambers looked healthy and clean. The cylinder bores had little or no wear-ridge above the ring contact area, and after using a chain wrench and breaker bar with huge cheater bars to loosen the crank pulley/damper, proceeded to remove all components from the timing end of the powerplant.
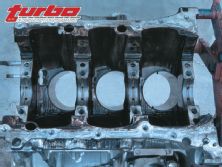
Rotating the V6 upside-down on the engine stand, we unbolted the oil pump pickup, the upper oil pan and a structural aluminum casting. This put the massive six-bolt main caps in plain view, and provided easy access to the rod bolts for piston removal.
Up to this time we hadn't seen a single damaged or overly worn component, but as we successively unbolted the connecting rods from the crank and pushed the pistons upward through its bores, this happy state of affairs was not to continue.
The second-from-rear rod on the starboard side of the engine revealed a distorted rod cap and bearing shells with moderate heat damage and metal loss. The source of the tapping noise from deep within the 1MZ was now clear.
Fortunately, the rod and bearing damage had clearly been recent, and the bearings had done their job, absorbing the fallout of the rod/cap distortion before the crank itself was badly scored.
The rods and bearings from other bores appeared to be OK, and it appeared as if polishing would render the crankshaft fit and ready for return to action.
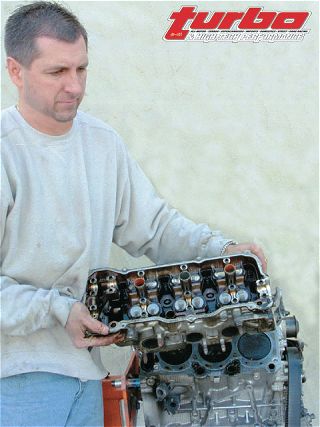 | Head Lifting
Brice removed the second 1MZ-FE V6 head. These heads have excellent low- and mid-lift gas flow, even though Toyota engineers use trick gear-drive technology to make them narrow enough to fit four-cylinder engine compartments like the '91 MR2 bay of our Project MR6.
The stock pistons are flat-top castings designed for the small-cc Pentroof combustion chambers, with reliefs cut on one side for intake valves. We already had a set of super-duty Wiseco forgings with identical compression and wrist/pin location awaiting installation.
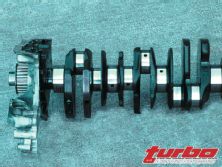
At this point, we removed the eight crossbolts securing the main caps through the sides of the block, unbolted the 16 12-point bolts from the four main caps, and removed the crankshaft from the block. The 1MZ crankshaft is a solid forging with offset crank pins on opposing cylinders for even-fire operation.
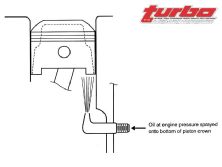
The main bearings and journal surfaces appeared healthy, and the plan was to polish the crank and reinstall with fresh stock Toyota main and rod bearings. With the block open, we decided installing piston-oil squirters in the block shouldn't be a problem.
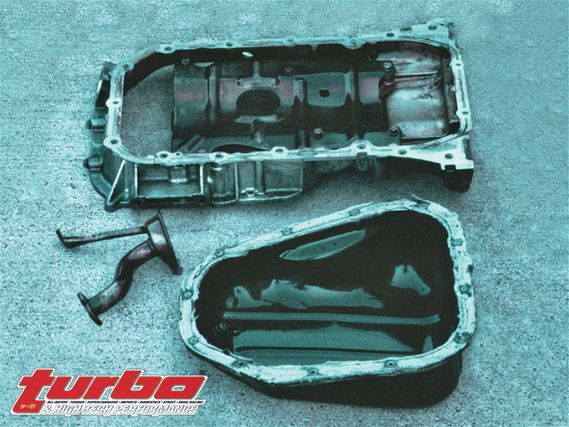 | Pans And Oil Pickup
The 1MZ-FE's aluminum block is designed for extreme rigidity, using modern concepts like the structural upper oil pan shown here for reinforcement. This block should have the rigidity to handle a lot of power without further low-end reinforcement.
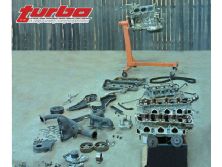
Finally, we set out the internal engine parts for "before" photography and analysis, consulting in Dallas with Alamo owner Brice Yingling, Bob Norwood, and James Patterson of Norwood Performance, and then shipped the heads and manifolds to GTP in Houston.
The head gaskets headed to Clark Gasket in Minnesota, and FedEx carried away sample fasteners for ARP in Southern California. Prior to disassembly, we arranged for Crower Cams and Equipment to build a set of stock length, super-duty 1MZ connecting rods that were up to the task.
The Plan: Engine Prepping for High BoostWe concluded the following components were sufficiently strong to withstand a significant power boost to at least triple the stock 200 hp and 7000 rpm:* Forged crankshaft, six-bolt main caps, alloy block with structural upper oil pan and end plates, oil pump, and the cam-drive system.
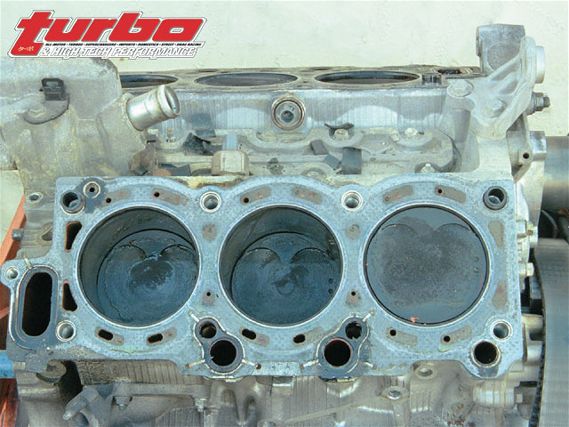 | Heads-off Gaskets On
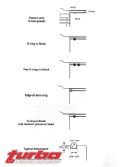
With the heads gone, we got a look at the stock head gaskets. These composition gaskets are fine for a stock powerplant, but they can easily fail in high-boost applications if there's even a hint of detonation. We sent them to Clark Copper Head Gaskets to duplicate them in copper. Note the OE flat-top 10.4:1 pistons with intake valve reliefs almost ready for the scrap heap: We already had a set of Wiseco forgings one size over with extra-thick crowns capable of machining for reduced compression if required. Toyota permits one size overboring.
We Decided The Following Parts Required Upgrading
Cast pistons, connecting rods, composition head gaskets, block deck surface.The cylinder heads, camshafts, and valvetrain required further analysis at GTP. The goal was to increase maximum rpm and improve high-speed breathing without sacrificing torque at lower engine speeds.
"The modern trick with boosted engines is to go for efficiency," says Craig Gallant. "People used to say 'Let the turbo do the work,' but if you add more pressure, you add more heat, and heat promotes detonation.
"Our plan with the MR6 heads-whether normally aspirated or boosted-was to make CFM vs. boost-based power. The 1MZ head can be improved tremendously, but the trick is to produce efficient airflow. GTP-ported heads are efficient; they have maximum CFM at very high air speeds."
"Stock Toyota 1MZ heads," says Gallant, "flow very well for the runner volume they have. The stock low-lift and mid-lift airflow is phenomenal, and there is a lot of CFM potential in these heads. The Toyota 1MZ-FE 3.0-liter V6 uses a four-valve DOHC shim-over-bucket style valvetrain, capable of very high rpm with excellent stability. This system virtually eliminates valvetrain flex. The shim-over-bucket design has good geometry. The downfall is relatively high bucket and shim weight, which makes it harder to control valve float at high rpm."
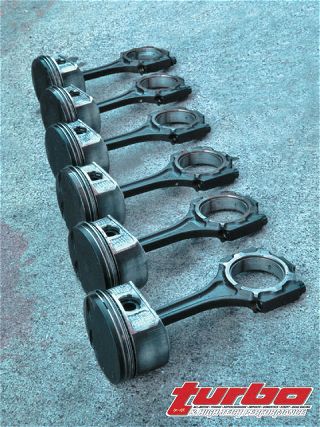 | Pistons
Pistons are probably the highest stressed items on a high-boost powerplant. Hypereutectic pressure-cast pistons are fine for low-to-moderate boost applications, but for serious boost, forgings are the way to go. Correct piston-to-cylinder clearance is critical, and the block should be bored or honed only when the machinist has the new forged pistons in hand. The stock 1MZ rods are a bit scary, and we'd already sent a new Toyota rod to Crower to have custom forgings built. Rpm is vastly harder on rods and rod fasteners than extra boost and combustion pressure, but cast or powder rods can suffer compression fracture in severe enough applications. Our engine had one bad rod cap and damaged bearing, though the crankshaft hadn't been damaged beyond polishing repair.
GTP can convert the 1MZ to a shim-under system with a 35-percent reduction in bucket weight and an 80-percent reduction in shim weight; with our relatively modest rpm-enhancement goals, we'll keep it simple for now with the stock valve-actuation system, including stock cams.
However, Gallant emphatically points out that raising the redline from 6250 to 7000 rpm requires stronger valve springs, particularly if you're planning to have 20 to 30 psi boost trying to push the intake valves open.
Stage II-type work, says Gallant, typically involves 1) aggressive media removal on both intake and exhaust ports and some combustion chamber work, 2) polishing with varying grit abrasives, 3) working the radius area to a desired finish, 4) flowing before and after, 5) checking the runner volumes, and 6) Rockin' 'n' Rollin'.
Prior to GTP's Stage II porting, intake airflow measured 264 CFM at .450 lift on the GTP flow bench, with exhaust at 147. After porting, GTP's flow bench found more than 301 CFM intake airflow at .450 lift and 185 exhaust.
In addition to the short-turn radius and bowl work, GTP removed a portion of the wall at the end of the twin exhaust ports coming out of each cylinder, improving the exhaust port exit and creating more room for a bigger exhaust header.
GTP techs moved the ridge bumps and blended with a lot of bowl work and short-turn work, streamlining the intake runners, working on the twist, and polishing the chambers.
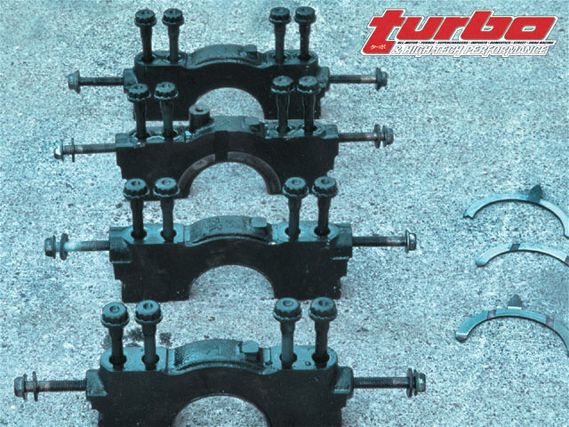 | Main Caps On Ground
The 1MZ mains are fastened with four 12-point bolts and two cross-bolts at each main cap. This is a great system, but the bolts are undercut for even torquing with factory robots, and thicker main studs are definitely the way to go for serious high-boost engines.
"What we're not doing at this point," says Gallant, "is radically changing the valvetrain. We could certainly lighten the stock valvetrain, but with compound supercharging this motor is designed to make power with boost and airflow rather than rpm. We're not installing big valves, seats, bronze guides, and we're not using exotic materials like aluminum-ceramics in the valvetrain. We're not raising the roofs .200 because there's not enough material and we'd be at the casting limits."
The 1MZ has decent factory valves with good, thin stem Honda-type valves, says Gallant. GTP's Stage II 1MZ MR6 heads use 35mm intake and 27.4mm exhaust valves. Gallant assures us there's room for bigger valves should it come to that.
Stay tuned as we'll cover engine assembly and testing in the next Project MR6 installment.
Spark Solutions
Ignition Solutions Coil-On-Plug StrategyThe stock Toyota coils did not like the lengthy, 6-milli-sec dwell period we'd been feeding it to get the kind of ignition power needed to fire plugs through the vastly thicker mixtures of a compound-boosted powerplant.
After a long Texas-to-California road trip, we replaced the stock Toyota coil-on-plug units with super-duty coil-on-plug plasma-direct coils from Ignition Solutions. Ignition Solutions' Ulf Arens provided the following chart correlating dwell time (programmable in the MoTeC M48 engine management system) to current in spark energy. Arens decided we should run a dwell time of 2.5 milli-sec, which he computed would provide a vast increase in spark energy compared to stock Toyota coils.
Coil Calculation Dwell Current Energy (msec) (Ampere) (Milli Joule) 1.00 2.2 11.68 1.50 3.3 25.13 2.00 4.5 46.73 2.50 5.7 74.97 3.00 7.0 113.07Says Arens, "The Plasma-Direct replacement ignition coil is built using Ignition Solutions' 'booster' technology to amplify secondary spark current by 100 percent (two times as much as OEM) and release about four times as much energy at the initial moment of spark.
"The Plasma-Direct coils are designed to provide a 100-percent secondary current (spark amperage) increase from 50mA to more than 100mA on most systems, with four times spark energy increase for the initial spark discharge (E=1/2*L*i*i). An added benefit is each coil's external LED that indicates power firing of the coil.

