 |
|  | Auto Detailing 101
Regular washing is important, but to keep your car looking good, you should detail and wax it regularly. Even if you’ve neglected your car’s finish, making it look almost new isn’t really all that difficult. The car care experts at Meguiar’s sat me down for a quick instructional course that was followed by hands-on detailing to show us how to use their products to bring that new car shine back to our filthy Subaru WRX with impressive results. Using Meguiar’s products including their newest 2012 lineup, we began the process by following their “Five Step Paint Care” process: 1) Wash; 2) Clean/Prep; 3) Polish (optional); 4) Wax/Protect; 5) Maintain. Embarrassingly, we admit the last time our Subaru was detailed was back in 2006 for the SEMA Show. We decided it was time for a makeover. Upon retrieving the car from storage last year to remove the decals off the car, we noticed some severe marks across the doors and hood that required detailing along with an unintentional two-tone color scheme that existed between the doors and fenders. Plain and simple, the paintjob was screwed.
 |
Auto Detailing 101
Auto Detailing: What is it?
More than simply washing the exterior of your car with soapy water and a rag, or wiping down the interior with various cleaners and a vacuum job, auto detailing involves a number of procedures that will ultimately give the car a renewed luster with brighter color. The goal of auto detailing is to restore and clean the car to its newest condition possible. The question often becomes: How committed are you toward cleaning your car? Sure, you can take the easy way out and find professional detailers in your neighborhood, but if you enjoy taking the time to make your car look its best, you can get the same results right in your very own driveway. All it takes are the right supplies and your time and attention to the job to get it done right.
 |
IMPP-121000-BLOG-084-088-
What you will need
1. Microfiber towels
2. Plastic/rubber treatment
3. Spray-on detailer
4. Polish/wax
5. Wax applicators and/or orbital polisher
 |
Auto Detailing 101
If your car hasn’t been washed or waxed and has been sitting as long as our WRX, you’ll need some additional items, including:
6. Clay bar
7. Compound (pre-wax cleaner)
8. Wax
Step 1: Wash Your Car
 | IMPP-121000-BLOG-084-088-
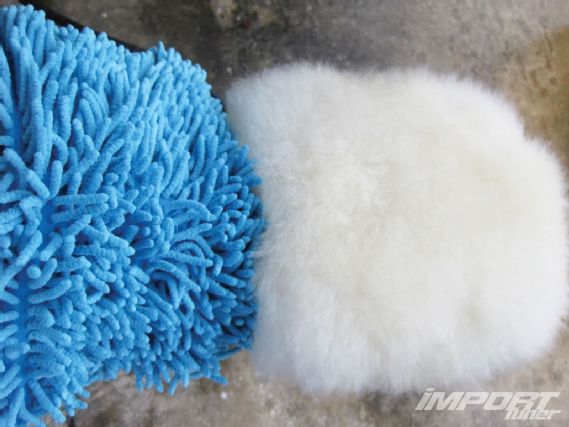
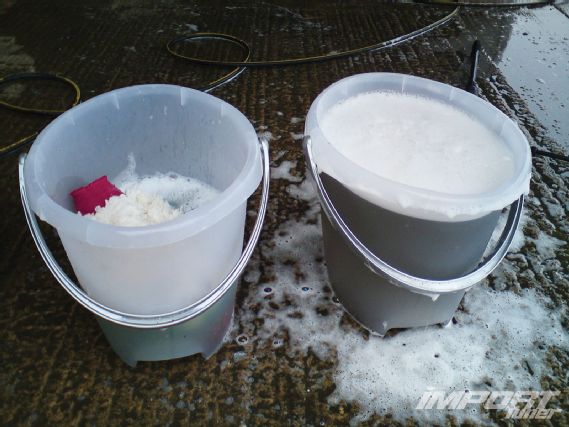
Wash and dry the car thoroughly before starting your detail work using the two-bucket method. While there is no approved way to wash a car, there are a number of wrong ways. Properly washing your car will minimize unwanted and unsightly paint swirls. Dark-colored cars, in particular, require utmost care and patience. Use a microfiber or genuine sheepskin mitt along with special automotive wash soap when cleaning. Stay away from dish-washing detergent, which will strip any remaining wax off your car. Quality car washes/shampoos are usually pH controlled, contain gloss enhancers, and some even have small amounts of water-soluble wax for good measure. The two-bucket method involves using two car wash buckets to ensure your car is properly washed. The first bucket is filled with clean water, and the second bucket is filled with car wash shampoo. Soak your mitt into the soapy car wash solution first to wash your car with suds and then soak into the bucket with clear water to rinse the mitt thoroughly. Using two buckets virtually eliminates the risk of transferring dirt back onto your paint and scratching the finish.
 |
IMPP-121000-BLOG-084-088-
When wiping your car be sure to use a microfiber style or genuine sheepskin cloth. Stay away from towels that contain polymer fibers that will scratch the clearcoat surface and leave unsightly swirls. Do not assume that the 100 percent cotton label on the towel is telling the truth. The only way to check is to actually set fire to a rolled-up corner of the towel. If you get a clean flame like a candlewick then it is 100 percent cotton. If you see black smoke and melted fibers, then most likely it uses polymer fibers.
 |
Auto Detailing 101
Step 2: Evaluate Your Paint
Meguiar's recommends washing your car at least once a week to help maintain its luster. If your vehicle's paint has been neglected or shows signs of heavy oxidation, similar to our carbon hood, we recommend moving onto the next step, which consists of claying the car.
 |
Auto Detailing 101
Step 3: Claying
 | Auto Detailing 101
To check if your car is in need of a clay job, simply run your fingertips over the paint surface of your car. Does it feel rough or sandy? If the answer is yes, your car's paint has contaminants that attached to your car's paint, where it bonds and begins a process of oxidation and needs to be addressed before waxing. Clay bars are used to remove deep ground-in dirt and stains, contaminants such as brake dust, overspray, and rust without damaging the car's finish.
 |
Auto Detailing 101
Meguiar's recommends using quick detailing spray as a lubricating agent for the clay versus water.
To begin the process, glide the clay in a straight back-and-forth direction while making sure that you are only using one side of the clay. When the clay glides freely as you rub the surface, this means the clay bar has pulled the contaminants out of the paint. Immediately discard any clay if dropped on the floor as rock or dirt sediments will adhere and scratch your paint surface if reused. Clay bars are also an excellent source on glass to remove heavy road film, bug deposits, and water spots.
Step 4: Polishing/Waxing
Rotary polishers are the professional's choice for paint correction. The main purpose of rotary polishers is to remove paint imperfections, and professional detailers will have no problem operating a polisher safely. However, when placed in the hands of an amateur, improper use of a circular machine polisher can actually burn the clearcoat due to overheating. This is one reason to stay away from heavy-duty circular polishers. The Meguiar's Dual Action polisher uses a random motion to help eliminate the risk of paint burning and designed with an internal feedback circuit that increases torque when downward pressure is applied to remove imperfections in the paint. We used Meguiar's yellow foam (polishing pad) with their Ultimate Compound to safely restore color and clarity to abused and neglected finishes. This formula cuts as fast as harsh abrasive compounds but without scratching, even on clearcoat finishes. The Meguiar's black foam (finishing pad) was paired up with Ultimate Liquid Wax. This new-and-improved synthetic polymer wax can be applied in direct sunlight on a warm surface-it won't turn white or affect its performance. If you're unsure what types of compounds of waxes to use on your vehicle, we suggest asking a professional or simply taking the time to read the detailed instructions/labels on the product.
 | Auto Detailing 101
Michael Pennington, Meguiar's director and detailing guru, revealed a neat trick to clean your door locks using a bamboo skewer found at your local grocery store. The skewers are soft enough not to damage the paint while the tips flare out to contour to the edges you're attempting to clean.
 |
Auto Detailing 101
Another trick of the trade includes using the bamboo skewer covered with a microfiber cloth to clean around hard to reach areas like emblems.
Step 5: Polish/Wax Removal
When cleaning your car, make sure to address areas you wouldn't normally wash, like areas between the doors. Doorjambs are the areas all the way around the interior doors; the rubber seal, the hinge and door locking mechanisms tend to collect dirt, but usually don't get cleaned during a normal wash. Before wiping down the doorjambs, spray them with a good cleaner product. We used Meguiar's newly released Ultimate Wash and Wax-the waterless cleaner is simply sprayed on and wiped off.
 |
Auto Detailing 101
Another area that often goes uncleaned is under the door handles. Use a soft foam applicator pad or a microfiber pad as shown to apply around the handles. Remember to always use a microfiber cloth to remove wax.
Step 6: Hit Those Plastic and Rubber Parts!
Unpainted trim and weather seals made of rubber, vinyl, or other types of hard plastic will become brittle and oxidized over time. We used Meguiar's Ultimate Black Plastic Restorer on the front cowl. After one application, the piece looked showroom new.
 |
Auto Detailing 101
Step 7: Glass Cleaning
When asking Pennington if he recommends using newspaper to clean windshields he laughed and had this to offer. "What year is this? 1960? I'd like to think we've civilized over the years. But in all seriousness using newspaper can become rather messy, not to mention leaving smudge marks and streaks," he says. Pennington suggests using Meguiar's Perfect Clarity Glass Cleaner. This streak-free cleaner is another new 2012 product that is available in either a trigger spray bottle or aerosol can.
 |
Auto Detailing 101
To clean your windows and guarantee not to leave any streaks, Pennington offers a simple four-step process. Frame the cloth (fold it in a square), fill (wipe), flip (upon wiping), and wipe using a second towel.
 |
Auto Detailing 101
Step 8: Interior Maintenance
The labels pretty much explain all there is to know about which type of finish you prefer. Both products are nongreasy and infused with Scotchgard protectant.
 |
Auto Detailing 101
Step 9: Wheels/Tires
Brake dust will coat your wheels in a fine layer of unsightly brown residue. To clean them, we once again used our waterless Ultimate Wash and Wax before applying the tire dressing.
Meguiar's Endurance Tire Gel is formulated with highly advanced polymers (macro polymers and copolymers) that bond to the tire's surface and will not sling off onto your side panels or body kit while driving, leaving hard to remove stains.
The tire gel formula uses anti-ozonants, which help guard against sun exposure and pollutants that cause tires to "yellow" and acquire that brownish film. Upon applying the gel, owners have an option of leaving it with a shiny appearance or toning it down by simply wiping down the surface with cloth-we prefer the subtler matte look.
Even under low light conditions, the detailing makeover from before to its current state was simply amazing.
We were relieved to see the marks on the door were removed and wouldn't have to repaint the car due to some old decal etchings that we thought were permanent.
It was difficult to get a good photo of the carbon-fiber hood due to all the shiny reflections-that's a good thing to have!
We pulled the car into the sunlight and performed a quick look over to check for any missed areas on the car before we called it a day.
 | Auto Detailing 101


