 | IMPP-120800-411-020-022-1
When it comes to questionable products, nothing beats a can of so-called “OEM” spray paint at the local auto parts store. Although spray paints are somewhat similar in color, they are far from a perfect match. If you’re like us, it’s happened on more than one occasion, yet we continue to search high-and-mighty for matching paint, even resorting to pulling our vehicle’s gas lid to color match with the tops of spray can caps. In the end we decided rather than play the guessing game using over-the-counter paint, we took matters into our own hands and purchased some professionally mixed paint, a compressed air spray bottle, sandpaper, primer, and clearcoat paint. Follow along as we paint our Nissan Cube front grille using this smarter and more affordable approach.
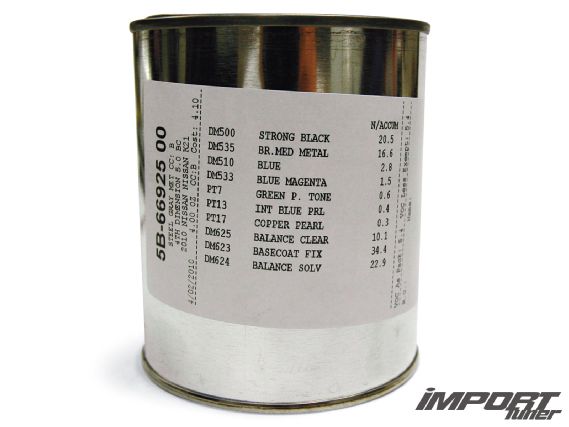
Here’s a close-up of our paint mixed by a professional. Check out how many colors were used to finalize the steel gray color.
 |
IMPP-120800-411-020-022-1
Our compressed spray bottle was also purchased at the professional paint store. Be sure to ask the shop to mix the proper paint reducers or else the mixture will come out of the spray bottle looking like silly string.
 |
DIY Painting - Tricks Of The Trade
1. The first stage of our paint preparation is removing the grille. You can do this by loosening the bolts or unfastening clips that hold the grille in place.
 |
DIY Painting - Tricks Of The Trade
2. Begin the preparation process by scuffing up the grille using 1,000- to 1,500-grit sandpaper. Be sure to thoroughly sand the grille, as you do not want the surface to appear shiny in any areas to ensure the primer adheres to the plastic.
 |
DIY Painting - Tricks Of The Trade
3. We recommend using plastic primer, but ordinary body primer is more than sufficient to get the job done. Apply the primer to the surface while leaving 30 minutes in-between coats before applying the final layer. Sand the grille lightly once the primer has dried. This will make the grille’s surface nice and smooth to apply the basecoat.
 |
DIY Painting - Tricks Of The Trade
4. Apply the basecoat in two even coats to eliminate any drips or sags.
 |
DIY Painting - Tricks Of The Trade
5. Once the basecoat has dried, apply a layer of clearcoat paint. Two layers of clearcoat paint will be more than enough to give your grille a nice, shiny appearance.
 |
DIY Painting - Tricks Of The Trade
6. If there are any indications of orange peels or unevenness in the clearcoat, use 2,000-grit sandpaper to even out the surface. Reinstall the grille and wait at least one month until the paint has fully cured before attempting to wax the grille.
 |
DIY Painting - Tricks Of The Trade
