When we last left the former
Motor Trend Truck of the Year, we had the 5.4L engine purring like a kitten. We turned it into something that we were afraid to drive on the freeway to something that we mash the gas pedal in with confidence. Now the plan was to give the brakes and suspension a similar once-over, not a complete rebuild, but something that covers a lot of bases and makes the truck safe and fun to drive. Since we're still not sure what our long- term plans are (could go 'bagged, could go full prerunner), we didn't really want to do anything we couldn't undo, but there was also no way we were going to leave the truck stock, either! We decided that a mild and relatively simple lift was the ticket for our '97 F-150, along with a whole bunch of maintenance along the way.
The base of the buildup is the 3.5-inch spindle lift from Fabtech Motorsports. Their kit also includes their performance shocks, alignment cams, and a block and U-bolt kit. Since we were doing the work, we also picked up a few items from Summit Racing. To improve the neglected brake system, we ordered a set of their cross-drilled rotors along with Hawk Performance front pads. For the rear, we picked up new drums, shoes, and a rebuild kit. Since the 5x135-bolt pattern has slowly become obsolete, and the truck could use a slightly beefier stance, we also ordered up a set of Trans-Dapt billet aluminum spacers and adapters that space the wheels out 1.25 inches while also converting to the much more popular 5-on-5 bolt pattern. Once we got the truck back together, we decided that the truck still had a bit of that factory stance we were trying to rid it of, so rather than remove the block we just put in the back, we opted to add one more item to the Summit list with a pair of Daystar 1.50-inch coil spacers. This also took the tire rub situation from minimal to non-existent. Finally, we mounted up a set of 18-inch wheels and 33-inch Xtreme MT2 tires from Pro Comp to finish off this chapter of the build.
The result of new shocks, new brakes, new tires, and a few other goodies brought the driveability of this truck way up and on par with the engine mods we have. Follow along as we start this build at Fabtech headquarters and finish it up at New Century Tire in Westminster, California. Check back soon as we tackle the next item on our F-150 project
| 1997 Ford F150 Project Truck
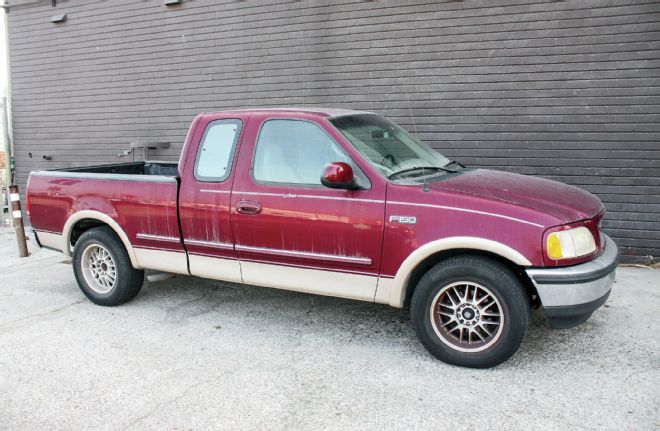
1. This old F-150 had fallen pretty far, but that all changed once we got our hands on it.
| 1997 Ford F150 Fabtech K2070 Kit
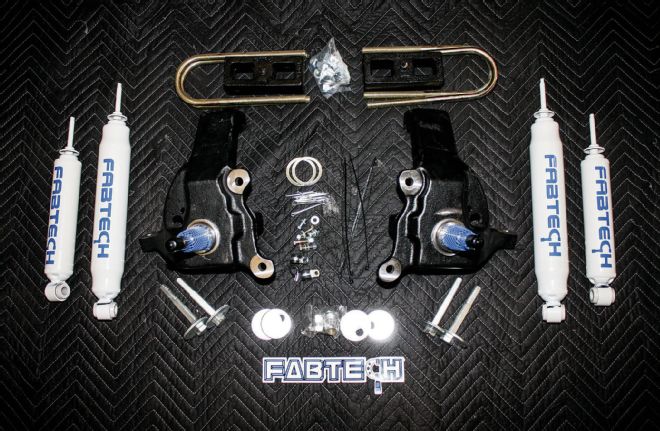
2. In the quest for keeping it fairly simple and only performing mods that can be undone (for the time being), we ordered up kit No. K2070 from Fabtech Motorsports. Besides the 3.5-inch spindle, the kit comes with shocks, alignment cams, a U-bolt and block kit, shims for the lower ball joints, and all of the hardware.
| 1997 Ford F150 Slotted Rotors
| 1997 Ford F150 Hawk Pads
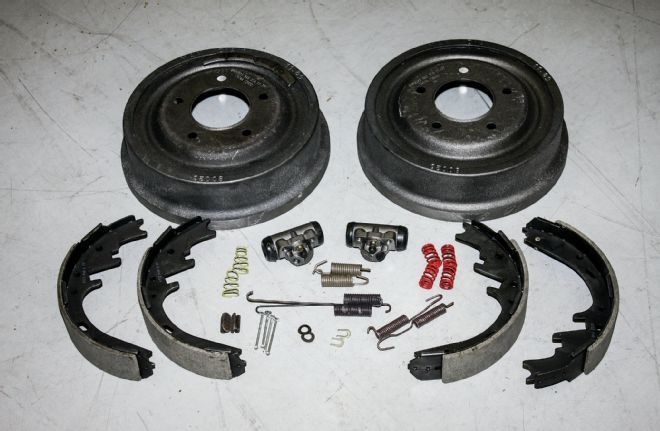
| 1997 Ford F150 Brake Shoes And Hardware Kit
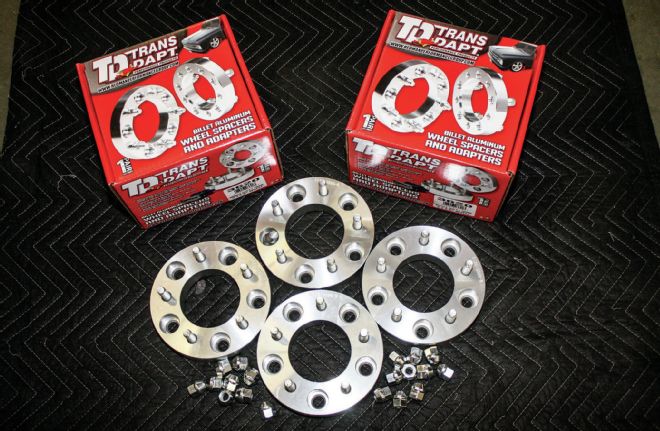
| 1997 Ford F150 Trans Dapt Spacer Adapters
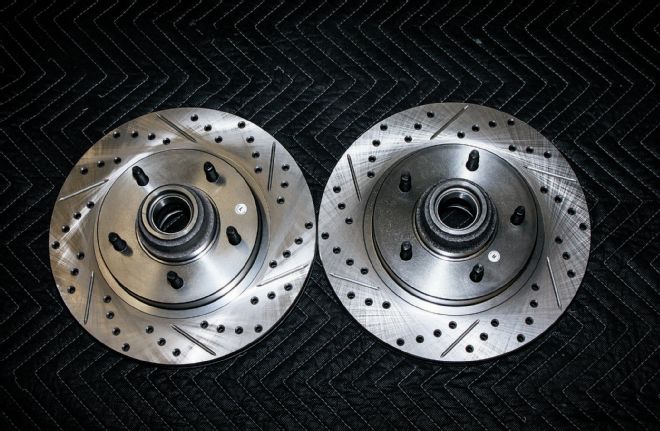
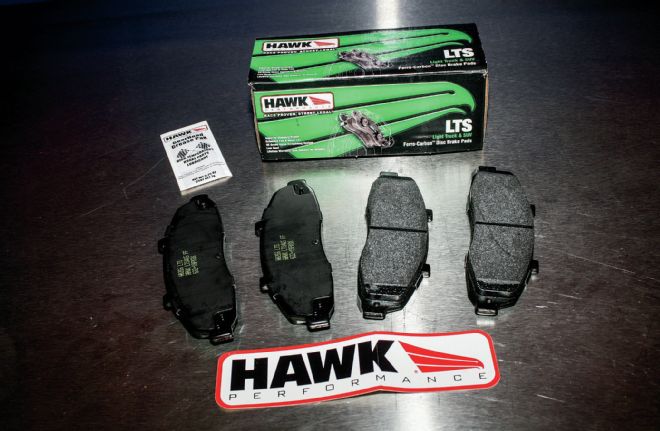
3-6. Our Summit order came with all the brake components to get the truck stopping again and included drilled and slotted rotors (PN BR65055L&R), Hawk pads (PN HB266Y-650), rear drums along with shoes and a hardware kit (PN AD8538, B723, HW7298), and a set of Trans-Dapt spacer adapters to widen the stance a bit and convert the 5-on-135 bolt pattern to the more common 5-on-5 pattern.
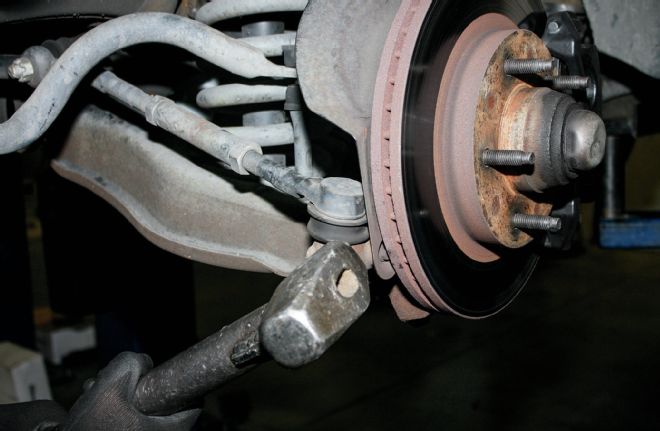
| 1997 Ford F150 Tie Rod End
7. With parts in hand we headed to Fabtech headquarters and got the truck on the lift. The crew made quick work of the disassembly, beginning with the tie-rod end.
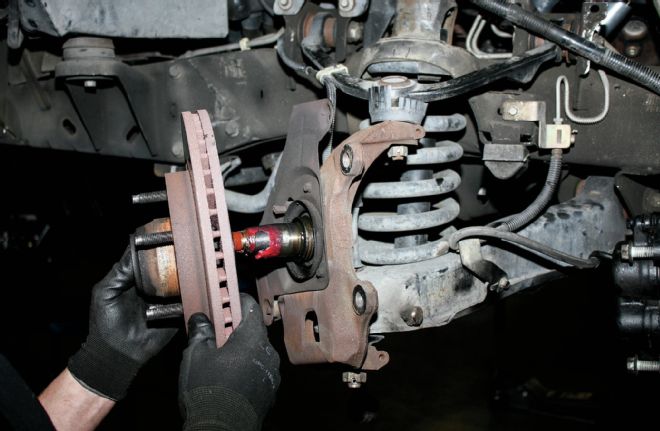
| 1997 Ford F150 Caliper And Rotor Unbolting
8. Next, the caliper was unbolted and hung to the side, and the rotor was unbolted and removed complete with the bearings.
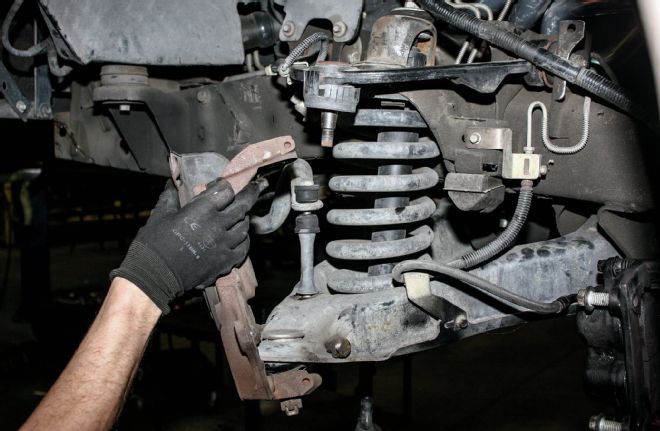
| 1997 Ford F150 Spindle Removal
9. With a jack under the lower control arm, the upper and lower spindle nuts were loosened up a few threads, then a few love taps with a hammer and the spindle was free.
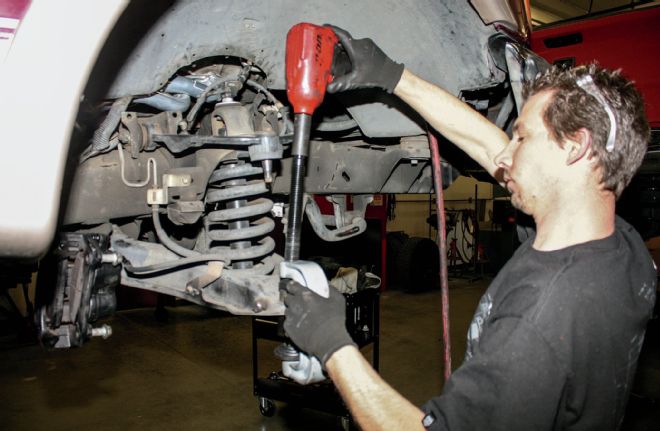
| 1997 Ford F150 Lower Ball Joints
10. Because these lower ball joints have proven to loosen up on occasion, Fabtech supplies shims to remedy the issue. With the snap ring removed, they are checked to make sure they are pressed fully upward.
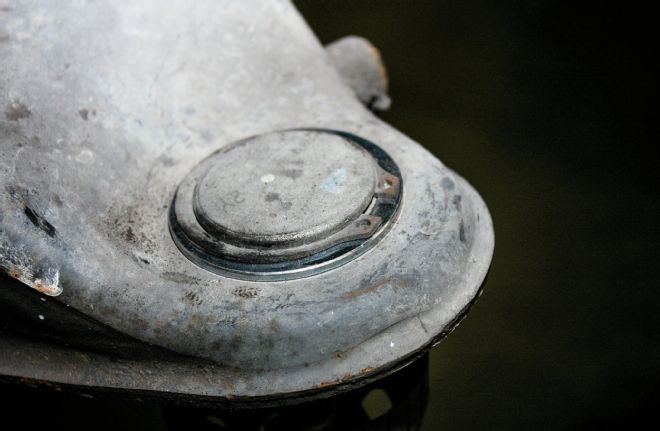
| 1997 Ford F150 Shim
11. Now the shim can be added before the snap ring is reinstalled. Problem solved!
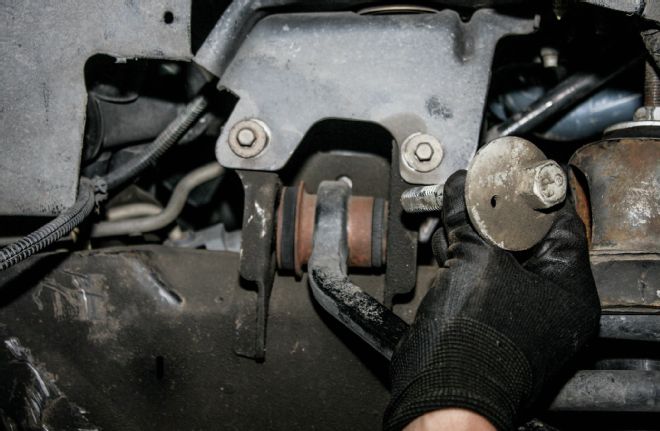
| 1997 Ford F150 Upper Control Arm Mounting Bolts
12. The upper control arm mounting bolts are now removed and replaced with the supplied alignment cams.
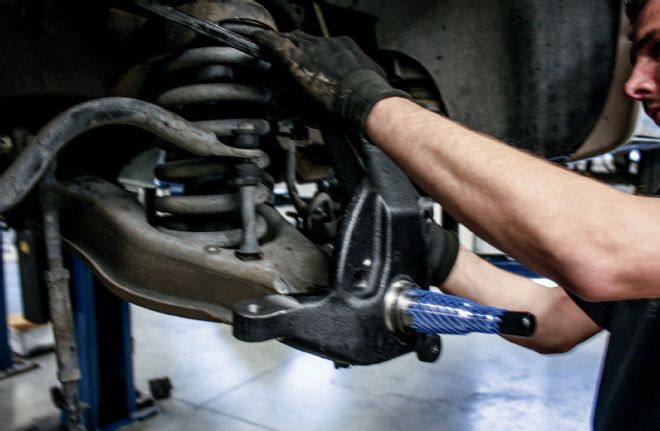
| 1997 Ford F150 Lift Spindle Mounting
13. At this point, the lift spindle can be mounted back onto the upper and lower ball joints. By the way, the ball joints, control arm bushings, and tie-rod ends were all in pretty good shape, so we kept them in service this time around.
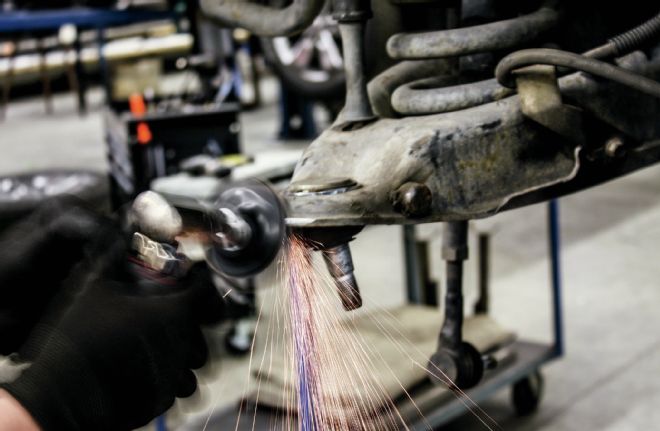
| 1997 Ford F150 Lower Control Arm Shaving
14. We noticed the very edge of the lower control arms were touching the spindles at full droop, so just to be safe we took some material off.
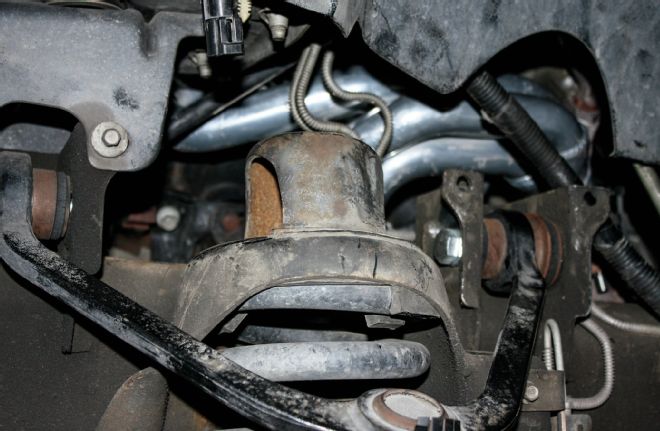
| 1997 Ford F150 Upper Mounts
15. At this point, we snugged up the upper mounts as well as the spindle.
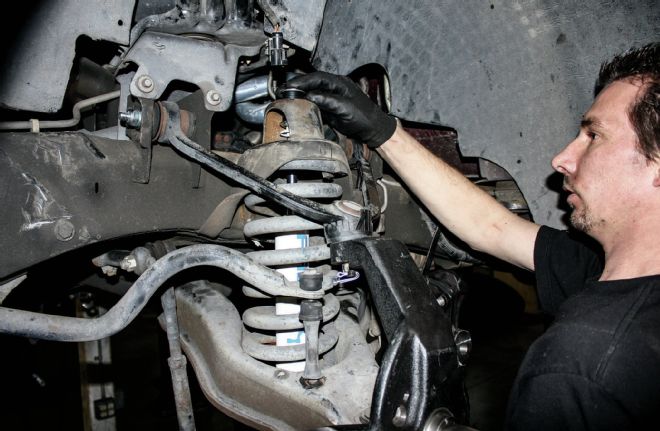
| 1997 Ford F150 Fabtech Shock Install
16. Next, the Fabtech shock was installed. See that missing sway bar bushing? We fixed it right up with a used shock bushing.
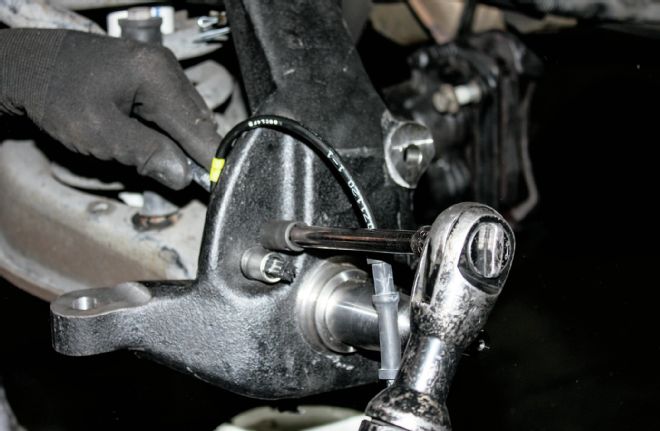
| 1997 Ford F150 Abs Module
17. We found out the hard way that since this truck was a pre-production model (No. 86 of this body style, ever, to be exact!), it used different ABS modules than the rest. By some miracle, Fabtech had a pair of new ones on the shelf from back when they were developing these kits originally. We were beyond appreciative.
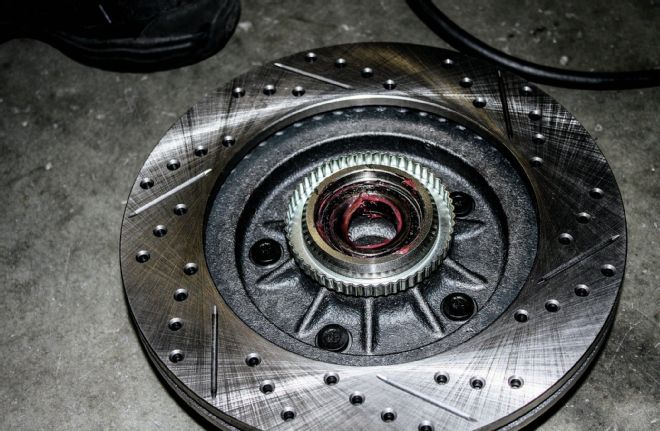
| 1997 Ford F150 Bearing Inspection
18. We inspected the bearings and repacked them before installing new seals onto the Summit rotors.
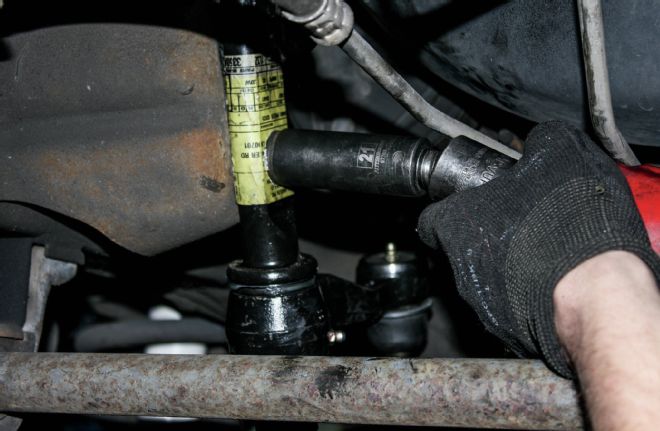
| 1997 Ford F150 Brake Pad Install
19. After cleaning up the calipers with some Ford semigloss black, we installed the heavy-duty Hawk pads.
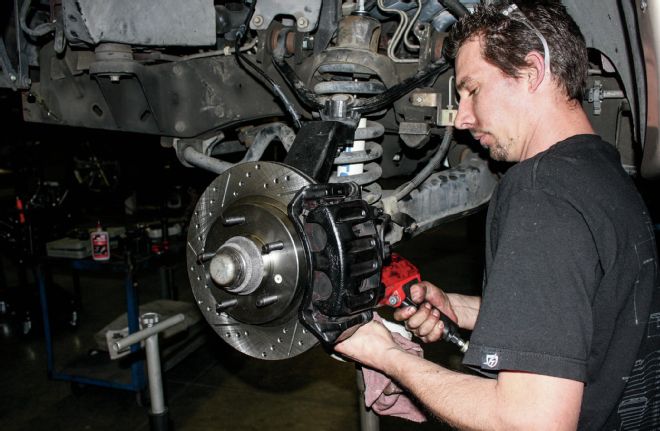
| 1997 Ford F150 Rotor And Caliper Install
20. Then, we installed the rotors and calipers onto the new spindle.

| 1997 Ford F150 Idler Arm Install
21. We noticed some play and determined the original idler arm to be the culprit. Wouldn't you know that Fabtech had a new one of those on the shelf, too! We love these guys.
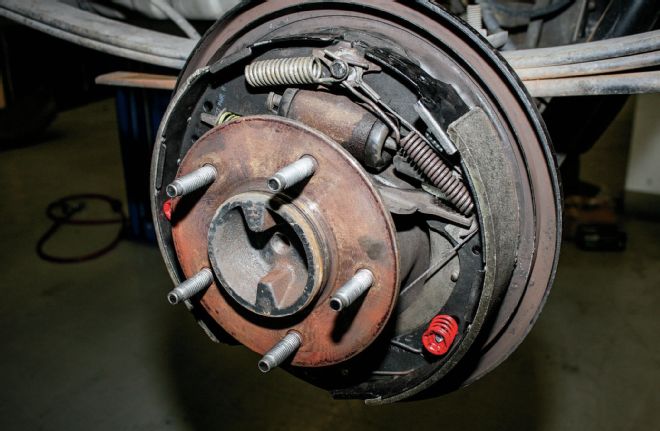
| 1997 Ford F150 Rear Brake Rebuild
22. Using the Summit parts, we rebuilt the rear brakes while the black paint on the new drums was drying.
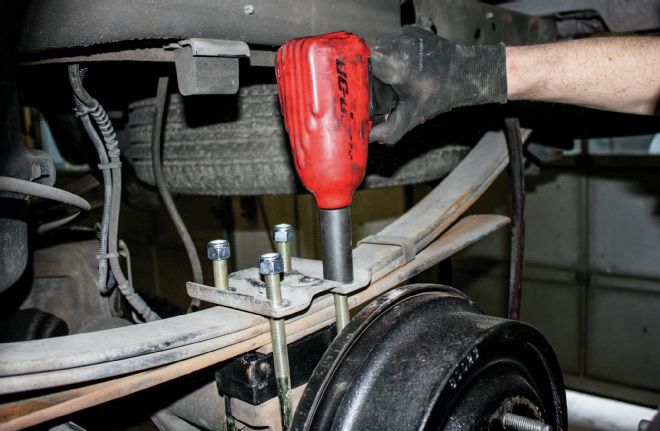
| 1997 Ford F150 U Bolt Swap
23. Moving to the rear of the truck, we put a jack under the axle and removed the stock shocks, then ditched the stock U-bolts. The new block was fit in place and the new U-bolts were installed and torqued down.
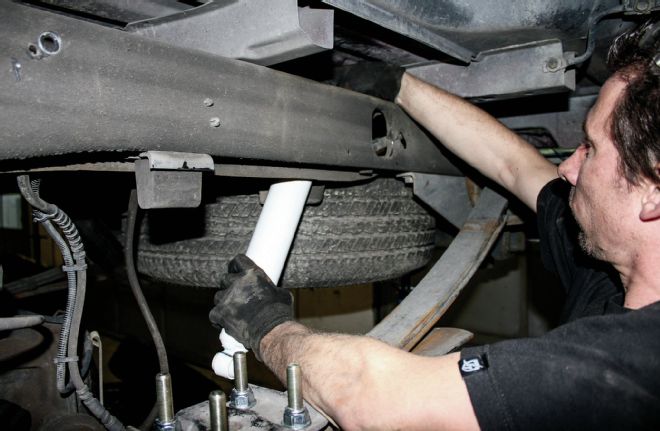
| 1997 Ford F150 Fabtech Shock Bolting
24. Now the Fabtech shocks were bolted up. We actually found an old set of Blue Point locking pliers clamped on the upper stud of one of the old ones. Score!
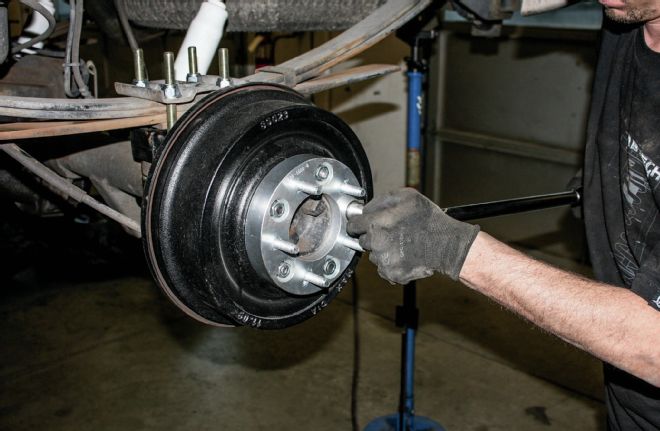
| 1997 Ford F150 Spacer Adapter Install
25. Lastly, the spacer adapters were bolted in place front and rear. We had to grind just a bit of the stud down for clearance-not even enough to affect the threads.
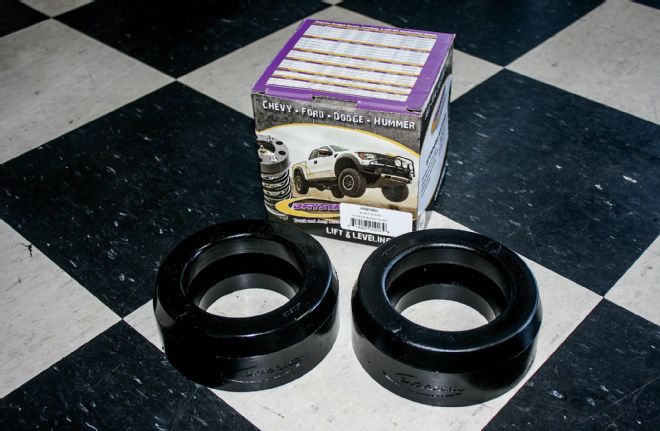
| 1997 Ford F150 Daystar Spacer
26. Over at New Century Tire, we decided that the truck needed just a little more clearance and coolness in the front, so we added in the Daystar 1.5-inch polyurethane spacer from Summit.
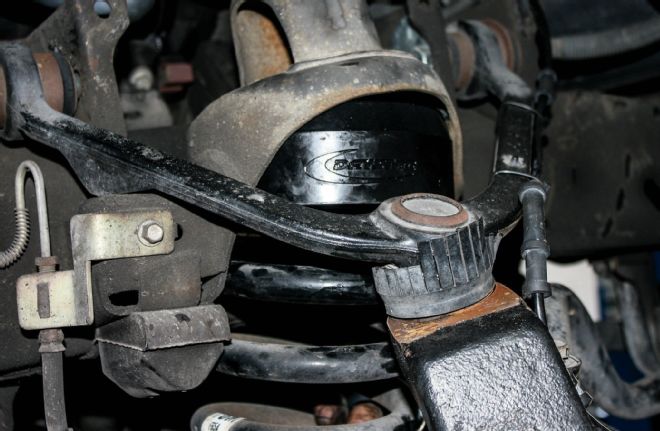
| 1997 Ford F150 Unbolting
27. It required unbolting a few components again, but we had the truck back on the ground in an hour flat.
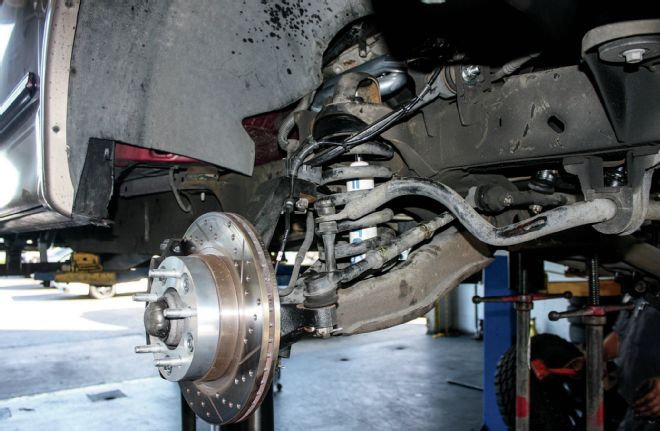
| 1997 Ford F150 Front Shocks
28. Here is our final product up front. It's no long travel with coilovers or anything. But it's all kinds of cool compared to what we started out with and performs world's better thanks to the brakes, shocks, and idler arm.
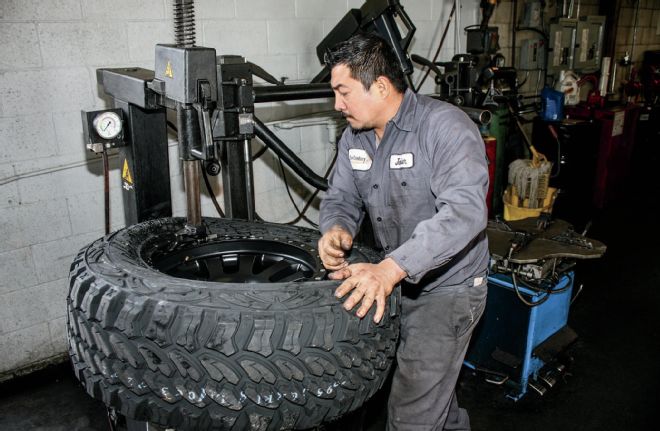
| 1997 Ford F150 Tire Mounting
29. Javier of New Century Tire got busy mounting and balancing the Pro Comp wheel and tire combo
| 1997 Ford F150 Pro Comp Series 7036 Wheel
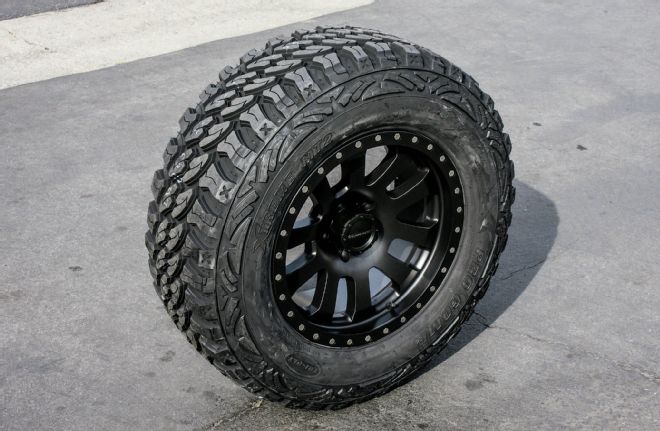
30. The Pro Comp Series 7036 alloys come in flat black and in 17 to 20-inch sizes. We ordered up 18x9s in a 5 on 5 bolt pattern and 5 inches of backspacing. The Pro Comp Xtreme MT2 radial is an aggressive mud tire that still has good road manners and a relatively subtle look. The 33x12.50R18s were perfect for our application
| 1997 Ford F150 Alignment Rack
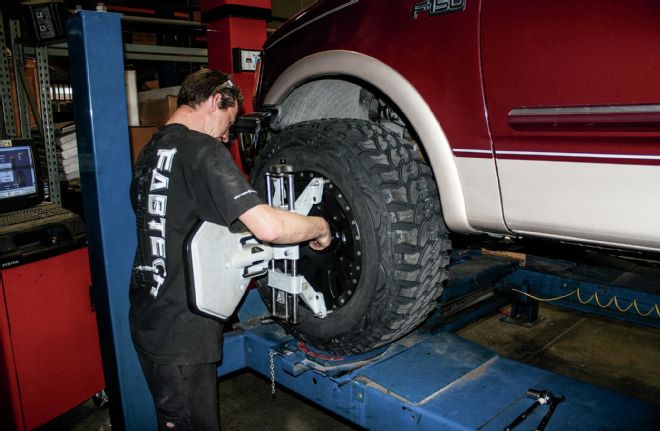
31. Once back at Fabtech, we hit the alignment rack for some minor adjustments.
| 1997 Ford F150 Project Truck
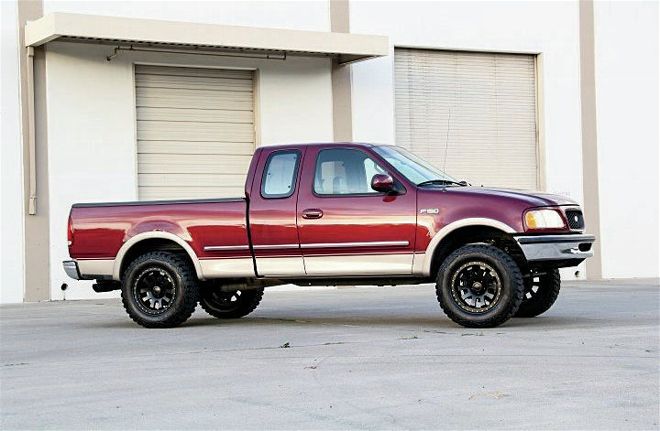
32. Whoa! It's finally starting to look like we have something here. The TotYl now runs and drives so nice we're confident that we can get in and drive anywhere we want. More importantly, it's starting to look like something that we would! Stay tuned for the next installment where we give the exterior a one-day makeover!
 | 1997 Ford F150 Project Truck
1. This old F-150 had fallen pretty far, but that all changed once we got our hands on it.
 | 1997 Ford F150 Fabtech K2070 Kit
2. In the quest for keeping it fairly simple and only performing mods that can be undone (for the time being), we ordered up kit No. K2070 from Fabtech Motorsports. Besides the 3.5-inch spindle, the kit comes with shocks, alignment cams, a U-bolt and block kit, shims for the lower ball joints, and all of the hardware.
 | 1997 Ford F150 Slotted Rotors
 | 1997 Ford F150 Hawk Pads
 | 1997 Ford F150 Brake Shoes And Hardware Kit
 | 1997 Ford F150 Trans Dapt Spacer Adapters
3-6. Our Summit order came with all the brake components to get the truck stopping again and included drilled and slotted rotors (PN BR65055L&R), Hawk pads (PN HB266Y-650), rear drums along with shoes and a hardware kit (PN AD8538, B723, HW7298), and a set of Trans-Dapt spacer adapters to widen the stance a bit and convert the 5-on-135 bolt pattern to the more common 5-on-5 pattern.
 | 1997 Ford F150 Tie Rod End
7. With parts in hand we headed to Fabtech headquarters and got the truck on the lift. The crew made quick work of the disassembly, beginning with the tie-rod end.
 | 1997 Ford F150 Caliper And Rotor Unbolting
8. Next, the caliper was unbolted and hung to the side, and the rotor was unbolted and removed complete with the bearings.
 | 1997 Ford F150 Spindle Removal
9. With a jack under the lower control arm, the upper and lower spindle nuts were loosened up a few threads, then a few love taps with a hammer and the spindle was free.
 | 1997 Ford F150 Lower Ball Joints
10. Because these lower ball joints have proven to loosen up on occasion, Fabtech supplies shims to remedy the issue. With the snap ring removed, they are checked to make sure they are pressed fully upward.
 | 1997 Ford F150 Shim
11. Now the shim can be added before the snap ring is reinstalled. Problem solved!
 | 1997 Ford F150 Upper Control Arm Mounting Bolts
12. The upper control arm mounting bolts are now removed and replaced with the supplied alignment cams.
 | 1997 Ford F150 Lift Spindle Mounting
13. At this point, the lift spindle can be mounted back onto the upper and lower ball joints. By the way, the ball joints, control arm bushings, and tie-rod ends were all in pretty good shape, so we kept them in service this time around.
 | 1997 Ford F150 Lower Control Arm Shaving
14. We noticed the very edge of the lower control arms were touching the spindles at full droop, so just to be safe we took some material off.
 | 1997 Ford F150 Upper Mounts
15. At this point, we snugged up the upper mounts as well as the spindle.
 | 1997 Ford F150 Fabtech Shock Install
16. Next, the Fabtech shock was installed. See that missing sway bar bushing? We fixed it right up with a used shock bushing.
 | 1997 Ford F150 Abs Module
17. We found out the hard way that since this truck was a pre-production model (No. 86 of this body style, ever, to be exact!), it used different ABS modules than the rest. By some miracle, Fabtech had a pair of new ones on the shelf from back when they were developing these kits originally. We were beyond appreciative.
 | 1997 Ford F150 Bearing Inspection
18. We inspected the bearings and repacked them before installing new seals onto the Summit rotors.
 | 1997 Ford F150 Brake Pad Install
19. After cleaning up the calipers with some Ford semigloss black, we installed the heavy-duty Hawk pads.
 | 1997 Ford F150 Rotor And Caliper Install
20. Then, we installed the rotors and calipers onto the new spindle.
 | 1997 Ford F150 Idler Arm Install
21. We noticed some play and determined the original idler arm to be the culprit. Wouldn't you know that Fabtech had a new one of those on the shelf, too! We love these guys.
 | 1997 Ford F150 Rear Brake Rebuild
22. Using the Summit parts, we rebuilt the rear brakes while the black paint on the new drums was drying.
 | 1997 Ford F150 U Bolt Swap
23. Moving to the rear of the truck, we put a jack under the axle and removed the stock shocks, then ditched the stock U-bolts. The new block was fit in place and the new U-bolts were installed and torqued down.
 | 1997 Ford F150 Fabtech Shock Bolting
24. Now the Fabtech shocks were bolted up. We actually found an old set of Blue Point locking pliers clamped on the upper stud of one of the old ones. Score!
 | 1997 Ford F150 Spacer Adapter Install
25. Lastly, the spacer adapters were bolted in place front and rear. We had to grind just a bit of the stud down for clearance-not even enough to affect the threads.
 | 1997 Ford F150 Daystar Spacer
26. Over at New Century Tire, we decided that the truck needed just a little more clearance and coolness in the front, so we added in the Daystar 1.5-inch polyurethane spacer from Summit.
 | 1997 Ford F150 Unbolting
27. It required unbolting a few components again, but we had the truck back on the ground in an hour flat.
 | 1997 Ford F150 Front Shocks
28. Here is our final product up front. It's no long travel with coilovers or anything. But it's all kinds of cool compared to what we started out with and performs world's better thanks to the brakes, shocks, and idler arm.
 | 1997 Ford F150 Tire Mounting
29. Javier of New Century Tire got busy mounting and balancing the Pro Comp wheel and tire combo
 | 1997 Ford F150 Pro Comp Series 7036 Wheel
30. The Pro Comp Series 7036 alloys come in flat black and in 17 to 20-inch sizes. We ordered up 18x9s in a 5 on 5 bolt pattern and 5 inches of backspacing. The Pro Comp Xtreme MT2 radial is an aggressive mud tire that still has good road manners and a relatively subtle look. The 33x12.50R18s were perfect for our application
 | 1997 Ford F150 Alignment Rack
31. Once back at Fabtech, we hit the alignment rack for some minor adjustments.
 | 1997 Ford F150 Project Truck
32. Whoa! It's finally starting to look like we have something here. The TotYl now runs and drives so nice we're confident that we can get in and drive anywhere we want. More importantly, it's starting to look like something that we would! Stay tuned for the next installment where we give the exterior a one-day makeover!