Standard-cab trucks have been making something of a comeback in the custom truck scene as of late. For a long while now, crew cabs of all makes and heights have dominated the scene with nary a lowered short wheelbase truck in sight. As we have continually proven with trucks participating in the Truckin THROWDOWN series, the short wheelbase is king of the handling department. So it goes without saying that we were waiting with crazed anticipation to get our hands on a 2014 GM single cab with a V-8 filling the engine compartment for some much-needed wheel time.
The time had finally come for us to be let loose with a pretty well optioned 2014 GMC Sierra to install and test some lowering suspension components from McGaughys suspension in Fresno, California. McGaughys has developed a single part number adjustable lowering system to make ordering parts a simple affair. With so many options for height alteration included in one kit, the new system turns choosing the proper height for your truck into child’s play. Better looks, better handling, and a brand-new custom truck -- sounds killer to us. We headed over to Bad Habit Customs in Fresno, California, for the installation of the new suspension on the 2014 GMC Sierra and had enough time at the end of day to go out for a fun-filled test drive.
| 01.
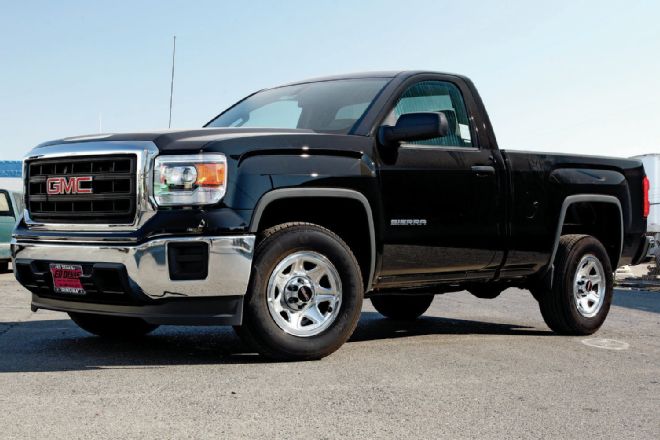
01. At Bad Habit Customs, we began with a zero-mileage standard-cab GMC Sierra fresh off the lot from Ed Dena’s Auto Center in Dinuba, California. Some lucky customer will be able to purchase it when it’s completed.
| 02.
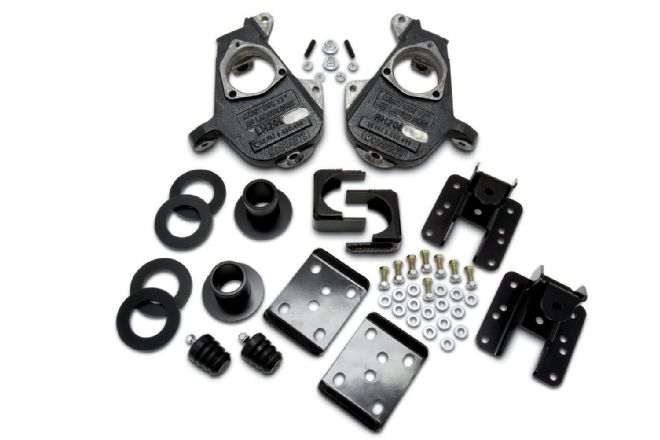
02. McGaughys included everything needed in one part number to lower this 2014 GM truck as much as four inches up front and seven inches out back. Depending on the amount of lowering desired, your application may not use all of the included components.
| 03.
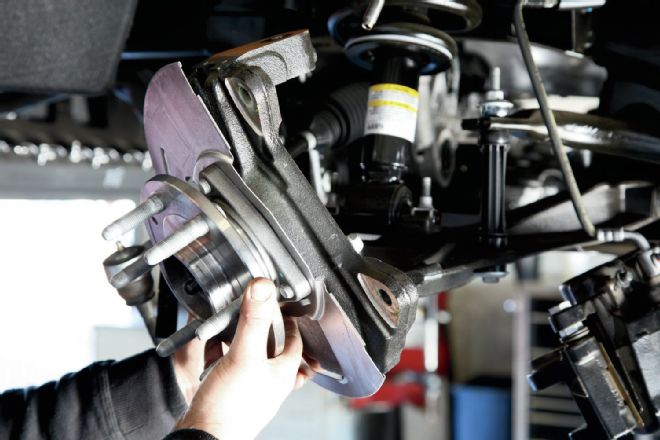
03. Our installer, Kelly, jumped right into the suspension by first pulling the brake caliper and rotor off the factory spindle. Next the balljoints were broken free and the factory spindle was removed from the front suspension.
| 04.
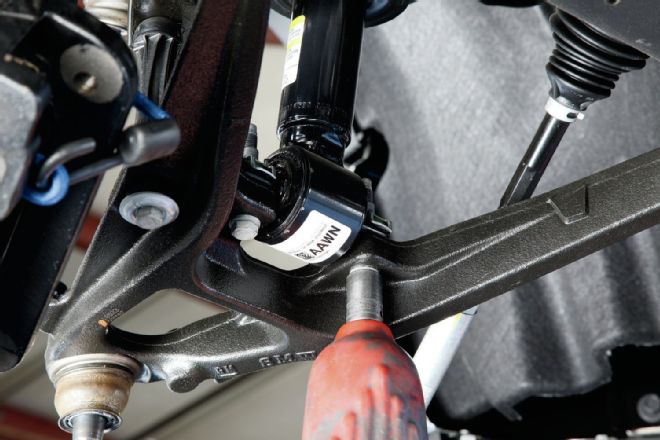
04. Once the three upper retaining bolts were removed with an 18mm wrench (or socket), we moved to the lower strut mounting bolts and zipped them off with a pneumatic gun.
| 05.
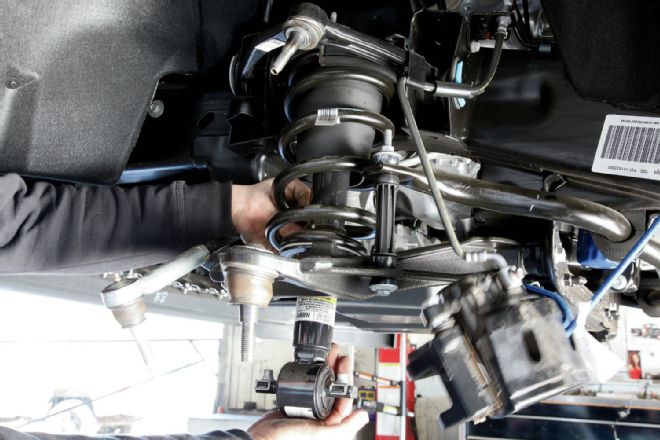
05. Kelly lowered the complete stock strut assembly from the Sierra without much fanfare or unnecessary labor.
| 06.
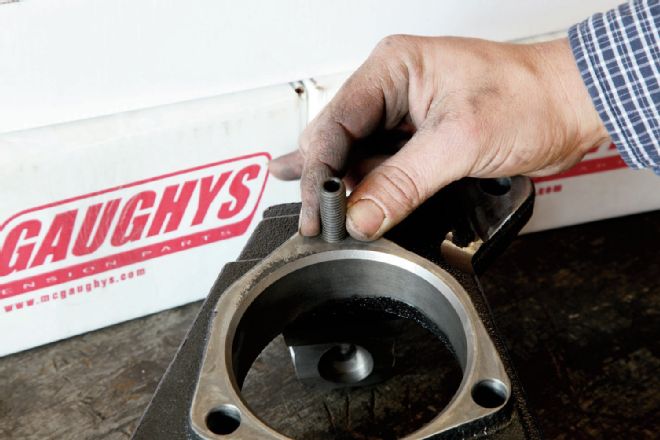
06. Due to the new raised position of the unit bearing to create the 2-inch lowering built into the McGaughys spindle, a stud was used to replace the factory upper retaining bolt.7. Two of the original three bolts were used to mount the unit bearing and brake dust shield onto the new McGaughys drop spindle. Kelly tightened the included nut onto the stud from the front side with an open-end wrench.
| 07.
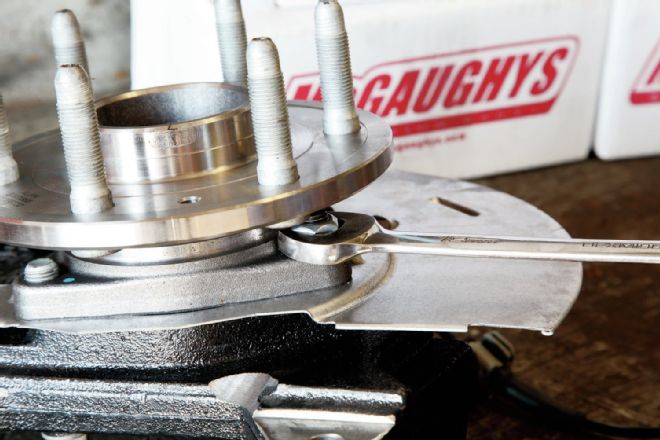
07. Two of the original three bolts were used to mount the unit bearing and brake dust shield onto the new McGaughys drop spindle. Kelly tightened the included nut onto the stud from the front side with an open-end wrench.
| 08.
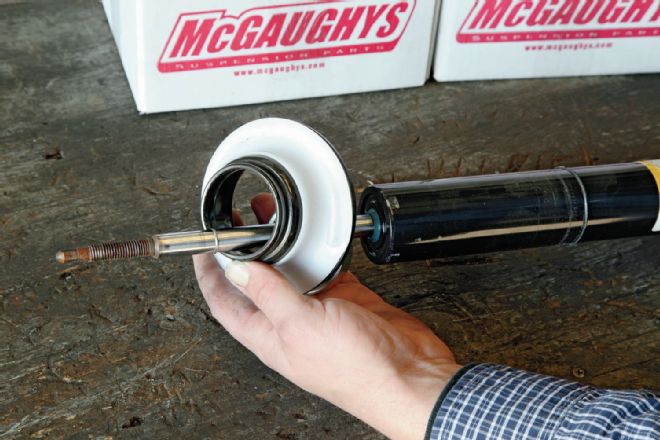
08. Achieving the full four inches of drop required using a spring compressor to disassemble the strut. With the coil spring removed, Kelly knocked the retaining cap off and slid the stock spring cup off the strut.
| 09.
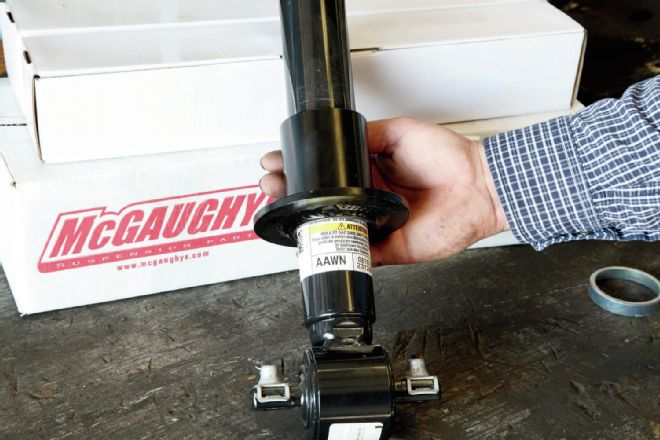
09. It was replaced with the fabricated McGaughys coil cup, which sat lower on the strut body to achieve two inches of drop. Combined with the lowering spindle, the front end was sit a full four inches closer to the ground.
| 10.
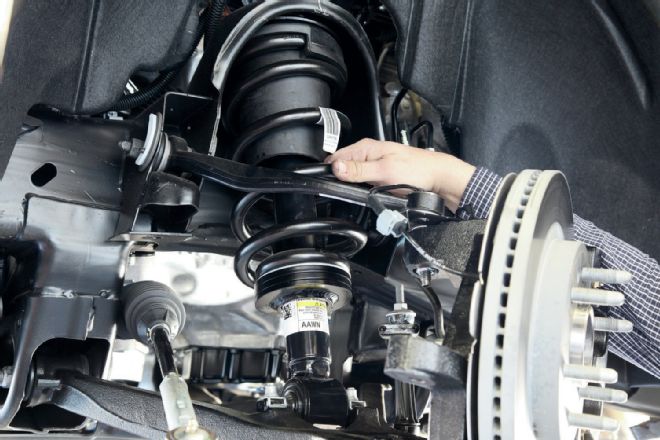
10. Kelly safely reassembled the strut in the spring compressor before placing it back on the ’14 Sierra using all of the factory hardware. Since it was now shorter, the strut assembly slid easily into position.
| 11.
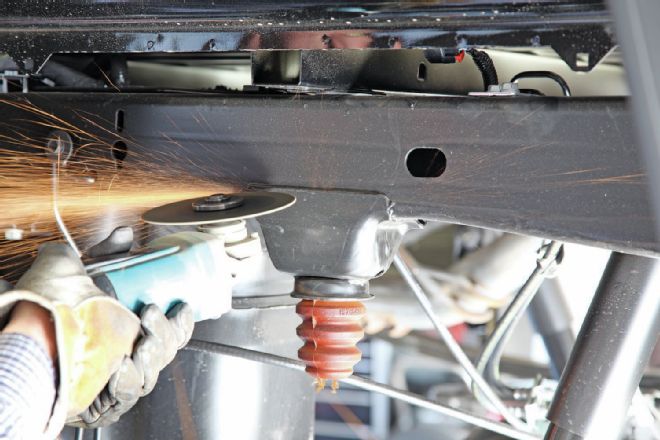
11. For the rear suspension, an axle flip was performed to achieve the desired seven inches of lowering. Kelly attacked the bumpstop mounts with an electric cut-off wheel to remove them for axle travel clearance.
| 12.
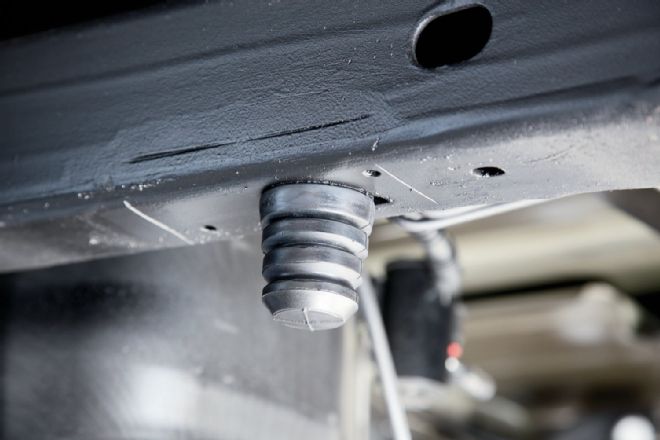
12. McGaughys included multi-stage bumpstops that were bolted onto the frame to provide a measure of safety in case of large suspension impacts while driving.
| 13.
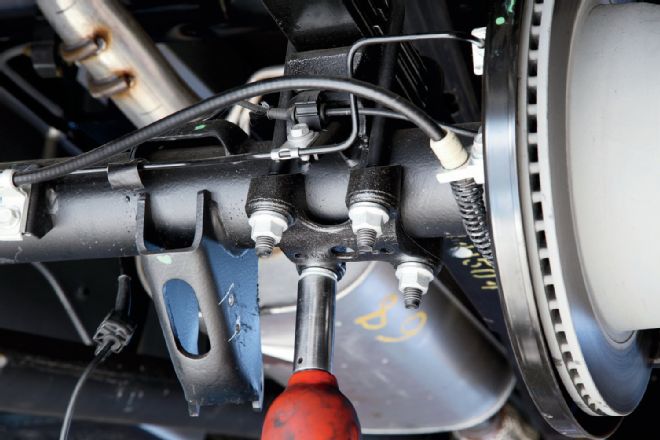
13. Both rear shocks were removed and discarded, as they’ll be upgraded with improved units from McGaughys. Safety stands were used to support the axle while Kelly zipped off the U-bolts.
| 14.
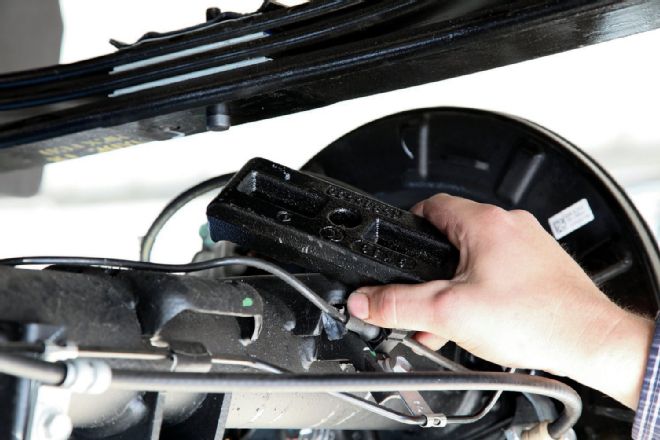
14. We certainly did not need the factory 1-inch lift block for the new stance McGaughys was providing. They were, however, perfect for paperweights.
| 15.
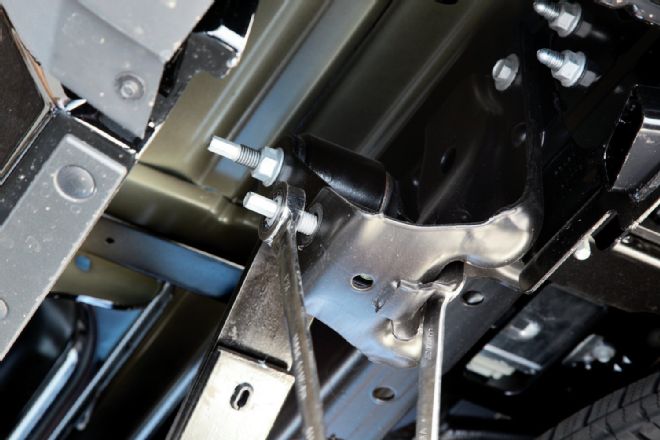
15. Using a couple of 21mm wrenches, Kelly removed the lower shackle bolts all together and only loosened the upper shackle bolts for freedom of movement.
| 16.
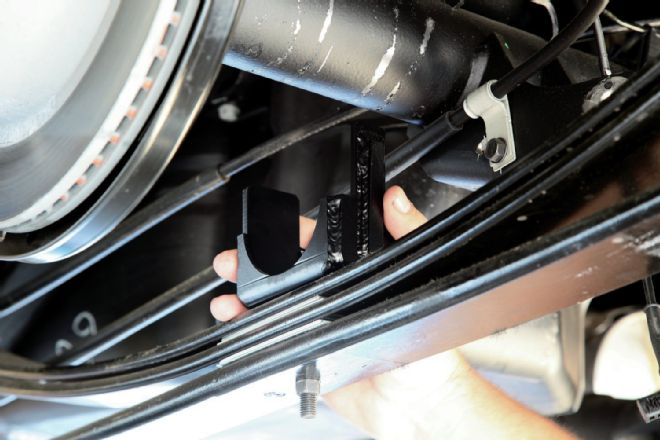
16. Moving the axle on top of the leaf springs created the 7-inch lowering we desired. As part of the suspension kit, these axle saddles located the axle for proper placement.
| 17.
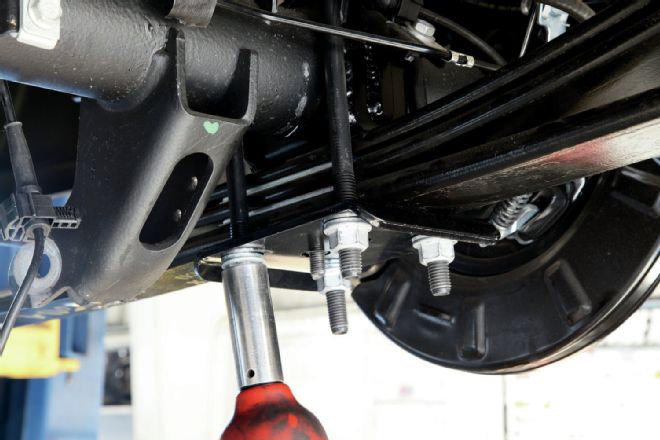
17. Stock U-bolts were torqued in place to keep the GM and McGaughys pieces firmly together for the long haul.
| 18.
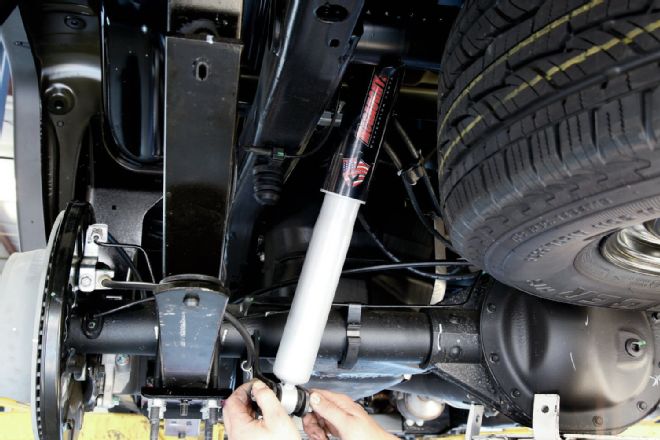
18. Instead of adding shock extenders, McGaughys supplied us with a pair of its gas-charged performance shocks designed especially for this application.
| 19.
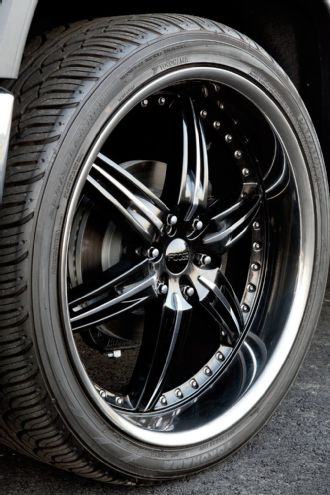
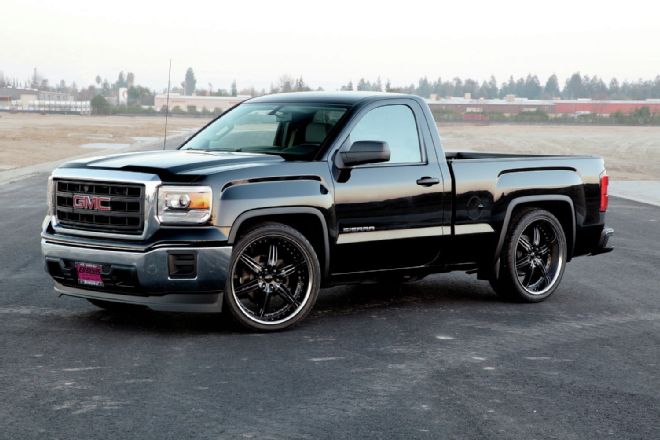
19. Filling the newly lowered wheel openings under the fenders were 24x10 Foose DF-6 wheels finished with black faces and stainless steel lips. Appropriately sized 295/35R24 Yokohama Parada Spec-X tires finished off the look.
| 2014 GMC Sierra McGaughys Suspension Tech 00
 | 01.
01. At Bad Habit Customs, we began with a zero-mileage standard-cab GMC Sierra fresh off the lot from Ed Dena’s Auto Center in Dinuba, California. Some lucky customer will be able to purchase it when it’s completed.
 | 02.
02. McGaughys included everything needed in one part number to lower this 2014 GM truck as much as four inches up front and seven inches out back. Depending on the amount of lowering desired, your application may not use all of the included components.
 | 03.
03. Our installer, Kelly, jumped right into the suspension by first pulling the brake caliper and rotor off the factory spindle. Next the balljoints were broken free and the factory spindle was removed from the front suspension.
 | 04.
04. Once the three upper retaining bolts were removed with an 18mm wrench (or socket), we moved to the lower strut mounting bolts and zipped them off with a pneumatic gun.
 | 05.
05. Kelly lowered the complete stock strut assembly from the Sierra without much fanfare or unnecessary labor.
 | 06.
06. Due to the new raised position of the unit bearing to create the 2-inch lowering built into the McGaughys spindle, a stud was used to replace the factory upper retaining bolt.7. Two of the original three bolts were used to mount the unit bearing and brake dust shield onto the new McGaughys drop spindle. Kelly tightened the included nut onto the stud from the front side with an open-end wrench.
 | 07.
07. Two of the original three bolts were used to mount the unit bearing and brake dust shield onto the new McGaughys drop spindle. Kelly tightened the included nut onto the stud from the front side with an open-end wrench.
 | 08.
08. Achieving the full four inches of drop required using a spring compressor to disassemble the strut. With the coil spring removed, Kelly knocked the retaining cap off and slid the stock spring cup off the strut.
 | 09.
09. It was replaced with the fabricated McGaughys coil cup, which sat lower on the strut body to achieve two inches of drop. Combined with the lowering spindle, the front end was sit a full four inches closer to the ground.
 | 10.
10. Kelly safely reassembled the strut in the spring compressor before placing it back on the ’14 Sierra using all of the factory hardware. Since it was now shorter, the strut assembly slid easily into position.
 | 11.
11. For the rear suspension, an axle flip was performed to achieve the desired seven inches of lowering. Kelly attacked the bumpstop mounts with an electric cut-off wheel to remove them for axle travel clearance.
 | 12.
12. McGaughys included multi-stage bumpstops that were bolted onto the frame to provide a measure of safety in case of large suspension impacts while driving.
 | 13.
13. Both rear shocks were removed and discarded, as they’ll be upgraded with improved units from McGaughys. Safety stands were used to support the axle while Kelly zipped off the U-bolts.
 | 14.
14. We certainly did not need the factory 1-inch lift block for the new stance McGaughys was providing. They were, however, perfect for paperweights.
 | 15.
15. Using a couple of 21mm wrenches, Kelly removed the lower shackle bolts all together and only loosened the upper shackle bolts for freedom of movement.
 | 16.
16. Moving the axle on top of the leaf springs created the 7-inch lowering we desired. As part of the suspension kit, these axle saddles located the axle for proper placement.
 | 17.
17. Stock U-bolts were torqued in place to keep the GM and McGaughys pieces firmly together for the long haul.
 | 18.
18. Instead of adding shock extenders, McGaughys supplied us with a pair of its gas-charged performance shocks designed especially for this application.
 | 19.
19. Filling the newly lowered wheel openings under the fenders were 24x10 Foose DF-6 wheels finished with black faces and stainless steel lips. Appropriately sized 295/35R24 Yokohama Parada Spec-X tires finished off the look.
 | 2014 GMC Sierra McGaughys Suspension Tech 00