General Motors brought out a new version of the 6.6L Duramax V-8 engine, known as the LML, for the 2011 model year. Among various other changes, the company replaced the previous Duramax’s CP3 injection pump with a new CP4 unit, which is designed to provide higher fuel pressure and a cleaner burn to meet new emissions requirements.
However, one problem—lagging throttle response—is becoming increasingly prevalent as more and more of these trucks hit enthusiasts’ garages, mainly because the higher-pressure fuel pump sometimes has trouble supplying enough diesel to the engine. For anyone who owns a Duramax LML-powered Chevrolet Silverado or GMC Sierra 2500HD or 3500HD and plans on taking its performance to the next level, a fuel pump upgrade is one of the first tasks that needs to be accomplished.
Fortunately, there are a variety of aftermarket diesel suppliers who can help, including Thoroughbred Diesel Performance of Winchester, Kentucky. Using their own LML-equipped ’11 Chevrolet Silverado 2500HD as a guinea pig, the experts at Thoroughbred allowed us to follow along as they installed the ATS Diesel Performance Twin Fueler kit, which adds a CP3 injection pump to the existing CP4 setup. According to Wade McGinnis, Thoroughbred’s general manager, such a fuel system offers the high-pressure advantages of a CP4 with the high-volume fuel supply of a CP3. Let’s see what it takes to get the Twin Fueler up and running.
| 002 Duramax LML CP3
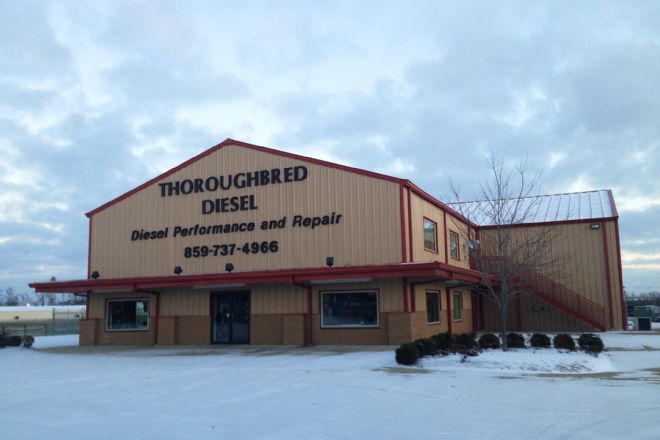
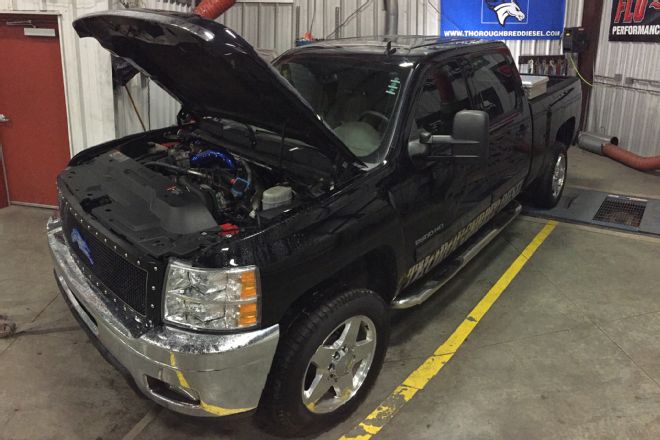
Thoroughbred Diesel Performance used its ’11 Chevrolet Silverado 2500HD shop truck as a test subject for the ATS Diesel Performance Twin Fueler CP3 kit.
| 003 Duramax LML CP3
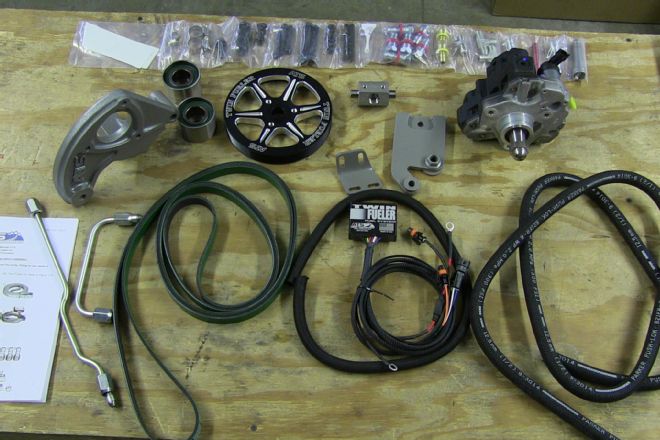
The ATS Twin Fueler system includes fuel lines, belts, software, wiring, and the CP3 injection pump. Before starting the installation, we disconnected both negative battery cables and removed the serpentine belt.
| 004 Duramax LML CP3
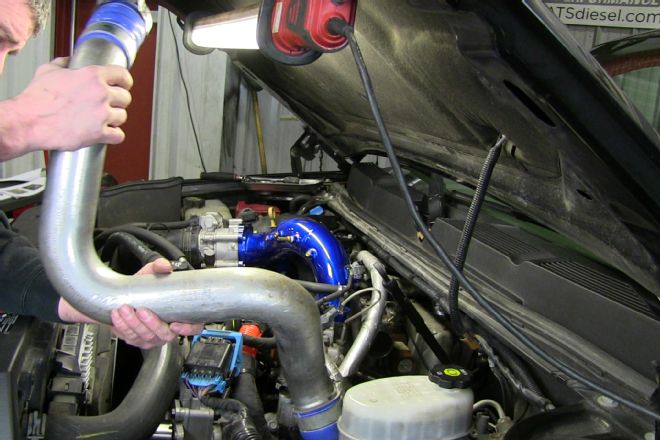
Next, the driver-side fenderwell liner is removed, which allows access to the fuel lines and the intercooler pipe. After loosening the intercooler fittings, the pipe is easily removed from the top of the engine bay.
| 005 Duramax LML CP3
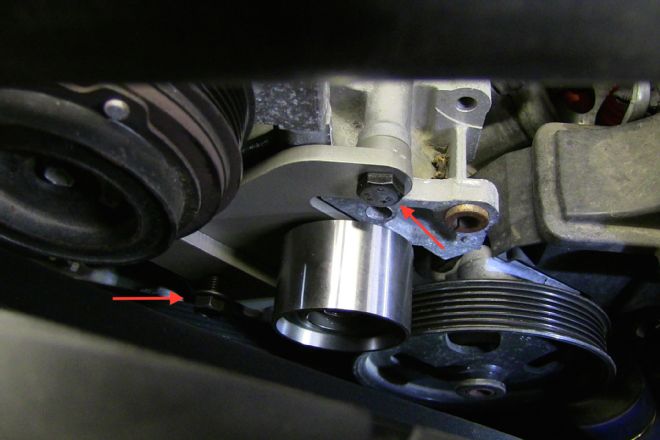
The second idler bracket and pulley are secured next in the location where the second alternator would be mounted if this truck were so equipped. We applied thread locker to the bolts to ensure a strong, durable hold.
| 006 Duramax LML CP3
| 007 Duramax LML CP3
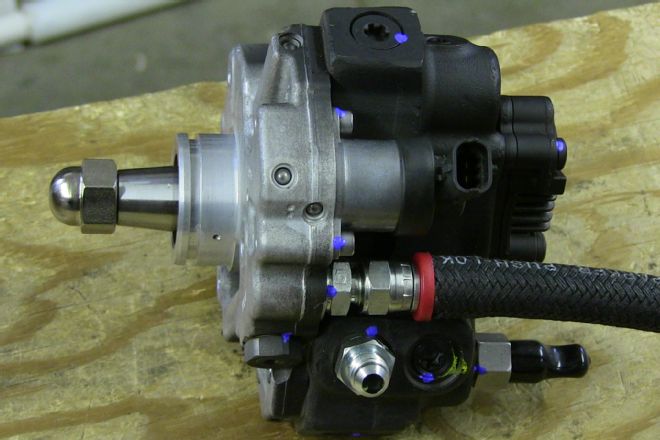
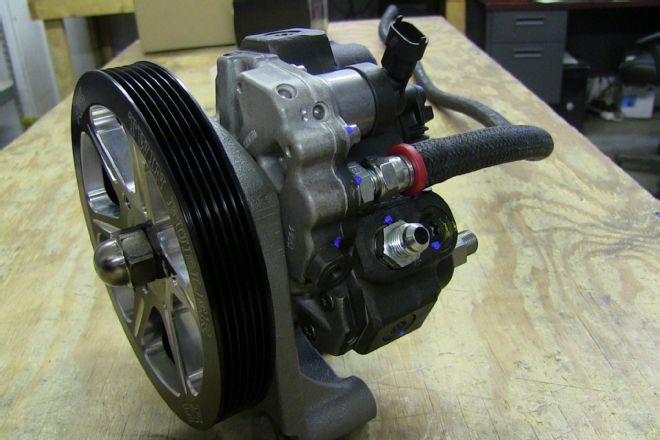
Using a male push-to-lock JIC fitting on one end of the supplied ½-inch fuel line, we’re now able to attach the hose to the supply side of the new CP3. Then, the pump, bracket, and pulley assembly is bolted together.
| 008 Duramax LML CP3
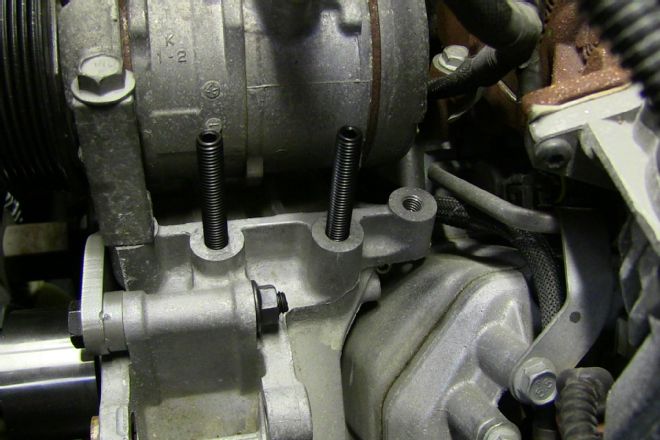
ATS provides two mounting studs, which go on the front cover near the idler bracket. Once the two vertical studs are finger-tightened in place, the pump and bracket assembly is seated flush against the front cover and secured with two flange nuts.
| 009 Duramax LML CP3
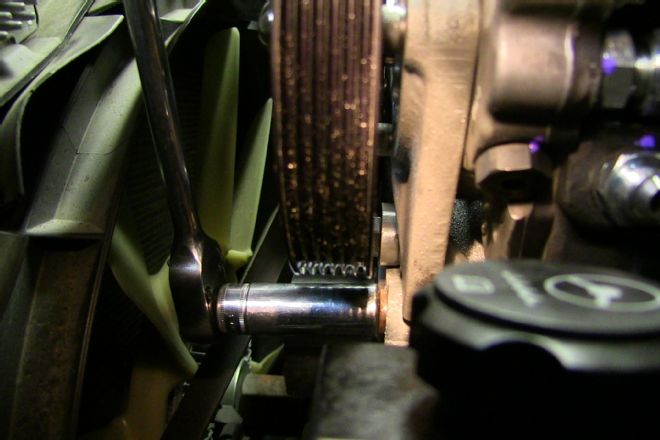
With the pump assembly mounted, the remaining bolt gets driven into the front cover, just below the pulley.
| 010 Duramax LML CP3
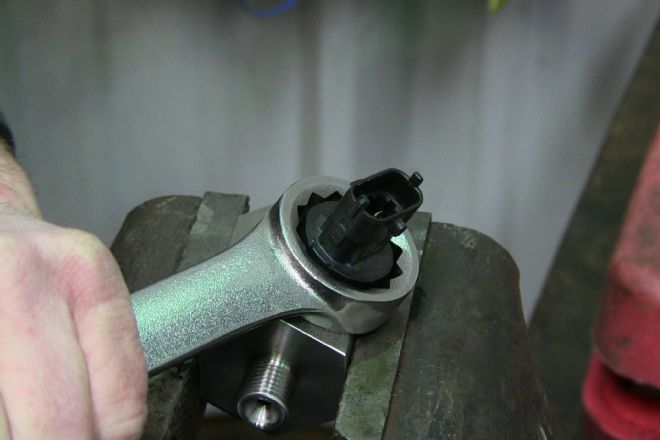
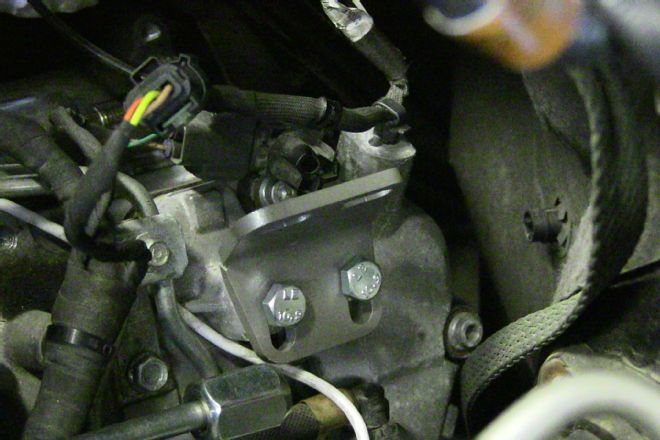
Next, the rail-pressure sensor, located on the back of the driver-side fuel rail, is removed and replaced with a high-pressure fuel-line fitting that’s tightened to 68 ft-lb. The stock sensor is then installed in the fuel-injection junction block.
| 011 Duramax LML CP3
| 012 Duramax LML CP3
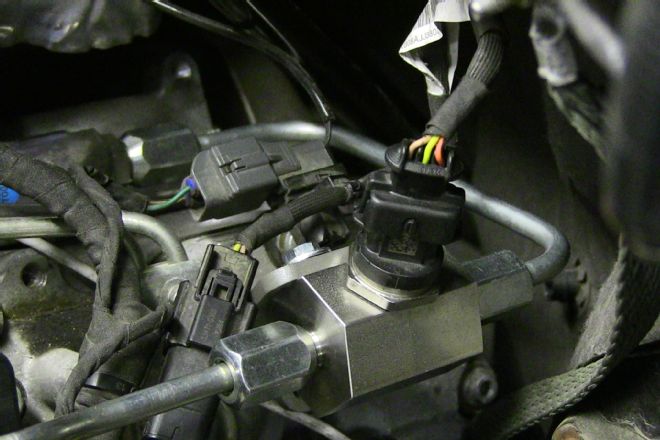
The bracket for the junction block is mounted to the driver-side valve cover and secured with bolts. After that, the fuel lines are attached to the junction block. The long CP3 fuel line is tightened onto the inlet side of the junction block, and the U-shaped hose runs from the block’s outlet to the inlet fitting on the fuel rail. The stock fuel-pressure sensor is then connected to the wiring harness, and all brackets and lines are fully secured.
| 013 Duramax LML CP3
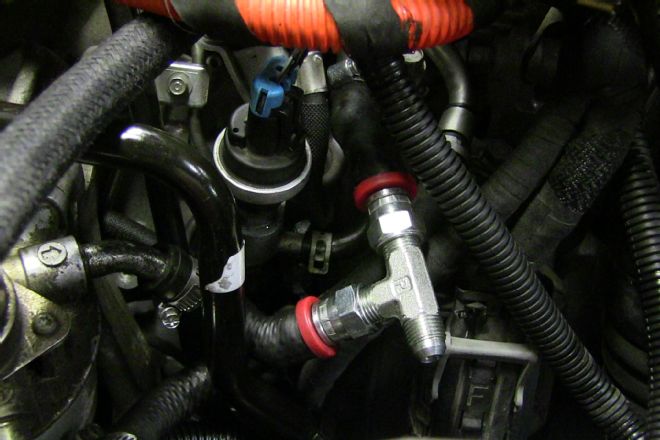
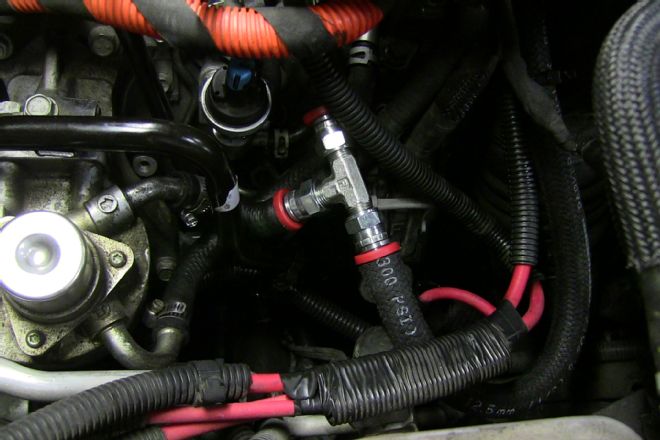
Turning our attention to the hoses running from the fuel filter, the stock ½-inch line is removed and cut in two, and then each side of the split fuel line is set up with a female push-to-lock JIC fitting. The two ends are joined with a supplied fuel tee and tightened down. Note that the line running from the filter goes into the “bottom” of the tee and the line going to the CP4 attaches to one of its arms.
| 014 Duramax LML CP3
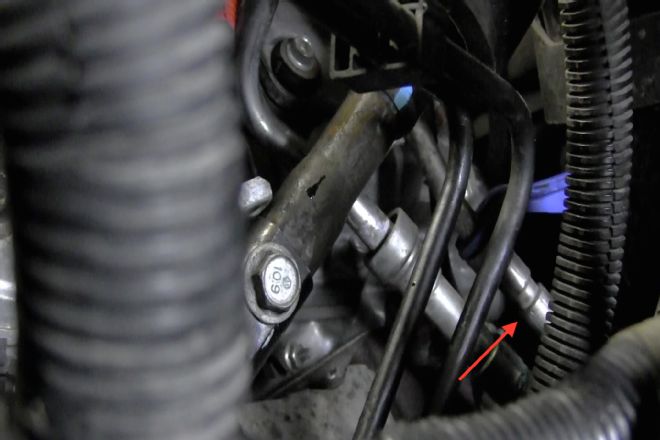
Remember that uncut fuel line we attached to the back of the CP3? Well, after cutting it to length and installing another female JIC fitting, the fuel line attached it to the open end of the fuel tee.
| 015 Duramax LML CP3
| 016 Duramax LML CP3
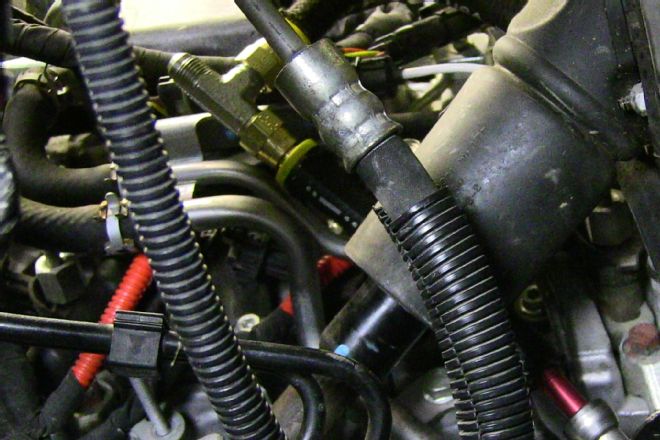
The ½-inch supply and 3/8-inch return lines are then routed via the driver-side front fenderwell.
| 017 Duramax LML CP3
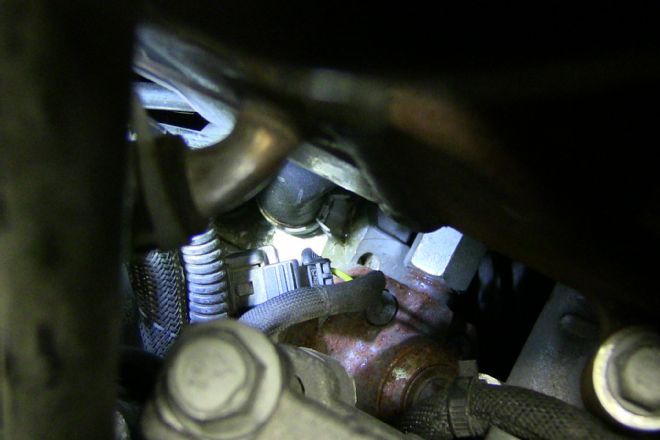
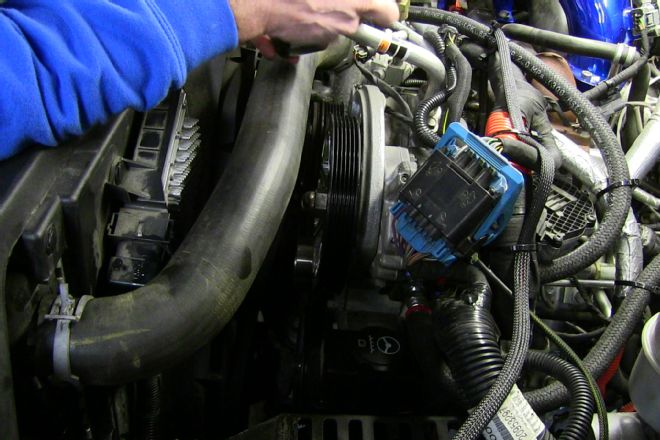
Powering the ATS Twin Fueler system involves routing the red and black wires from the control box to the positive and negative battery posts. The CP3’s wiring is plugged into the stock CP4 connector, which is then reattached to the original harness. The photo shows the little gray clip found just in front of and beneath the EGR. Disengaging the clip creates access to the CP4’s connector.
| 018 Duramax LML CP3
| 019 Duramax LML CP3
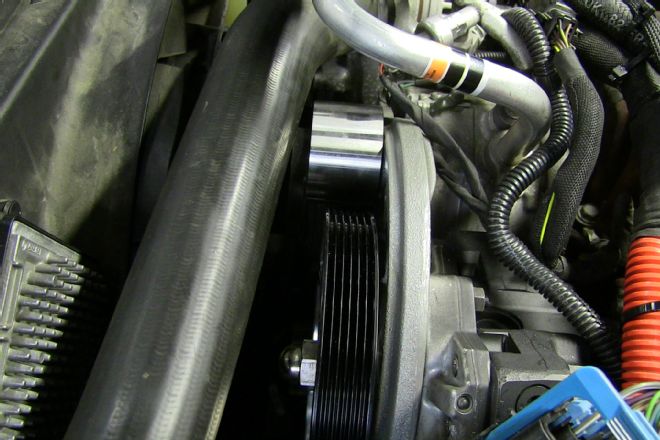
Coolant must be drained and the upper radiator hose is rerouted to provide clearance for the CP3’s pulley.
| 020 Duramax LML CP3
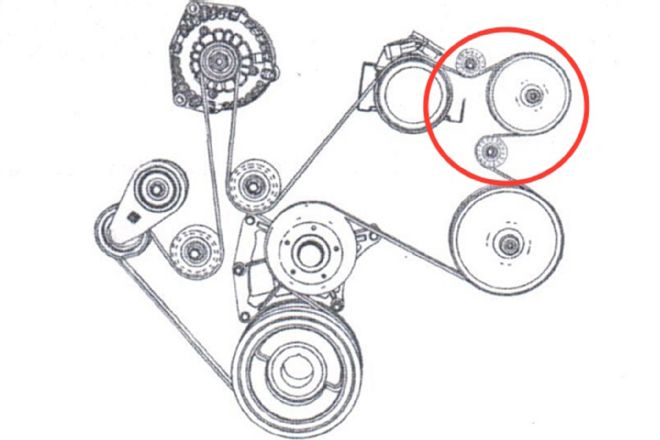
ATS supplies a new serpentine belt and routing diagram that details exactly where the belt should go to include the high-volume CP3.
| 021 Duramax LML CP3
Finally, the intercooler pipe and negative battery cables are reattached, and the updated fuel system is tested for any low-pressure leaks by turning the key to the “On” position, which starts the lift pump. Cranking the engine allows us to verify any leaks on the high-pressure side. With a leak-free fuel system and no diagnostic codes triggered, the Silverado is now ready to hit the road again, with better throttle response and increased fueling capacity to boot.
 | 002 Duramax LML CP3
Thoroughbred Diesel Performance used its ’11 Chevrolet Silverado 2500HD shop truck as a test subject for the ATS Diesel Performance Twin Fueler CP3 kit.
 | 003 Duramax LML CP3
The ATS Twin Fueler system includes fuel lines, belts, software, wiring, and the CP3 injection pump. Before starting the installation, we disconnected both negative battery cables and removed the serpentine belt.
 | 004 Duramax LML CP3
Next, the driver-side fenderwell liner is removed, which allows access to the fuel lines and the intercooler pipe. After loosening the intercooler fittings, the pipe is easily removed from the top of the engine bay.
 | 005 Duramax LML CP3
The second idler bracket and pulley are secured next in the location where the second alternator would be mounted if this truck were so equipped. We applied thread locker to the bolts to ensure a strong, durable hold.
 | 006 Duramax LML CP3
 | 007 Duramax LML CP3
Using a male push-to-lock JIC fitting on one end of the supplied ½-inch fuel line, we’re now able to attach the hose to the supply side of the new CP3. Then, the pump, bracket, and pulley assembly is bolted together.
 | 008 Duramax LML CP3
ATS provides two mounting studs, which go on the front cover near the idler bracket. Once the two vertical studs are finger-tightened in place, the pump and bracket assembly is seated flush against the front cover and secured with two flange nuts.
 | 009 Duramax LML CP3
With the pump assembly mounted, the remaining bolt gets driven into the front cover, just below the pulley.
 | 010 Duramax LML CP3
Next, the rail-pressure sensor, located on the back of the driver-side fuel rail, is removed and replaced with a high-pressure fuel-line fitting that’s tightened to 68 ft-lb. The stock sensor is then installed in the fuel-injection junction block.
 | 011 Duramax LML CP3
 | 012 Duramax LML CP3
The bracket for the junction block is mounted to the driver-side valve cover and secured with bolts. After that, the fuel lines are attached to the junction block. The long CP3 fuel line is tightened onto the inlet side of the junction block, and the U-shaped hose runs from the block’s outlet to the inlet fitting on the fuel rail. The stock fuel-pressure sensor is then connected to the wiring harness, and all brackets and lines are fully secured.
 | 013 Duramax LML CP3
Turning our attention to the hoses running from the fuel filter, the stock ½-inch line is removed and cut in two, and then each side of the split fuel line is set up with a female push-to-lock JIC fitting. The two ends are joined with a supplied fuel tee and tightened down. Note that the line running from the filter goes into the “bottom” of the tee and the line going to the CP4 attaches to one of its arms.
 | 014 Duramax LML CP3
Remember that uncut fuel line we attached to the back of the CP3? Well, after cutting it to length and installing another female JIC fitting, the fuel line attached it to the open end of the fuel tee.
 | 015 Duramax LML CP3
 | 016 Duramax LML CP3
The ½-inch supply and 3/8-inch return lines are then routed via the driver-side front fenderwell.
 | 017 Duramax LML CP3
Powering the ATS Twin Fueler system involves routing the red and black wires from the control box to the positive and negative battery posts. The CP3’s wiring is plugged into the stock CP4 connector, which is then reattached to the original harness. The photo shows the little gray clip found just in front of and beneath the EGR. Disengaging the clip creates access to the CP4’s connector.
 | 018 Duramax LML CP3
 | 019 Duramax LML CP3
Coolant must be drained and the upper radiator hose is rerouted to provide clearance for the CP3’s pulley.
 | 020 Duramax LML CP3
ATS supplies a new serpentine belt and routing diagram that details exactly where the belt should go to include the high-volume CP3.
 | 021 Duramax LML CP3
Finally, the intercooler pipe and negative battery cables are reattached, and the updated fuel system is tested for any low-pressure leaks by turning the key to the “On” position, which starts the lift pump. Cranking the engine allows us to verify any leaks on the high-pressure side. With a leak-free fuel system and no diagnostic codes triggered, the Silverado is now ready to hit the road again, with better throttle response and increased fueling capacity to boot.