When most people think about a supercharger the first thought that usually comes to mind is that large block of polished aluminum sticking out of the hood of some old hot rod or drag-style muscle car. What many don’t know is that the supercharger has been around longer than the automobile itself as the original use was to push more air into blast furnaces used to forge steel. The original design was patented by the Roots Brothers, in which their inter-winding rotors were turned by a steam engine that was used to push more air into the furnaces to bring up the temperature of the flames turning iron and ore into steel.
A few decades later, the automobile came along and the Europeans were the first to become fascinated with speed, and many of the early speed record attempts saw the use of superchargers, but it was an American mechanic by the name of Lee Chadwick of Pottstown, Pennsylvania, who built the first vehicle to travel 100 mph back in 1908. His secret weapon, of course, was a supercharger.
Again, what most people think of the supercharger they refer to the “Roots” style of superchargers, but other designs such as the centrifugal, and the screw type of supercharger were developed back in the late 1870s for use as air compressors, with two cycle engines, and many other uses. All superchargers have one or two moving items called rotors or an impeller. They must be turned by another rotating item to build internal pressures within the superchargers case, or housing. The easiest way is for the engine’s crankshaft to turn the items, whereas the constant crankshaft speed maintains a smooth rpm of the superchargers internals, thus creating consistent air pressure. During the middle of the 20th century, roots-style superchargers were cheap. Surplus military items that were used during the war effort were sold as scrap from large trucking companies. Back then hot rodders didn’t mind if the supercharger stuck out of the hood, and lacked the computer technology to monitor the proper air fuel mixtures. They only knew this: more air, mixed with more fuel made a bigger bang!
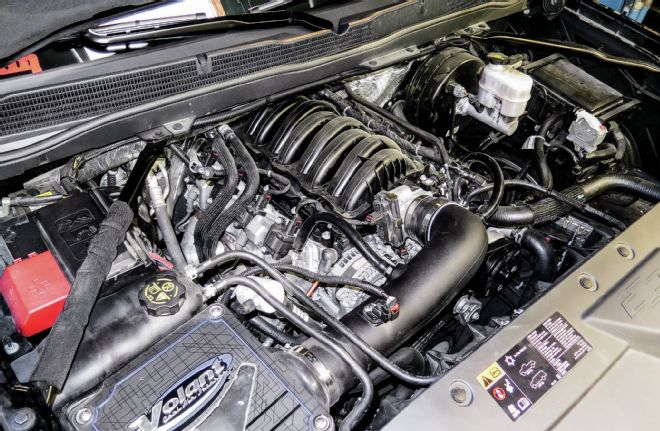
| We started out with this brand-new ’14 Chevy Silverado equipped with the 5.3 LT1 engine package, which we had already outfitted with air intake and exhaust systems from Volant, a DiabloSport tuner, and a COMP Cam. This engine was primed and ready for a supercharger.
One of those crazy pioneers of speed at the dragstrips in California was a guy by the name of Art Whipple, who built a few successful drag cars for himself. But when he and a fellow truck driver named Ed ”the Ace” McCulloch teamed together, they went on to change history, winning multiple U.S. National titles and helping change the world of motorsports. During his stint as crew chief for the Whipple and McCulloch Funny Car team, Art learned more and more about the uses and designs of superchargers, realizing that there was a need for superchargers for more practical applications. One of the first things he determined was that there is a style of supercharger for every application. In theory, they all make boost, however the size of the unit was important for practical uses such as the everyday truck enthusiast. Beginning back in the late ’80s, Art set out to do just that. He developed a reliable supercharger system that can be placed atop of any mass-produced vehicle to enhance the engine’s power for uses in either work-related tasks, such as towing, or to punish the vehicle’s tires at will when you step on the throttle pedal. After 25 years or so, Art and his family are one of the biggest names in supercharged power.
Their latest offering is this new supercharger kit for the direct-injection LT1 engine that comes factory equipped in the ’14 GM truck line. Whipple’s design team and slew of engineers developed a true bolt-on supercharger kit that includes everything you need to safely make more horsepower, torque, and engine efficiency than you can ask for. The only caution when it comes to installing a supercharger on your truck is that you’ll never want to drive a naturally aspirated truck again. Follow along as we perform the installation at Stillen Motorsports, an authorized Whipple dealer, and check the Whipple or Stillen website to find some serious bolt-on horsepower for your truck.
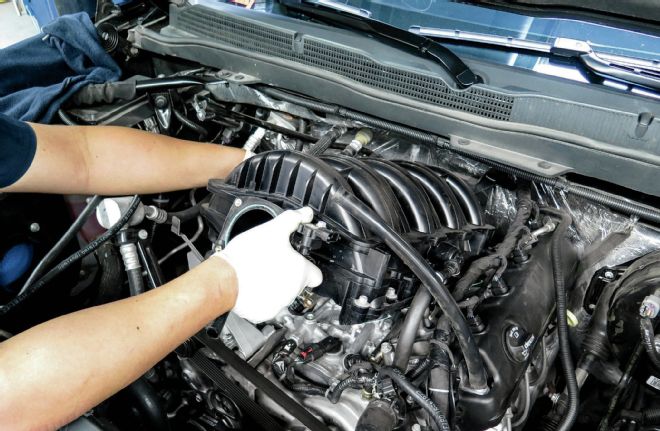
| Stock Intake Removal
We dove directly into the installation by removing the air intake and throttle body, to allow access to for us to remove the OEM intake.
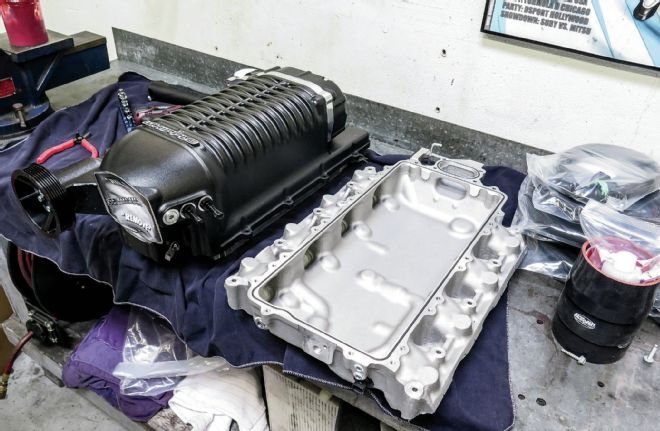
| Whipple Supercharger
Although this massive appearing Whipple compressor may look deceiving in respect to having enough engine compartment space, Whipple’s engineers have worked tirelessly to make the supercharger not only fit back into the engine compartment but look as if it was meant to be there in the first place.
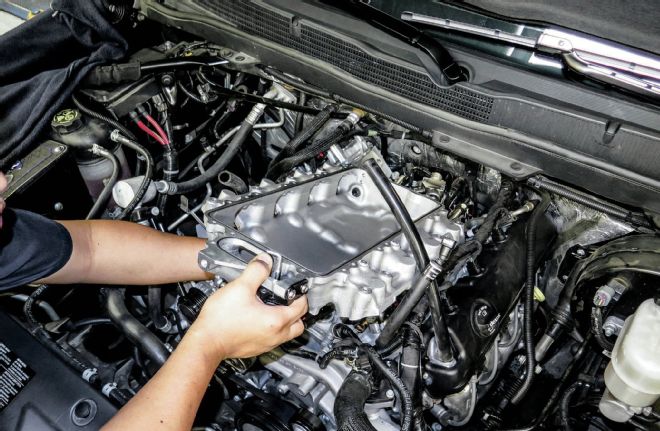
| Whipple Intake Manifold Install
Step one for the installation process had us lowering the Whipple intake manifold back into the cylinder head valley atop the engine.
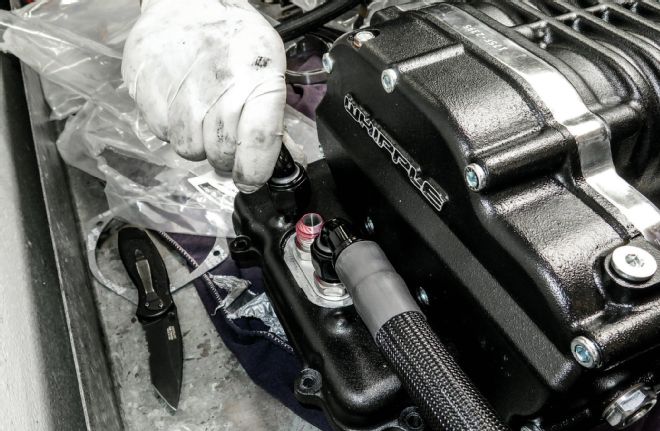
| Coolant Line Connection
The next step was to install the coolant lines that transfer coolant from the heat exchanger that will be located in front of the radiator, to the intercooler that sits in-between the intake manifold and the screw compressor.
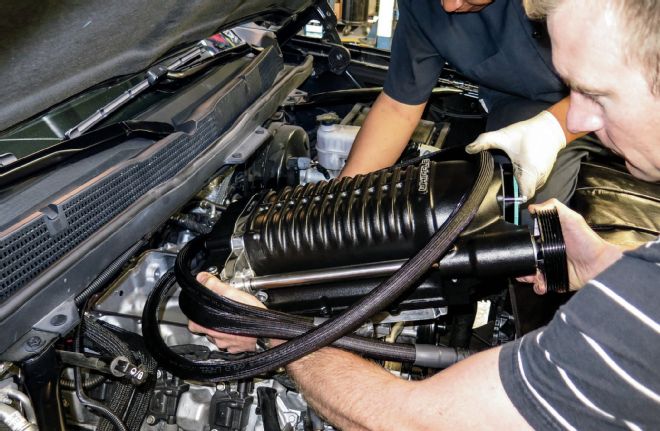
| Lowering Whipple Supercharger Onto Intake
It’s a good idea to install these lines first before lowering the compressor and intercooler on top of the manifold, as access to these fittings will be close to impossible once the unit is set into place.
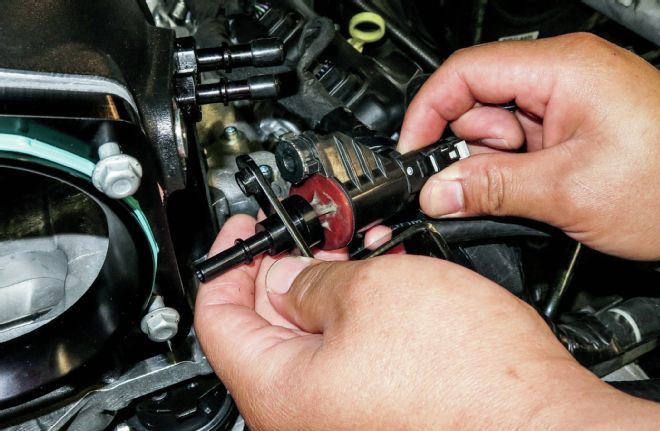
| Fuel Purge Valve
Among other things, the factory fuel purge valve will need to be relocated.
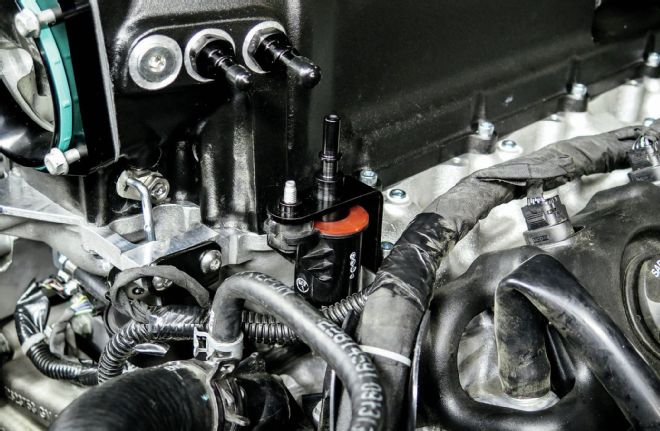
| Fuel Purge Valve Bracket
Whipple includes a simple bolt-on bracket to remedy this fix.
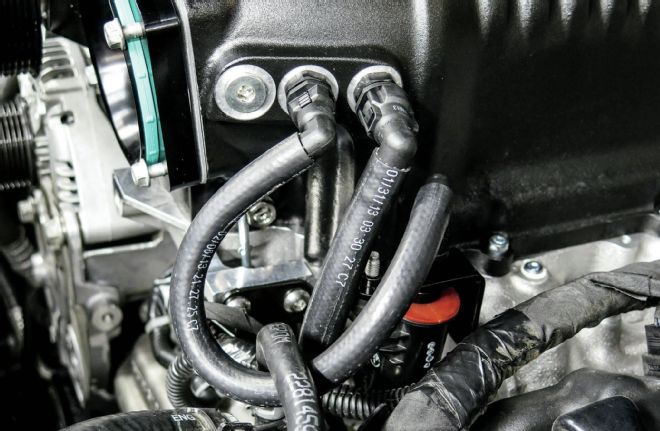
| Lines Routed To Supercharger
Once the fuel purge valve is set into place, route the lines to the supercharger per the instructions.
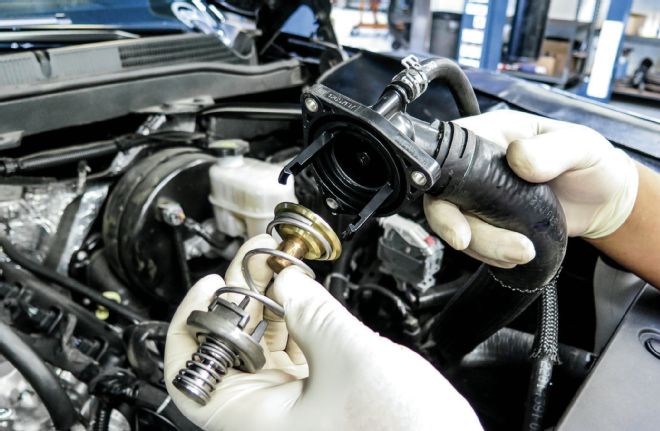
| Thermostat Replacement
To assist in cooling requirements it is vital to exchange the factory thermostat that operates around 185 to 190 degrees over to this unit that operates at 160 degrees. This helps combat harmful detonation while under boost.
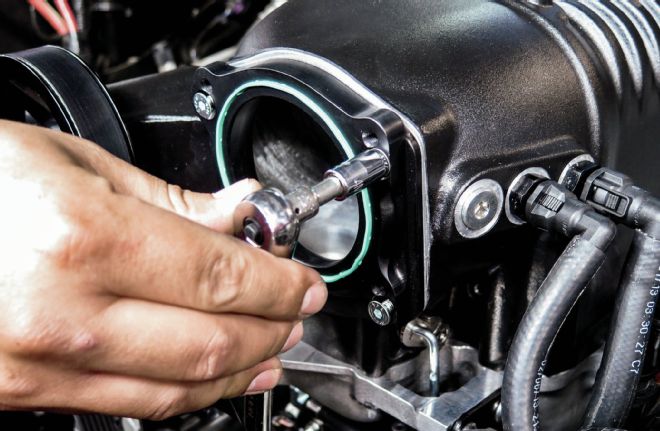
| Throttle Body Spacer Install
Moving onto the throttle body, we begin with the installation of this throttle-body spacer that reduces the inlet size of the compressor back down to the size of the factory throttle body.
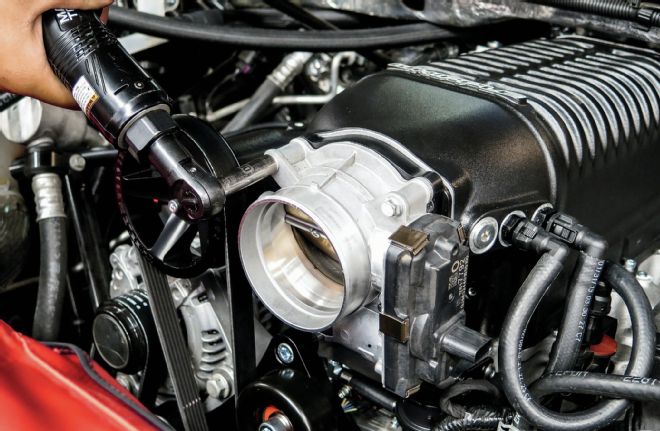
| Throttle Body Install
Now many of you will say, “Why did they do that; isn’t bigger better?” In this case the answer is no, as matching the inlet from the supercharger to the factory throttle-body size will allow for better street manners, making for a better idle circuit during low speed maneuvers such as stop and go traffic.
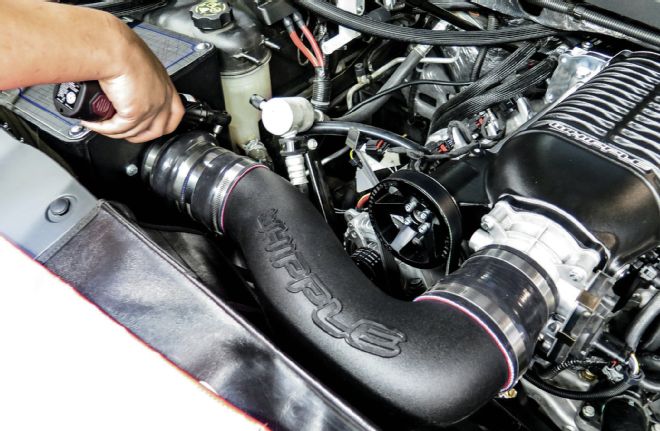
| Whipple Intake Tube Install
To complete what’s left to do in the engine bay, the provided intake tube is mated back to the aftermarket airbox from Volant that was previously installed on this truck. Whipple has engineered their kit with everything that you need, minus the tools to get your truck moving in a hurry. So the provided intake tube will fit the OEM-style airbox.
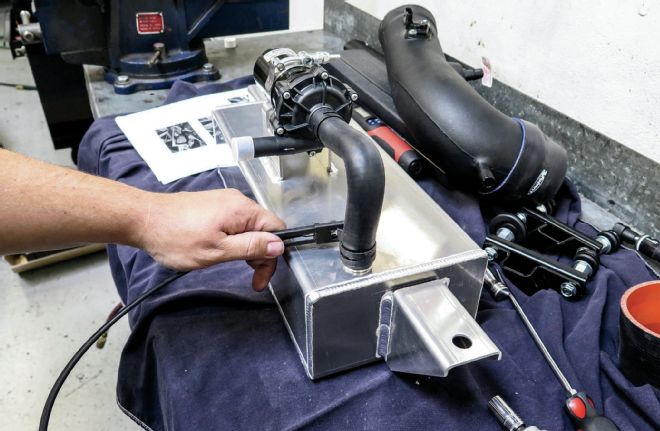
| Recirculation Tank
With most of the kit wrapped up in the engine bay, it’s time to address the recirculation tank that holds coolant for the intercooler.
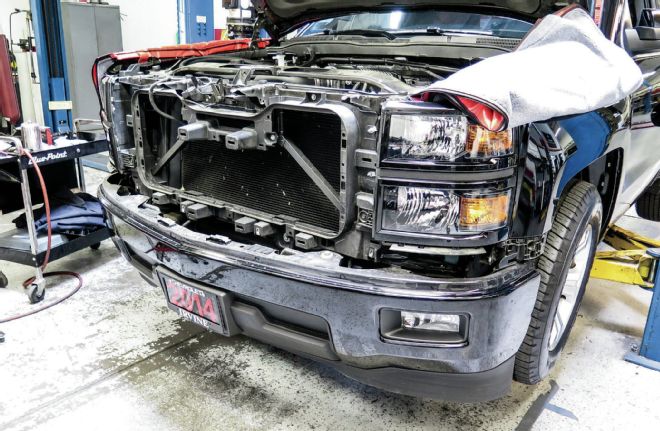
| 2014 Chevy Silverado With Grille Removed
The first step is to remove the grille to allow access for the tank and the pump.
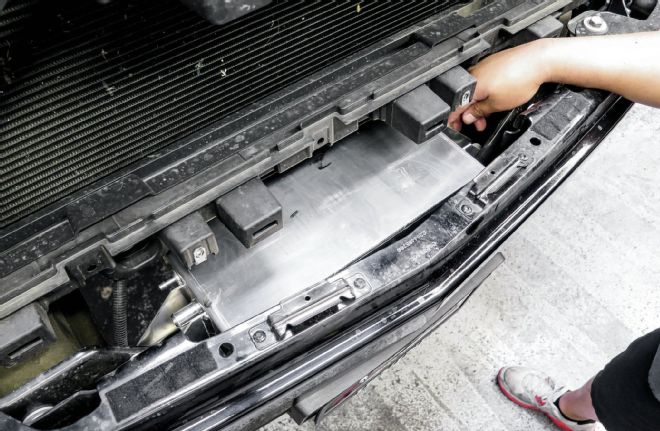
| Recirculation Tank Installed
The whole assembly mounts just under the radiator support and the front bumper.
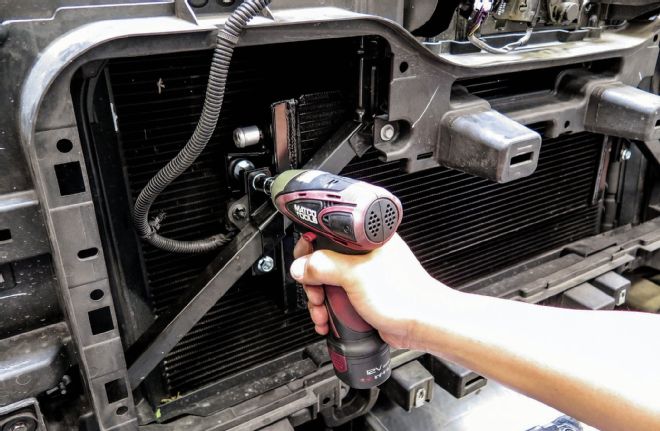
| Heat Exchanger Install
Now, the heat exchanger allows the coolant from the intercooler to be chilled by the outside flow of air just like the engine’s radiator and is mounted to the factory radiator support as seen in the photo.
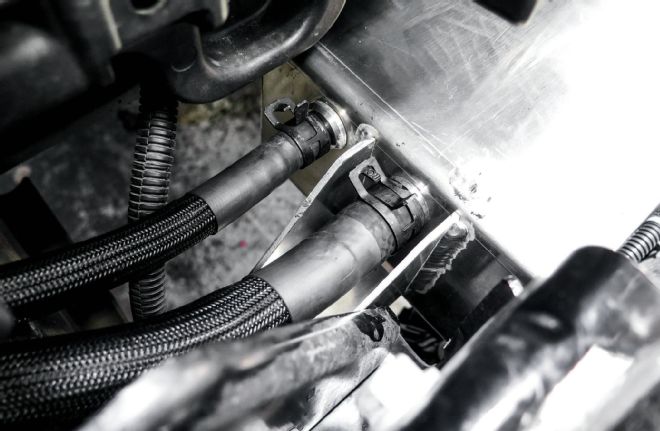
| Cooling Lines Connected
Next the cooling lines are routed to all three components (intercooler, heat exchanger, and the recirculation tank) to complete the circuit.
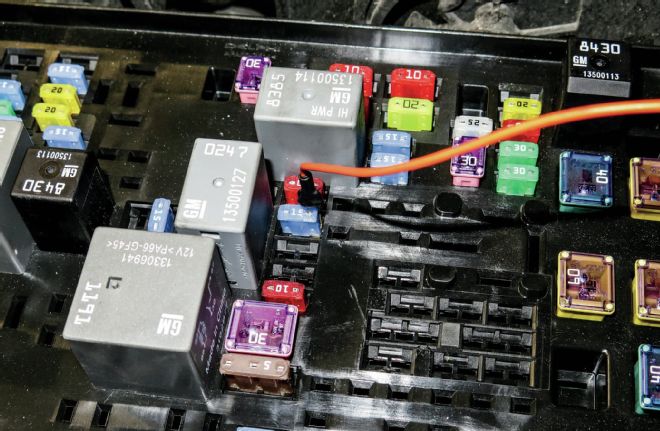
| Wire Tap On Fuse
Power to run the recirculating pump is tied into the engine bay’s fuse block.
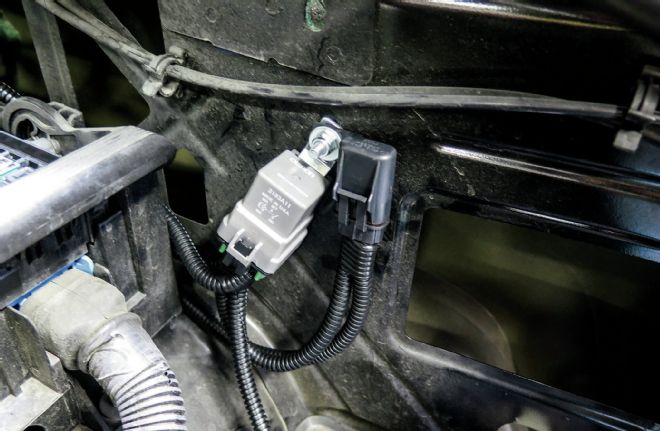
| Relay
The pump is operated by this relay that allows the flow of power to operate the pump when the engine is running.
| Air Filter Install
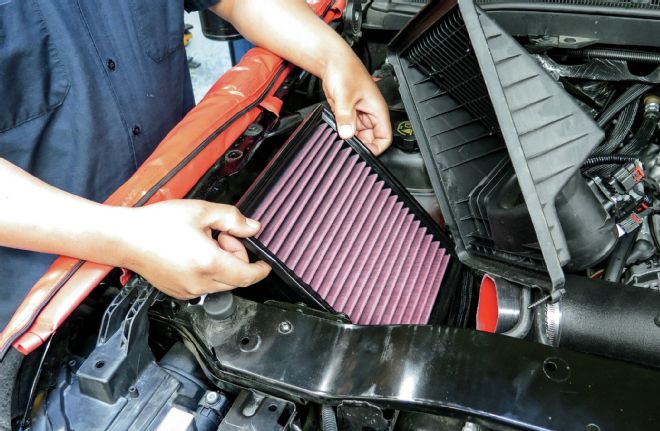
To revisit the OEM airbox, shown here in the photo is the provided high-flow air filter that is part of Whipple’s kit. Like we said before, everything minus the tools comes in Whipple’s kit to make your truck go fast.
| Whipple Supercharger Oil Install
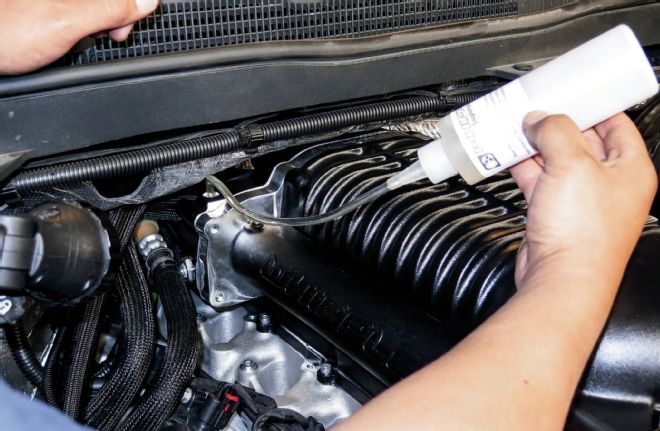
Last but not least, the compressor is topped off with a lightweight oil that will allow the compressor’s rotors to spin freely at high rpm.
| Supercharger Dyno Graph
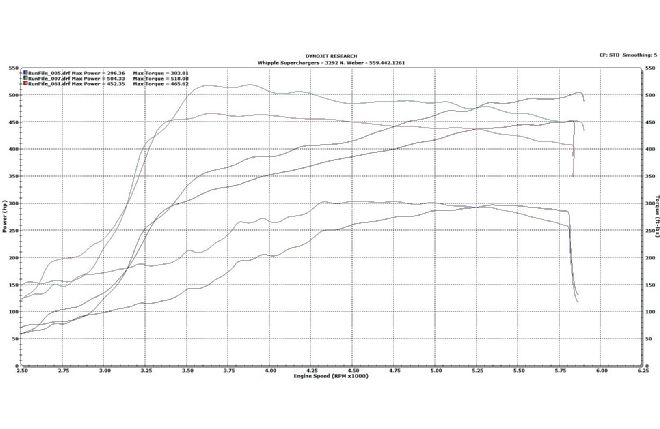
We really wanted to see the final numbers for this engine, but it wasn’t in the cards to make our deadline. After talking with Dustin Whipple, we realized that he was doing the exact same install in-house, albeit in a different order. So what will a direct-injection 5.3L make with a fully tuned Whipple. How about 452 hp at the wheels? The cam and additional tuning was good for another 50! With numbers like that, we have a feeling the new LT1s are going to be a hit!
 | We started out with this brand-new ’14 Chevy Silverado equipped with the 5.3 LT1 engine package, which we had already outfitted with air intake and exhaust systems from Volant, a DiabloSport tuner, and a COMP Cam. This engine was primed and ready for a supercharger.
One of those crazy pioneers of speed at the dragstrips in California was a guy by the name of Art Whipple, who built a few successful drag cars for himself. But when he and a fellow truck driver named Ed ”the Ace” McCulloch teamed together, they went on to change history, winning multiple U.S. National titles and helping change the world of motorsports. During his stint as crew chief for the Whipple and McCulloch Funny Car team, Art learned more and more about the uses and designs of superchargers, realizing that there was a need for superchargers for more practical applications. One of the first things he determined was that there is a style of supercharger for every application. In theory, they all make boost, however the size of the unit was important for practical uses such as the everyday truck enthusiast. Beginning back in the late ’80s, Art set out to do just that. He developed a reliable supercharger system that can be placed atop of any mass-produced vehicle to enhance the engine’s power for uses in either work-related tasks, such as towing, or to punish the vehicle’s tires at will when you step on the throttle pedal. After 25 years or so, Art and his family are one of the biggest names in supercharged power.
Their latest offering is this new supercharger kit for the direct-injection LT1 engine that comes factory equipped in the ’14 GM truck line. Whipple’s design team and slew of engineers developed a true bolt-on supercharger kit that includes everything you need to safely make more horsepower, torque, and engine efficiency than you can ask for. The only caution when it comes to installing a supercharger on your truck is that you’ll never want to drive a naturally aspirated truck again. Follow along as we perform the installation at Stillen Motorsports, an authorized Whipple dealer, and check the Whipple or Stillen website to find some serious bolt-on horsepower for your truck.
 | Stock Intake Removal
We dove directly into the installation by removing the air intake and throttle body, to allow access to for us to remove the OEM intake.
 | Whipple Supercharger
Although this massive appearing Whipple compressor may look deceiving in respect to having enough engine compartment space, Whipple’s engineers have worked tirelessly to make the supercharger not only fit back into the engine compartment but look as if it was meant to be there in the first place.
 | Whipple Intake Manifold Install
Step one for the installation process had us lowering the Whipple intake manifold back into the cylinder head valley atop the engine.
 | Coolant Line Connection
The next step was to install the coolant lines that transfer coolant from the heat exchanger that will be located in front of the radiator, to the intercooler that sits in-between the intake manifold and the screw compressor.
 | Lowering Whipple Supercharger Onto Intake
It’s a good idea to install these lines first before lowering the compressor and intercooler on top of the manifold, as access to these fittings will be close to impossible once the unit is set into place.
 | Fuel Purge Valve
Among other things, the factory fuel purge valve will need to be relocated.
 | Fuel Purge Valve Bracket
Whipple includes a simple bolt-on bracket to remedy this fix.
 | Lines Routed To Supercharger
Once the fuel purge valve is set into place, route the lines to the supercharger per the instructions.
 | Thermostat Replacement
To assist in cooling requirements it is vital to exchange the factory thermostat that operates around 185 to 190 degrees over to this unit that operates at 160 degrees. This helps combat harmful detonation while under boost.
 | Throttle Body Spacer Install
Moving onto the throttle body, we begin with the installation of this throttle-body spacer that reduces the inlet size of the compressor back down to the size of the factory throttle body.
 | Throttle Body Install
Now many of you will say, “Why did they do that; isn’t bigger better?” In this case the answer is no, as matching the inlet from the supercharger to the factory throttle-body size will allow for better street manners, making for a better idle circuit during low speed maneuvers such as stop and go traffic.
 | Whipple Intake Tube Install
To complete what’s left to do in the engine bay, the provided intake tube is mated back to the aftermarket airbox from Volant that was previously installed on this truck. Whipple has engineered their kit with everything that you need, minus the tools to get your truck moving in a hurry. So the provided intake tube will fit the OEM-style airbox.
 | Recirculation Tank
With most of the kit wrapped up in the engine bay, it’s time to address the recirculation tank that holds coolant for the intercooler.
 | 2014 Chevy Silverado With Grille Removed
The first step is to remove the grille to allow access for the tank and the pump.
 | Recirculation Tank Installed
The whole assembly mounts just under the radiator support and the front bumper.
 | Heat Exchanger Install
Now, the heat exchanger allows the coolant from the intercooler to be chilled by the outside flow of air just like the engine’s radiator and is mounted to the factory radiator support as seen in the photo.
 | Cooling Lines Connected
Next the cooling lines are routed to all three components (intercooler, heat exchanger, and the recirculation tank) to complete the circuit.
 | Wire Tap On Fuse
Power to run the recirculating pump is tied into the engine bay’s fuse block.
 | Relay
The pump is operated by this relay that allows the flow of power to operate the pump when the engine is running.
 | Air Filter Install
To revisit the OEM airbox, shown here in the photo is the provided high-flow air filter that is part of Whipple’s kit. Like we said before, everything minus the tools comes in Whipple’s kit to make your truck go fast.
 | Whipple Supercharger Oil Install
Last but not least, the compressor is topped off with a lightweight oil that will allow the compressor’s rotors to spin freely at high rpm.
 | Supercharger Dyno Graph
We really wanted to see the final numbers for this engine, but it wasn’t in the cards to make our deadline. After talking with Dustin Whipple, we realized that he was doing the exact same install in-house, albeit in a different order. So what will a direct-injection 5.3L make with a fully tuned Whipple. How about 452 hp at the wheels? The cam and additional tuning was good for another 50! With numbers like that, we have a feeling the new LT1s are going to be a hit!