| ats Manifold Upgrade stock Manifold Over Heat
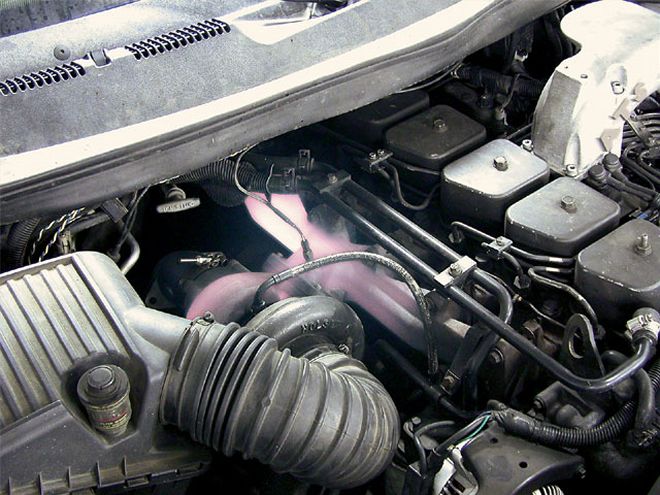
As much as we like the 5.9L Cummins powerplant, the stock exhaust manifold is constrictive and contorted, interfering with the flow of gases to the turbo and downpipe. That, in turn, can produce the cherry-red condition shown to the left. As a result, certain sections are prone to heat-induced cracks. Of course, one way to avoid that scenario is to make sure you have an EGT gauge and monitor it carefully when temperatures rise above 1,250 degrees Fahrenheit. Or for less obstructed flow (which lowers EGT and improves throttle response), ATS Diesel developed a multi-piece pulse exhaust manifold. Available for common rail, 12-, and 24-valve Cummins engines, it's designed to let the turbo spool up sooner with less exhaust backpressure and increase fuel efficiency. This pulse manifold design also eliminates the problems with shrinking and breaking, as well as cracking and gasket issues.
| ats Manifold Upgrade stock Manifold Crack
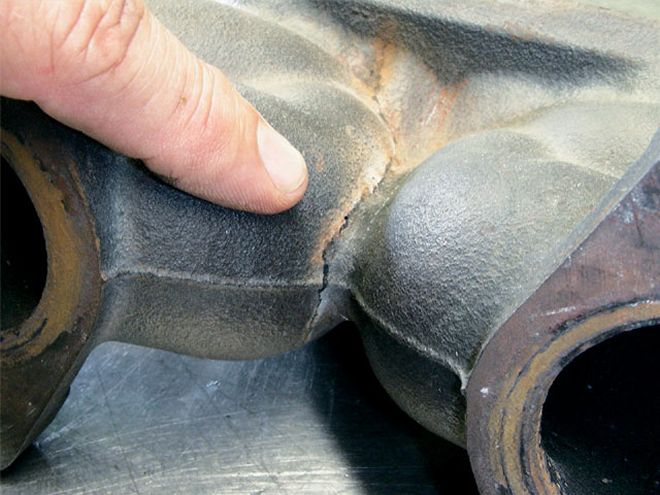
This is what you're trying to avoid. These areas on the factory Cummins manifold are subject to heat-induced cracking. Cracks lead to leaks, and leaks lead to lost turbo drive pressure and decreased engine performance.
| ats Manifold Upgrade ats Manifold Components
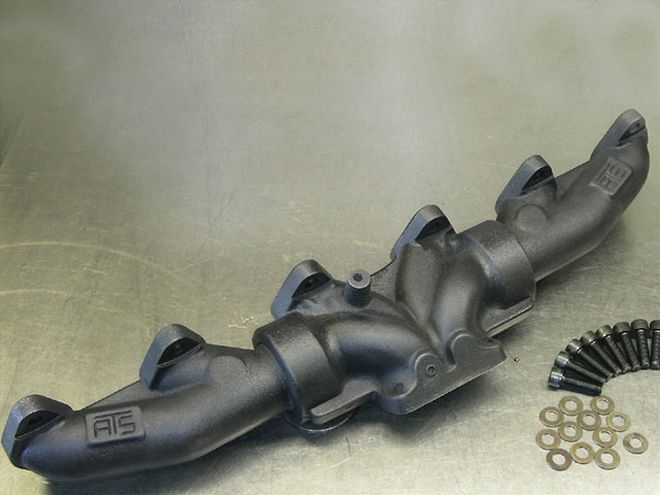
The multi-piece design of the ATS manifold is joined together by ball-socket joints that are not only smoother in shape but also allow for expansion and contraction to prevent fracturing. A high-temp coating helps keep the surface temperature down as well.
| ats Manifold Upgrade manifold Comparison
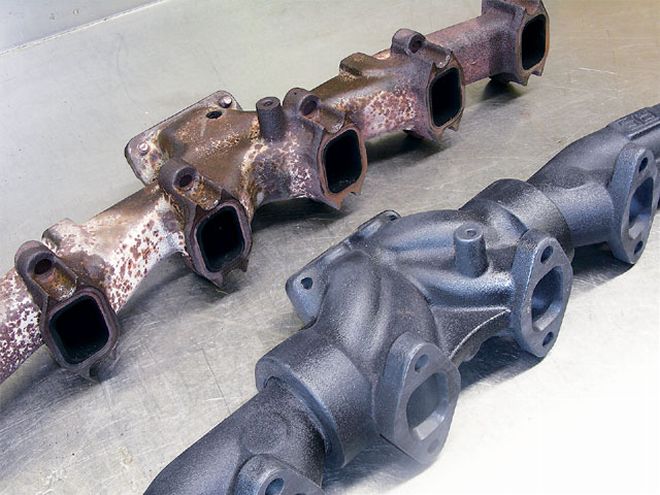
A side-by-side comparison between the stock (top) and ATS manifold really shows the obvious differences in design. Note how much smoother the ATS shape is, with fewer restrictions that can build up heat and rob performance. The ATS bolt flanges are much beefier as well.
| ats Manifold Upgrade probe Removal
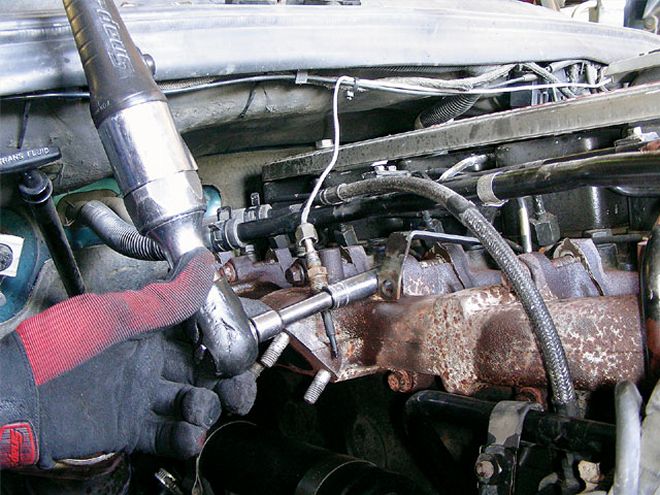
Installation of the new manifold begins with removing any pyrometer probes you may have added to monitor EGT and then unbolting the turbo, oil line, and any cooling lines that may be in the way. An air ratchet makes removing the factory bolts quicker once they are broken free.
| ats Manifold Upgrade drilling
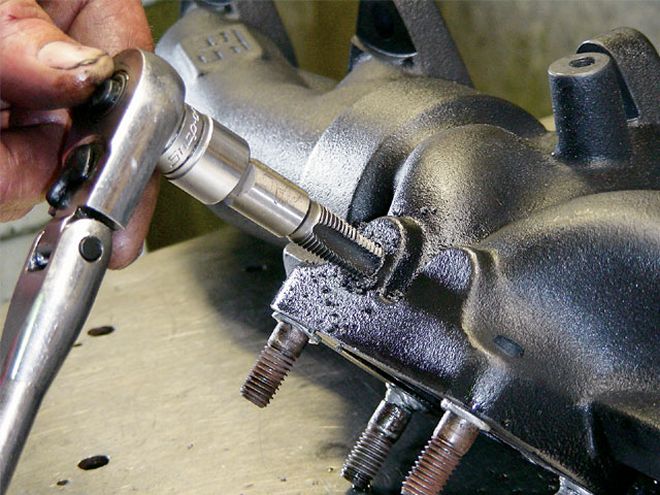
There is a boss cast into the ATS manifold for a pyrometer probe, but you are required to drill and tap the hole yourself to ensure it is the proper size for your gauge.
We had Collins Diesel Injection install one of the ATS manifolds on our 12-valve truck in about half a day. We noticed two immediate benefits. The EGT was as much as 100 degrees cooler (depending on load factors and when used in conjunction with a Banks exhaust system), and the throttle response became noticeably quicker, with less foot pressure required to accelerate and maintain a given vehicle speed.
| ats Manifold Upgrade antiseize Application
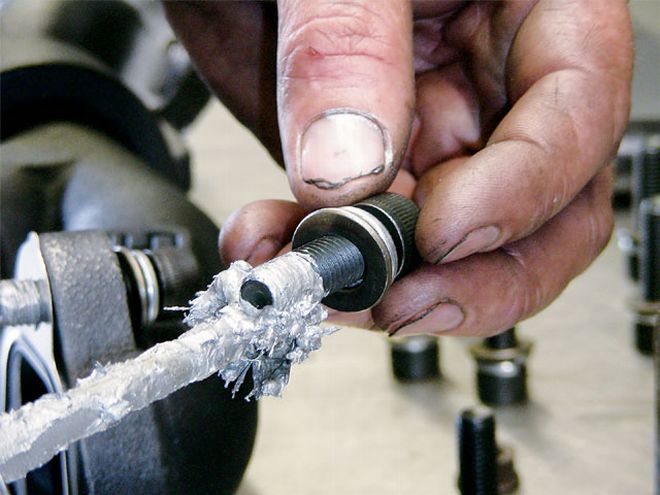
The ATS manifold includes 8mm Allen-head bolts and washers that should be coated thoroughly in antiseize before installation. At this point you will also need to remove the four turbo studs from the stock manifold and screw them into the ATS manifold.
| ats Manifold Upgrade manifold Install
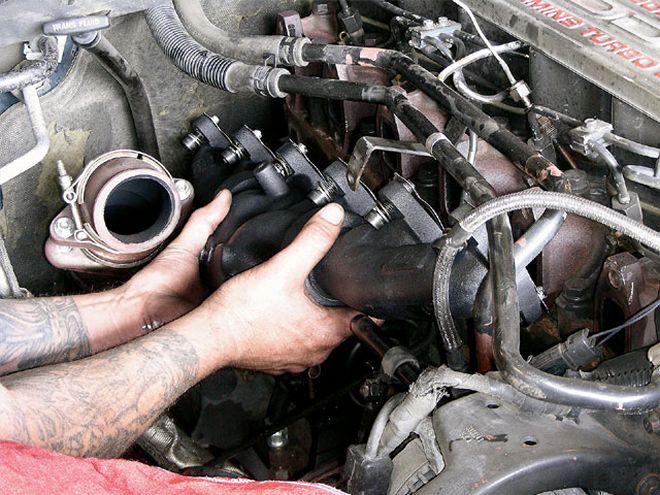
Carefully clean off the cast-iron mounting surface on the engine block to ensure good sealing surface for the new manifold. Then slide the exhaust manifold gaskets in place over the new mounting bolts. New gaskets may not be required unless the original ones are burned or damaged. A few dabs of antiseize will help keep the gaskets in place as you slide the manifold in place.
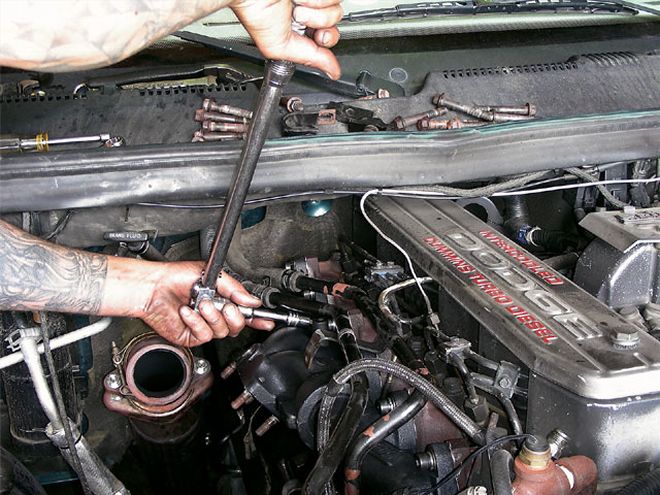
| ats Manifold Upgrade bolt Tightening
Tighten all bolts to 35 lb-ft of torque in a clockwise direction, starting from the center section outward.
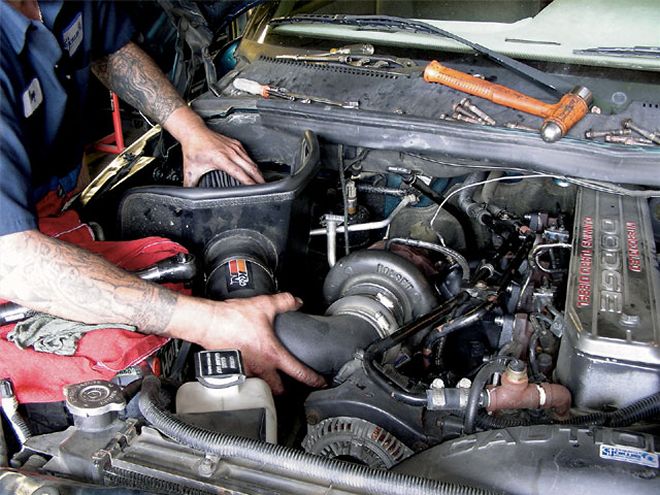
| ats Manifold Upgrade reinstall Turbo Components
Reinstall the turbo housing, exhaust downpipe, intake tube, and your pyrometer probe (if so equipped).
When the installation is complete you'll want to fire up the engine and check for any leaks. It's a good idea to re-torque the manifold bolts after the engine has gotten a chance to heat up and cool down a few times.
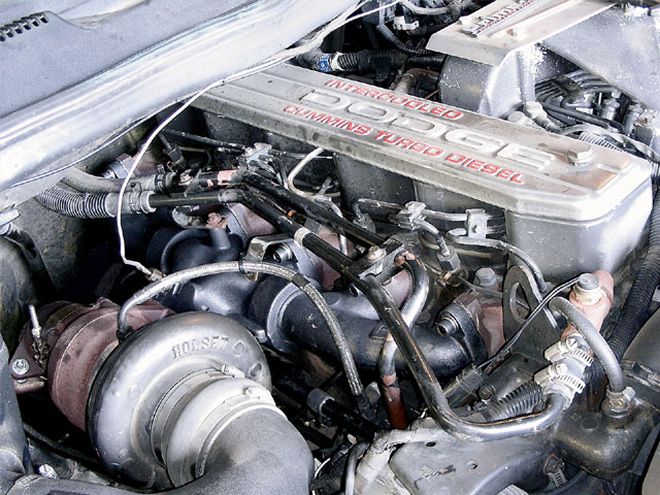
| ats Manifold Upgrade installation Complete
The install procedure was fairly straightforward, with no special tools or equipment required. Even though there's a pre-cast spot for the pyrometer (EGT) probe, it does need to be drilled and tapped. We also encountered a bit of shifting in the gasket after start-up, so be prepared to do a bit of tweaking in the mounting if you don't get it exactly right the first time. Those of you with competition trucks should note that an extra-wide racing flange is available for 12- and 24-valve Cummins exhaust manifold applications.
 | ats Manifold Upgrade stock Manifold Over Heat
As much as we like the 5.9L Cummins powerplant, the stock exhaust manifold is constrictive and contorted, interfering with the flow of gases to the turbo and downpipe. That, in turn, can produce the cherry-red condition shown to the left. As a result, certain sections are prone to heat-induced cracks. Of course, one way to avoid that scenario is to make sure you have an EGT gauge and monitor it carefully when temperatures rise above 1,250 degrees Fahrenheit. Or for less obstructed flow (which lowers EGT and improves throttle response), ATS Diesel developed a multi-piece pulse exhaust manifold. Available for common rail, 12-, and 24-valve Cummins engines, it's designed to let the turbo spool up sooner with less exhaust backpressure and increase fuel efficiency. This pulse manifold design also eliminates the problems with shrinking and breaking, as well as cracking and gasket issues.
 | ats Manifold Upgrade stock Manifold Crack
This is what you're trying to avoid. These areas on the factory Cummins manifold are subject to heat-induced cracking. Cracks lead to leaks, and leaks lead to lost turbo drive pressure and decreased engine performance.
 | ats Manifold Upgrade ats Manifold Components
The multi-piece design of the ATS manifold is joined together by ball-socket joints that are not only smoother in shape but also allow for expansion and contraction to prevent fracturing. A high-temp coating helps keep the surface temperature down as well.
 | ats Manifold Upgrade manifold Comparison
A side-by-side comparison between the stock (top) and ATS manifold really shows the obvious differences in design. Note how much smoother the ATS shape is, with fewer restrictions that can build up heat and rob performance. The ATS bolt flanges are much beefier as well.
 | ats Manifold Upgrade probe Removal
Installation of the new manifold begins with removing any pyrometer probes you may have added to monitor EGT and then unbolting the turbo, oil line, and any cooling lines that may be in the way. An air ratchet makes removing the factory bolts quicker once they are broken free.
 | ats Manifold Upgrade drilling
There is a boss cast into the ATS manifold for a pyrometer probe, but you are required to drill and tap the hole yourself to ensure it is the proper size for your gauge.
 | ats Manifold Upgrade antiseize Application
The ATS manifold includes 8mm Allen-head bolts and washers that should be coated thoroughly in antiseize before installation. At this point you will also need to remove the four turbo studs from the stock manifold and screw them into the ATS manifold.
 | ats Manifold Upgrade manifold Install
Carefully clean off the cast-iron mounting surface on the engine block to ensure good sealing surface for the new manifold. Then slide the exhaust manifold gaskets in place over the new mounting bolts. New gaskets may not be required unless the original ones are burned or damaged. A few dabs of antiseize will help keep the gaskets in place as you slide the manifold in place.
 | ats Manifold Upgrade bolt Tightening
Tighten all bolts to 35 lb-ft of torque in a clockwise direction, starting from the center section outward.
 | ats Manifold Upgrade reinstall Turbo Components
Reinstall the turbo housing, exhaust downpipe, intake tube, and your pyrometer probe (if so equipped).
 | ats Manifold Upgrade installation Complete
The install procedure was fairly straightforward, with no special tools or equipment required. Even though there's a pre-cast spot for the pyrometer (EGT) probe, it does need to be drilled and tapped. We also encountered a bit of shifting in the gasket after start-up, so be prepared to do a bit of tweaking in the mounting if you don't get it exactly right the first time. Those of you with competition trucks should note that an extra-wide racing flange is available for 12- and 24-valve Cummins exhaust manifold applications.