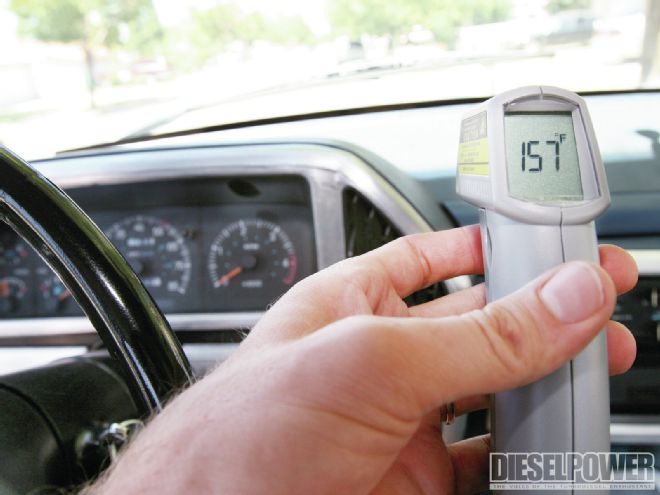
Amazingly, the same principles that apply to our diesels also apply to our refrigerators. The understanding of pressure, volume, and heat transfer lets you look at your diesel engine and A/C system in a whole new light. Besides basic thermodynamic theory, this article also gives some practical advice for getting your A/C system ready for summer.

| diesel Born Fron Air Conditioning ford Side Shot
The Basics of Air Conditioning
The heart of a vehicle’s A/C system is the compressor that’s connected to the engine by a clutch, which is triggered by a pressure switch located on the accumulator (in our case), and the A/C button in the cab. The compressor is designed to suck hot low- pressure refrigerant vapor coming from the accumulator (if the system is equipped with an orifice valve) and evaporator (located inside the cab). After the mechanical work is done, the smaller-diameter line is the high-pressure discharge side that takes hot high-pressure vapor and sends it to the condenser. Typical high-side pressure readings are between 250 and 300 psi (during maximum working conditions). There is a pressure release valve that pops if the pressure gets to be too much.

| diesel Born Fron Air Conditioning air Compressor
High-Side Discharge Port We took our ’87 Ford F-250 to an A/C shop that had R-134a adapters, which also fit our smaller R-12 ports. On our truck, the high-pressure side port was located on the driver side, inline between the compressor and condenser. It cost us $120 to evacuate the system, fill it with oil, and recharge it.

| diesel Born Fron Air Conditioning high Side Discharge Port
Condenser
The condenser dissipates the heat, which is transferred from the evaporator inside the cab. As the hot vapor goes through the coils (located in front of the radiator), it cools and condenses to form a high-pressure liquid, which releases its thermal energy into the atmosphere. It’s important to keep the condenser clean and free of debris.

| diesel Born Fron Air Conditioning condenser
Orifice Tube, Evaporator, Low-Side Suction Port, and Accumulator
The black hose coming from the condenser is the high-pressure liquid refrigerant line, and it ends with a quick-disconnect fitting and orifice tube. The orifice tube (or expansion valve, in some applications) is a reduced opening. When the liquid squirts out the small hole, its pressure is reduced. Then it gets very cold, starts to boil back into a vapor, and absorbs heat from inside the cab. The low-pressure vapor exits the evaporator and runs into the low-pressure port adapter covered with a black cap. Typical pressure readings here are 27 to 35 psi. The black canister is called the accumulator and it’s found on A/C systems that use orifice tubes. Its job is to make sure the compressor doesn’t get any liquid refrigerant, which will damage it. It also removes moisture and debris. The pressure switch that activates the compressor clutch is also located on the accumulator. Air conditioning systems with expansion valves have receiver driers instead, which are located on the high side between the condenser and evaporator.

| diesel Born Fron Air Conditioning accumulator
The R-12 refrigerant our truck’s A/C system came with was a great working fluid but bad for the atmosphere, so the industry discontinued it. The switch to R-134a (unfortunately, still a potent greenhouse gas) is not a big deal, according to many people who have successfully made the transition by evacuating the leftover R-12 and non-compatible oil, adding the R-134a-compatible oil to its 7 ounce capacity, and then filling the new refrigerant to around 80 percent of the R-12 capacity (about 35 ounces in our case). Too much oil will hurt the performance, and too little will cause compressor damage. Some recommend changing the accumulator and orifice tube and adding a filter, while others recommend flushing or replacing the entire system. Later on, if you decide to replace a component, measure how much oil came out with it and then add that amount (since the oil floats around the system in varied quantities). Moisture in the system is the major enemy—that’s why the machine pulled a vacuum for about 45 minutes before adding the oil and R-134a (those not living in the desert might want to give run it longer, especially if the system was opened). Future A/C systems and some in Europe use CO2 pressurized to 2,000 psi as the working fluid. Linde's first system used methyl ether.

| diesel Born Fron Air Conditioning cooltech Machine
Refrigeration: The Father Of The Diesel Engine
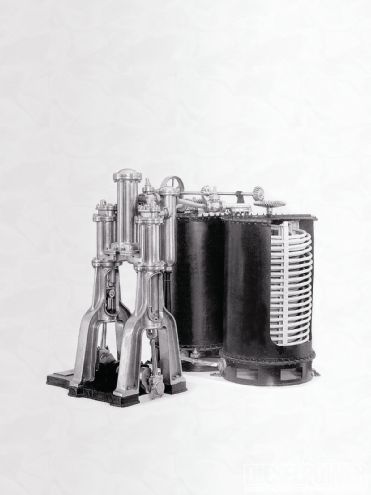
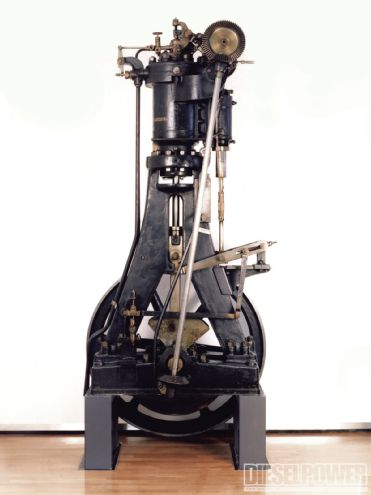
They say life doesn't come with a book of instructions, but looking back at history, it seems Carl Von Linde found a few chapters. Linde was Rudolf Diesel's engineering professor and later employed him in the refrigeration industry for 13 years. Another way Linde indirectly helped bring about the diesel vehicles we drive today was his gas seperation technology, which paved the way for high-strength steels, alloys, and welding. Linde used his understanding of thermodynamic theory to create several new industries. The first refrigeration machine created by Linde (left) looks very similar to the first diesel engine (right) both- used comparable A-frame construction and the connecting rods, crankshat, and cylinders were in about the same location.


