If you’re like most of us, you’ve probably got an older truck with halogen headlights and reflector housings. In most cases, these standard headlights are adequate, and when they’re not, you can always upgrade to HIDs and projectors. However, what if that’s still not enough light output for pitch-black roads? Enter the LED lightbar, one of the brightest and most efficient lighting solutions available. We recently came across a Raptor owner who hated low nighttime visibility so much, he wanted to add four LED lights. So, three single-row LED lightbars were purchased from SideTracked Offroad in 20-, 30-, and 40-inch sizes. These bars would fit behind the truck’s Outlaw Offroad front bumper, upper grille, and lower grille, respectively. Finally, the owner picked up a 54-inch Rigid Industries RDS-series radius bar to be mounted on the Raptor’s roof.
In order to install these new lights, the truck and parts were delivered to Outlaw Offroad in Santa Ana, California. The guys at Outlaw are experts at modifying Raptors, from fully caged race trucks to simple, daily-driven models. Within only a few hours, they had the lights installed and shining brightly. Follow along to see how this quick upgrade let us turn night into day at the flip of a switch.
With HID headlights, dual Vision X Light Cannons on the cowl, three SideTracked bars behind the grilles, and a Rigid radius bar on the roof, this Raptor’s light output was truly blinding.
| 01.
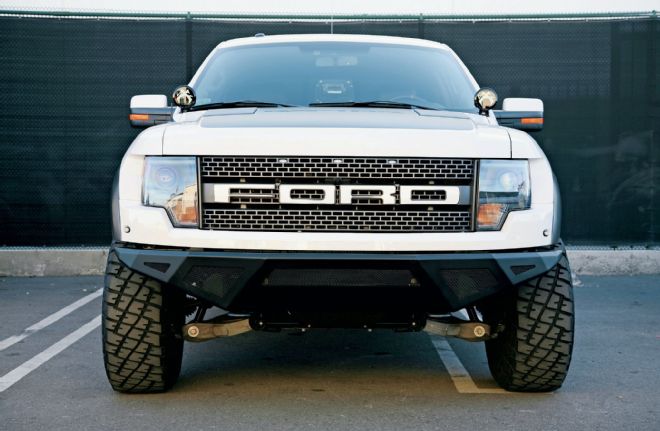
01. This 2013 Ford F-150 Raptor came from the factory with HID projector headlights, and the owner had already added two round Vision X Light Cannons to the wiper cowl. The truck also features an Outlaw Offroad sheetmetal bumper, which will provide space for our 20-inch SideTracked lightbar.
| 02.
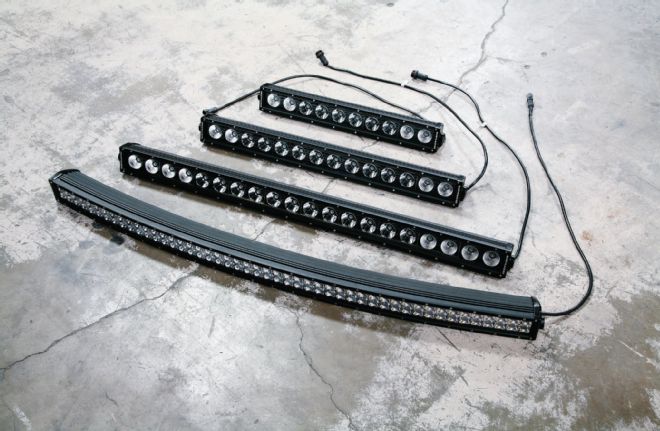
02. From top to bottom, the four lightbars we’ll be using consist of a SideTracked single-row 20-inch (PN ST_DR20, $220), 30-inch (PN ST_DR30, $320), 40-inch (PN ST_DR40, $410), and 54-inch Rigid Industries RDS-Series ($2,150 MSRP).
| 03.
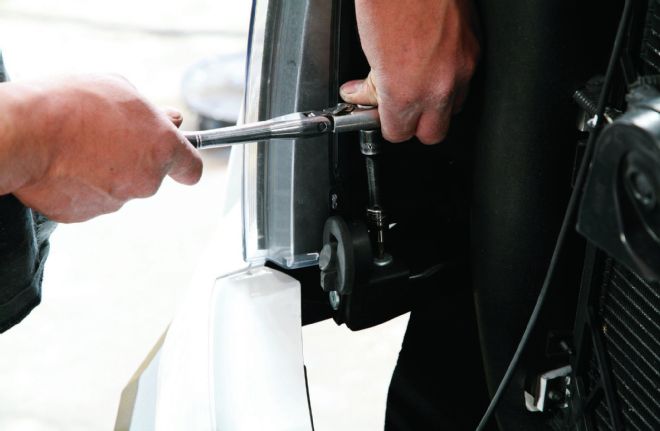
03. To install the 40-inch bar behind the grille, the hood was opened, and the rubber stoppers next to each headlight were unbolted and removed.
| 04.
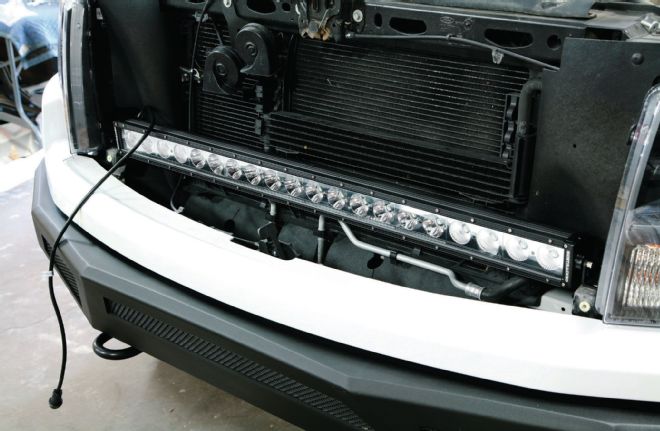
04. The included L-brackets were attached to each end of the 40-inch LED bar, and it was positioned where the stoppers once were. Bolting the stoppers back down over the LED bar brackets secured the 40-inch bar in place.
| 05.
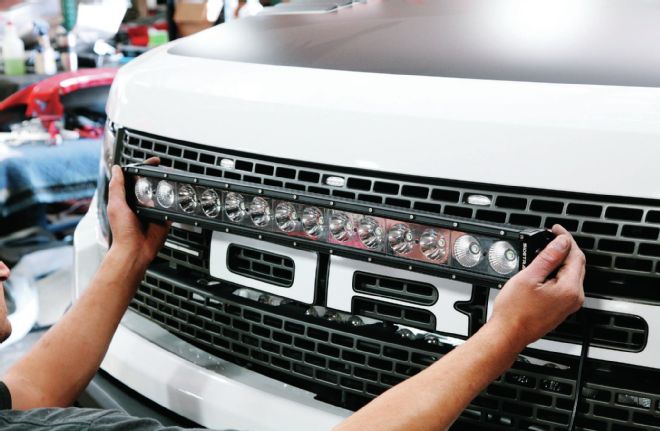
05. Next, the 30-inch SideTracked bar would be mounted behind the upper half of the grille.
| 06.
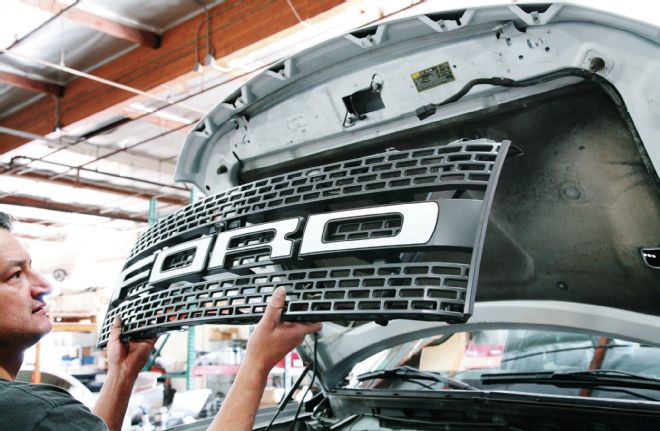
06. The grille was removed from the hood and set on the workbench so the lightbar could be test-fitted.
| 07.
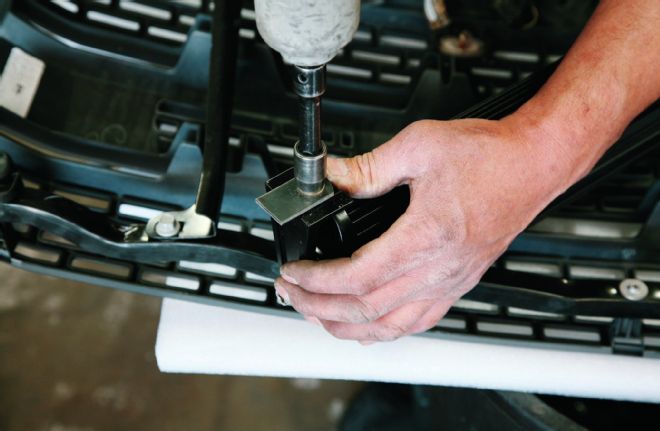
07. After test-fitting the bar, 2-inch metal tabs were cut out and bolted to the lightbar’s L-brackets. Outlaw will be welding these to the metal supports behind the grille.
| 08.
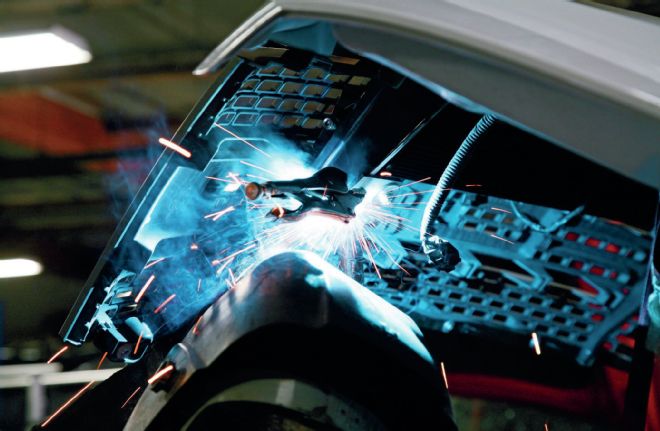
08. With the grille reinstalled and the lightbar clamped firmly in place, the metal tabs were welded to the vertical grille supports.
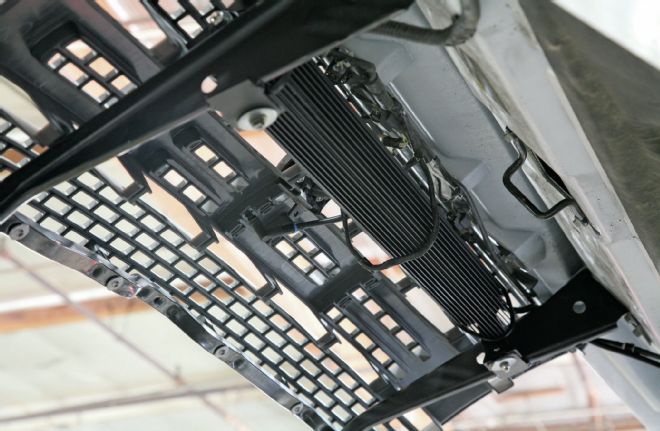
| 09.
09. Here’s how it looked when all was said and done. Outlaw also gave the tabs a quick coat of black spray-paint for rust prevention and a factory look.
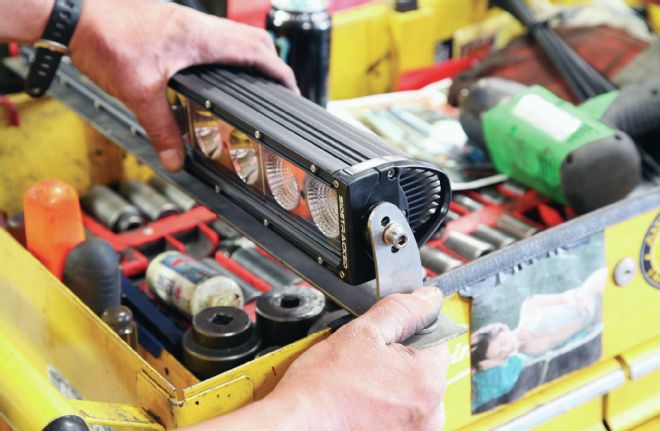
| 10.
10. The 20-inch bar was next in line, and it would be bolted to existing mounts behind the Outlaw Offroad sheetmetal bumper’s grille. Three-position L-brackets were welded to this flat piece of steel plate, and holes were drilled to match the bumper’s mounting points.
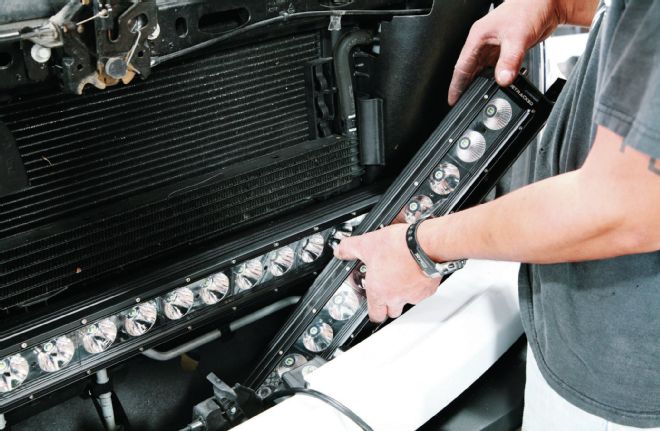
| 11.
11. With the new bracket welded together and spray-painted black, the lightbar was maneuvered down into the bumper from above.
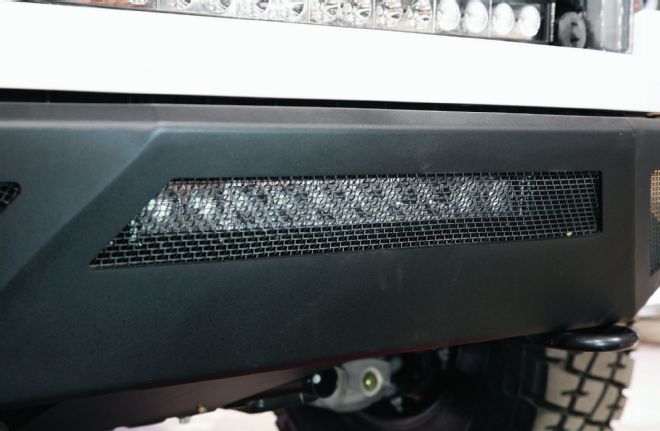
| 12.
12. After bolting the steel plate to the bumper’s mounting points, the lightbar lined up perfectly with the Outlaw bumper’s grille opening.
| 13.
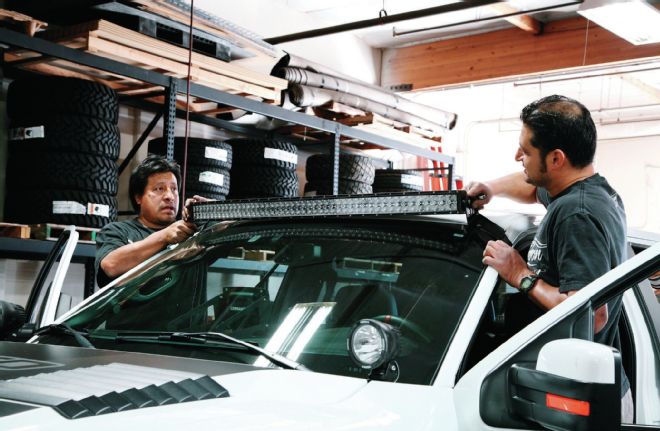
13. Finally, it was time to position the 54-inch Rigid Industries RDS-Series bar on the roof. This step required an extra pair of hands, since we didn’t want to scratch up the truck’s white paint while moving the brackets.
| 14.
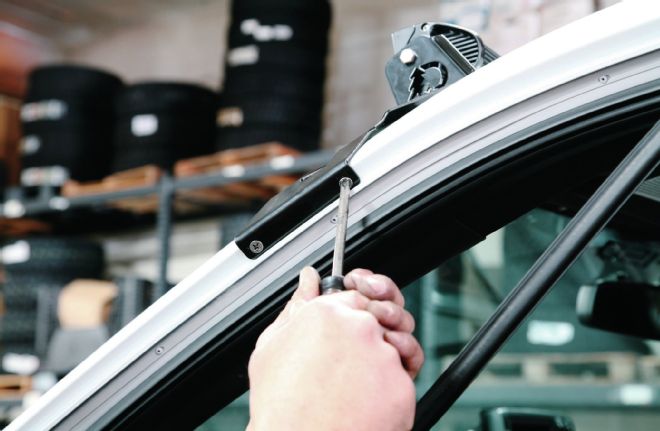
14. With the lightbar level and brackets in position, pilot holes were drilled into each A-pillar. Then, sheetmetal screws were screwed into place to hold the bar securely to the pillars.
| 15.
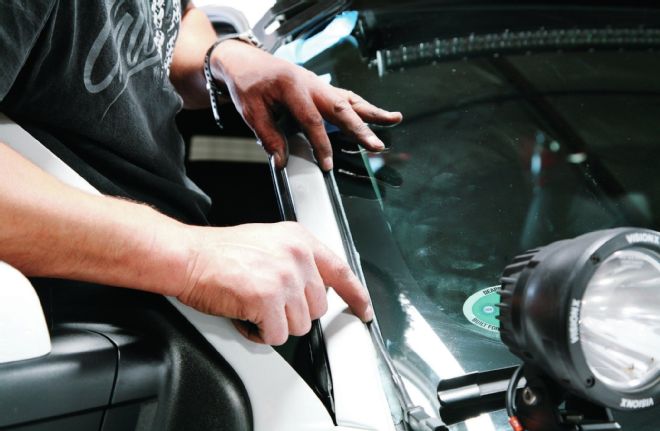
15. After applying a bead of clear silicon along the windshield’s edge, the Rigid bar’s wiring harness was pressed into the silicon. This secured it in place and made sure the wiring won’t look too conspicuous.
| 16.
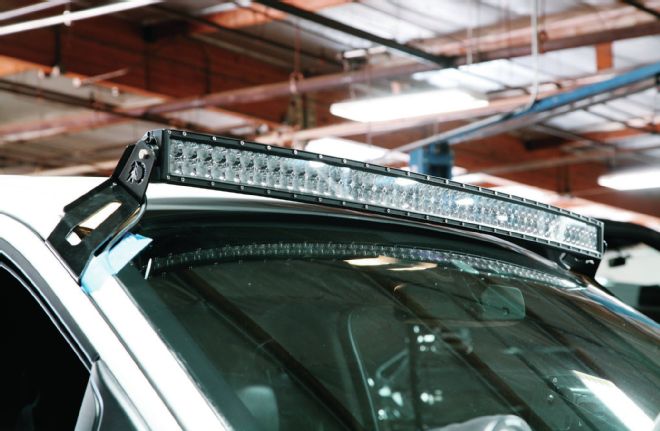
16. The 54-inch Rigid RDS-Series bar looks as if it were made for this truck, and its curved profile will help it light up a much wider area than a standard lightbar.
| 17.
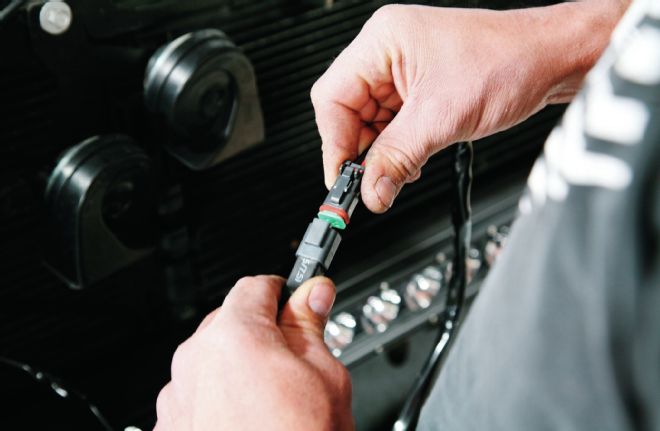
17. The included wiring harness extensions were attached to each bar’s harness and routed into the left side of the engine bay near the battery.
| 18.
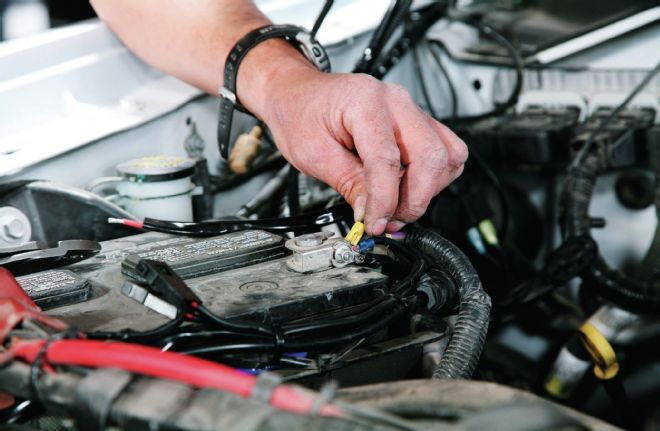
18. The bars’ ground wires were stripped and connected to the battery’s negative terminal.
| 19.
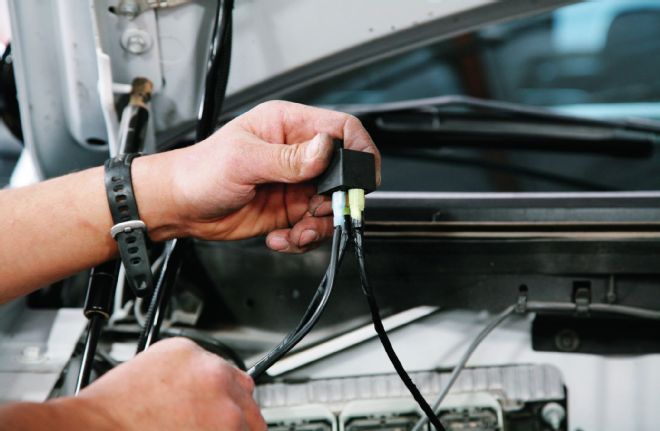
19. The positive wires were routed to a relay, which was zip-tied to the firewall. Then, wiring was run through the firewall to the Raptor’s preexisting AUX switch wires behind the passenger-side kick panel.
| 20.
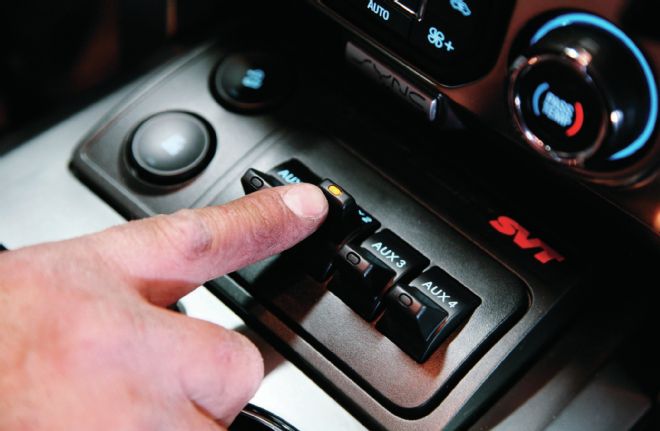
20. In this case, the owner wanted all lights to turn on when he flipped AUX switch number two, so all four lightbars were wired to that factory switch. Now, 144 inches and thousands of lumens of intense LED lights illuminate the road at the flip of this switch.
 | 01.
01. This 2013 Ford F-150 Raptor came from the factory with HID projector headlights, and the owner had already added two round Vision X Light Cannons to the wiper cowl. The truck also features an Outlaw Offroad sheetmetal bumper, which will provide space for our 20-inch SideTracked lightbar.
 | 02.
02. From top to bottom, the four lightbars we’ll be using consist of a SideTracked single-row 20-inch (PN ST_DR20, $220), 30-inch (PN ST_DR30, $320), 40-inch (PN ST_DR40, $410), and 54-inch Rigid Industries RDS-Series ($2,150 MSRP).
 | 03.
03. To install the 40-inch bar behind the grille, the hood was opened, and the rubber stoppers next to each headlight were unbolted and removed.
 | 04.
04. The included L-brackets were attached to each end of the 40-inch LED bar, and it was positioned where the stoppers once were. Bolting the stoppers back down over the LED bar brackets secured the 40-inch bar in place.
 | 05.
05. Next, the 30-inch SideTracked bar would be mounted behind the upper half of the grille.
 | 06.
06. The grille was removed from the hood and set on the workbench so the lightbar could be test-fitted.
 | 07.
07. After test-fitting the bar, 2-inch metal tabs were cut out and bolted to the lightbar’s L-brackets. Outlaw will be welding these to the metal supports behind the grille.
 | 08.
08. With the grille reinstalled and the lightbar clamped firmly in place, the metal tabs were welded to the vertical grille supports.
 | 09.
09. Here’s how it looked when all was said and done. Outlaw also gave the tabs a quick coat of black spray-paint for rust prevention and a factory look.
 | 10.
10. The 20-inch bar was next in line, and it would be bolted to existing mounts behind the Outlaw Offroad sheetmetal bumper’s grille. Three-position L-brackets were welded to this flat piece of steel plate, and holes were drilled to match the bumper’s mounting points.
 | 11.
11. With the new bracket welded together and spray-painted black, the lightbar was maneuvered down into the bumper from above.
 | 12.
12. After bolting the steel plate to the bumper’s mounting points, the lightbar lined up perfectly with the Outlaw bumper’s grille opening.
 | 13.
13. Finally, it was time to position the 54-inch Rigid Industries RDS-Series bar on the roof. This step required an extra pair of hands, since we didn’t want to scratch up the truck’s white paint while moving the brackets.
 | 14.
14. With the lightbar level and brackets in position, pilot holes were drilled into each A-pillar. Then, sheetmetal screws were screwed into place to hold the bar securely to the pillars.
 | 15.
15. After applying a bead of clear silicon along the windshield’s edge, the Rigid bar’s wiring harness was pressed into the silicon. This secured it in place and made sure the wiring won’t look too conspicuous.
 | 16.
16. The 54-inch Rigid RDS-Series bar looks as if it were made for this truck, and its curved profile will help it light up a much wider area than a standard lightbar.
 | 17.
17. The included wiring harness extensions were attached to each bar’s harness and routed into the left side of the engine bay near the battery.
 | 18.
18. The bars’ ground wires were stripped and connected to the battery’s negative terminal.
 | 19.
19. The positive wires were routed to a relay, which was zip-tied to the firewall. Then, wiring was run through the firewall to the Raptor’s preexisting AUX switch wires behind the passenger-side kick panel.
 | 20.
20. In this case, the owner wanted all lights to turn on when he flipped AUX switch number two, so all four lightbars were wired to that factory switch. Now, 144 inches and thousands of lumens of intense LED lights illuminate the road at the flip of this switch.