When it comes to building your truck, whether it's for off-road use or a fully built show vehicle, upgrading from your stock bumpers is almost mandatory. Since we had already added a 15-inch lift to our '14 Chevy Silverado 1500, we knew we couldn't leave the stock chrome bumpers on the truck. We wanted to make our truck appear meaner and more aggressive while keeping a clean look. We contacted the guys over at Fusion Bumpers for a set of bumpers that would really stand out. We also contacted Offroad LED Bars (OLB) and picked up a few lights to stuff in both the front and rear bumpers to ensure we would have plenty of visibility while driving such a large truck at night. We gave Fusion Bumpers our light layout and they built our bumpers to house our specific lights to ensure everything would fit right and would have proper gaps. They were able to fit two sets of 3x3 cubes in the foglight areas of the front bumper ($150 per pair) and a 12-inch in the center ($225 retail). Since our truck didn't have parking sensors we were able to fit a pair of 6-inch lights in the rear bumper ($150 each retail) to aid in backing up at night. If your truck has the sensors, 4-inch lights are the largest you will be able to fit.
The bumpers are all steel and come raw, ready to paint or powdercoat. For the front of our truck we ordered PN 14+CHV1500FB ($1,175 retail) and for the rear we ordered PN 14+CHV1500RB ($925 retail). Due to the size of the bumpers they were shipped freight and come strapped to a pallet. We had our bumpers shipped to Rimz One in Mooresville, North Carolina, since they would be handling the install for us. As soon as the bumpers were delivered, they were inspected and dropped off at the paint shop to be color matched to our truck. Once the paint had dried, we bolted in all the lights and began swapping out the stock chrome bumpers for the new ones. Follow the next few pages to see what it took to upgrade our truck's bumpers.
| Fusion Bumper Offroad Led Bars Install Fusion Front Bumper
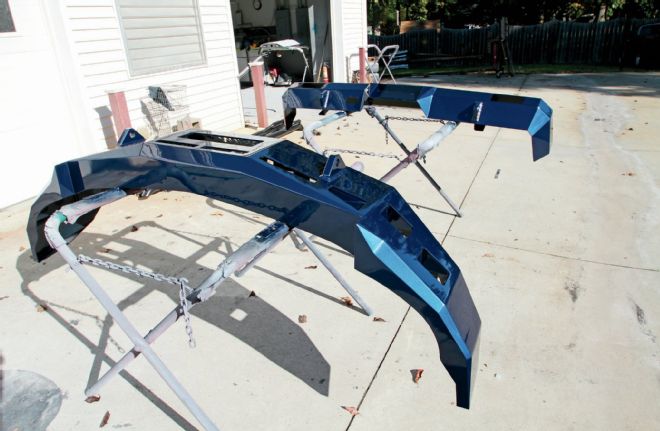
1. Once we decided on our lighting, we ordered up our bumpers from Fusion. As soon as they arrived we sent them out to be painted to match the truck.
| Fusion Bumper Offroad Led Bars Install Mounting Tab
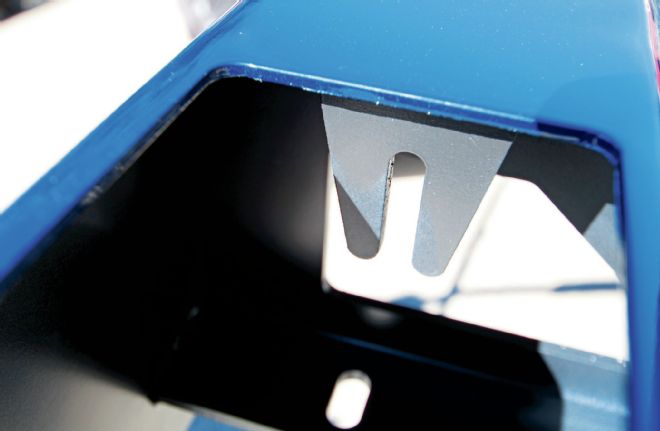
2. Every light hole in both bumpers had perfectly placed mounting tabs that allowed plenty of adjustment for the lights we were going to install.
| Fusion Bumper Offroad Led Bars Install Lights
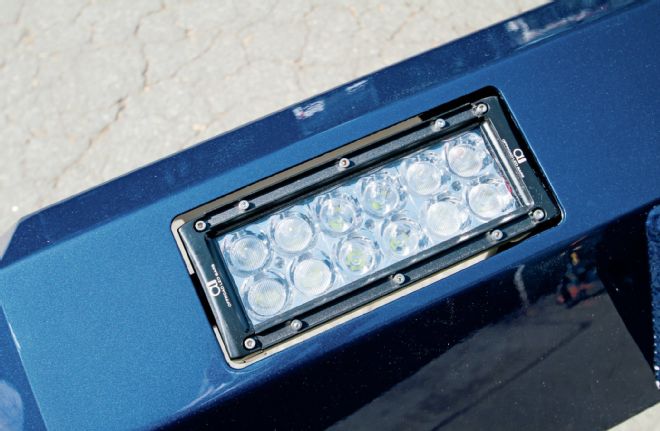
3. We knew exactly which lights we were going to use; the bumpers were made specifically for our lights so they fit perfect.
| Fusion Bumper Offroad Led Bars Install Led Tag Lights
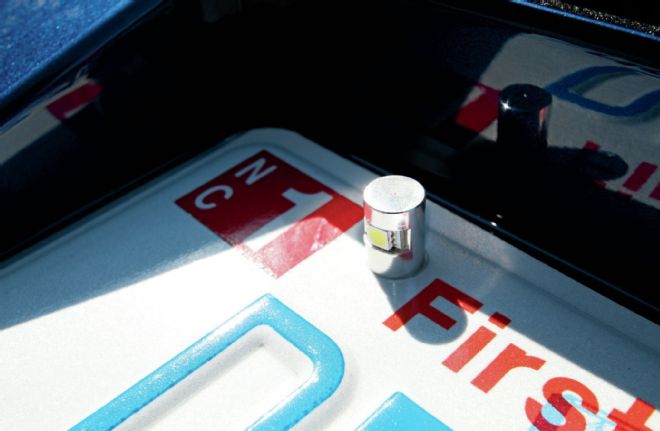
4. The bumpers came with LED tag lights/bolts to make sure your license plate stays lit up at night and to keep you legal.
| Fusion Bumper Offroad Led Bars Install Trailer Plug
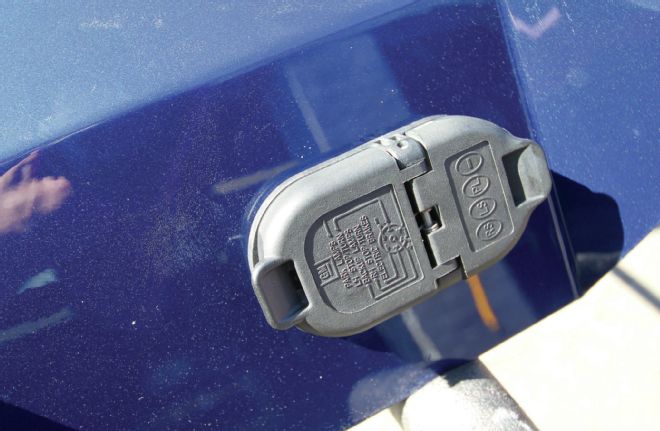
5. The stock trailer plug was used in the new rear bumper and was installed in the precut hole.
| Fusion Bumper Offroad Led Bars Install Bumper Cap
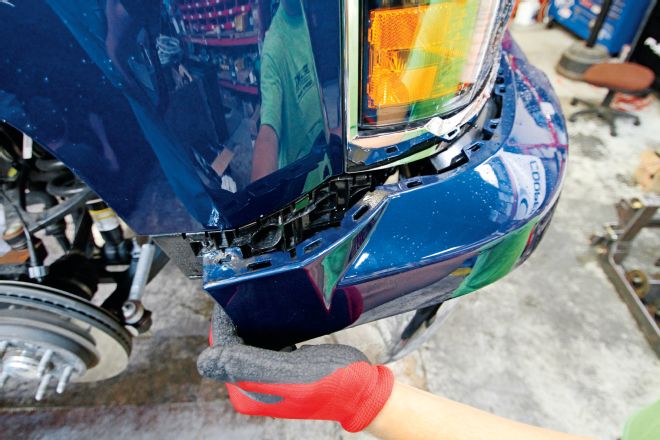
6. Starting with the front bumper, we removed the screws holding the bumper cap to the front fenders. Once the screws on both sides were removed, we pulled the bumper cap away from the fenders and forward to free up the sides.
| Fusion Bumper Offroad Led Bars Install Front Bumper Cap Removal
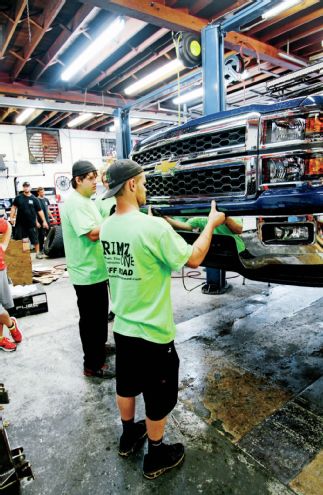
7. Behind the bumper, we unplugged the foglights. Then, we unclipped the bumper cap from behind the bumper. Once all the clips are released we simply lifted off the front bumper cap.
| Fusion Bumper Offroad Led Bars Install Grille Removal
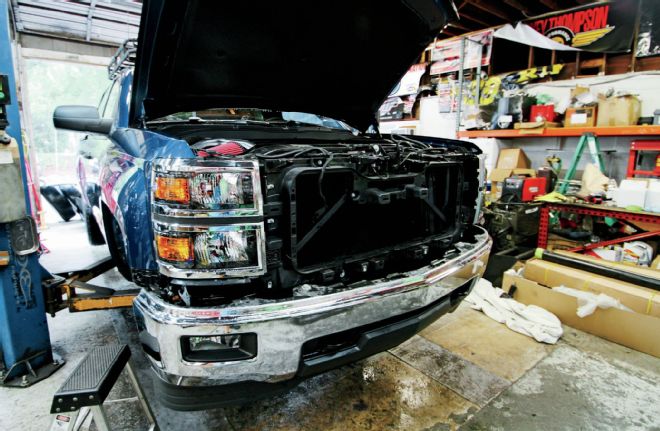
8. To remove the grille, we removed the radiator shroud to gain access to the grille clips. This step isn't required, but it allowed for more access to the bumper bolts.
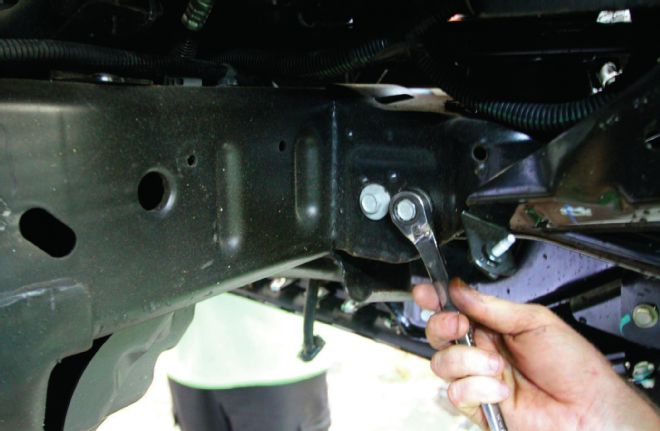
| Fusion Bumper Offroad Led Bars Install Bumper Bolts
9. Now we removed the six bolts that hold the bumper on, three on each side.
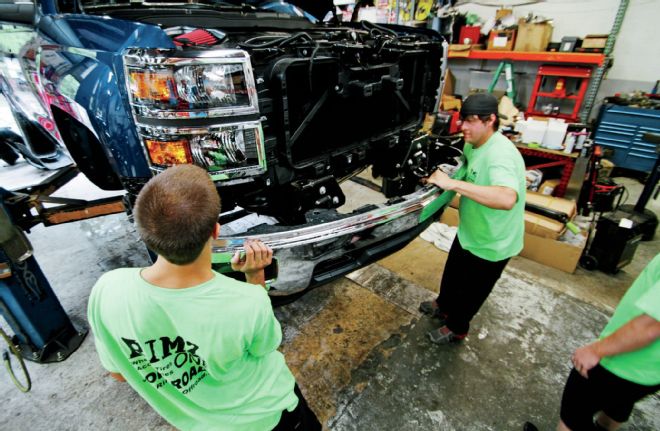
| Fusion Bumper Offroad Led Bars Install Front Bumper Removal
10. Then we lifted the front bumper off of the truck.
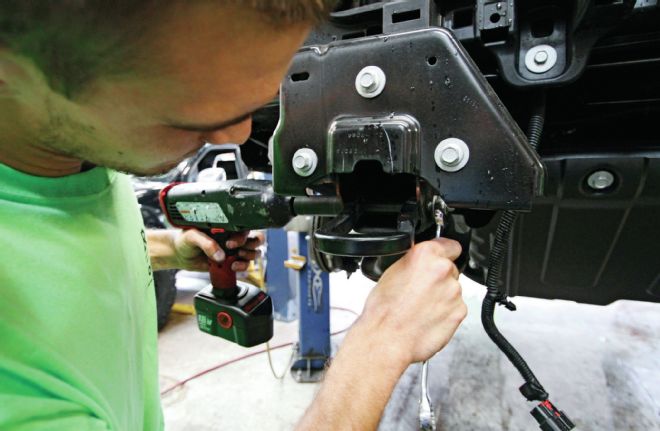
| Fusion Bumper Offroad Led Bars Install Factory Tow Hook Removal
11. Both factory tow hooks were unbolted and removed.
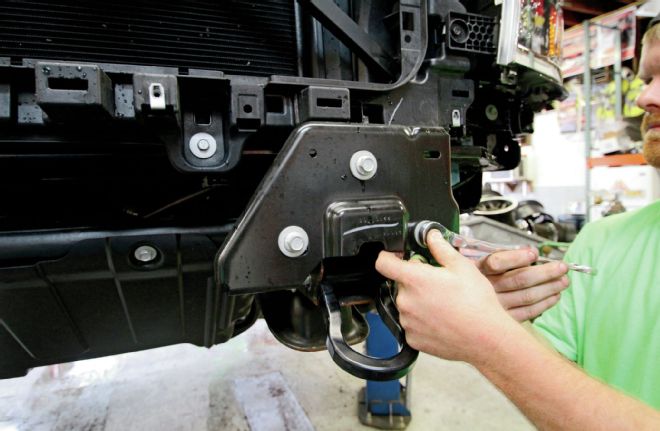
| Fusion Bumper Offroad Led Bars Install Factory Bumper Brackets
12. The factory bumper brackets were removed, but we made sure to keep the bolts as they will be reused.
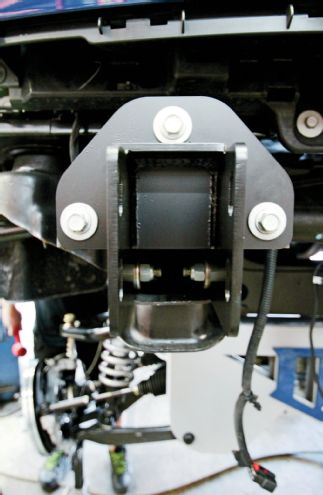
| Fusion Bumper Offroad Led Bars Install New Bumper Bracket
13. Using the factory bumper bracket bolts, we mounted the new bumper bracket. The slotted holes will make adjustments easy once the bumper is installed. We also installed the supplied bolts to the inner mounts of the bumper bracket.
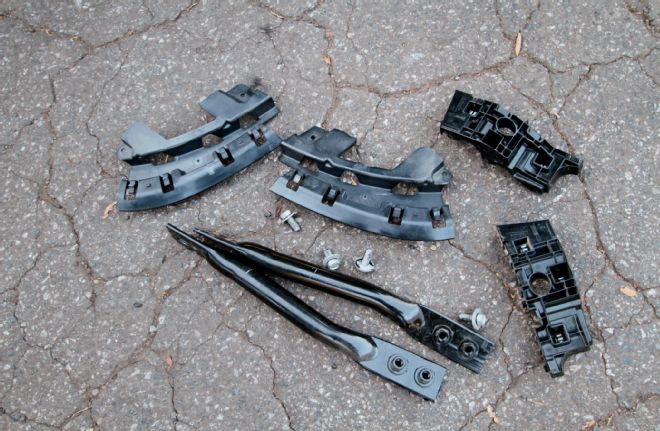
| Fusion Bumpers Offroad Led Bars Install Factory Bumper Braces And Clips
14. We removed all factory bumper braces and clips and tossed them in the scrap pile. They will not be needed.
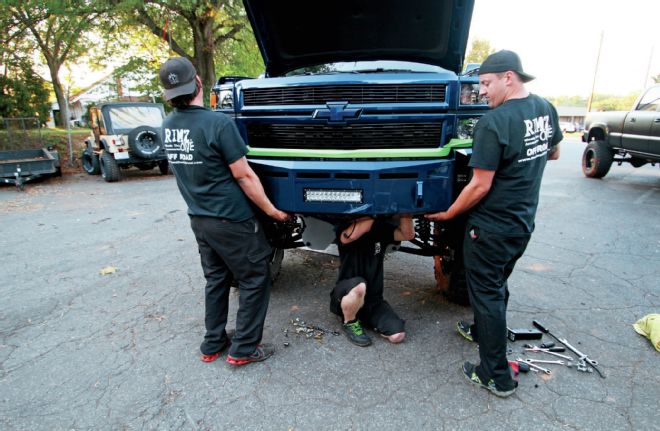
| Fusion Bumper Install
15. With the help of a couple extra hands, we set the new front bumper in place.
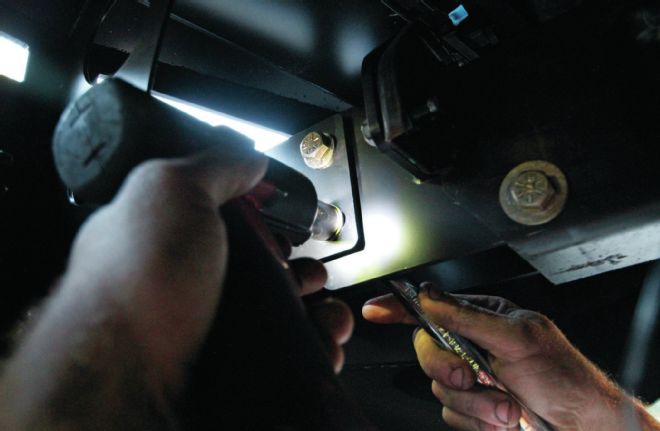
| Fusion Bumper Offroad Led Bars Install Bolt Install
16. We installed the bolts and made adjustments so the bumper was even and level, then tightened down all the bolts.
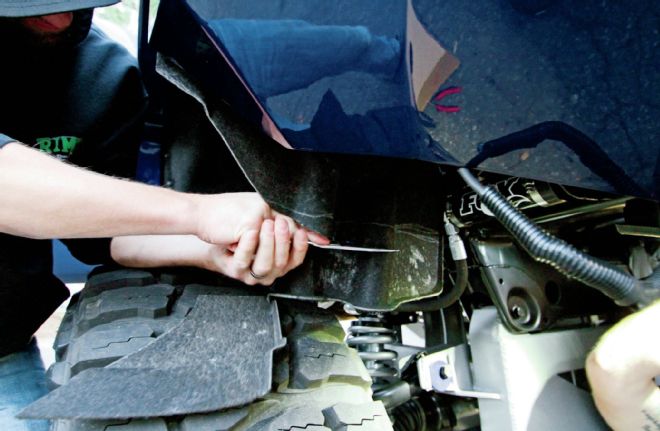
| Fusion Bumper Offroad Led Bars Install Inner Fender Trimming
17. The front of each inner fender was unbolted and trimmed to fit the contour of the Fusion Bumper.
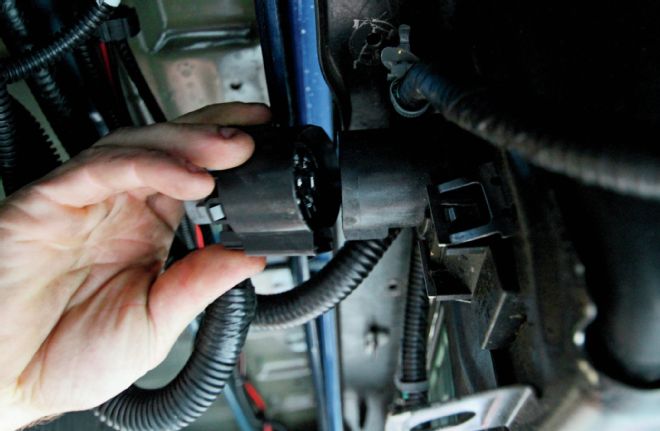
| Fusion Bumper Offroad Led Bars Install Tag Light Removal
18. We began the rear bumper swap by removing both tag lights from the factory rear bumper and unplugging all wiring harnesses attached to the rear bumper.
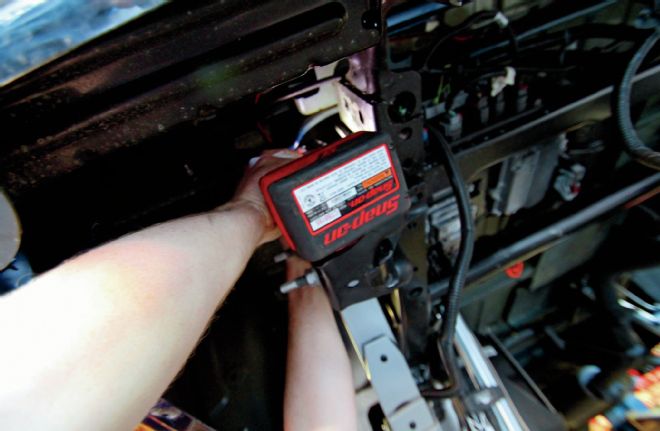
| Fusion Bumper Offroad Led Bars Install Bumper Bracket Unbolting
19. Next, we unbolted the bumper brackets on both sides.
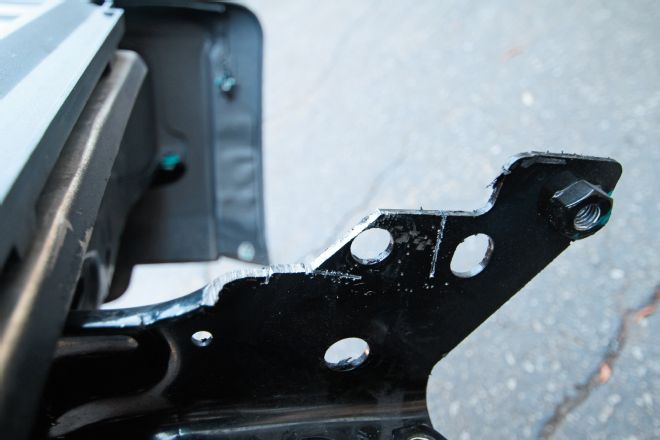
| Fusion Bumper Offroad Led Bars Install Bracket Relief Cuts
20. Due to the way the factory rear bumper is installed, small relief cuts were made on both brackets to make removal easier.
| Fusion Bumper Offroad Led Bars Install Fusion Brackets
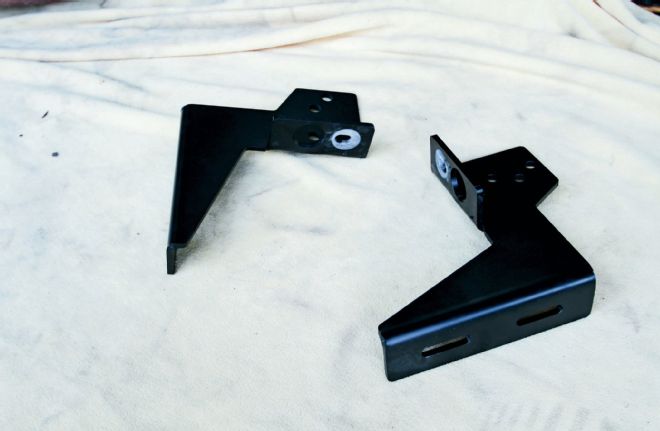
21. With the factory bumper removed and all wiring out of the way, we're ready to install the new Fusion brackets.
| Fusion Bumper Offroad Led Bars Install Fusion Brackets Installed
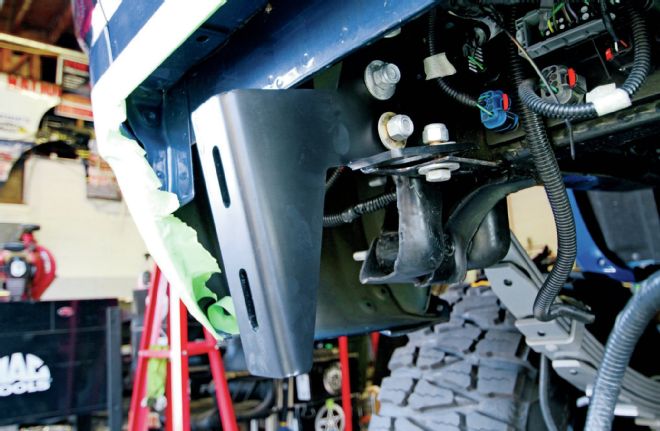
22. They were bolted to the rear of the frame in the factory location. The rear brackets also have the slotted holes for adjustment.
| Fusion Rear Bumper Install
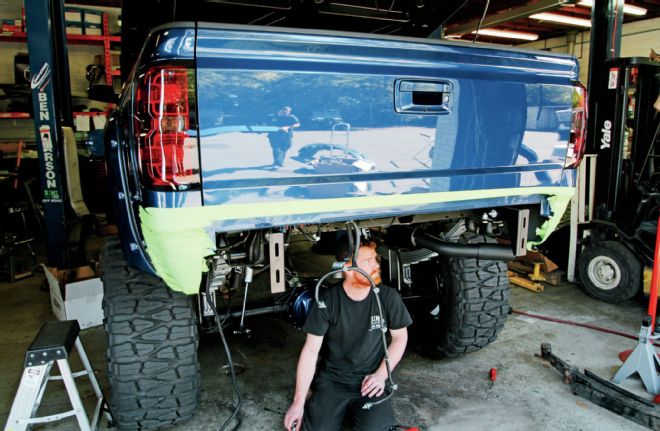
23. We always use painter's tape to make sure nothing is scratched while installing the bumpers. This may take a couple minutes to complete, but is well worth the added security when dealing with painted surfaces.
| Fusion Rear Bumper Install
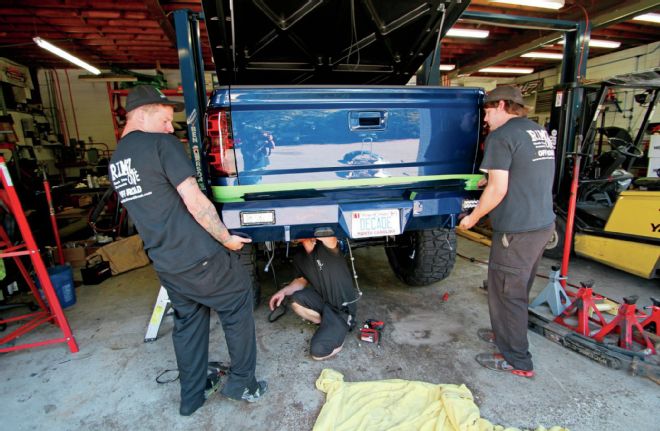
24. Now we lifted the rear bumper in place over the brackets.
| Fusion Bumper Offroad Led Bars Install Bumper Bolt Tightening
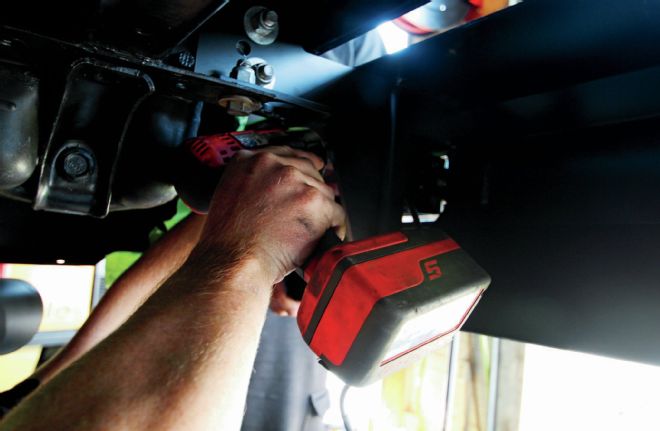
25. Once the bumper is lined up, install the supplied bolts and tighten.
| Fusion Bumper Offroad Led Bars Install Tag Lights Install
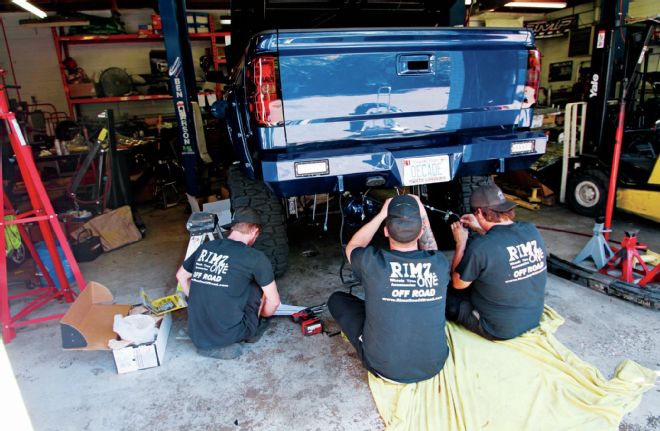
26. The supplied tag lights were connected to the factory wire harness and the trailer plug was plugged in. At this point, all of the OLB lights were also connected to their own wiring harnesses and connected to switches mounted in the dash.
| Fusion Bumper Offroad Led Bar Install 2014 Chevy Silverado 1500 Front Bumper
| Fusion Bumper Offroad Led Bar Install 2014 Chevy Silverado 1500 Rear Bumper
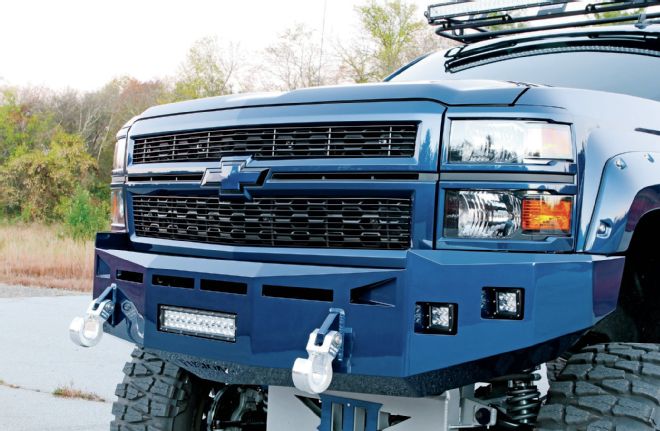
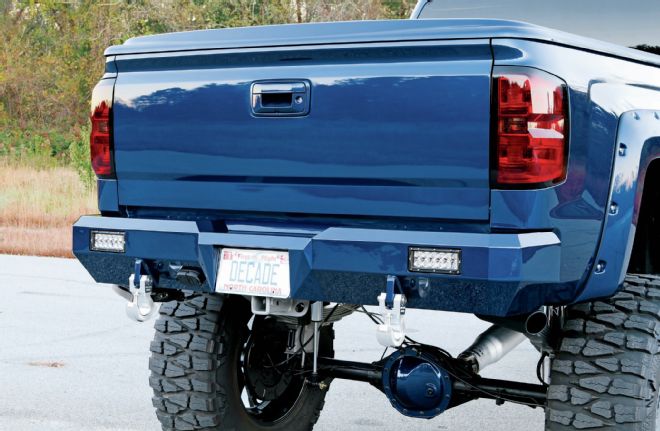
27-28. Both of the bumpers had mounting cleats for our Monster Hook Swivel hooks for an added touch of detail. Our new bumpers made our truck look bigger and beefier, but the paint matching kept them looking clean overall.
 | Fusion Bumper Offroad Led Bars Install Fusion Front Bumper
1. Once we decided on our lighting, we ordered up our bumpers from Fusion. As soon as they arrived we sent them out to be painted to match the truck.
 | Fusion Bumper Offroad Led Bars Install Mounting Tab
2. Every light hole in both bumpers had perfectly placed mounting tabs that allowed plenty of adjustment for the lights we were going to install.
 | Fusion Bumper Offroad Led Bars Install Lights
3. We knew exactly which lights we were going to use; the bumpers were made specifically for our lights so they fit perfect.
 | Fusion Bumper Offroad Led Bars Install Led Tag Lights
4. The bumpers came with LED tag lights/bolts to make sure your license plate stays lit up at night and to keep you legal.
 | Fusion Bumper Offroad Led Bars Install Trailer Plug
5. The stock trailer plug was used in the new rear bumper and was installed in the precut hole.
 | Fusion Bumper Offroad Led Bars Install Bumper Cap
6. Starting with the front bumper, we removed the screws holding the bumper cap to the front fenders. Once the screws on both sides were removed, we pulled the bumper cap away from the fenders and forward to free up the sides.
 | Fusion Bumper Offroad Led Bars Install Front Bumper Cap Removal
7. Behind the bumper, we unplugged the foglights. Then, we unclipped the bumper cap from behind the bumper. Once all the clips are released we simply lifted off the front bumper cap.
 | Fusion Bumper Offroad Led Bars Install Grille Removal
8. To remove the grille, we removed the radiator shroud to gain access to the grille clips. This step isn't required, but it allowed for more access to the bumper bolts.
 | Fusion Bumper Offroad Led Bars Install Bumper Bolts
9. Now we removed the six bolts that hold the bumper on, three on each side.
 | Fusion Bumper Offroad Led Bars Install Front Bumper Removal
10. Then we lifted the front bumper off of the truck.
 | Fusion Bumper Offroad Led Bars Install Factory Tow Hook Removal
11. Both factory tow hooks were unbolted and removed.
 | Fusion Bumper Offroad Led Bars Install Factory Bumper Brackets
12. The factory bumper brackets were removed, but we made sure to keep the bolts as they will be reused.
 | Fusion Bumper Offroad Led Bars Install New Bumper Bracket
13. Using the factory bumper bracket bolts, we mounted the new bumper bracket. The slotted holes will make adjustments easy once the bumper is installed. We also installed the supplied bolts to the inner mounts of the bumper bracket.
 | Fusion Bumpers Offroad Led Bars Install Factory Bumper Braces And Clips
14. We removed all factory bumper braces and clips and tossed them in the scrap pile. They will not be needed.
 | Fusion Bumper Install
15. With the help of a couple extra hands, we set the new front bumper in place.
 | Fusion Bumper Offroad Led Bars Install Bolt Install
16. We installed the bolts and made adjustments so the bumper was even and level, then tightened down all the bolts.
 | Fusion Bumper Offroad Led Bars Install Inner Fender Trimming
17. The front of each inner fender was unbolted and trimmed to fit the contour of the Fusion Bumper.
 | Fusion Bumper Offroad Led Bars Install Tag Light Removal
18. We began the rear bumper swap by removing both tag lights from the factory rear bumper and unplugging all wiring harnesses attached to the rear bumper.
 | Fusion Bumper Offroad Led Bars Install Bumper Bracket Unbolting
19. Next, we unbolted the bumper brackets on both sides.
 | Fusion Bumper Offroad Led Bars Install Bracket Relief Cuts
20. Due to the way the factory rear bumper is installed, small relief cuts were made on both brackets to make removal easier.
 | Fusion Bumper Offroad Led Bars Install Fusion Brackets
21. With the factory bumper removed and all wiring out of the way, we're ready to install the new Fusion brackets.
 | Fusion Bumper Offroad Led Bars Install Fusion Brackets Installed
22. They were bolted to the rear of the frame in the factory location. The rear brackets also have the slotted holes for adjustment.
 | Fusion Rear Bumper Install
23. We always use painter's tape to make sure nothing is scratched while installing the bumpers. This may take a couple minutes to complete, but is well worth the added security when dealing with painted surfaces.
 | Fusion Rear Bumper Install
24. Now we lifted the rear bumper in place over the brackets.
 | Fusion Bumper Offroad Led Bars Install Bumper Bolt Tightening
25. Once the bumper is lined up, install the supplied bolts and tighten.
 | Fusion Bumper Offroad Led Bars Install Tag Lights Install
26. The supplied tag lights were connected to the factory wire harness and the trailer plug was plugged in. At this point, all of the OLB lights were also connected to their own wiring harnesses and connected to switches mounted in the dash.
 | Fusion Bumper Offroad Led Bar Install 2014 Chevy Silverado 1500 Front Bumper
 | Fusion Bumper Offroad Led Bar Install 2014 Chevy Silverado 1500 Rear Bumper
27-28. Both of the bumpers had mounting cleats for our Monster Hook Swivel hooks for an added touch of detail. Our new bumpers made our truck look bigger and beefier, but the paint matching kept them looking clean overall.