Looking around at top off-road races and get-togethers, you get a sense for the kind of mods people carry out to make their trucks perform admirably off-road. One of the enhancements that always seems to come up is replacement bumpers, especially prerunner-style trucks. The factory bumper works well when the truck stays on the highway and never sees any dirt. But if you are flexing your axles and getting out of the city limits, you will need the extra clearance for your tires, as well as the ability to mount lights, winches, and tow hooks.
After lifting this ’14 GMC Sierra, the owner hated the look of the stock bumpers and wanted a tougher appearance. Enter N-Fab and its RSP replacement front bumper and RBS rear bumper. These are made to bolt right into place using the factory hardware. The front bumper has accommodations for a 38-inch Rigid lightbar and can come with a cutout for a winch. Once the bumpers arrived, we loaded them up and took the truck to JBM Motoring in Orange, California, to install these bumpers in less than two hours.
| 1.
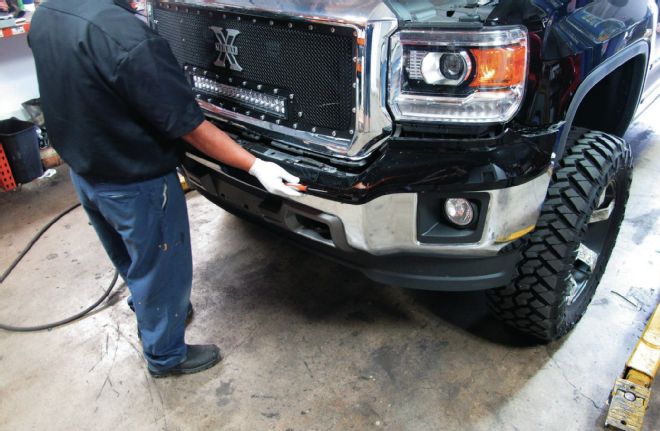
1. Up to this point, the truck had a lift, wheels and tires, and a T-Rex Torch grille. The owner wanted that extra level of custom with off-road bumpers. The first step was to pull the upper plastic off the bumper.
| 2.
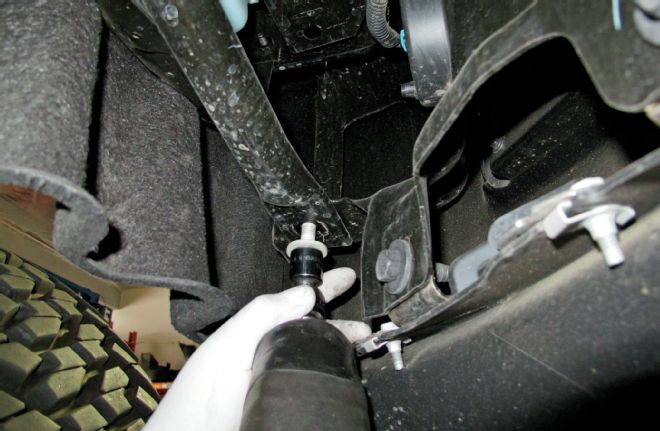
2. Next, the six bolts that held the bumper on were removed.
| 3.
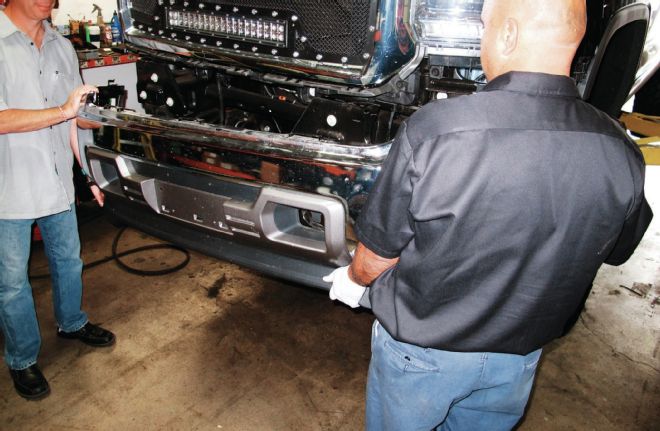
3. With some help, the bumper was removed from the truck and set aside.
| 4.
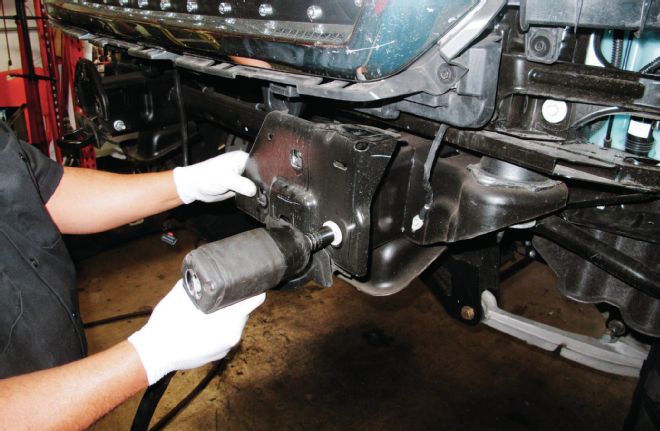
4. These cover plates were next to go, as this is where the N-Fab bumper will be bolted on.
| 5.
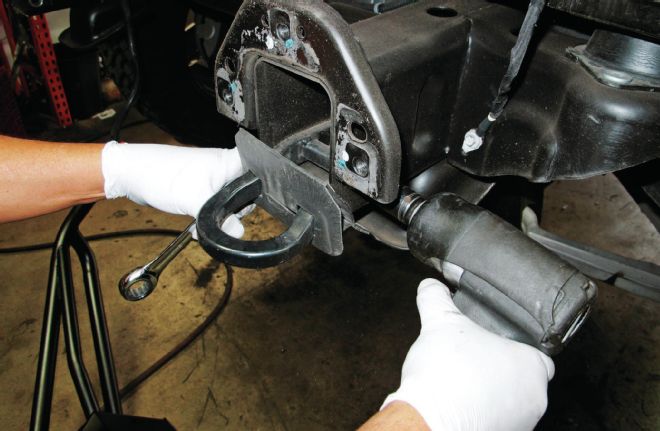
5. The tow hook was held in place with a single bolt that was removed and tossed in the scrap heap.
| 6.
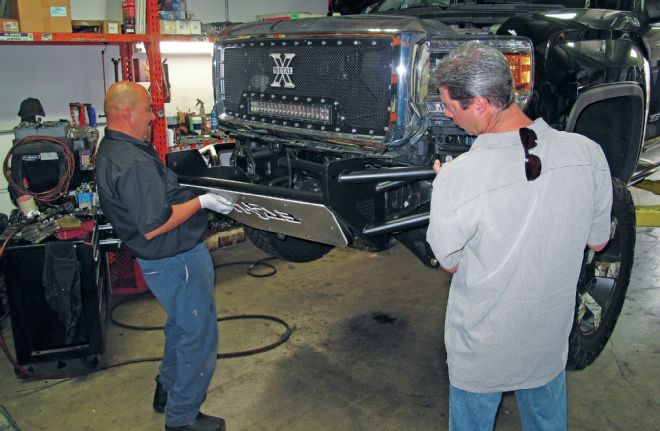
6. Again enlisting the help of a muscular man, the RSP bumper (PN: C141LRSP-TX, $832.22) was lifted into place.
| 7.
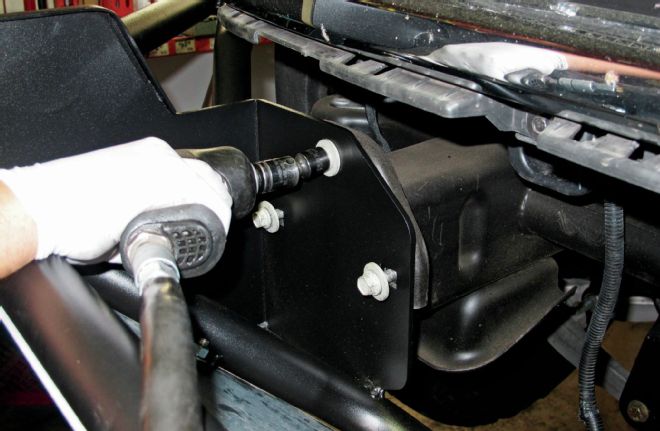
7. A total of six bolts held the new bumper to the front of the truck.
| 8.
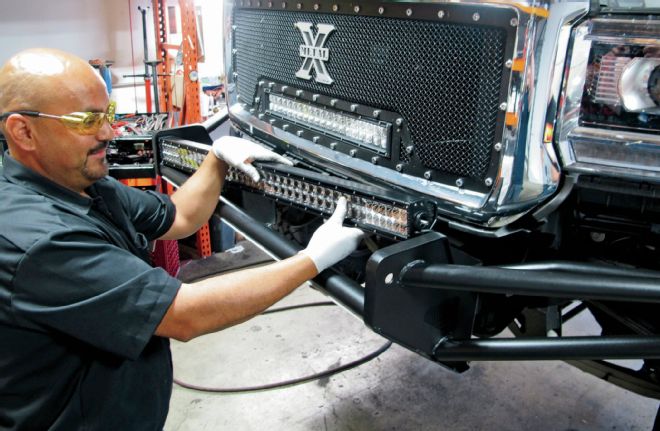
8. Next, the 38-inch Rigid lightbar (PN: 138312, $1,239.99) was slipped into the holes in the bumper.
| 9.
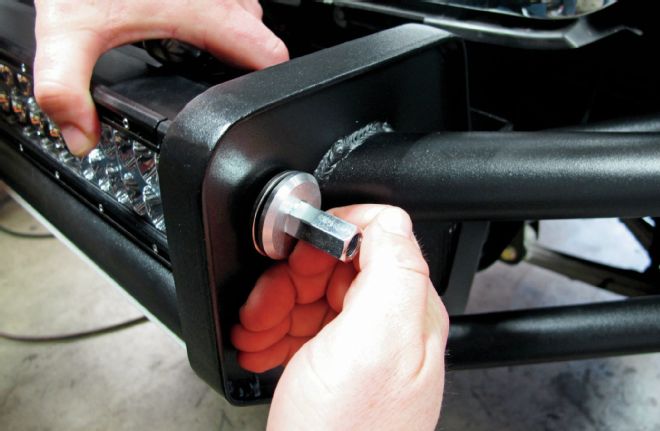
9. The light was bolted in with these ingenious nuts. There is a hexagonal opening in the head of the bolt that a key slips into to tighten it down.
| 10.
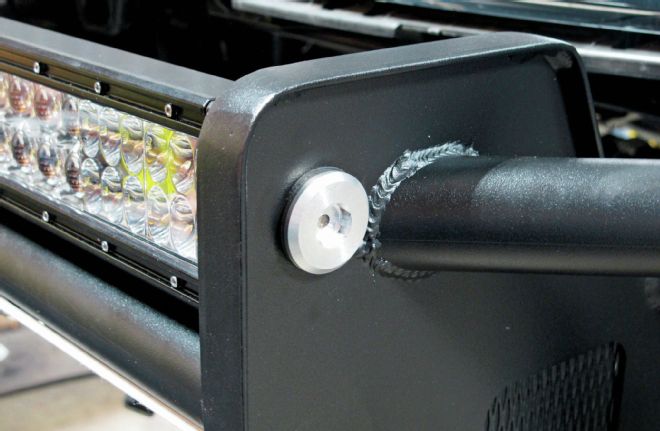
10. Once the bolt is sufficiently tight, the key is removed and the light is safe and virtually impossible to steal.
| 11.
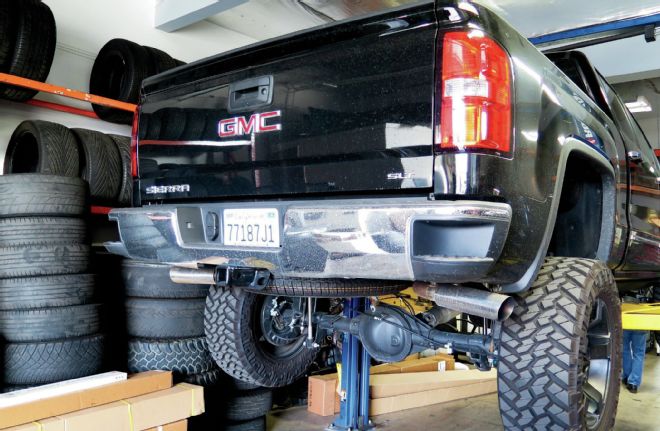
11. With the front done, we moved around to the rear.
| 12.
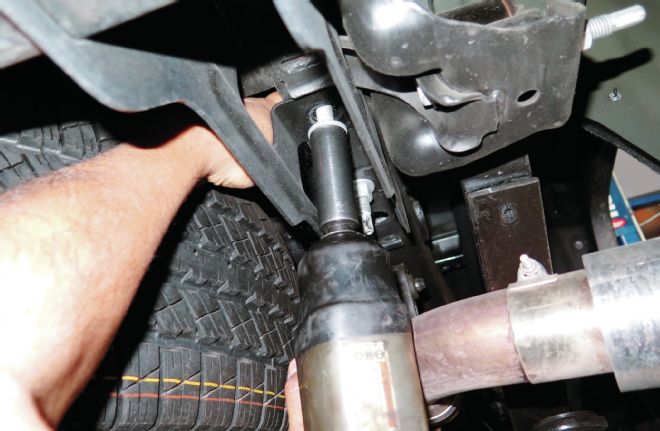
12. Since this truck had a hitch mount, that was the first thing removed.
| 13.
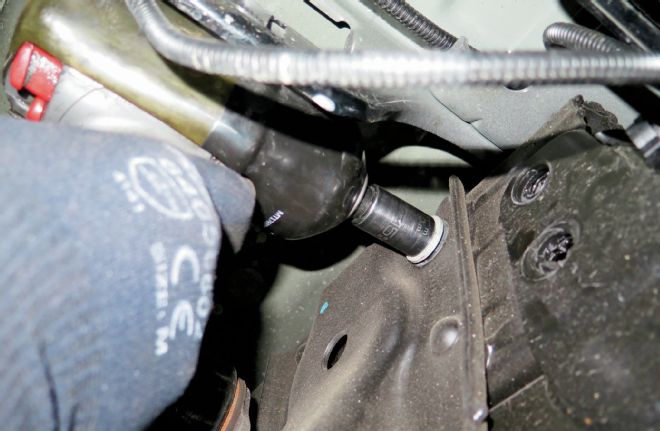
13. As with the front, the nuts holding the bumper to the truck were removed.
| 14.
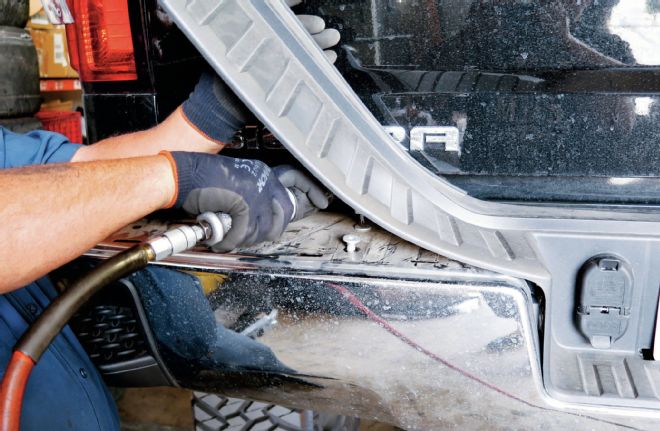
14. On the ’14 GM trucks, the plastic bumper step pad needs to be removed to access six Torx bolts that hold the bumper in place.
| 15.
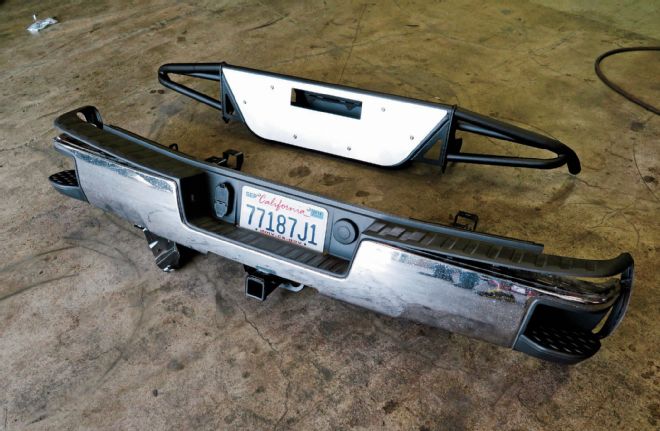
15. The difference between the two bumpers was drastic. Not only did the N-Fab replacement bumper (PN:C14RBS-TX, $721.11) look better, but it weighed considerably less than the factory bumper and hitch.
| 16.
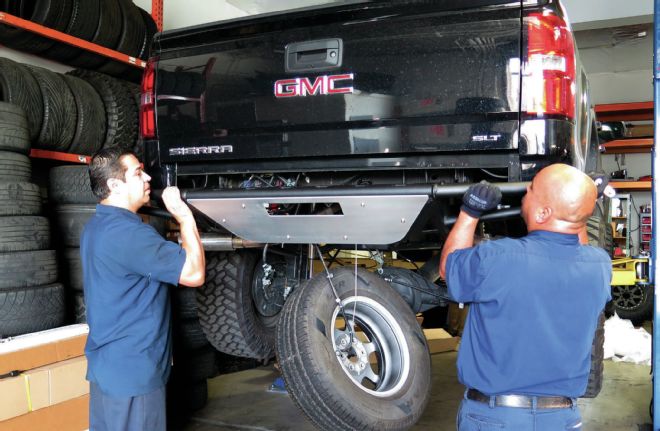
16. Lifting the bumper up into place was a two-person affair. While one held the bumper, the other slid the bolts into place to hold it up.
| 17.
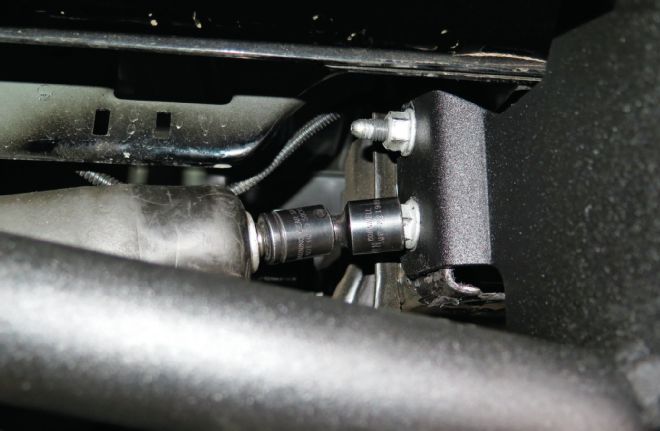
17. Four bolts held the bumper to the frame horns on the truck.
| 18.
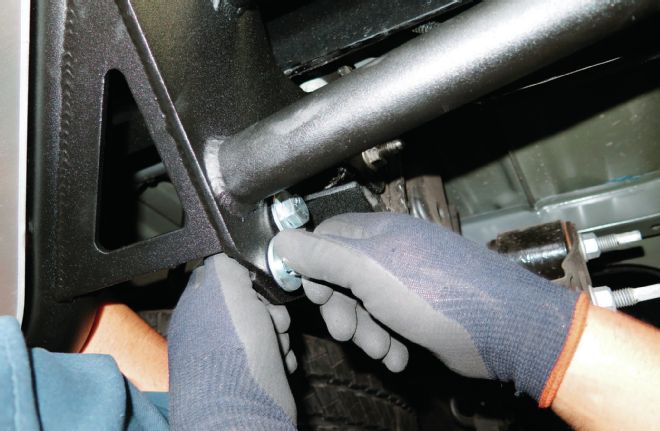
18. Another four bolts held the bottom of the bumper in place for added strength and rigidity.
| 19.
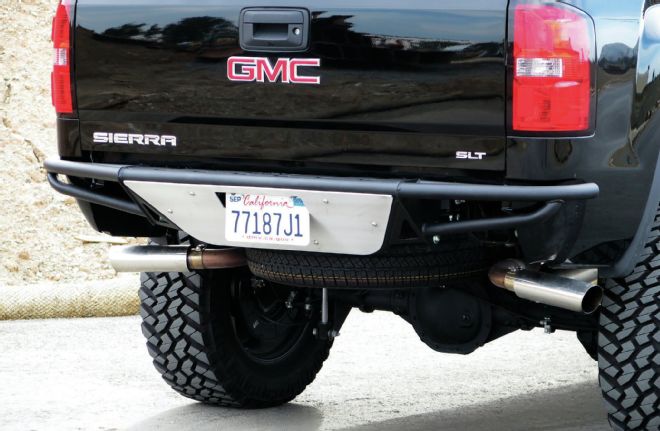
19. The last step was to tighten the bolts holding the skidplate on and install the license plate. The install took less than two hours and completely changed the look of the truck. The only downside was the loss of the hitch.
 | 1.
1. Up to this point, the truck had a lift, wheels and tires, and a T-Rex Torch grille. The owner wanted that extra level of custom with off-road bumpers. The first step was to pull the upper plastic off the bumper.
 | 2.
2. Next, the six bolts that held the bumper on were removed.
 | 3.
3. With some help, the bumper was removed from the truck and set aside.
 | 4.
4. These cover plates were next to go, as this is where the N-Fab bumper will be bolted on.
 | 5.
5. The tow hook was held in place with a single bolt that was removed and tossed in the scrap heap.
 | 6.
6. Again enlisting the help of a muscular man, the RSP bumper (PN: C141LRSP-TX, $832.22) was lifted into place.
 | 7.
7. A total of six bolts held the new bumper to the front of the truck.
 | 8.
8. Next, the 38-inch Rigid lightbar (PN: 138312, $1,239.99) was slipped into the holes in the bumper.
 | 9.
9. The light was bolted in with these ingenious nuts. There is a hexagonal opening in the head of the bolt that a key slips into to tighten it down.
 | 10.
10. Once the bolt is sufficiently tight, the key is removed and the light is safe and virtually impossible to steal.
 | 11.
11. With the front done, we moved around to the rear.
 | 12.
12. Since this truck had a hitch mount, that was the first thing removed.
 | 13.
13. As with the front, the nuts holding the bumper to the truck were removed.
 | 14.
14. On the ’14 GM trucks, the plastic bumper step pad needs to be removed to access six Torx bolts that hold the bumper in place.
 | 15.
15. The difference between the two bumpers was drastic. Not only did the N-Fab replacement bumper (PN:C14RBS-TX, $721.11) look better, but it weighed considerably less than the factory bumper and hitch.
 | 16.
16. Lifting the bumper up into place was a two-person affair. While one held the bumper, the other slid the bolts into place to hold it up.
 | 17.
17. Four bolts held the bumper to the frame horns on the truck.
 | 18.
18. Another four bolts held the bottom of the bumper in place for added strength and rigidity.
 | 19.
19. The last step was to tighten the bolts holding the skidplate on and install the license plate. The install took less than two hours and completely changed the look of the truck. The only downside was the loss of the hitch.