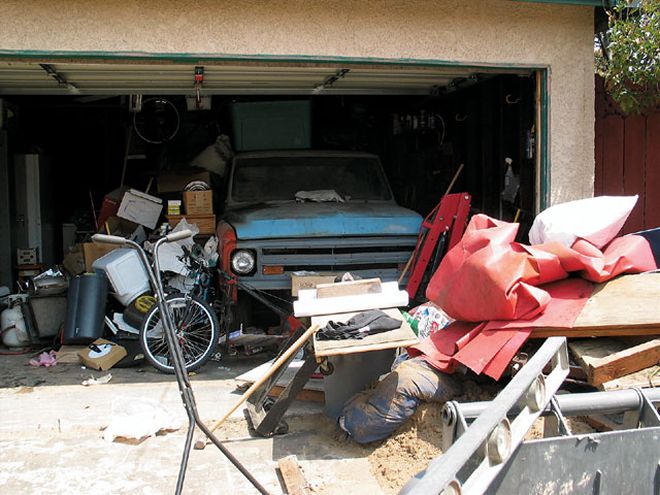
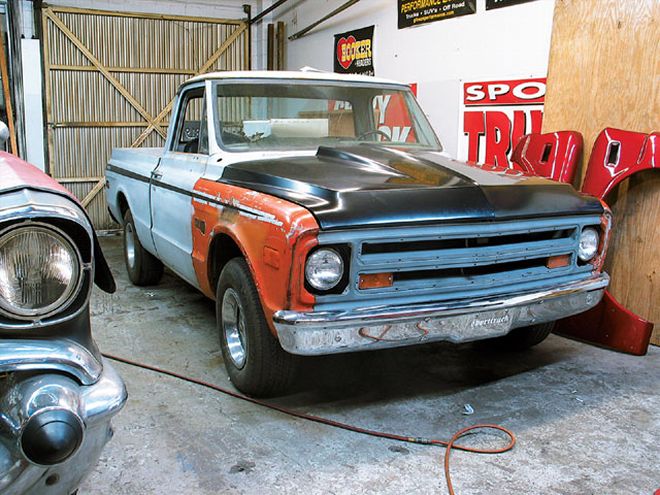
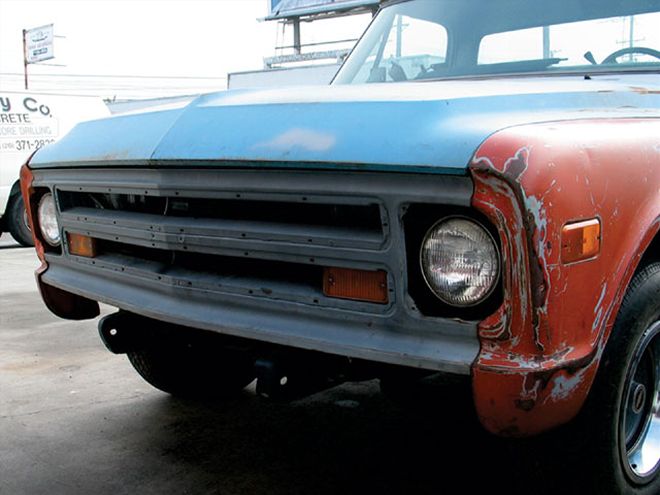
| Here is the truck when I first walked up to it. I told you it was buried.
This is the story of my vacation. Instead of taking a trip like most normal people, I stayed in town to buy, build, and then drive a new truck to work. There were a lot of sleepless nights and a constant flow of money flying out of my wallet, but there would be no crossing the finish line for me. All the hard work sort of paid off in the end, but I still didn't get to drive the truck to work. Here is the story on how it went, what happened, and who has the smelliest gas in the land.
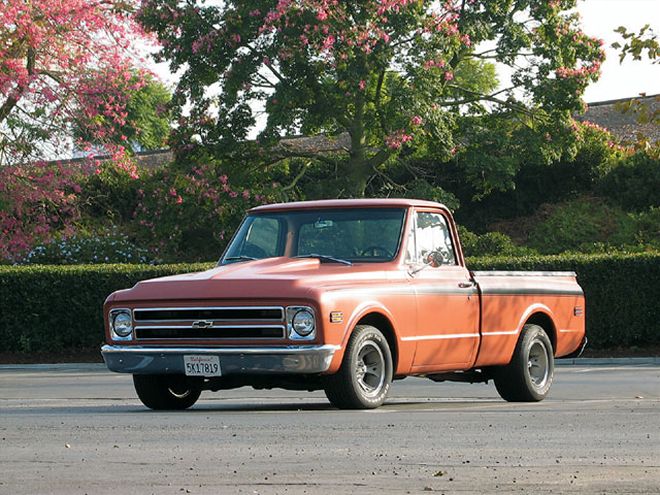
Day 1A few months back, I took the first day of my 28-day vacation to buy and build a daily driveable truck. The truck in question happens to be a 1/2-ton '68 Chevrolet short fleet that was owned by a friend of my dad's. The truck was buried in this guy's garage-and when I say buried, I mean it. The owner was just starting a full house remodel, and all the stuff he packed into boxes was stacked around the truck. To top it all off, there was a huge mound-excuse me, if I exaggerate-of sand piled in front of it. The owner needed the cash for his house project and the room in his garage for storage, so I went to take a look. After about an hour of climbing around the truck like a monkey looking for rust and other things, I figured out it was a good deal and I bought it. I told the guy I wanted the truck ASAP and asked if he could dig it out-literally.
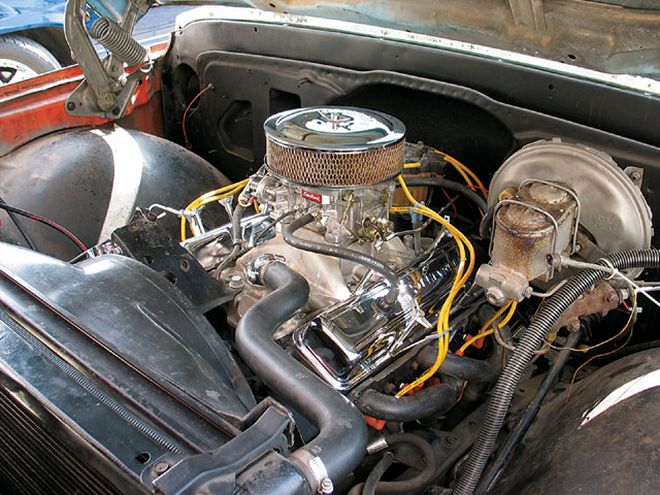
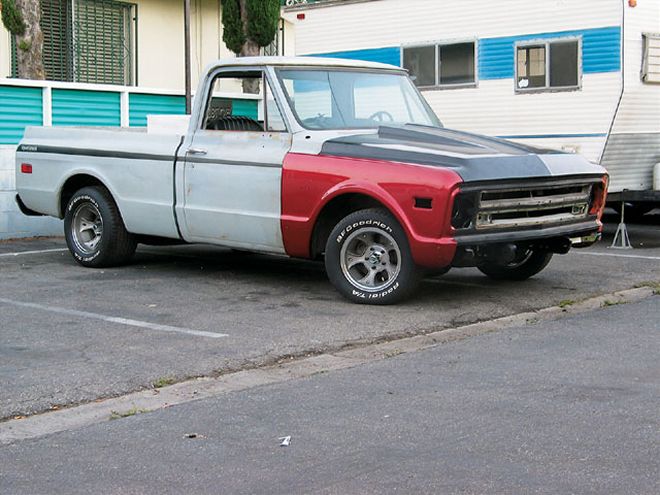
| Back at my dad's shop, we got the motor fired up and made sure it would move under its own power.
Day 2He called me the next day and said it was out of the garage and sitting in the driveway, ready for pick-up. Luckily, the guy's house was right around the corner from my dad's upholstery shop, so we pushed it there and started wrenchin' on it. After doing a quick inventory of what the truck needed, me and Pops set forth to fire up the 350ci small-block under the hood. After putting in a new battery, a set of spark plugs, and some fresh fuel, we got the motor to light off. Surprisingly, the motor purred like a kitten and even sounded like it had a small camshaft-sweet. There was one bummer: The starter was either wrong or just not shimmed properly, because when we hit the key, it sounded more like a cat being tortured than a truck starting. With the truck running, we checked the function of the brakes and dropped the shifter into drive to see if it would actually move, and it did. That was enough for me to take it on its maiden voyage toward my shop a couple miles away. While driving, a few problems showed up. There was an alignment issue because the truck pulled to the right pretty bad. Also, there was something definitely wrong with the carb since the truck had a bad stumble as I tried to accelerate. Luckily, the truck made it to my shop without breaking or overheating, so I was stoked about that.
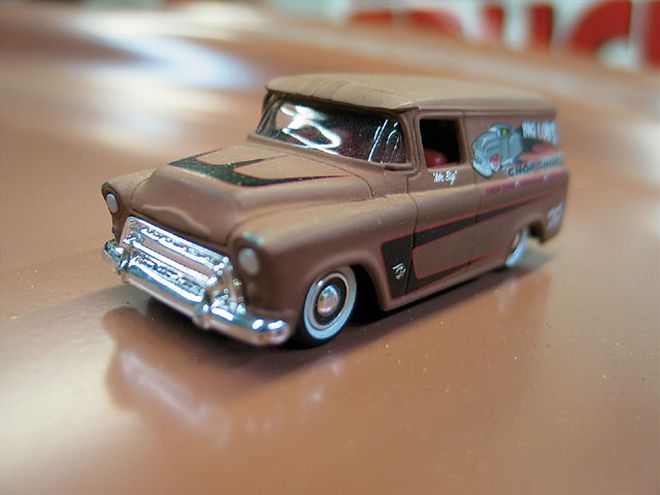
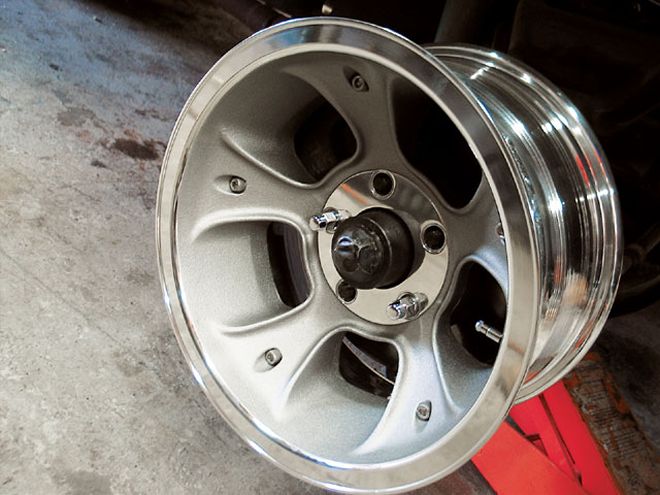
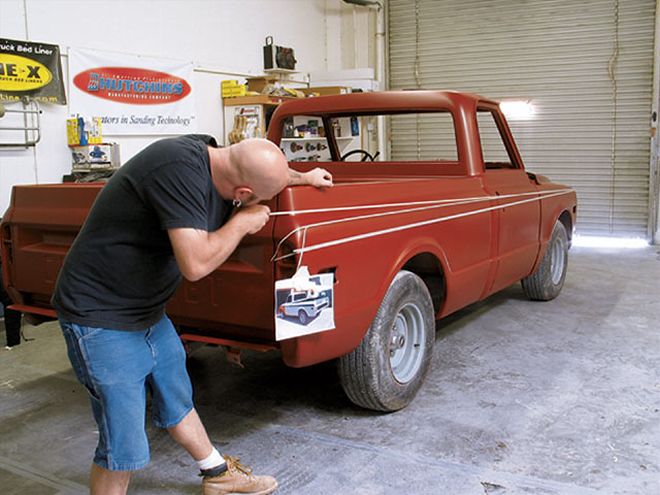
Days 3-10I spent the next week fixing the carb, some general tinkering, making my list of parts needed, and drawing up concepts in my head about how to build it. Like I stated before, I bought this truck for a daily driver, so there will be no frame-off restoration going on here, just a quick mechanical once-over and get the truck in one color. One thing I knew I wanted was the wheels. My dad picked up a set of vintage ET Fueler wheels at a swap meet for his '56 210 Chevy, and I fell in love with the design. After a little web search, I found out a company called Team 3 is still making them, and after a little measuring, I ordered up a set. Because I found the wheels I wanted, it made it very easy to decide on a paint scheme. The look of the wheels screams muscle to me, so a musclecar paintjob will round out the design of the truck. My first thought was to put a set of SS-style stripes on the hood, reminiscent of a '70 Chevelle, but I really didn't want the stripes on the tailgate so that idea got canned. Then, the idea of stripes on the side of the truck, much like the Yenko Novas had on them, popped into my head. I drew up a ghetto concept drawing by printing a picture of the truck and doodling all over it. I liked the way the sketch came out, so that part was figured out. Now for the color-for me, when I think of musclecars and fast trucks, the old red oxide primer color is classic, and I thought, why not? To help me with how that would look, I searched the toy store for a die-cast car, and I found a '56 panel truck in the Road Rats line that was not only the right shade of red oxide, but it also had black scallops on the side-perfect. There was one more element to the muscle theme that was missing, and that was the hood. Every SS from back in the day had some sort of styled hood, and lucky for me, Goodmark makes a Camaro-style cowl hood for the '67-'72 Chevy pickups, so I ordered one.
-
-
-
-
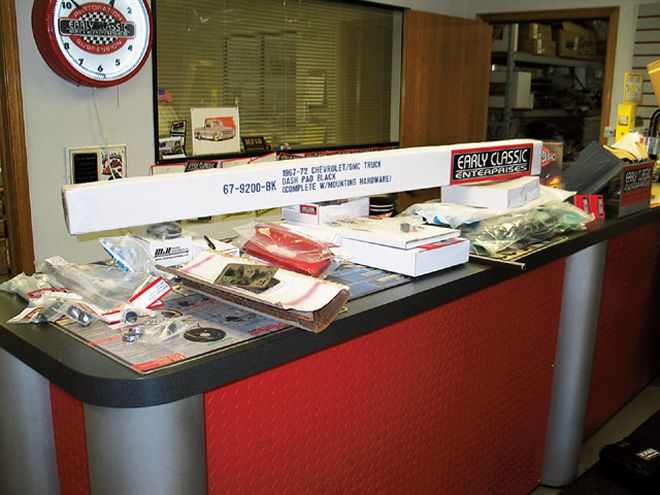
Days 11-13Now that I had the basic plan, it was time to get the parts from the list I made. It just so happened that my mom had just bought a little S-10, but it needed a little bodywork, so my pops and I drove up to visit and brought the truck home with us. Early Classic Enterprises happened to be on the way home, so I stopped and met up with Stan, the owner of ECE. I dropped my list on his counter and told him I need all of it. He took the list and disappeared to the back of his place, and every couple of minutes came back with a handful of boxes. This back-and-forth process lasted a little while, so it gave me time to look over the bulletin board littered with pictures of his customer's trucks. Luckily, there wasn't one that looked like my concept. When Stan came back through the magic parts door for the last time, he was carrying the lowering springs, which was the last thing on my list. After I emptied my wallet into Stan's cash register, he helped me fill the bed of the S-10 with all my newly acquired parts. I said thanks and was off.
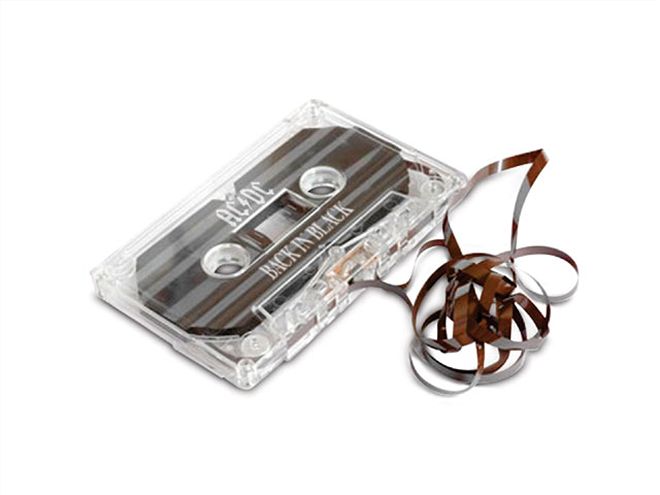
During the 5-hour drive back to my shop, not only did I go through a whole bag of beef jerky and two bags of Combos, but the stereo in the S-10 ate my AC/DC Back In Black tape. Even though I had lost my favorite tape-and we won't go into why I still own a cassette tape-I was still in good spirits when I pulled into the shop. I offloaded the parts and started installing the bumpers. I wanted to get them on, so I could start aligning the whole front clip in one shot. While I was pounding away on the driver-side fender, trying to get a dent out, a big brown truck showed up with my hood-perfect timing. I ripped off my stock hood and threw on the Goodmark piece. By the way, if you have never installed a hood by yourself, don't. I almost blew out my O-ring, muscling that thing around. Anyway, I got all the body gaps and lines set, but I had one that was being a bitch; the passenger-side fender had a big stretched area right above the fenderwell, and no matter how much I massaged it, the hood gap wouldn't tighten up.
-
-
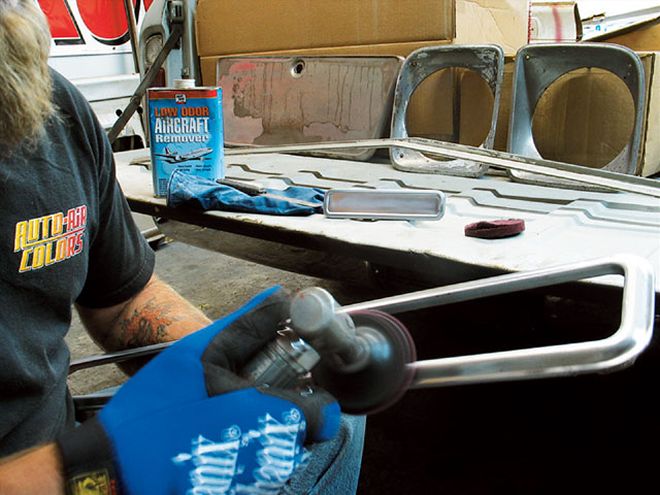
| Stripping and polishing your own steel pieces might be a way to get your stuff chromed a little faster.
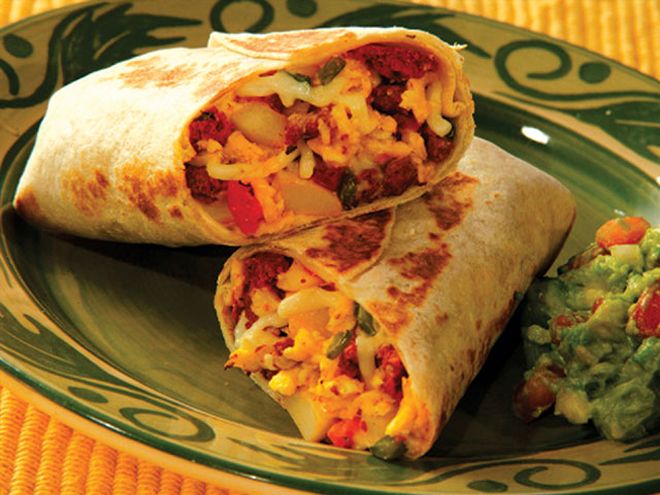
Day 14Instead of getting too frustrated, I went home and called in the cavalry for the next day, which in my case is my dad. He came over and said the fender was junk because the dent had caused it to roll the gap area open, but he might know where a clean set was. After a quick phone call, he told me to give him 250 bucks, and he'd be right back. He must have hauled ass to wherever he was going because he was back before I could finish a much-needed bathroom break-the chorizo and egg burrito from the mobile choke-and-puke was sitting heavy. After a few "What crawled up in you and died?" comments, he brought the fenders in. These bad boys were clean and were fully bodyworked and painted, so it was worth the price. Once we got it on the truck, my gap problem was gone.
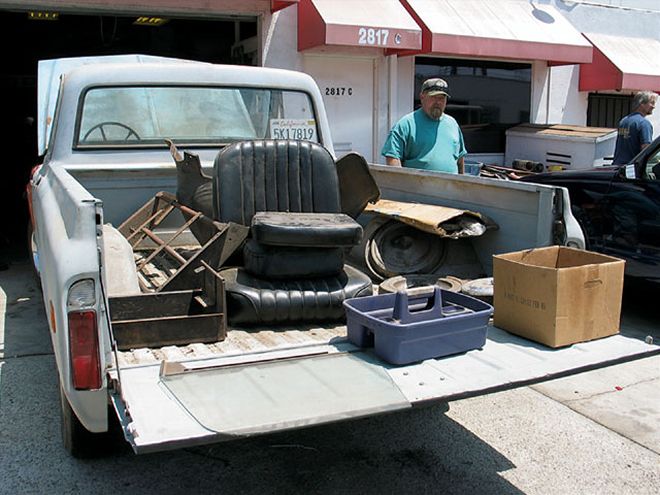
Day 15I took off the bumpers and figured I better get my grille and headlight pieces to the chrome shop. I called Verne's Chrome Plating and spoke to Bob Barns, a guy I had worked with before. I asked if I could get these pieces done quickly. After he stopped laughing, he told me his polisher was backed up with parts for cars going to the Pebble Beach show, and he could get to them in a month. Being the patient person I am, I asked if I could do the polishing to speed things up, and he said sure. After a few thank yous, I got busy stripping and polishing the pieces to be chromed. I finished doing that at about 3 a.m., so I called it quits.
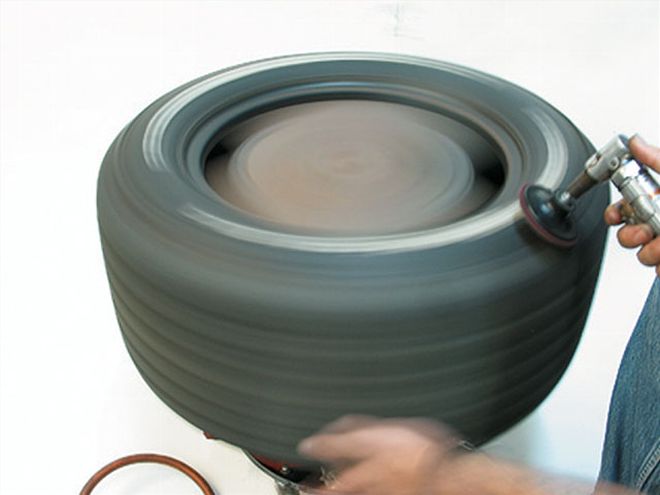
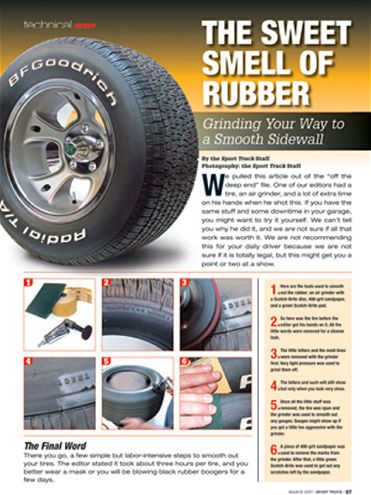
Day 16The next morning, I dropped the parts off at Verne's and got back to the shop. I decided this day would be a mechanical day, so I rebuilt the brakes. I had two leaky wheel cylinders and bad brake lines in front. I also installed the lowering springs I got from ECE, as well as the wheels and tires. The truck was taking shape, and I was excited to get going on the paint. I called in a favor with Marcel Venable to use his knowledge and his spray booth for this portion of the build. He said I could bring the truck over tomorrow and get working on it. That would give me time to do a few more things. Well, I did get something done. With an air grinder, I smoothed the sidewalls on the BFG tires. You might have seen that tech story in our Mar. '07 issue. The end result was clean, but man, I must have blown 10 pounds of black boogers after it.
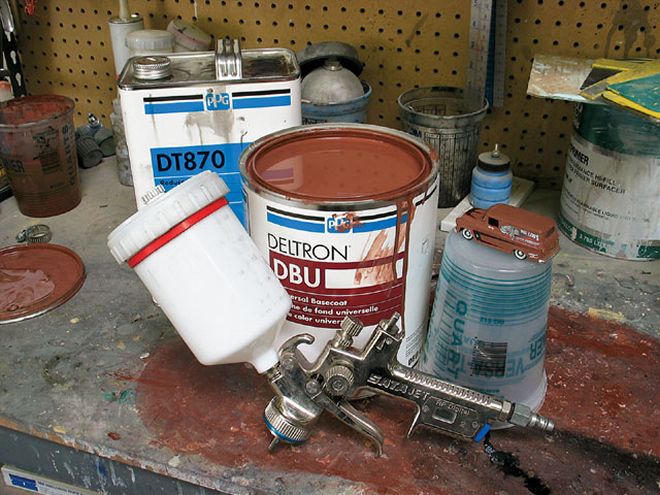
| Check out how close the paint color is to my little toy car. Mike, the guy at the paint store, really came through with that.
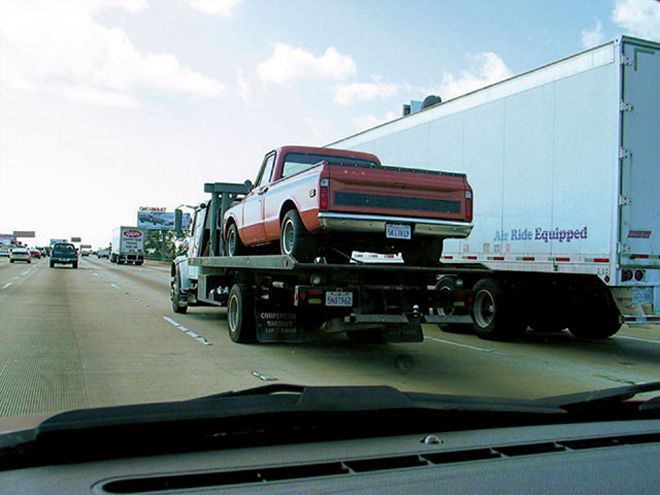
Day 17That next morning, I conned my friend Dan who owns a flat-bed tow truck to haul my Chevy out to Marcel's and dropped it off. Luckily, Dan is a nice guy. After thanking Dan, I pulled the truck into Marcel's place and proceeded to tear out all the glass and interior. Because I'm not totally secure in my painting knowledge, I had Marcel go with me to the paint supply store to pick up everything I needed. Not only did Mike, the guy behind the counter, have everything we needed, like the flat clear, he also mixed up my Red Oxide color from my little die-cast car, perfectly. We loaded up the nearly 1,000 dollars worth of paint and body supplies and hightailed it back to the shop to drop them off for tomorrow.
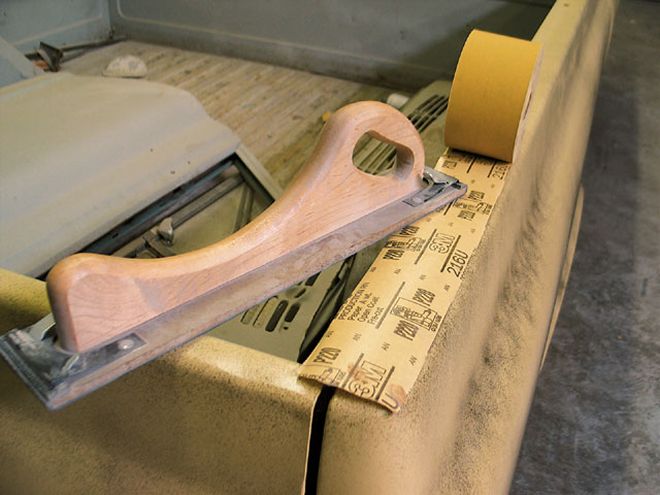
| These were the tools that almost sent me into an early retirement-if I never see a block again, that will be too soon.
Day 18When I got there in the morning, Marcel told me in true Mr. Miagi fashion "Sand the truck." I sanded the truck really quick, but let me tell you, sanding sucks! I unearthed a big problem with my driver door, when I was sanding like a slave. Lots of rust and a big patch of Bondo was hiding under the primer, so I called a friend I went to school with to see if he still had any parts from his Blazer buildup. He said he had a few doors and inner fenders, so I asked how much he wanted for the driver door? He said, "For you, 75 bucks and a beer." That was fair enough for me, so I paid him for his door, gave him a 40 of High Life, went back to the shop, and hung the door.
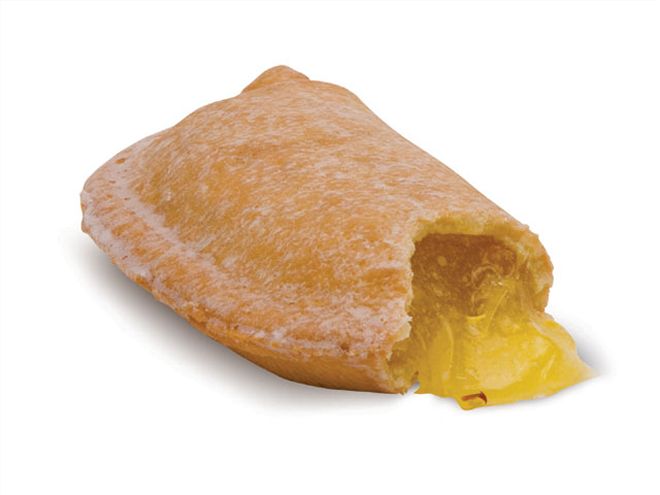
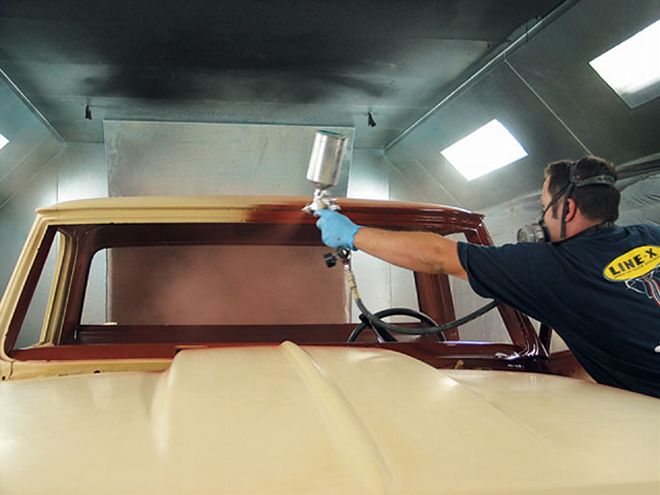
Day 19After I scuffed the whole truck, Marcel and his crew masked it off and rolled it in his booth. Marcel took me over to his mix table and showed me the proper way to mix the primer per the instructions and what gun to use. After Marcel set the fan and air pressure on the paint gun, he handed it to me and said "I set it up to spray thick so try not to run it." With that awesome vote of confidence, I strapped on a crusty respirator and went in the booth to spray. I consider myself to be a Picasso with a spray-paint can, so I figured this would be easy-wrong! Not only was the gun throwing out a lot more material, but it got really heavy when I stretched out to spray the center of the hood. When I came out of the booth for the last time, my arm felt like rubber, but at least the first layer of primer was down. The truck was left to dry, while I cleaned out the primer gun and took a trip to the store for few much-needed sugary treats. I got back and stuffed my face with a lemon pie and washed it down with a 24-gallon Super Big Gulp of soda. There was still enough time for Marcel to give me a short lecture about eating better before the primer was dry enough to sand.
-
-
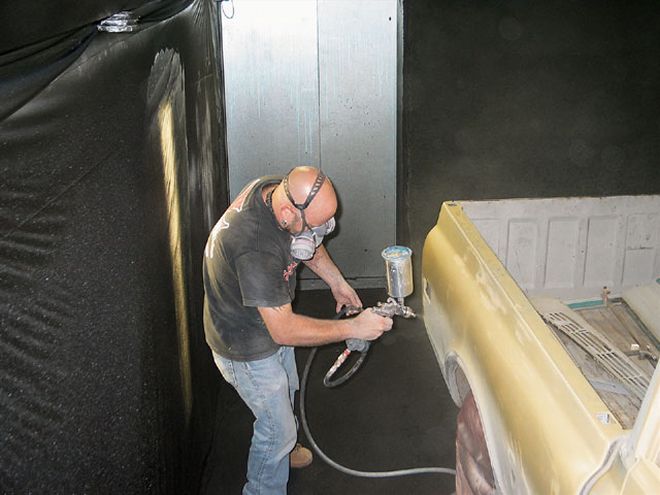
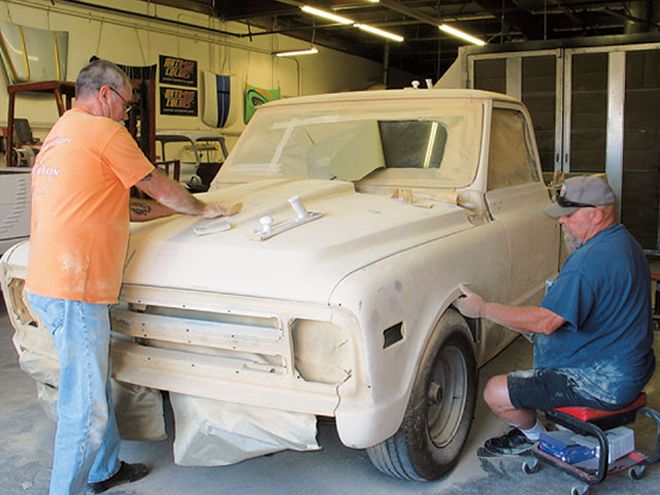
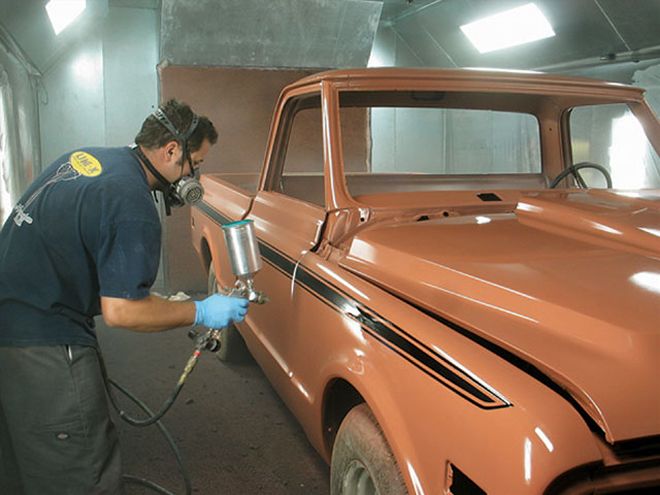
Days 20-24After the beating I took sanding the truck once, that was enough for me to call in reinforcements. My dad (blue shirt) and roommate, Joe (orange shirt), were nice enough to come over and help me get the truck finished. This sanding and priming cycle lasted for a few days, which was enough to burn off the crappy food that has become the staple of my high-fat, high-sugar, and low-vitamin diet. Once the truck was straight enough, a coat of sealer was applied and color-sanded smooth-yeah, more sanding. Instead of spraying the paint and then applying the stripe, I laid out the stripe on the sealer, hoping that it would minimize the paint ridge once the job was complete. The stripe went on without a hitch, and once dry, I carefully taped over it and started mixing the basecoat. I asked if Marcel would help me spray because he is much better, and a mistake at this stage might push me past deadline. He obliged, as long as I would keep mixing up the paint and keep his gun topped off. When he came out of the booth with his respirator around his neck, I knew we were ready to clear.
There was a small window of time we needed to wait, so I took that opportunity to clean up Marcel's shop as small thanks. Again, I asked if Marcel could shoot the clear since it would be hard to sand out runs because it dries to a flat sheen. Yes, we could have sanded the runs out and put down another coat, but I was really over-sanding, and it was way past Marcel's bed time. He obliged and finished the paintjob, and we went home for the night.
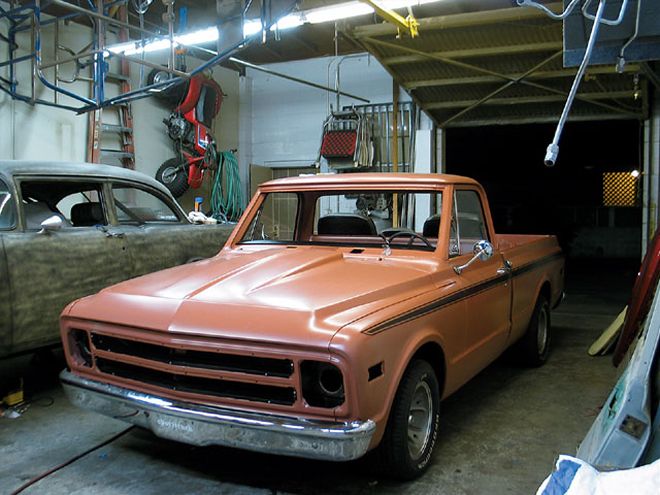
| After the truck was back to my shop, I closed the door and installed parts all night. If I could put it on alone, I did. When I left that night, the glass and interior was the only thing left. Well, I still needed to get my chrome back from Verne's, but he said it would be done in time.
Day 25The next day, I conned Dan into driving me to Marcel's in his tow truck to bring my Chevy back to my shop for the reassembly. I think Marcel was happy to get the room back in his shop because of the little happy dance he did as we drove off. Dan and I stopped to get a nice healthy breakfast burrito before continuing on to the shop. I hopped in the truck and hit the tortured cat starter and drove the truck in the shop and closed the door behind me, not knowing that would be the last time I saw daylight that day. The rest of that day was spent installing all the restoration parts I got from Stan, trying very hard not to scratch my new paint. As I got to the grille, I had an idea about how to shave the front turn signals that mount in the lower grille opening. I knew there was a company that makes round headlights with LED turn signals integrated into the light. I stopped working on the truck for a little web search to look for the lights. I found them on Yogi's Street Rods site and had them shipped out overnight. Back to the truck, I had an extra center grille section, so I removed the upper portion's inner bezel to see if it would mount in the lower hole. By replacing the lower with an extra upper, I basically shaved the turn signals. After patting myself on the back, I painted and installed the bezels into the grille's centersection. Leaving that night, I had everything done, besides the front and back glass and the interior.
-
-
Day 26The next day, I drove with no windshield to an upholstery supply house and picked up a few yards of black loop carpet and some vinyl for the tonneau cover. If you have never driven without a windshield, then you haven't lived. There is nothing better than getting hit in the face by all the road dust kicked up by the cars in front and Kamikaze bugs that dive-bomb from out of nowhere. I pulled into dad's shop with bug guts on my forehead, and wouldn't you know it, he spotted the yellowish green goo and started busting up laughing. As I cleaned up, the old man ripped out the seat to get going on the carpet. I laid down a nice layer of pad, as my dad told me that we could use the steamer to soften up the carpet and get it to lay in one piece without sewing. I liked that idea, so I sewed on a heal pad, and then we got to steaming and gluing the carpet down. He was right. Once the last area was stuck down, the floor looked sweet. The seat was in great shape, so there was no need to re-cover it. After a little elbow grease, it was clean enough to install. Then, we broke out the twine and silicone spray to install the glass. The new rubbers made the job easier, but it is very unnerving to sit inside as my gorilla-handed father slaps on the glass. All I could picture was the scene from Terminator, as Arnold punched through the windshield, but luckily, that didn't happen.
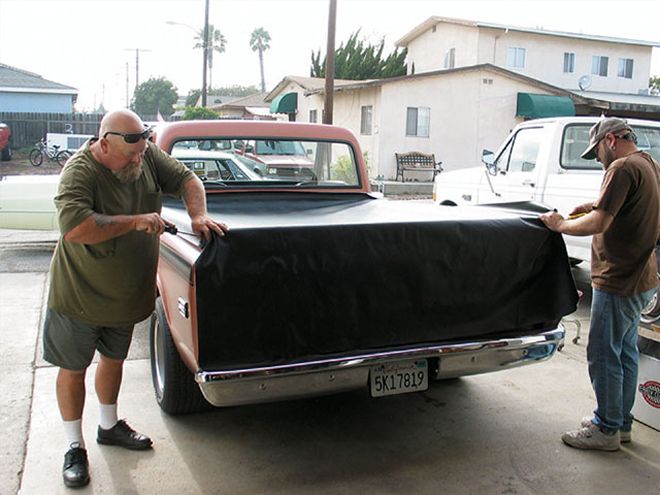
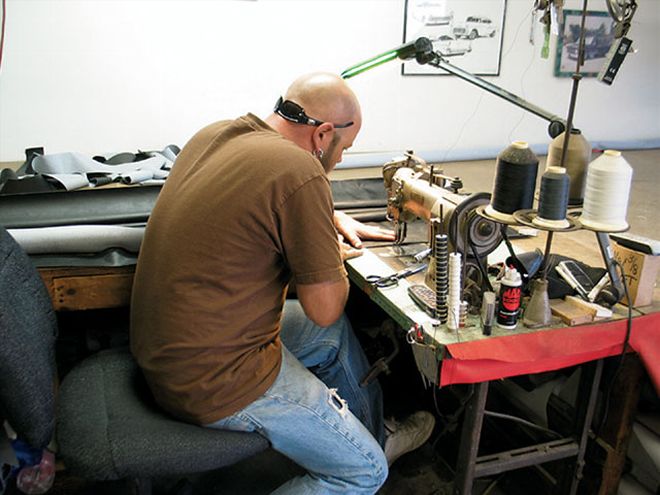
The last part of the build was the tonneau cover. My dad had been doing the snap-on-style covers for years and has it down to a science. I like the classic look of it, and all I had to do was get over the 70-plus holes I was about to drill in the bed. I dusted off my sewing skills and started sewing up the tonneau, I got about half way around, when my dad chimed in with "Are you going to f*ck that dog all day?" I got up and let him finish the sewing, so we could get out of there sometime this year. He had it done quickly; I guess the old man sews as fast as he drives. We snapped the tonneau on and high-fived each other-we were done. I said thanks and told Dad I would be driving around all day tomorrow to see if the truck would make the 35-mile drive to work for the first time.
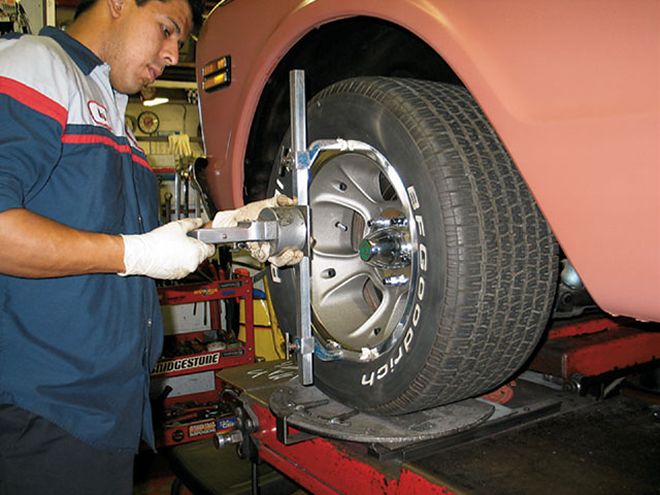
| Mario from Porter's Alignment was nice enough to get rid of the nasty pull the truck had-and not only that the tire I spent so much time on won't wear out so fast.
Day 27The next morning, I hopped in the truck, hit the dying cat key again, and took off for my day of cruising. The first part of the day was great. I took the truck to Porter's Alignment to get the tires straight again and had fun putting around. But, once dusk fell, the good times were over. I picked up my girlfriend to go get dinner. Did I mention it was the first time she had been in the truck? Just as we were pulling into the local Taco Bell parking lot, the transmission decided to just stop working. The truck wouldn't move under its own power, and I knew this was no easy fix. Considering I had to be back at work the next day, I decided to have it towed to the shop and park it.
Day 28Today, I went back to work-not with my new truck but in my normal beater. I'm still kind of pissed that after all that sanding, bad food, and lack of sleep I didn't accomplish my goal. Either way it goes, the truck came out the way I wanted and should only need a new transmission to be road-worthy. I have to say I wouldn't have even made it close without the help of some very talented people, and I hope I can repay them someday. The last and biggest thank you will be for the man that taught me almost everything I know and helped me out not just with this truck but with life in general. His name is Sam, and he is my father. Love you, Pops!
 | Here is the truck when I first walked up to it. I told you it was buried.
This is the story of my vacation. Instead of taking a trip like most normal people, I stayed in town to buy, build, and then drive a new truck to work. There were a lot of sleepless nights and a constant flow of money flying out of my wallet, but there would be no crossing the finish line for me. All the hard work sort of paid off in the end, but I still didn't get to drive the truck to work. Here is the story on how it went, what happened, and who has the smelliest gas in the land.
Day 1
 | Back at my dad's shop, we got the motor fired up and made sure it would move under its own power.


 | Stripping and polishing your own steel pieces might be a way to get your stuff chromed a little faster.
Day 14
 | Check out how close the paint color is to my little toy car. Mike, the guy at the paint store, really came through with that.
Day 17
 | These were the tools that almost sent me into an early retirement-if I never see a block again, that will be too soon.
Day 18

 | After the truck was back to my shop, I closed the door and installed parts all night. If I could put it on alone, I did. When I left that night, the glass and interior was the only thing left. Well, I still needed to get my chrome back from Verne's, but he said it would be done in time.
Day 25

 | Mario from Porter's Alignment was nice enough to get rid of the nasty pull the truck had-and not only that the tire I spent so much time on won't wear out so fast.
Day 27