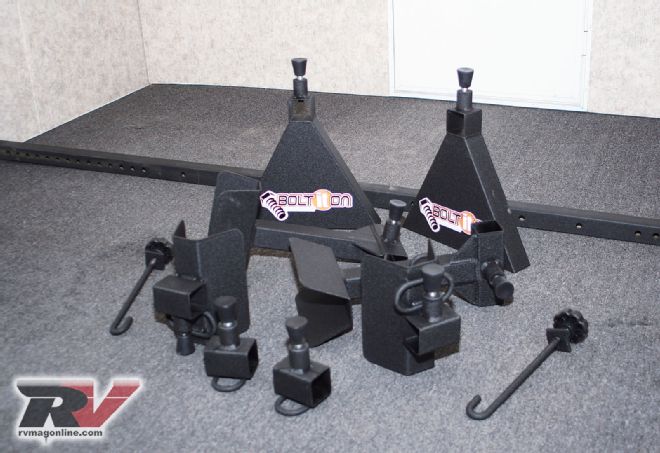
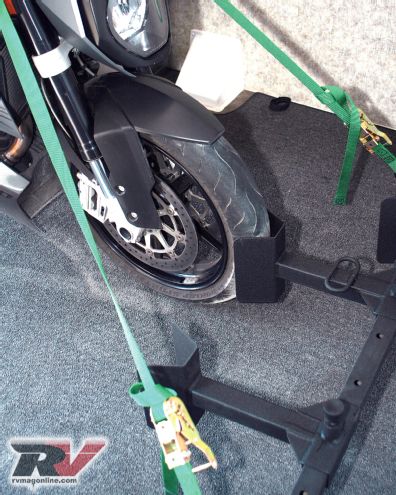
 | Bolt It On's new bike restraining system was installed in less than 10 minutes. The Bolt It On Motorcycle Restraint System is available with two separate-sized tire stops. One is for wider, streetbike-style tires, while the other is designed for thinner, dirt-bike-style tires. Be sure to use the proper tire stop for your application. The one shown here is the thinner version.
In most cases, toy haulers come equipped with four basic recessed D-ring tie-down anchors, one at each corner of the garage area. This works well for securing heavier ATVs and UTVs. But when it comes time to transport motorcycles or dirt bikes, we must choose from a plethora of aftermarket devices intended to do just that.
However, not all restraint systems work as intended, especially while riding in the back of a bouncy toy hauler. What you think might work just fine can turn into an expensive travel disaster should a part of it fail while in motion. So how does one avoid a tangled pile of dirt bikes and gear at the trailhead?
We did a little investigation and found a system that not only works but is so darn simple to install, even a child could figure it out. The product comes from a company called Bolt It On, which was funny because their Motorcycle Restraint System didn't actually require any bolts at all. In fact, this particular system didn't even require any tools to mount or use.
 | Built out of tough carbon steel, the rack is treated with a durable wrinkle-texture black powdercoat, which should withstand many years of abuse. This is a good thing, because we figure someone will inevitably store the system outside in the elements when not in use.
It's available in four different configurations, able to secure two, four, six or even eight dirt bikes with no hassle whatsoever. The installation process reminded us of erecting one of those E-Z Up tents; simply slide the parts in place, tension the unit in place and snap the locking pins-you're ready to load motorcycles. It's that easy.
The kit arrived as two separate parcels via UPS. The long, square crossbar was packed separately in a long cardboard tube. The remaining brackets were individually wrapped in newspaper and packaged together in one medium-size box. We were impressed with the fact that the only thing we had to do was unwrap the newspaper from each part and start building.
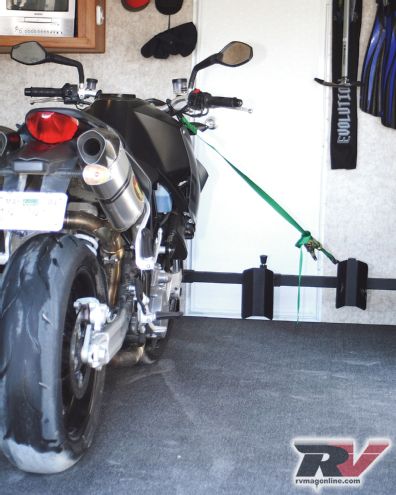
 | Here you can see the system in use with a 700-pound streetbike. After more than 100 miles of use, the bike didn't move a bit. This gave us the confidence to test the system with multiple dirt bikes anchored down.
Instructions were included, too, but kind of like an excited child on Christmas morning, we skipped right to the installation process. The system went together in less than 10 minutes.
We installed it on a toy hauler and can offer these tips: